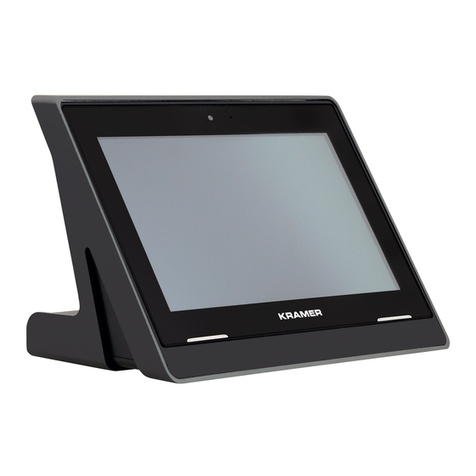
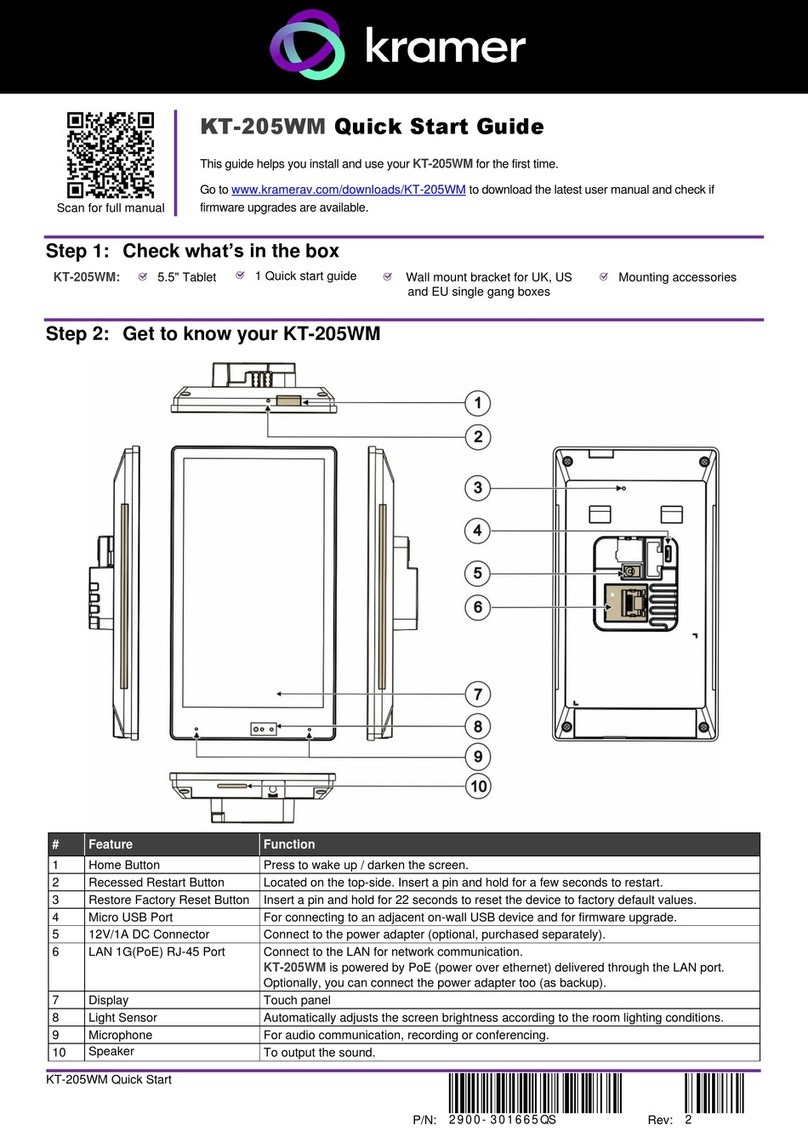
Kramer KT-205WM User manual

Kramer Electronics Ltd.
KT-205WM – Contents
2
Contents
Contents 2
Introduction 3
Getting Started 3
Overview 4
Defining KT-205WM 5.5" Touch Panel 5
On-Wall Mount 6
Mounting the KT-205WM 7
Mounting KT-205WM on a Wall 7
Connection Options 8
Controlling KT-205WM 9
Using Navigation Buttons or Gestures 9
Using the Home Page 10
Exiting or Starting the Kramer Control app 10
Basic Settings of KT-205WM 11
Essential First Steps 11
Setting the Date and Time 11
Connecting to Wi-Fi or Ethernet 12
Installing an 802.1X Certificate 13
Changing the Automated Firmware Update 14
Changing the Automated Kramer Control Agent Update 16
Setting the Display and Keyboard Language 17
Using the Kramer Control agent (connecting to Brain) 18
Updating the interface URL in the Kramer Control agent 19
Advanced Settings 23
Factory Reset & Reboot 23
Logging Activity 24
Technical Specifications 25

Kramer Electronics Ltd.
KT-205WM – Introduction
3
Introduction
Welcome to Kramer Electronics! Since 1981, Kramer Electronics has been providing a world of
unique, creative, and affordable solutions to the vast range of problems that confront the video,
audio, presentation, and broadcasting professional on a daily basis. In recent years, we have
redesigned and upgraded most of our line, making the best even better!
Getting Started
We recommend that you:
•Unpack the equipment carefully and save the original box and packaging materials for
possible future shipment.
•Review the contents of this user manual.
Go to
www.kramerav.com/downloads/KT-205WM to check for up-to-date user manuals,
application programs, and to check if firmware upgrades are available (where appropriate).
Achieving Best Performance
•Use only good quality connection cables (we recommend Kramer high-performance,
high-resolution cables) to avoid interference, deterioration in signal quality due to poor
matching, and elevated noise levels (often associated with low quality cables).
•Do not secure the cables in tight bundles or roll the slack into tight coils.
•Avoid interference from neighboring electrical appliances that may adversely influence signal
quality.
•Position your Kramer KT-205WM away from moisture, excessive sunlight and dust.
Safety Instructions
Caution:
•This equipment is to be used only inside a building. It may only be connected to other
equipment that is installed inside a building.
•For products with relay terminals and GPI\O ports, please refer to the permitted rating for
an external connection, located next to the terminal or in the User Manual.
•There are no operator serviceable parts inside the unit.
Warning:
•If not using PoE, use only the optional power cord that is supplied for the unit.
•Do not open the unit. High voltages can cause electrical shock! Servicing by qualified
personnel only.
Recycling Kramer Products
The Waste Electrical and Electronic Equipment (WEEE) Directive 2002/96/EC aims to reduce the
amount of WEEE sent for disposal to landfill or incineration by requiring it to be collected and
recycled. To comply with the WEEE Directive, Kramer Electronics has made arrangements with

Kramer Electronics Ltd.
KT-205WM – Introduction
4
the European Advanced Recycling Network (EARN) and will cover any costs of treatment,
recycling and recovery of waste Kramer Electronics branded equipment on arrival at the EARN
facility. For details of Kramer’s recycling arrangements in your particular country go to our recycling
pages at www.kramerav.com/social-responsibility/environment.
Overview
Congratulations on purchasing your Kramer KT-205WM 5.5" Touch Panel.
KT-205WM is a new powerful, 5.5 inch, IPS, multi−touch, touch panel with 720x1280 resolution.
Elegantly designed for wall-mounted decorative room integration.
KT-205WM runs the latest Android 11, supports wired PoE (Power over Ethernet) and advanced
Wi−Fi connectivity options. The touch panel has a built−in speaker and camera and comes with a
wall mount. The touch panel is easy to assemble, with elegant wiring and secured mounting
providing reliable operation and flexible deployment.
KT-205WM touch panel is ideal for any 24/7 Kramer-supported commercial AV or control
applications and features a user−friendly, fully customizable graphical user interface configured by
Kramer software.
Exceptional Quality
•Superior User Experience – IPS 720x1280 hi–resolution screen with ±80° horizontal and
vertical wide viewing angles, ambient light sensor and proximity sensor with advanced 10
multi–touch points and 2–finger gesture capabilities.
•Powerful Processing – i.MX8M Plus Quad Core A53, 2GB RAM, 32GB ROM processing
performance, smoothly running complicated media and graphics–rich applications, such as
H.265 video and audio stream encoding and decoding.
•Flexible Services – Latest Android 11 operating system.
Advanced and User-friendly Operation
•Easy Installation – Powering and connectivity via a single Ethernet cable.
•Optional Connectivity – Wireless Bluetooth 5 and connection to USB peripheral devices.
•Reliable Networking – Seamless switching between wired and wireless 802.11ac
connectivity.
•Versatile Powering Options – PoE or power adapter (sold separately).
•Auto Sensing – Optimized performance and operation according to automatically detected
LAN speed.
•Firmware Upgrade – Define automatic updates at a predefined time of day or update
manually using the USB port.
Typical Applications
KT-205WM is ideal for controlling user interfaces in meeting and conference rooms, boardrooms,
and auditoriums.
Kramer Electronics Ltd.
KT-205WM – Defining KT-205WM 5.5" Touch Panel
5
Defining KT-205WM 5.5" Touch
Panel
This section defines KT-205WM.
Figure 1: KT-205WM 5.5" Touch Panel
#
Feature
Function
Home Button
Press to wake up / darken the screen.
Recessed Restart Button
Located on the top-side. Insert a pin and hold for a few seconds to
restart.
Restore Factory Reset Button
Insert a pin and hold for 22 seconds to reset the device to factory default
values.
Micro USB Port
For connecting to an adjacent on-wall USB device and for firmware
upgrade.
12V/1A DC Connector
Connect to the power adapter (optional, purchased separately).
LAN 1G(PoE) RJ-45 Port
Connect to the LAN for network communication.
KT-205WM is powered by PoE (power over ethernet) delivered through
the LAN port.
Optionally, you can connect the power adapter too (as backup).
Display
Touch panel.
Light Sensor
Automatically adjusts the screen brightness according to the room
lighting conditions.
Microphone
For audio communication, recording or conferencing.
Speaker
To output the sound.
1
2
3
4
5
6
7
8
9
10

Kramer Electronics Ltd.
KT-205WM – Defining KT-205WM 5.5" Touch Panel
6
On-Wall Mount
Figure 2: On Wall Mount
#
Feature
Function
Screw Opening
For securing the 5.5" Touch Panel to the wall mount bracket using
the supplied M2.5 screw.
M3.2 Screw Opening
For securing the wall mount bracket to the gang box.
M3.2 Screw Opening
For securing the wall mount bracket to the gang box.
11
12
13

Kramer Electronics Ltd.
KT-205WM – Mounting the KT-205WM
7
Mounting the KT-205WM
Always be careful when attaching or removing the
5.5" Touch Panel from a mount.
Mounting KT-205WM on a Wall
To mount the device on a wall:
KT-205WM can only be mounted in portrait
mode.
1. Install an in-wall gang box.
2. Attach the wall mount bracket to the installed gang
box
(top side up: see the indication arrows on the bracket)
,
using two M3.2 screws provided.
The wall mount bracket works with UK, EU and US
single gang boxes. Screws are provided for all
configurations.
3. Connect Ethernet and/or power cables and optionally,
insert the micro-
USB cable (supplied) for connecting to
an adjacent external USB device.
4. Rest KT-205WM on the wall mount bracket:
a)Line up the top holders and the bottom mounting
screw hole.
b)Push the touch panel down, snapping the top
holders into place.
5. Insert one M2.5 screw below the touch panel and
secure the touch panel to the wall mount bracket.

Kramer Electronics Ltd.
KT-205WM – Mounting the KT-205WM
8
Connection Options
Connect KT-205 to power using one or both of the following options:
1. Connect the PoE-enabled LAN RJ-45 connector to your local area PoE-enabled network.
2. Connect the power adapter to the 12V DC connector on the rear side. The power adapter is
optional: It can be purchased separately.
When both PoE and the power supply are
connected to the touch panel, the unit is
powered by the power supply.
Figure 3: Powering the Touch Panel

Kramer Electronics Ltd.
KT-205WM – Controlling KT-205WM
9
Controlling KT-205WM
Using Navigation Buttons or Gestures
By default, KT-205WM runs the Kramer Control agent and displays its login screen at start-up. You
can also use navigation buttons displayed at the bottom of the screen or setup your device to use
gesture-based navigation.
Using navigation buttons
Swipe a finger upwards from the line at the bottom of the screen and release to see the navigation
buttons:
- Back – Returns to the previous screen (or opens the home page if there is none).
- Home – Opens the home page, see Using the Home Page on page 10.
- Recent apps – Scroll between the active apps.
Changing the navigation system
By default, navigation buttons are used, however the touch panel can be set to use gesture
navigation instead.
To change the navigation method:
1. If the touch panel is running the Kramer Control agent, exit the Kramer Control agent by
entering the PIN (default 9428). If the PIN button is not displayed, swipe up from the Kramer
icon at the bottom of the screen to bring up the PIN entry pop-up.
2. On the Home page, press Settings . The device’s Settings menu opens.
3. Select Advanced settings > System.
4. In the System menu, press Gestures and then System navigation.
5. Select Gesture navigation or 3-button navigation. If you are using Gesture navigation, the
sensitivity is adjustable.
Using Gesture navigation
•Back – Drag a finger inwards from the left or right edge of the screen.
•Home – Swipe a finger upwards from the line at the bottom of the screen and release.
•Recent apps – Swipe a finger upwards from the line at the bottom of the screen and hold.
Hiding the Navigation Bar
To hide/unhide the navigation bar:
1. On the Home page, press the Settings button . The device’s Settings menu opens.
2. In the Settings menu, open Player settings and enable Fullscreen mode.

Kramer Electronics Ltd.
KT-205WM – Controlling KT-205WM
10
Using the Home Page
Swipe a finger upwards from the line at the bottom of the screen and release to see the navigation
buttons:
- Home – Opens the home page.
The Home page contains the following icons:
- Chromium browser
- Touch panel settings
- Kramer Control Agent
Exiting or Starting the Kramer Control app
KT-205WM comes with a Kramer Control agent (icon ) pre-installed app. The role of this app
is to display an interface that you defined in Kramer Control.
When the touch panel starts, the Kramer Control agent runs automatically. To exit the Kramer
Control agent, enter the PIN (default 9428). If the PIN button is not displayed, swipe up from the
Kramer icon at the bottom of the screen to bring up the PIN entry pop-up.
To re-open the Control Agent click the icon on the Home page.
During initial installation the k-agent app may need to be started manually the first time.

Kramer Electronics Ltd.
KT-205WM – Basic Settings of KT-205WM
11
Basic Settings of KT-205WM
Essential First Steps
To exit the Kramer Control agent, enter the PIN (default 9428). If the PIN button is not displayed,
swipe up from the bottom of the screen to bring up the PIN entry pop-up.
To re-open the Control Agent click the icon on the Home page.
The following are essential first steps in using the touch panel:
1. Set the device date and time; Setting the Date and Time on page 11.
2. Setup the Ethernet and/or Wi-Fi connections; Connecting to Wi-Fi or Ethernet on page 12.
3. Consider changing the time that the system checks for firmware (OS) updates;
Changing the Automated Firmware Update on page 14. By default, this is set to midnight,
change it if you have no internet access at midnight or prefer another time.
4. Consider changing the time that the system checks for Kramer Control (APK) updates;
Changing the Automated Kramer Control Agent Update on page 16. By default, this is set to
midnight, change it if you have no internet access at midnight or prefer another time.
5. Setup the Kramer Control agent; See Using the Kramer Control agent (connecting to Brain)
on page 18.
6. Change the display language (if necessary); Setting the Display and Keyboard Language
on page 17.
Setting the Date and Time
The device arrives preset to New York time and you will need to set the correct time region.
To adjust the date and time settings:
1. If necessary, swipe up from the bottom of the screen to bring up the PIN entry pop-up and
enter the PIN (default 9428).
2. On the Home page, press the Settings button . The device’s Settings menu opens.
3. Select Date & Time > Time zone.
4. Set the correct Region. The time will display correctly.

Kramer Electronics Ltd.
KT-205WM – Basic Settings of KT-205WM
12
Connecting to Wi-Fi or Ethernet
Connect an Ethernet cable to the device or activate Wi-Fi and setup a connection to your Wi-Fi. If
multiple network connections are used, Ethernet will be prioritized over any others.
If you are using 802.1X authentication, do Installing an 802.1X Certificate on page 13, before you
connect to the internet.
Connecting Ethernet
Ethernet connections must be plugged into the back of the device, see in Defining KT-205WM
5.5" Touch Panel on page 5. By default, the IP address of the device is set automatically by a
DHCP server.
Enabling 802.1X Authentication
1. Do Installing an 802.1X Certificate on page 13.
2. In the Settings screen, select Network & Internet > Ethernet.
3. Make sure the Ethernet is disabled and then enable Security.
802.1X authentication cannot be applied to active Ethernet connections
4. Select 802.1X settings and input the EAP (Extensible Authentication Protocol) information.
802.1X authentication is enabled.
Using a Static IP Address
1. If necessary, swipe up from the bottom of the screen to bring up the PIN entry pop-up and
enter the PIN (default 9428).
2. From the Home page, open the Settings screen .
3. In the Settings screen, select Network & Internet > Ethernet.
4. Press Ethernet IP mode and select Static.
5. Enter the IP information and press Connect.
The static IP address is setup.
Connecting Wi-Fi
Enabling 802.1X Authentication
1. Do Installing an 802.1X Certificate on page 13.
2. From the Home page, open the Settings screen .
3. In the Settings screen, select Network & Internet > Wi-Fi.
4. Make sure Use Wi-Fi is enabled. The device will scan and list the Wi-Fi networks.
5. Select a Wi-Fi SSID, check Advanced options and enter the Wi-Fi information in the fields
that appear, then press Connect.
6. If you are using 802.1X authentication, then add the certificate information.
802.1X is enabled.

Kramer Electronics Ltd.
KT-205WM – Basic Settings of KT-205WM
13
Installing an 802.1X Certificate
802.1X certificates enhance the security of network authentication. KT-205WM support .pem, .pfx
and .p12 certificate formats.
Installing a certificate is a two-stage process: First import the certificate, then set it up.
Importing an 802.1X Certificate
1. Copy the certificate file to an empty USB flash drive.
2. If necessary, swipe up from the bottom of the screen to bring up the PIN entry pop-up and
enter the PIN (default 9428).
3. From the Home page, open the Settings screen .
4. Select Advanced settings > Security > Encryption & credentials.
Figure 4: The path to Install from storage
5. In the Encryption & credentials screen, select Install from storage: The Install a certificate
screen opens.
6. Select the Wi-Fi certificate: The Recent files screen opens.
To browse to the file location, press the 3 lines at the top left of the screen.
7. Select the credentials file and install it, some certificates require you to know a password.
An 802.1X certificate is imported.
Setting up an 802.1X Certificate
1. In the Settings screen, select Network & Internet > Wi-Fi.
2. Select Install from storage: The Install a certificate screen opens.
3. Select Wi-Fi certificate (also for Ethernet connections): The Recent files screen opens.
To browse to the file location, press the 3 lines at the top left of the screen.
802.1X certificate is set.
After installing the certificates, see Connecting to Wi-Fi or Ethernet on page 12 for instructions on
using the certificates. Ethernet must be disabled before setting-up Ethernet certificates.

Kramer Electronics Ltd.
KT-205WM – Basic Settings of KT-205WM
14
Changing the Automated Firmware Update
KT-205 arrives preset to check for firmware (touch panel OS) updates at midnight. If an update is
found, the device will download the update file and install it. If you prefer to run manual updates,
you must manually download the update file and then install it in the touch panel.
Changing the Time of the Firmware’s Automated Update
1. If necessary, swipe up from the bottom of the screen to bring up the PIN entry pop-up and
enter the PIN (default 9428).
2. From the Home page, open the Settings screen .
3. Select Firmware update and then select Remote firmware upgrade URL.
Remote firmware upgrade URL is the site from which the firmware is downloaded.
The upgrade URL (case sensitive):
https://cdn.kramerav.com/web/apk/transformer-Kramer-AndroidR.xml
Figure 5: The Firmware update page
4. A pop-up opens, inviting you to set the check time:
Figure 6: The Remote firmware upgrade URL page
5. To change the time that the system checks for updates, press Set check time and select a
new time.
6. Press OK to close the window and then press SET.
C
hanging (or clearing) the URL will disable the updates.
The time of the automated firmware check is set.

Kramer Electronics Ltd.
KT-205WM – Basic Settings of KT-205WM
15
Manually Updating the Firmware
Manual firmware updates require a downloaded firmware file from Kramer.
The firmware upgrade process requires:
•An empty USB flash drive to store the firmware file.
•A micro-USB OTG (on the go) cable to connect the USB flash drive to the touch panel.
•Access to the back of the touch panel.
You may need to remove the touch panel from its mount for this purpose. The touch panel
should remain connected to a power source such as PoE or the optional power adapter (see
in Defining KT-205WM 5.5" Touch Panel on page 5).
To upgrade the firmware:
1. Download the firmware update file from the Kramer website at
www.kramerav.com/product/KT-205WM.
Verify that you are using the correct KT-205WM firmware file as there maybe more than
one firmware file available.
Do not unzip the firmware update file.
2. Copy the firmware file to an empty USB flash drive.
3. On the touch panel, open the Settings screen .
4. Select Firmware update and then select Firmware update (again).
5. Plug the USB flash drive into a micro-USB OTG cable and connect the cable to the back of
the touch panel.
6. Click START FIRMWARE UPDATE.
The firmware update will then begin.

Kramer Electronics Ltd.
KT-205WM – Basic Settings of KT-205WM
16
Changing the Automated Kramer Control Agent Update
KT-205 arrives preset to check for updates to the Kramer Control Agent at midnight every day. If
an update is found, the device will download the update file and install it.
Changing the time of the automated APK update check
1. If necessary, swipe up from the bottom of the screen to bring up the PIN entry pop-up and
enter the PIN (default 9428).
2. From the Home page, open the Settings screen .
3. Select Remote APP upgrade URL.
Remote APP upgrade URL is the site from which the APK is downloaded.
The upgrade URL (case sensitive) is:
https://cdn.kramerav.com/web/apk/remote_app_update.xml
4. A pop-up opens, inviting you to set the check time:
Figure 7: The Remote APP upgrade URL page
5. Press Set check time to select a new time.
6. Press OK to close the window and then press SET.
C
hanging (or clearing) the URL will disable the updates.
The time of the automated APK update check is changed.

Kramer Electronics Ltd.
KT-205WM – Basic Settings of KT-205WM
17
Setting the Display and Keyboard Language
To set your preferred interface language:
1. If necessary, swipe up from the bottom of the screen to bring up the PIN entry pop-up and
enter the PIN (default 9428).
2. From the Home page, open the Settings screen .
3. Select Language & input.
4. Select Languages.
5. Press Add a language to select a language.
6. If you are using multiple languages, the order in which they are listed represents the priority
assigned to them, change the order by dragging languages.
The keyboard language has been set.

Kramer Electronics Ltd.
KT-205WM – Using the Kramer Control agent (connecting to Brain)
18
Using the Kramer Control agent
(connecting to Brain)
The KT-205WM touch panel contains a Kramer Control agent (an app), which connects to Kramer
Control.Kramer Control’s Brain creates customized interfaces which the Kramer Control agent
can display on the touch panel. The customized interfaces can control all aspects of a meeting
space. For more information about Kramer Brain, see https://www.kramerav.com/product/Kramer
Control.
When the touch panel starts, the Kramer Control
agent loads automatically (it is pre-installed on KT-
205WM). If an interface has been defined, it will be
displayed.
If this is the first time the Kramer Control app has run,
then it will ask you to enter the URL & port number of
the customized interface you have chosen to display.
Interface URL
The URL of the customized interface is generated by
KC-Brain or by your SL-240 / SL-280 interface. The
URL is always followed by a port number (and a code
on SL-240 / SL-280).
The hardware section of the builder’s Brain Info
contains the URL (in the format IP:port#) of the
customized Brain interface.
Port Numbers
Different versions of the Kramer Control Brain use
different port numbers:
1. Kramer SL-240 or SL-280: Port 8000.
2. KC-Virtual Brain 1: Port 8001.
Figure 8: Example of a touch panel interface
menu
3. KC-Virtual Brain 5: Ports 8001 – 8005 (KC-Virtual Brain 5 can define up to 5 different touch pad
control interfaces, each will use a different port).
Figure 9: Interface IP Address

Kramer Electronics Ltd.
KT-205WM – Using the Kramer Control agent (connecting to Brain)
19
Updating the interface URL in the Kramer Control agent
There are 3 possible methods of updating the interface URL in the Kramer Control agent:
1. In the Kramer Control agent (on the touch panel screen).
2. In a web browser (on a remote computer connected to the same network).
3. In the Brain software (setting up the touch panel in the Brain software).
Any one of these methods can load the interface URL into the touch panel’s Kramer Control agent.
1. Entering the interface URL in the Kramer Control agent
a. Kramer Control agent opens automatically when the touch panel starts. If no interface
URL has been entered, this is how the screen looks:
Figure 10: Touch panel running the Kramer Control agent
•If the touch panel is not displaying the Kramer Control agent, open the Kramer
Agent app from the touch panel’s Home page.
b. Press LAUNCH CONTROL INTERFACE, the URL entry pop-up appears.
Figure 11: Kramer Control agent, URL entry pop-up
c. Enter the IP address and port of the interface that was defined in Kramer Brain, for
example https://192.168.88.180:8001.
d. By default, the K-Control slider is on, setting the tablet in “Immersive Mode”. In
Immersive (full screen) mode, the system bars are hidden and users can exit the
interface only by swiping up and entering a PIN. Immersive mode is recommended for
the Kramer Control interface; Disable it if you are using a generic webpage.
e. Press OK and the touch panel will load your interface. To exit the interface and access
touch panel controls, slide your fingers up from the bottom of the screen and enter the
PIN (default 9428).

Kramer Electronics Ltd.
KT-205WM – Using the Kramer Control agent (connecting to Brain)
20
2. Entering the Kramer Control URL from a browser on the
same network
The following is an alternative method to setting the Kramer Control link on the touch panel.
This procedure can be done remotely, without using the touch panel.
Note: The touch panel must be switched on and connected to the same LAN.
a) Open a browser window on a computer connected to the same network as the touch
panel.
b) Enter the interface URL in the following format:
https://<IP of the touch panel>:9804/launchkramerurl?<IP of the brain interface>:<port #>
For example: if the touch panel’s IP is 192.168.0.56 and the Brain interface’s IP is
“192.168.22.53:8001”, then you would enter
https://192.168.0.56:9804/launchkramerurl?192.168.22.53:8001
Note: The touch panel port (on the first URL) is 9803 for http and 9804 for https.
If there is more than one interface on the brain it is recommended to copy and paste the
highlighted portion of the URL from a browser tab showing the correct interface.
After this command is sent, the touch pad will display the Brain-defined interface.
The following interface commands for the touch panel can be sent from a browser:
a) Check if the agent is running: https://<IP of the touch panel>:9804/health/
Successful response: {"Status”:”up”}
b) Reboot the touch panel: https://<IP of the touch panel>:9804/reboot/
Successful response: {“Status”: “Rebooting”}
c) Clear the interface URL definition in the Control app:
https://<IP of the touch panel>:9804/reseturl/
Successful response: {“Status”: “URL is reset now”}
d) Define a new interface URL:
https://<IP of the touch panel>:9804/launchkramerurl?<IP of the interface>:<port#>
Successful response: Browser will be launched with given URL.
e) Define a generic URL (have the touch panel display a non-Brain URL such as
https://www.google.com: https://<IP of the touch panel>:9804/launchurl?<full generic URL>
Successful response: Browser will be launched with given URL.
Figure 12: Example of a successful response message.
Other manuals for KT-205WM
2
Table of contents
Other Kramer Touch Panel manuals

Kramer
Kramer KT-107SC User manual

Kramer
Kramer KT-107S User manual

Kramer
Kramer KronoMeet KT-1010SC User manual

Kramer
Kramer KT-205WM User manual

Kramer
Kramer KT-1010 User manual

Kramer
Kramer KT-10 User manual

Kramer
Kramer KT-10 User manual

Kramer
Kramer KT-7 User manual

Kramer
Kramer KT-107 User manual

Kramer
Kramer KT-208 User manual