6
Deutsch MSL 60, MSL 60/2, CSS 15, CSS 20/45
Wichtig!
Laden Sie mit diesem Gerät nur Akkus, welche vom
Hersteller für dieses Gerät empfohlen wurden.
Die Nennspannung des Akku muss mit den Angaben
auf dem Gerät übereinstimmen.
– Die Akkus sind nicht geladen. Vor Inbetriebnahme
müssen deshalb die Akkus aufgeladen werden.
– Der Akku entwickelt seine max. Leistung nach
ca. fünf Entlade-/Ladezyklen.
– Die maximale Lebensdauer der Akkus wird erzielt,
wenn Sie diese bei einer Umgebungstemperatur
zwischen +5 °C und max. +45 °C laden.
– Befindet sich der Akku außerhalb des zulässigen
Ladetemperaturbereiches (ca. +5 °C und +45 °C),
verlängert sich die Ladezeit um die Abkühl- bzw.
Erwärmungszeit.
– Wichtig! Akkus entladen sich auch, wenn das
Gerät nicht benutzt wird. Laden Sie deshalb die
Akkus regelmäßig.
Oder besser: Stecken Sie den Akku in das an das
Netz angeschlossene betriebsbereite Ladegerät,
das nach beendeter Ladung auf Erhaltungsladung
umschaltet. Das ist von besonderem Vorteil für die
Pflege und die optimale Einsatzbereitschaft der
Akkus.
– Den Akku nicht im Ladegerät lassen, wenn dieses
nicht im Betriebszustand ist.
Falls eine ordnungsgemäße Ladung der Akkus
nicht möglich ist:
1. Prüfen, ob die Steckdose Spannung führt.
2. Prüfen, ob einwandfreier Kontakt im Ladegerät vor-
handen ist.
3. Sollte noch immer kein Laden möglich sein,
senden Sie bitte Akku-Gerät und Ladegerät an
unsere nächstgelegene Service-Stelle.
Hinweise zum richtigen Gebrauch des Akkus:
– SorgenSieimInteresseeiner langenLebensdauer
stets für rechtzeitige Ladung der Akkus. Das ist auf
jeden Fall dann notwendig, wenn Sie feststellen,
dass die Leistung des Gerätes nachlässt.
– Zur Erzielung einer maximalen Lebensdauer, den
Akku nach kurzzeitigem Gebrauch nicht sofort
nachladen, sondern nach Möglichkeit bis zur unte-
ren Kapazitätsgrenze entladen und anschließend
wieder aufladen.
– Vermeiden Sie möglichst ein Blockieren der
Maschine. Der dadurch bedingte, überhöhte
Stromfluss führt zu schnellerer Entladung und
höherem Verschleiß des Akkus.
– Eine immer kürzer werdende Betriebszeit des
Akkus pro Aufladung zeigt an, dass der Akku ver-
braucht ist und ersetzt werden muss.
Führen Sie keine Reparaturen selbst am Ladegerät
aus!
Senden Sie defekte Geräte generell (auch bei defek-
ten Netzkabeln) an unsere nächstgelegene Service-
Stelle!
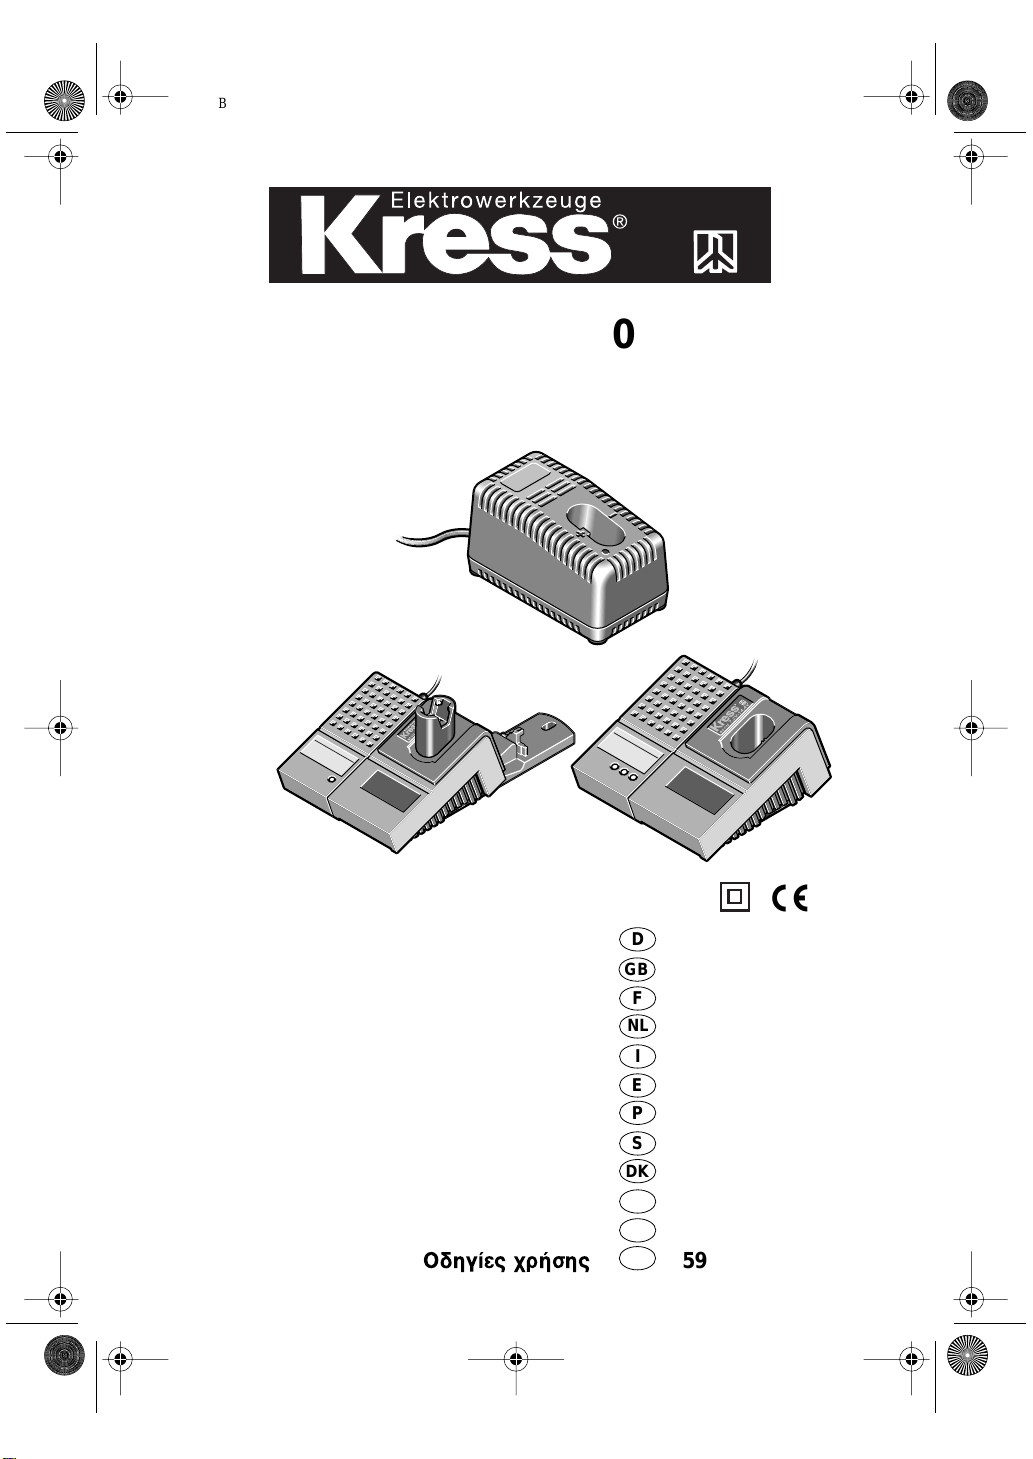
Bestimmungsgemäßer Gebrauch
Das Gerät ist nur bestimmt zum Laden von
Kress-NiCd-Akkus mit Spannungen zwischen
12 V und 13,2 V.
Die tabellarische Übersicht am Schluss dieser Bedie-
nungsanleitung informiert Sie über die Verwendungs-
möglichkeiten der Ladegeräte.
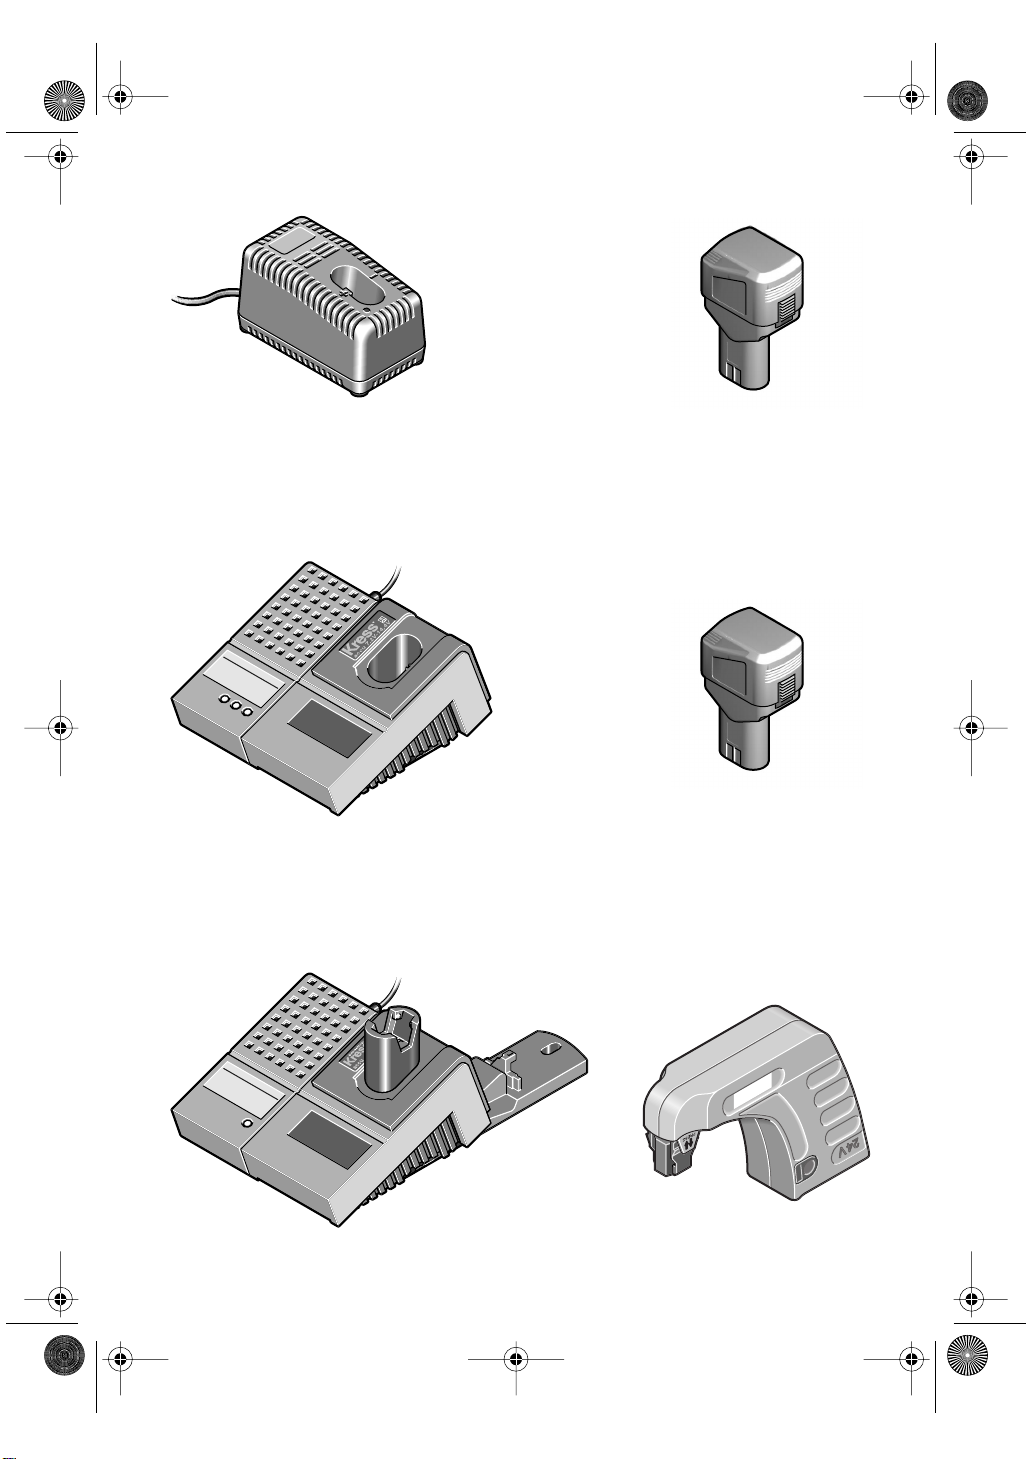
Inbetriebnahme
Entnahme des Akkus aus der Maschine wie in der
Bedienungsanleitung Ihres Akku-Gerätes beschrie-
ben. Wiedermontage in umgekehrter Weise. Akku bis
zum Anschlag in das Ladegerät einführen.
Ladevorgang
Der Ladevorgang startet, sobald der Netzstecker in
die Steckdose und der Akku in den Ladeschacht ein-
gesteckt wird.
Das„intelligente“LadegeräterkenntdenLadezustand
desAkkus undschaltet beivollgeladenemAkku sofort
auf Erhaltungsladung um. Durch dieses Ladeverfah-
ren wird der Akku geschont und immer vollständig
aufgeladen.
Schnellladung ist nur möglich, wenn die Temperatur
des Akkus zwischen +5 °C und +45 °C liegt.
Das Ladegerät ist für Dauerbetrieb geeignet.
Anzeige und Bedeutung
Blinklicht grün:
Akku hat Kontakt, der Ladevorgang
läuft (max. 60 Minuten).
Dauerlicht grün:
Akku ist geladen, Ladegerät hat auf
Erhaltungsladung umgeschaltet.
Dauerlicht rot:
Akku hat keinen Kontakt oder ist zu
warm. Akku aus dem Ladegerät entnehmen und neu
einstecken oder auf Raumtemperatur abkühlen
lassen und Ladevorgang neu beginnen.
Blinklicht rot:
Akku defekt oder Kurzschluss zwi-
schen den Ladekontakten.
– Akku aus dem Ladegerät entnehmen.
– Netzstecker ziehen!
– Ladeschacht auf Fremdkörper überprüfen.
3 Laden der Akkus
4
Akku-Ladegerät Typ: MSL 60
Ladegeräte - Buch Seite 6 Montag, 3. April 2000 2:45 14