KRESS KAC15 Installation manual

SAFETY AND OPERATING MANUAL
Battery Charger KAC15


3
Battery Charger KAC15
TABLE OF CONTENTS
Introduction......................................................................................................................................................3
Component List.............................................................................................................................................4
Safety Instructions........................................................................................................................................5
Charging Procedure.....................................................................................................................................6
Maintenance....................................................................................................................................................7
Troubleshooting.............................................................................................................................................8
Technical Data................................................................................................................................................8
Environmental Protection..........................................................................................................................8
Declaration Of Conformity.........................................................................................................................9
INTRODUCTION
Dear Customer,
Thank you for buying this Kress product. We are dedicated to developing high quality
products to meet your lawn & garden requirements.
The Kress brand is synonymous with premium quality service. Over the years of
your products life, if you have any questions or concerns about your product, please
contact your location of purchase or our Customer Service Team for assistance.
We are condent you will enjoy working with your Kress product for years to come.

4
Battery Charger KAC15
1
2
3
COMPONENT LIST
1. CHARGER
2. CHARGE INDICATOR LIGHT
3. DUAL CHARGING PORT
Not all the accessories illustrated or described are included in standard delivery.

5
Battery Charger KAC15
Users can view the
electronic instructions at
https://www.kress.com/.
ORIGINAL INSTRUCTIONS
PRODUCT SAFETY
GENERAL SAFETY
WARNINGS
WARNING: Read all
safety warnings and all
instructions.
Failure to follow
the warnings and instructions
may result in electric shock,
re and/or serious injury.
Save all warnings and
instructions for future
reference.
This appliance can be used
by children aged from 8 years
and above and persons with
reduced physical, sensory
or mental capabilities or
lack of experience and
knowledge if they have
been given supervision or
instruction concerning use
of the appliance in a safe
way and understand the
hazards involved. Children
shall not play with the
appliance. Cleaning and
user maintenance shall not
be made by children without
supervision.
If the supply cord is damaged,
it must be replaced by the
manufacturer, its service
agent or similarly qualied
persons in order to avoid a
hazard.
ADDITIONAL SAFETY
INSTRUCTIONS FOR YOUR
BATTERY CHARGER
1. Before charging, read the
instructions.
2. Do not charge a leaking
battery.
3. Do not use chargers for
works other than those for
which they are designed.
4. Before charging, ensure
your charger is matching
the local AC supply.
5. For indoor use, or do not
expose to rain.
6. The charging device must
be protected from moisture.
7. Do not use the charging
device outdoors.
8. Do not short out the
contacts of battery or
charger.
9. Do not open the unit and
keep it out of the reach of
children.
10.Do not charge the batteries
of other manufactures or
ill-suited models.
11.Ensure that the connection

6
Battery Charger KAC15
between the battery
charger and battery is
correctly positioned.
12.Keep battery charger’s
slots free of foreign objects
and protect against dirt and
humidity. Store in a dry and
frost-free place.
13.When charging batteries,
ensure that the battery
charger is in a well-
ventilated area and away
from inammable materials.
Batteries can get hot
during charging. Do not
overcharge any batteries.
Ensure that batteries
and chargers are not
left unsupervised during
charging.
14.Do not recharge non-
rechargeable batteries,
as they can overheat and
break.
15.Longer life and better
performance can be
obtained if the battery pack
is charged when the air
temperature is between
18oCand 24oC. Do not
charge the battery pack
in air temperatures below
0oC or above 40oC. This is
important as it can prevent
serious damage to the
battery pack.
16.Charge only battery packs
of models recommended
by Kress.
SYMBOLS
Read the operator’s manual.
Warning
For indoor use only
T6.3A Fuse
Double insulation
Positive terminal
Negative terminal
Waste electrical products must
not be disposed of with household
waste. Please recycle where facili-
ties exist. Check with your local
authorities or retailer for recycling
advice.
CHARGING PROCEDURE
NOTE: Before using the tool, read the
instruction book carefully.
CHARGING INSTRUCTIONS
1. CHARGING YOUR BATTERY PACK (NOT
SUPPLIED)
WARNING: The charger and battery pack are
specifically designed to work together so do
not attempt to use any other devices. Never insert
or allow metallic objects into your charger or
battery pack connections because an electrical

7
Battery Charger KAC15
failure and hazard will occur.
2. BEFORE USING YOUR CORDLESS
TOOL
Your battery pack is UNCHARGED and you must
charge once before use.
3. HOW TO CHARGE YOUR BATTERY (NOT
SUPPLIED) (SEE FIG. A)
- CHARGING PROCEDURE
1) Plug the charger into an appropriate outlet.
2) Slide the battery pack into the charger. Normally,
the relevant indication lights will flash in green
color showing the battery is being charged.
WARNING: When battery charge runs out
after continuous use or exposure to direct
sunlight or heat, allow time for the battery to
cool down before re-charging to achieve the full
charge.
A
- CHARGING INDICATOR
This charger is designed to detect some problems
that can arise with battery packs. Indicator lights
indicate problems (see table below). If this occurs,
insert a new battery pack to determine if the
charger is OK. If the new battery charges correctly,
then the original pack is defective and should be
returned to a service center or recycling service
center. If the new battery pack displays the same
problem as the original Battery Pack, have the
charger tested at an authorized service center.
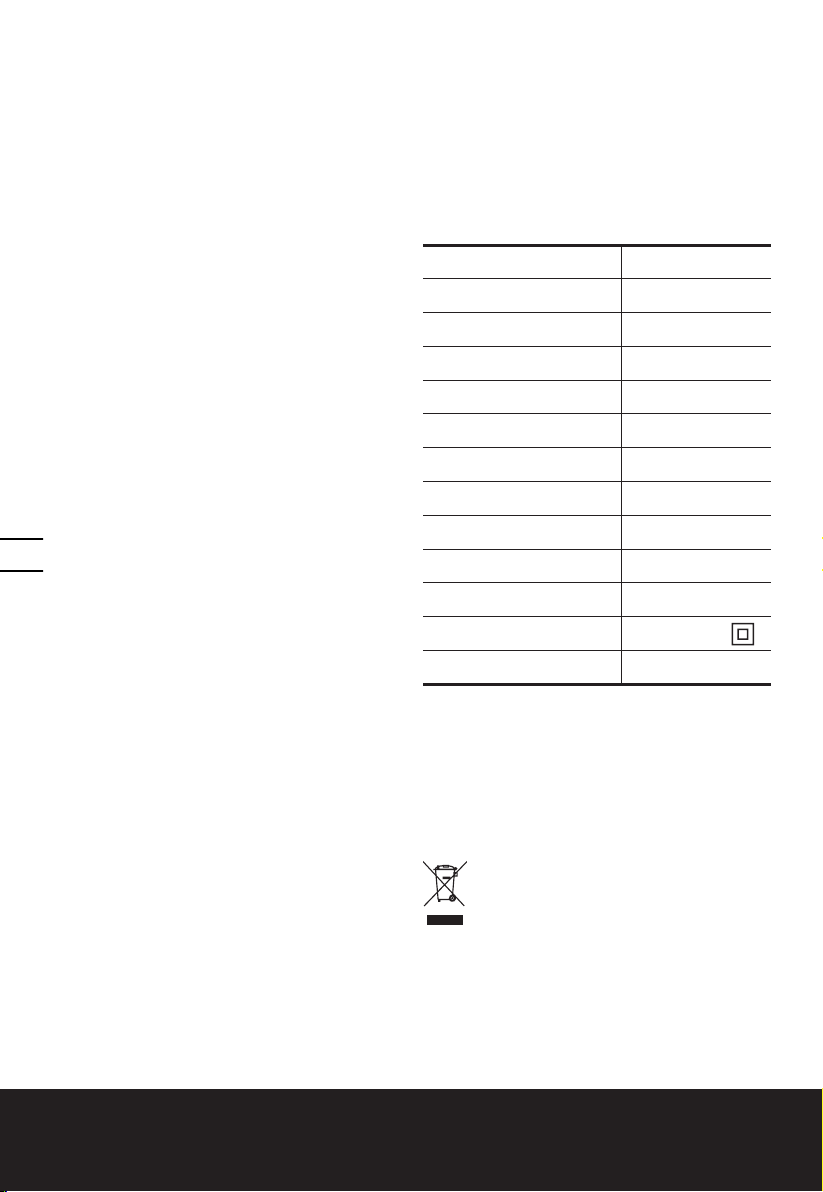
Light ON/ Flash Status
Red on
Defective Battery
Red ash
- - - - -
Battery Temperature
Protection
The temperature of battery
pack is less than 0oC or
more than 45oC.
Green on
Fully Charged
Green ash
- - - - - - Charging
- BATTERY TEMPERATURE PROTECTION
This charger has a battery temperature protection
feature. When the charger detects a battery pack
that is too hot or cold (the light will be red and
flash), it automatically activates the protection
circuit, and suspends charging until the battery
pack has reached the correct temperature. The
charging process will then automatically begin (the
light will be green and flash). This feature ensures
maximum battery life.
- DEFECTIVE BATTERY PACKS
This charger will detect a defective battery pack.
When a defective battery pack is inserted into the
charger, the charger will try to repair it. This process
will last about 30mins (the light will be green and
flash). If the repair is successful, the charger will
automatically begin to charge the battery pack to
the highest capacity possible (the light will be green
and flash). If the light becomes solid red, then the
battery pack is dead, and should be returned to a
service center or recycling service center.
IMPORTANT CHARGING
NOTES
1. For a new battery or a battery that has been
in storage for sometime, please recharge the
battery before use. If you want to store the
battery for a long time, please fully charge the
battery pack to ensure maximum battery life.
2. Longer life and better performance can be
obtained if the battery pack is charged when the
air temperature is between 18°C and 24°C. Do
not charge the battery pack in air temperatures
below 0°C, or above 40°C. This is important as it
can prevent serious damage to the battery pack.
3. Never freeze your charger or immerse charger in
water or any other liquid.
4. When the battery pack fails to produce sufficient
power on jobs that were previously done easily,
please recharge you battery, do not continue

8
Battery Charger KAC15
to use under this condition. You may charge a
partially used pack whenever you desire with no
adverse affect on the battery pack.
5. When charging it is normal that the charger and
battery pack may become warm to touch.
6. If the battery pack does not charge properly:
• Check current at power outlet by plugging in
another appliance.
• Plug and unplug to check whether the charger is
ok.
• Check whether the battery has been damaged
• Move the charger and battery pack to a location
where the surrounding air temperature is
approximately 18°C~24°C.
• If the charging problem persists, take the tool,
battery pack and charger to an authorized service
center.
• Under certain conditions, when the charger is
plugged into the power supply, the exposed
charging contacts inside the charger can be
shorted by foreign material. Foreign materials of
a conductive nature such as metallic particles
should be kept away from charger cavities.
Always unplug the charger from the power supply
when there is no battery pack in the charger or
before attempting to clean.
MAINTENANCE
Remove the plug from the socket before carrying
out any adjustment, servicing or maintenance.
Your tool requires no additional lubrication or
maintenance. Never use water or chemical cleaners
to clean your tool. Wipe clean with a dry cloth.
Always store your tool in a dry place.
If the supply cord is damaged, it must be replaced
by the manufacturer, its service agent or similarly
qualified persons in order to avoid a hazard.
TROUBLESHOOTING
1. I CANNOT FIT THE BATTERY INTO THE
BATTERY CHARGER. WHY?
a) Check if the charger and the battery pack are
specifically designed for working together.
b) The battery pack can be inserted into the charger
only in one direction. Turn the battery pack
around until it can be inserted into the slot, the
indicator light should be green and flash when
the battery pack is charging.
2. REASONS FOR DIFFERENT CHARGING
TIMES
The charging time can be affected by many reasons
which are not defects in your product.
a) If the battery pack is only partly discharged it
may be re-charged in less than rated charging
time.
b) If the battery pack and ambient temperature are
very cold/ hot, it may take longer to re-charge.
Please find an appropriate environment with
proper air temperature to start charging.
TECHNICAL DATA
Rated input voltage 100-240 V~50/60 Hz
Rated input power 380 W
Output 20 V DC, 15 A
Charge battery Li-Ion
Charging time (approx.)
2.0 Ah (1 pc) 20 mins
2.0 Ah (2 pcs) 40 mins
4.0 Ah (1 pc) 20 mins
4.0 Ah (2 pcs) 40 mins
8.0 Ah (1 pc) 32 mins
8.0 Ah (2 pcs) 64 mins
Protection class /II
Machine weight 1.5 kg
For the technical data of the types, the number of
cells and the rated capacity of the batteries that
can be charged, please refer the nameplate of the
battery pack supplied by manufacture.
ENVIRONMENTAL
PROTECTION
Waste electrical products must not be
disposed of with household waste. Please
recycle where facilities exist. Check with
your local authorities or retailer for recycling
advice.

9
Battery Charger KAC15
PLUG REPLACEMENT(ONLY
FOR REWIRABLE PLUG OF
UK & IRELAND)
If you need to replace the tted plug then follow the
instructions below.
IMPORTANT
The wires in the mains lead are colored in
accordance with the following code:
BLUE = NEUTRAL
BROWN = LIVE
As the colors of the wires in the mains lead of this
appliance may not correspond with the colored
markings identifying the terminals in your plug,
proceed as follows. The wire which is colored blue
must be connected to the terminal which is marked
with N. The wire which is colored brown must be
connected to the terminal which is marked with L.
WARNING!
Never connect live or neutral wires to
the earth terminal of the plug. Only t an approved
BS1363/A plug and the correct rated current fuse
which is used in the plug.
NOTE:
If a moulded plug is tted and has to be
removed take great care in disposing of the plug
and severed cable, it must be destroyed to prevent
engaging into a socket.
C
onnect
Blue to N
(neutral)
Outer sleeve
firml
y
clam
p
ed
Cable grip
Brown L (live)
Fuse
DECLARATION OF
CONFORMITY
We,
Positec Germany GmbH
Postfach 32 02 16, 50796 Cologne, Germany
On behalf of Positec declare that the product
Description Kress Battery Charger
Type KAC15
Complies with the following Directives,
2014/35/EU, 2014/30/EU,
2011/65/EU&(EU)2015/863
Standards conform to
EN 60335-1, EN 60335-2-29
EN 62233, EN IEC 55014-1, EN IEC 55014-2,
EN IEC 61000-3-2, EN 61000-3-3
2022/12/9
Allen Ding
Deputy Chief Engineer Testing & Certication
Positec Technology (China) Co., Ltd
18, Dongwang Road, Suzhou Industrial
Park, Jiangsu 215123, P. R. China

10
Battery Charger KAC15
DECLARATION OF
CONFORMITY
We,
Positec (UK & Ireland) Ltd.
PO Box 6242, Newbury, RG14 9LT, UK
On behalf of Positec declare that the product
Description Kress Battery Charger
Type KAC15
Complies with the following Directives,
Electrical Equipment (Safety) Regulations 2016
Electromagnetic Compatibility Regulations 2016
The Restriction of the Use of Certain Hazardous
Substances in Electrical and Electronic
Equipment Regulations
Standards conform to
BS EN 60335-1, BS EN 60335-2-29
BS EN 62233, BS EN IEC 55014-1,
BS EN IEC 55014-2,
BS EN IEC 61000-3-2, BS EN 61000-3-3
2022/12/9
Allen Ding
Deputy Chief Engineer Testing & Certication
Positec Technology (China) Co., Ltd
18, Dongwang Road, Suzhou Industrial
Park, Jiangsu 215123, P. R. China


Copyright © 2023 Positec. All Rights Reserved.
AR03058801
Other manuals for KAC15
1
Table of contents
Other KRESS Batteries Charger manuals

KRESS
KRESS KAC22 User manual

KRESS
KRESS KA3714 Installation manual

KRESS
KRESS KAC840 User manual

KRESS
KRESS KAC840 User manual

KRESS
KRESS KAC804 User manual

KRESS
KRESS CyberPack KAC810 User manual

KRESS
KRESS KA3706 Installation manual

KRESS
KRESS KA3712 User manual

KRESS
KRESS KAC15 User manual

KRESS
KRESS MSL 60 User manual