KWIK GOAL 9B1201 User manual

NZ284 Rev. 12/04/19
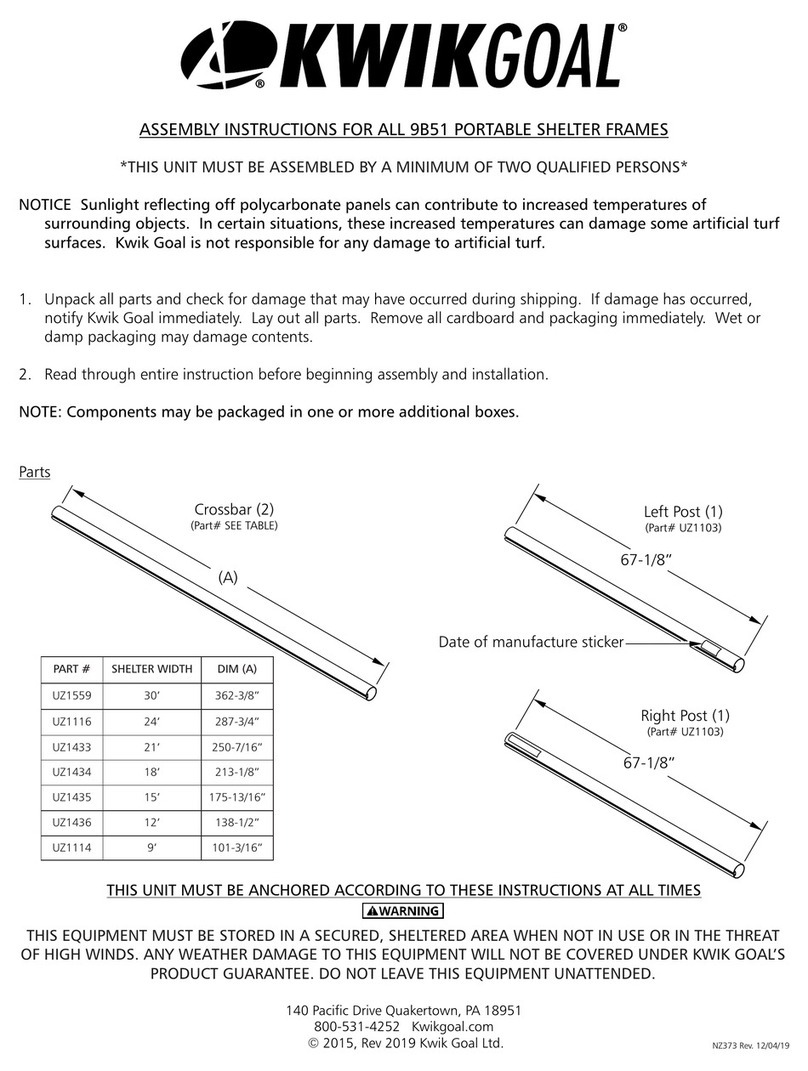
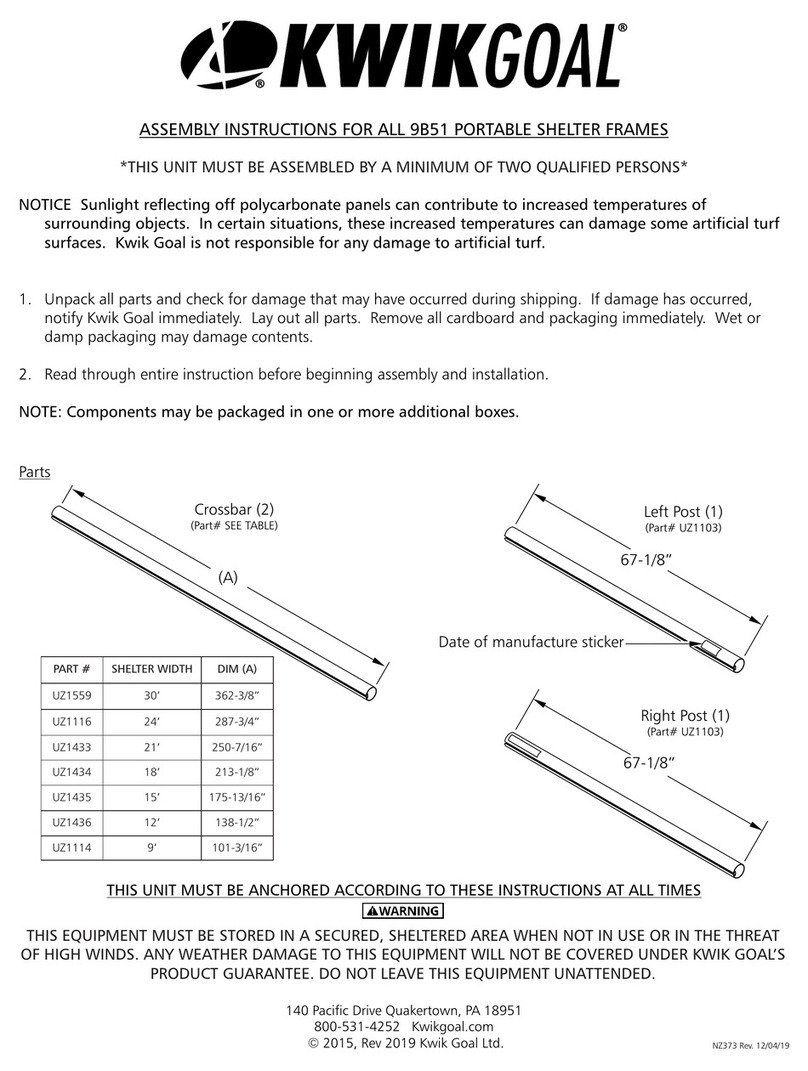
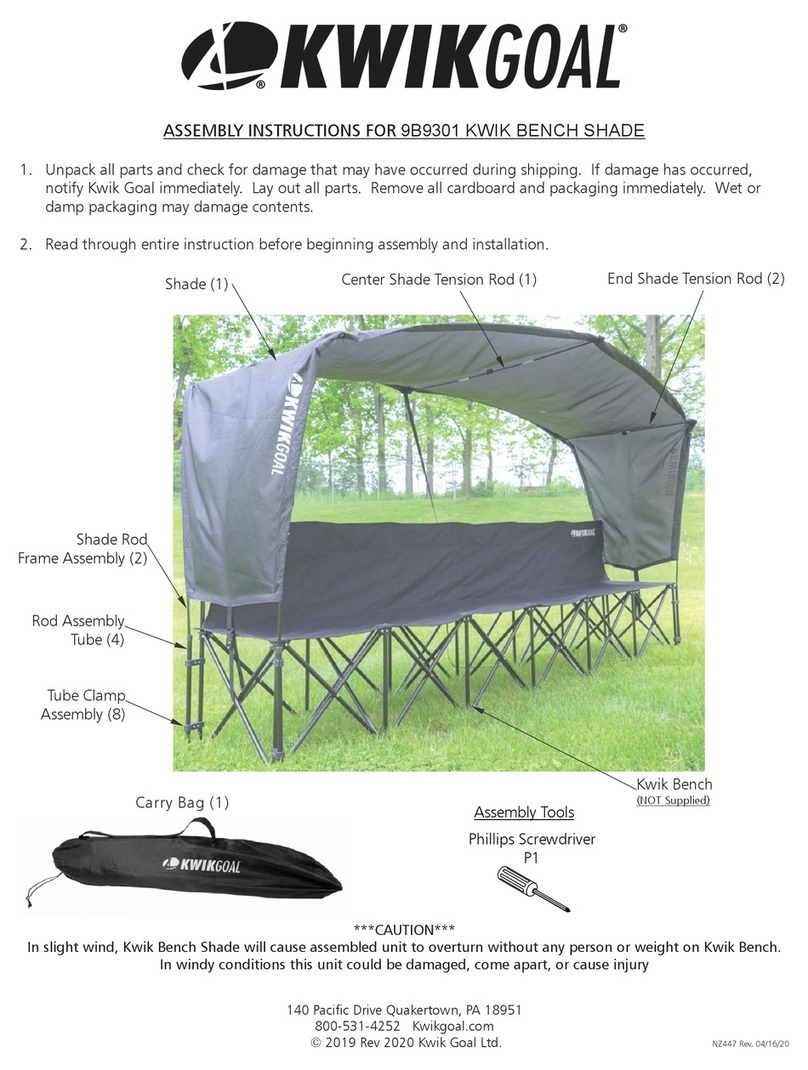
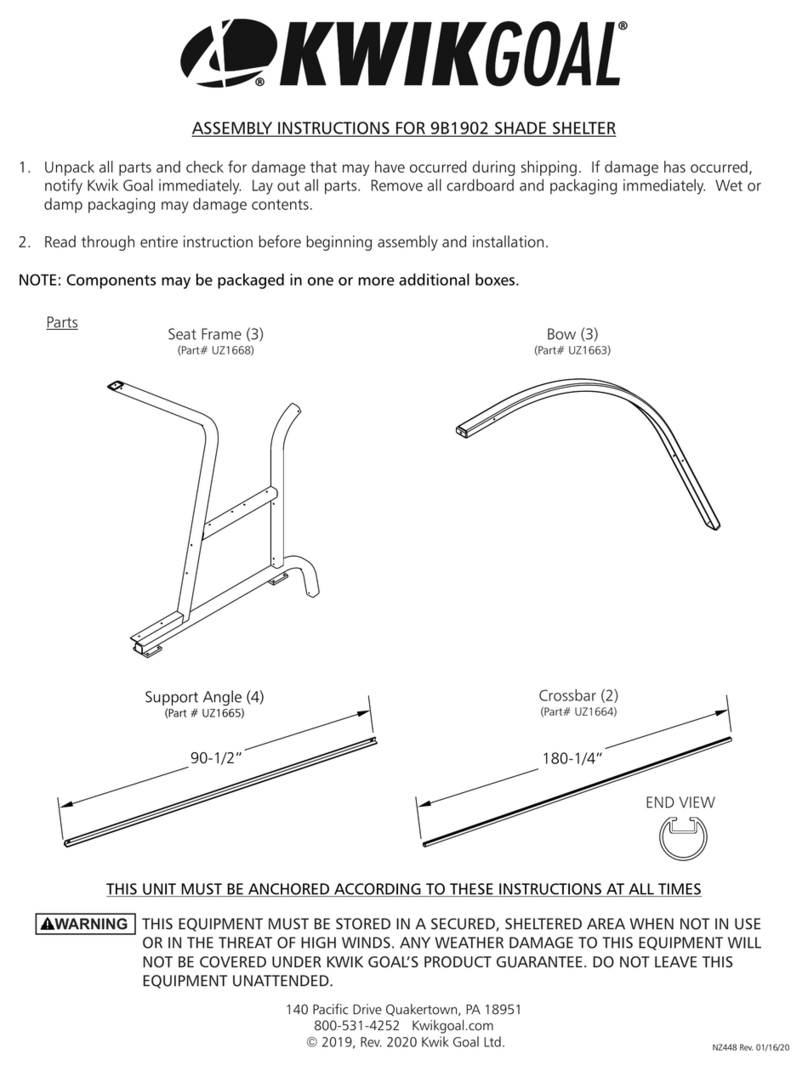
2. Read through entire instruction before beginning assembly and installation.
SHELTERS MUST BE ANCHORED AT ALL TIMES WITH PERMANENT GROUND ANCHORS.
1. Unpack all parts and check for damage that may have occurred during shipping. If damage has occurred,
notify Kwik Goal immediately. Lay out all parts. Remove all cardboard and packaging immediately. Wet or
damp packaging may damage contents.
ASSEMBLY INSTRUCTIONS FOR 9B1201 SHELTER DOLLY
Parts
Assembly Tools
Handle Support Brace (1)
(Part# UZ1110)
Dolly Handle (1)
(Part# UZ1112)
Spacer Plate (4)
(Part# UZ1311)
7/16”, 1/2” & 9/16”
Wrenches
Pliers
Ratchet with
7/16”, 1/2” & 9/16”
Sockets
Dolly Tire (2)
(Part# VZ639)
Dolly Axle Assembly (1)
(Part# UZ1312)
Swivel Tire (4)
(Part# VZ629)
Swivel Tire
Mount Assembly (4)
(Part# UZ1104)
Bumper (1)
(Part# VZ821)
5/32” Hex wrench
5/16” X 1-1/2” Hex Bolt (Part# TZ341) (16)
Note: Hardware may be packaged separately
Hardware
in one or more boxes. Open all packages
before beginning assembly.
3/16“ X 1-1/2” Cotter Pin (Part# TZ310) (2)
1/4” U-Bolt (Part# TZ309) (2)
1/4” Flat Washer (Part# TZ147) (4)
1/4“ Lock Nut (Part# TZ19) (4)
5/16” Flat Washer (Part# TZ4) (16)
3/8” X 3" Hex Bolt (Part# TZ325) (1)
3/8” Flat Washer (Part# TZ189) (4)
3/8” Lock Nut (Part# TZ197) (2)
3/4” Flat Washer (Part# TZ2) (4)
5/16“ Lock Nut (Part# TZ5) (16)
3/8” X 2-1/2” Hex Bolt (Part# TZ165) (1)
1/4” X 1-1/4” Button Head (Part# TZ397) (1)
THIS EQUIPMENT MUST BE STORED IN A SECURED, SHELTERED AREA WHEN NOT IN USE OR IN THE THREAT
OF HIGH WINDS. ANY WEATHER DAMAGE TO THIS EQUIPMENT WILL NOT BE COVERED UNDER KWIK GOAL’S
PRODUCT GUARANTEE. DO NOT LEAVE THIS EQUIPMENT UNATTENDED.
140 Pacific Drive Quakertown, PA 18951
800-531-4252 Kwikgoal.com
2010, Rev 2019 Kwik Goal Ltd. ©

NZ284 Rev. 12/04/19
IMPORTANT SAFETY INSTRUCTIONS
READ CAREFULLY
6. Dolly is to be used as a wheel transport/storage and shelter lifting device. Do
not use dolly to move shelter.
5. Shelter must be on level, flat ground to use dolly handle and/or wheels.
3. Do not attempt to lift, move, or remove anchors from any shelter in windy
conditions.
NEVER LOWER SHELTER WITH ONLY ONE WHEEL INSTALLED
9. Always use two people to lift shelter with dolly. With one person maintaining
light pressure on the handle, the second may insert wheels into shelter. Install
both wheels before resting shelter on the ground. (Refer to 9B1201 - Shelter
Dolly instructions for details.)
7. Use extreme caution when pushing shelter. Excessive force can overturn
shelter. Always push at lowest point on shelter frame possible.
4. Shelters must not be left unattended when wheels are installed.
2. A minimum of four qualified, experienced people are required to install wheels
and move shelter.
1. Lifting and moving heavy field equipment can be dangerous if not done
properly. All Kwik Goal shelters must be moved by qualified personnel who are
experienced in moving large, heavy field equipment. Kwik Goal recommends
storing dolly and wheels in a secured area to prevent unauthorized use.
8. Do not push shelter directly from the front to rear or rear to front. Push from
end to end. (Refer to 9B1201 - Shelter Dolly instructions for details.)
WARNING
140 Pacific Drive Quakertown, PA 18951
800-531-4252 Kwikgoal.com
2017, Rev 2019 Kwik Goal Ltd. ©
3. Assemble all 4 swivel tires as shown.
5/16” X 1- 1/2” Hex Bolt
Swivel Tire Mount Assembly
Spacer Plate
5/16” Flat Washer
5/16” Lock Nut
Swivel Tire
4. Attach tires to dolly axle assembly and secure on axle with cotter pin. Be
sure that long side of hub faces in. Apply 5 “pumps” of grease to the
grease fitting on each of the six tires.
3/4” Flat Washer
3/4” Flat Washer
Dolly Tire
Dolly Axle Assembly
3/16” X 1-1/2”
Cotter Pin
Grease Fitting
NZ284 Rev. 12/04/19
THIS EQUIPMENT MUST BE STORED IN A SECURED, SHELTERED AREA WHEN NOT IN USE OR IN THE THREAT
OF HIGH WINDS. ANY WEATHER DAMAGE TO THIS EQUIPMENT WILL NOT BE COVERED UNDER KWIK GOAL’S
PRODUCT GUARANTEE. DO NOT LEAVE THIS EQUIPMENT UNATTENDED.

5. Complete the assembly of dolly as shown but do NOT tighten bolt until all parts are attached. Note the
orientation of holes in dolly handle.
3/8” Flat Washer
Handle Support
Brace
3/8” Lock Nut
3/8” X 2-1/2”
Hex Bolt
Dolly Handle
Dolly Handle
1/4” Lock Nut & 1/4” Flat Washer
3/8” Flat Washer
3/8” X 3”
Hex Bolt
Handle Support
Brace
3/8” Lock Nut
1/4” U-Bolt
Brace
Handle Support
Assembled Tire & Axle
Dolly Handle
NZ284 Rev. 12/04/19
Dolly Handle
Bumper
1/4” X 1-1/4”
Button Head
Center handle on axle
Center
handle
on axle
THIS EQUIPMENT MUST BE STORED IN A SECURED, SHELTERED AREA WHEN NOT IN USE OR IN THE THREAT
OF HIGH WINDS. ANY WEATHER DAMAGE TO THIS EQUIPMENT WILL NOT BE COVERED UNDER KWIK GOAL’S
PRODUCT GUARANTEE. DO NOT LEAVE THIS EQUIPMENT UNATTENDED.

6. To lift shelter, insert hook of dolly under lift U-bolt,
and with two people, push handle down to ground.
With one person maintaining light pressure on the
handle, the second may insert tires into shelter. With
flat of pin facing forward, insert pin completely into
hole in underside of shelter frame and rotate swivel
tire mount 1/2 turn to lock tire into place. After
installing both tires, use two people to raise dolly
handle and rest tires onto ground. NEVER LOWER
SHELTER WITH ONLY ONE TIRE INSTALLED.
Assembled Dolly
Lift U-Bolt
Lift Hook
NZ284 Rev. 12/04/19
Assembled Dolly
Down
Push Handle
Assembled Swivel Tire
Tire Mount
Swivel
Flat Spot
to the Front
Tire Mount 180
Turn Swivel
TO MOVE SHELTER
CAUTION DO NOT USE DOLLY
Lift Handle Upright to set
on Swivel Tires
THIS EQUIPMENT MUST BE STORED IN A SECURED, SHELTERED AREA WHEN NOT IN USE OR IN THE THREAT
OF HIGH WINDS. ANY WEATHER DAMAGE TO THIS EQUIPMENT WILL NOT BE COVERED UNDER KWIK GOAL’S
PRODUCT GUARANTEE. DO NOT LEAVE THIS EQUIPMENT UNATTENDED.

Person at Post
Person at Rear Corner
7. All 4 swivel tires must be locked into frame before attempting to move shelter. A minimum of 4 people are needed
to move one shelter. One person on each corner is recommended. Push from end to end, note acceptable
directions to push below.
WARNING: DO NOT ATTEMPT TO MOVE SHELTER WITH DOLLY. MOVING SHELTER WITH DOLLY WILL CAUSE
INJURY AND/OR DAMAGE.
DO NOT PUT A NY WEIGHT ON
SEATING OR STORAGE SHELF WHEN
UNIT IS ON WHEELS OR RAISED.
UNIT MUST BE A NCHORED A T A LL T IMES.
WARNING
7. After removing the swivel tires they
can be stored on the dolly for later
use.
Person at Post
Dolly Handle
Swivel Tires
Tire Rack
NO PUSH
OR PULL 90
NO PUSH
OR PULL 90
NO PUSH
OR PULL 90
NO PUSH
OR PULL 90
WITHIN 120
PUSH OR PULL
PUSH OR PULL
WITHIN 120
NZ284 Rev. 12/04/19
Swivel Tires
Tire Rack
Go to kwikgoal.com for additional product information.
THIS EQUIPMENT MUST BE STORED IN A SECURED, SHELTERED AREA WHEN NOT IN USE OR IN THE THREAT
OF HIGH WINDS. ANY WEATHER DAMAGE TO THIS EQUIPMENT WILL NOT BE COVERED UNDER KWIK GOAL’S
PRODUCT GUARANTEE. DO NOT LEAVE THIS EQUIPMENT UNATTENDED.
Table of contents
Other KWIK GOAL Shelter manuals
Popular Shelter manuals by other brands

Sojag
Sojag 999-6158779 owner's manual

No Butts Bin
No Butts Bin SR1553-F Assembly instructions

TMG
TMG TMG-DT3380 product manual

cantaport
cantaport Assembly Instructions installation manual

Staying Home
Staying Home Hide-Away Storm Shelter Folding Installation Manual

ShelterLogic
ShelterLogic Shed-in-a-Box 70401 Assembly instructions