3
3 - LIMITATIONS OF USE
• The
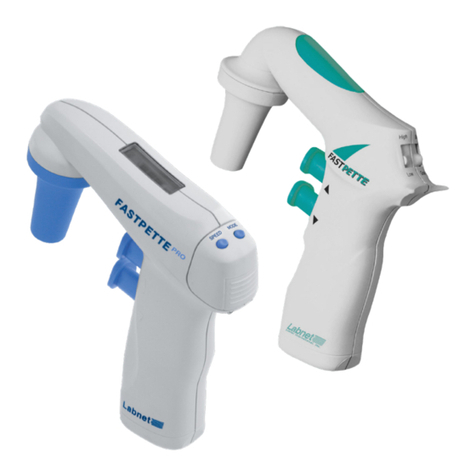
FASTPETTE PRO
may not be used for measuring substances, the vapours of which
damage the following plastics: PP, SI, EPDM, POM.
• The pipette controller may not be used in an environment where explosion risk is present.
• Flammable liquids shall not be measured - in particular substances with flash-point below
0 °C (ether, acetone).
•
The pipette controller shall not be used for drawing acids with a concentration above 1 mol.
•
The pipette controller shall not be used for drawing solutions with a temperature above 50 °C.
• The pipette controller may work in temperature range from +10 °C to +35 °C.
4 - TO SWITCH ON THE FASTPETTE PRO
Take off the batteries cover and place the batteries according to the drawing (fig. 8). Place the
batteries cover, wait a moment till the icons appear on the display. Before the pipette con-
troller is activated for the first time the batteries should be charged. Batteries full charging
state is indicated by successive lighting „bars” in the display according to the section 8 in the
instruction manual.
The FASTPETTE PRO pipette controller is switched on by pressing any of the buttons.
The display will show the selected aspiration mode,
dispense mode and the batteries level
indicator. Examples of the display indications are shown in (fig. 5.1). The batteries are
discharged and requires charging if the indicator does not display "bars" (fig. 5.4). When
the batteries are fully charged, the indicator displays three „bars” (fig. 5.1)
.
The FASTPETTE PRO switches off automatically if not used for 5 minutes.
The
FASTPETTE PRO
may be charged only with the original charger.
The mains voltage shall conform with the specification on the charger.
Charging shall be done in accordance with section 8 of the instruction manual.
5 - ASPIRATING AND DISPENSING LIQUIDS
Attaching a pipette
CAUTION: Before attaching a pipette check whether the pipette is not damaged, has no
dents or sharp edges in the gripping part. Check whether the gripping part is dry.
The pipette shall be gripped as close to the upper end as possible and carefully inserted
into the pipette holder until resistance is noticed (fig. 3A).
WARNING!
Do not apply excessive force so as not to damage thin pipettes and to avoid injury risk.
A pipette that has been correctly attached and sealed in the holder should not tilt to the sides.
After attaching a pipette hold the device in such a way as to keep the pipettor in vertical
position.
After finished work it is recommended not to leave the device with attached pipette
for a longer period, for example overnight or over a weekend.
4
CAUTION: Do not put aside the pipette controller if there is liquid in the pipette.
Filling the pipette
Before aspirating is started, set the speed by successive pressing the SPEED switch (fig. 1C)
until the display shows the right speed (fig. 1E).
• HIGH speed - fast aspirating (fig. 2.1)
• LOW speed - slow aspirating (fig. 2.2)
It is recommended to choose the LOW position for pipettes with a volume up to 5 ml, and
the HIGH position for pipettes with a volume greater than 5 ml. Holding the pipette con-
troller in such a way that the pipette is in vertical position immerse the pipette end in the liq-
uid
to be drawn up (fig. 3B), and press the aspiration button gently. The pipette filling speed
depends
on how deep the aspirating button has been pressed. The deeper the button
is pressed the faster the liquid is aspirated into the pipette.
It is recommended to draw a slightly greater liquid volume than required (due to meniscus
above the required volume mark), adjusting the aspiration speed, particularly in the final fillin
g
stage, so as not to overfill the pipette.
Setting the volume
After aspirating the liquid to the pipette, in order to remove the solution rests from the out-
side surface of the pipette, its end shall be dried with absorbent paper that does not leave
impurities. Then set
the required liquid volume precisely. Pressing the dispense button gently
(fig. 3C), dispense
the excessive liquid from the pipette until the meniscus of the liquid
aligns exactly with the required volume mark on the pipette.
Emptying the pipette
Holding the vessel in inclined position, place the pipette end in contact with the vessel wall
and press the dispense button gently (fig. 3C). The dispensing intensity may be adjusted
depending on how deep the dispense button has been pressed. The deeper the button
is pressed the faster the outflow of liquid from the pipette.
The
FASTPETTE PRO
has two dispense modes. The dispense mode is selected by succes-
sive pressing the MODE switch (fig. 1D) until the display shows the right mode (fig. 1E).
• dispense in gravity mode marked with the „drop” icon on the display (fig. 2.4) - the dis-
pense is effected in gravity mode, which means that the liquid flows out of the pipette by
its own weight. The outflow speed is adjusted depending on how deep the dispense but-
ton has been pressed.
•
forced dispense with a blow marked with the „arrow” icon on the display (fig. 2.5) – the dis-
pense is effected in gravity mode, however, when the dispense button is pressed to the
middle position, the pump is started and fast emptying of the pipette with a blow is effected.
CAUTION:
During gravimetrical dispensing the pipette is not completely emptied due to the characte-
ristics of pipettes used with the pipette controller.
