manuals.online logo
Brands
  1. Home
  2. •
  3. Brands
  4. •
  5. Laird
  6. •
  7. Gateway
  8. •
  9. Laird Sentrius RG1 Series User manual

Laird Sentrius RG1 Series User manual

Version 4.1
https://www.lairdconnect.com/
2
© Copyright 2020 Laird Connectivity.
All Rights Reserved
Americas: +1-800-492-2320
Europe: +44-1628-858-940
Hong Kong: +852 2923 0610
Ver.
Date
Notes
Contributor(s)
Approver
1.0
20 July
Initial Release
Jonathan Kaye
1.1
3 Aug 2017
Clarified web interface URL.
Identified separate mDNS address.
Shewan Yitayew
1.2
29 Nov 2017
Update info for compatibility with GA2
(93.7.2.x) firmware.
Add compliance information. Add IP67
Rated Version Specs
Jonathan Kaye
2.0
13 Dec 2017
Changed Rev # to 2.0 to match
engineering release
Jonathan Kaye
2.1
04 Jan 2018
Miscellaneous text and grammatical edits
Shewan Yitayew
2.2
10 Jan 2018
Adding Ordering Information
Jonathan Kaye
3.0
28 Feb 2018
Adding UAE Certification Compliance,
Firmware update info
RG, RDE
3.1
15 Mar 2018
Added note to Wi-Fi Quick Configuration
section regarding available firmware
version. Updated to new template
Jonathan Kaye
3.2
29 Mar 2018
Removed inapplicable Firmware update
URLs
Sue White
Jonathan Kaye
3.3
13 Apr 2018
Important update to firmware upgrade
procedure
Ryan Erickson
Shewan Yitayew
3.4
30 May 2018
Updates for GA3 firmware. Add section
for web session timeout. Update firmware
upgrade section.
Ryan Erickson
Jonathan Kaye
3.5
20 Aug 2018
Updated Outdoor Enclosure Connector
Layout
Robert Gosewehr
Jonathan Kaye
3.6
19 Dec 2018
Updated logos and URL
Sue White
Jonathan Kaye
3.7
7 Mar 2019
Updated Section 9.4.2 for clarity
Updated template
Robert Gosewehr
Sue White
Jonathan Kaye
3.8
11 Oct. 19
Added AS923/AU915 Region Support
Robert Gosewehr
Adam Ruehl
Raj Khatri
Chris Boorman
Jonathan Kaye
3.9
8 Nov 19
Update the remote management section to
include information about uploading and
downloading configuration files for LoRa
and Wi-Fi.
Adam Ruehl
Chris Boorman
4.0
4 Feb 2020
Updates for GA5
Adam Ruehl
Chris Boorman
4.1
17 April 2020
Added URL for GA4.1
Adam Ruehl
Chris Boorman
https://www.lairdconnect.com/
3
© Copyright 2020 Laird Connectivity.
All Rights Reserved
Americas: +1-800-492-2320
Europe: +44-1628-858-940
Hong Kong: +852 2923 0610
1About this Guide.............................................................................................................................................................5
2Introduction ....................................................................................................................................................................5
2.1 Product Overview .................................................................................................................................................5
2.2 Specification .........................................................................................................................................................6
2.3 Ordering Information.............................................................................................................................................9
3Connecting the Hardware ............................................................................................................................................10
3.1 Connect the Gateway .........................................................................................................................................10
3.1.1 Antenna Configuration ..................................................................................................................................10
3.1.2 Wi-Fi Quick Configuration.............................................................................................................................11
4Log into the Gateway...................................................................................................................................................11
5LAN Connection Setup.................................................................................................................................................14
5.1 IPv4 Configuration ..............................................................................................................................................14
5.2 IPv6 Configuration ..............................................................................................................................................14
5.3 Advanced View...................................................................................................................................................15
6Wi-Fi Connection Setup...............................................................................................................................................16
6.1 Use Scan to Add a Profile...................................................................................................................................16
6.2 Manually Adding a Profile...................................................................................................................................17
6.3 Wi-Fi Advanced Page.........................................................................................................................................18
7LoRa Connection Setup...............................................................................................................................................19
7.1 Using Presets .....................................................................................................................................................19
7.2 Semtech Basic Station........................................................................................................................................20
7.2.1 Mode.............................................................................................................................................................20
7.2.2 Servers..........................................................................................................................................................20
7.2.3 Certificates....................................................................................................................................................21
7.2.4 Connection Status.........................................................................................................................................21
7.3 Senet ..................................................................................................................................................................22
7.4 Semtech Legacy UDP Forwarder .......................................................................................................................22
7.5 Advanced Configuration......................................................................................................................................28
7.6 Traffic..................................................................................................................................................................29
8Manage the Gateway...................................................................................................................................................30
8.1 Changing Username and Password ...................................................................................................................30
8.2 Web Session.......................................................................................................................................................30
8.3 Version Information.............................................................................................................................................31
8.4 Updating Gateway Firmware ..............................................................................................................................31
8.5 Save/Restore Settings........................................................................................................................................33
8.6 Remote Management .........................................................................................................................................34
8.6.1 Configuring the Gateway for Remote Management......................................................................................34
8.6.2 Updating Firmware Remotely........................................................................................................................34
8.6.3 Configuration File Upload..............................................................................................................................35
8.6.4 Configuration File Download.........................................................................................................................35
8.6.5 The Sentrius Gateway’s TR-069 Data Model................................................................................................35
8.7 Debug.................................................................................................................................................................44
8.8 Factory Reset .....................................................................................................................................................45
8.9 Bluetooth.............................................................................................................................................................45
9IP67 Rated Enclosure..................................................................................................................................................46
9.1 Specification .......................................................................................................................................................47
https://www.lairdconnect.com/
4
© Copyright 2020 Laird Connectivity.
All Rights Reserved
Americas: +1-800-492-2320
Europe: +44-1628-858-940
Hong Kong: +852 2923 0610
9.2 LED Display Reference.......................................................................................................................................48
9.3 Previous Generation Connector Adapter Layout ................................................................................................49
9.4 Cable Assemblies...............................................................................................................................................49
9.5 Mounting Hardware ............................................................................................................................................51
10 FCC and ISED Canada Regulatory Statements...........................................................................................................53
11 CE Regulatory..............................................................................................................................................................55
11.1 EU Declarations of Conformity............................................................................................................................55
12 Taiwan NCC Regulatory ..............................................................................................................................................56
13 Telecommunications Regulatory Authority (TRA) Compliance ....................................................................................56
14 Region Supported Labels.............................................................................................................................................57
14.1 RG191 Version...................................................................................................................................................57
14.2 AU915 & AS923 Regions....................................................................................................................................57
14.2.1 Taiwan (TW) .................................................................................................................................................57
14.2.2 New Zealand (NZ).........................................................................................................................................57
14.2.3 Hong Kong (HK)............................................................................................................................................58
14.2.4 Australia (AU)................................................................................................................................................58
14.2.5 Singapore (SG).............................................................................................................................................58
14.2.6 Malaysia (MY)...............................................................................................................................................58
https://www.lairdconnect.com/
5
© Copyright 2020 Laird Connectivity.
All Rights Reserved
Americas: +1-800-492-2320
Europe: +44-1628-858-940
Hong Kong: +852 2923 0610
This document is the parent guide of the RG1xx Quick Start Guide and provides a comprehensive guide on how to configure
the SentriusTM RG1xx gateways to suit the intended application. It covers all the SentriusTM RG1xx functionality, including
Ethernet, Wi-Fi and LoRa configurations. It also provides instructions for setting up the gateway on a LoRa network server.
Note: Step-by-step instruction, screen shots, and pictures are based on the SentriusTM RG191, but the same is applicable
for the SentriusTM RG186 and other AS915, AU923 variants; differences are highlighted in the notes.
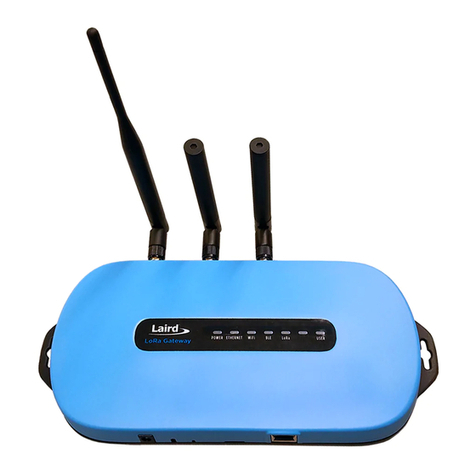
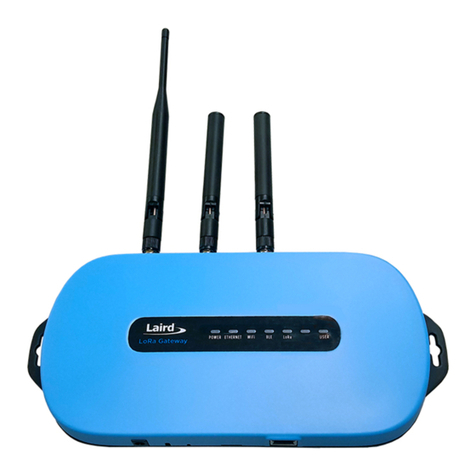
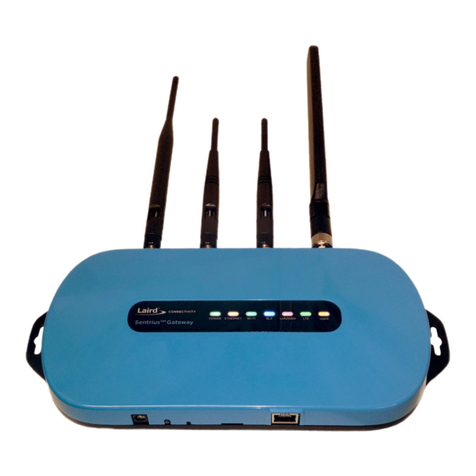
Laird’s Sentrius™ RG1xx LoRa-Enabled Gateway is the ultimate in secure, scalable, robust
LoRa solutions for end-to-end control of your private LoRaWAN network. Leveraging Laird’s field-
proven and reliable 50 Series Wireless Bridge certified module, it also offers enterprise dual-band
Wi-Fi and wired Ethernet for complete design freedom. Based on the Semtech SX1301/SX1257
chipset designs, it offers a LoRa range up to ten miles and pre-loaded LoRa Packet Forwarder
software, perfect for highly scalable, flexible IoT networks. The Sentrius RG1xx Gateway works
with Laird’s SentriusTM RM1xx Series LoRa+BLE certified modules for simple out-of-the-box
integration and is compatible with third-party cloud and LoRa partners, as well as any LoRaWAN-
certified client devices.
Figure 1: Top of the Sentrius™RG1xx gateway
1. LoRa and Wi-Fi antennas
2. LEDs
3. Mounting holes
4. User button
Figure 2: Side panel of the Sentrius™ RG1xx gateway
5. DC power input
6. User button
7. Reset button
8. SD card slot
9. Ethernet connector
133 mm
https://www.lairdconnect.com/
6
© Copyright 2020 Laird Connectivity.
All Rights Reserved
Americas: +1-800-492-2320
Europe: +44-1628-858-940
Hong Kong: +852 2923 0610
Category
Feature
Specification
Chipset
LoRa®
Semtech SX1301/SX1257
Bluetooth®
Cambridge Silicon Radio CSR8811 A08
Wi-Fi
Qualcomm Atheros QCA6004
Wireless Characteristics
Wi-Fi Spatial Streams
2x2 MIMO
Wi-Fi Frequencies
2.4 and 5 GHz operation
Conducted Maximum Transmit Power
Note: Transmit power on each channel
varies according to individual country
regulations. All values for lowest data
rate are nominal, +/-2 dBm.
Others are +/-2.5 dBm
Note:
HT40 –40 MHz-wide channels
HT20 –20 MHz-wide channels
802.11a (UNII-1, UNII-2A, UNII-2C) or CH 36 –CH140
6 Mbps
17 dBm
54 Mbps
14 dBm
802.11a (UNII-3) or CH 148 –CH 165
6 Mbps
15 dBm
54 Mbps
14 dBm
802.11b
1 Mbps
17 dBm
11 Mbps
17 dBm
802.11g
6 Mbps
17 dBm
54 Mbps
14 dBm
802.11n (2.4 GHz)
6.5 Mbps (MCS0)
17 dBm
65 Mbps (MCS7)
13 dBm
802.11n (5 GHz) (UNII-1, UNII-2A, UNII-2C) or
CH 36 –CH140
6.5 Mbps (MCS0, HT20)
17 dBm
65 Mbps (MCS7, HT20)
13 dBm
(MCS0, HT40)
14 dBm
(MCS7, HT40)
11 dBm
802.11n (5 GHz) (UNII-3) or CH 148 –CH 165
6.5 Mbps (MCS0, HT20)
15 dBm
65 Mbps (MCS7, HT20)
12 dBm
(MCS0, HT40)
14 dBm
(MCS7, HT40)
11 dBm
Bluetooth Low Energy
1 Mbps
6 dBm
Wi-Fi Radio
Conducted Typical Receiver
Sensitivity
Note: All values nominal, ±3 dBm.
Variant by channels.
802.11a
6 Mbps
-92 dBm
54 Mbps
-74 dBm (PER <= 10%)
802.11b
1 Mbps
-94 dBm
11 Mbps
-87 dBm (PER <= 8%)
802.11g
6 Mbps
-91 dBm
54 Mbps
-74 dBm (PER <= 10%)
802.11n (2.4 GHz)
6.5 Mbps (MCS0)
-91 dBm
65 Mbps (MCS7)
-71 dBm
https://www.lairdconnect.com/
7
© Copyright 2020 Laird Connectivity.
All Rights Reserved
Americas: +1-800-492-2320
Europe: +44-1628-858-940
Hong Kong: +852 2923 0610
Category
Feature
Specification
802.11n (5 GHz HT20)
6.5 Mbps (MCS0)
-92 dBm
65 Mbps (MCS7)
-71 dBm
Bluetooth Low Energy
1 Mbps
-86 dBm
LoRa - Wireless
Characteristics
LoRa Frequencies, LoRaWAN Region,
UL/DL, Laird part number
EU
863 –870 MHz (LoRaWAN EU863-870, UL/DL) –RG186
US
902 –928 MHz (LoRaWAN US902-928, UL) –RG191
NZ
918.2 –927.6 MHz (LoRaWAN AS923 UL/DL) –
455-00055
AU
923.3 –927.5 MHz (LoRaWAN AU915-928, UL) –
455-00057
AU
915.4 –927.7 MHz (LoRAWAN AS923, UL/DL) –
455-00057
TWN
920.2 –924.8 MHz (LoRaWAN AS923, UL/DL) –455-00054
HK
920.2 –924.8 MHz (LoRaWAN AS923, UL/DL) –455-00056
MY
919 –924 MHz (LoRaWAN AS923, UL/DL) –455-00101
SG
920 –925 MHz (LoRaWAN AS923, UL/DL) –455-00102
LoRa Radio Conducted TX Power
(at -40°C)
(RG191 plus AS915 & AU923 variants)
US
28 dBm (max entry in Radio TX Power Table)
NZ
24 dBm (max entry in Radio TX Power Table)
AUS
27 dBm (max entry in Radio TX Power Table), AU915
and AS923
TWN
25 dBm (max entry in Radio TX Power Table)
HK
25 dBm (max entry in Radio TX Power Table)
MY
25 dBm (max entry in Radio TX Power Table)
SG
27 dBm (max entry in Radio TX Power Table)
US, NZ, AUS,
TWN, HK,
MY, SG
0 dBm (min entry in Radio TX Power Table)
LoRa Radio Conducted RX Sensitivity
(RG191 plus AS915 & AU923 variants)
-127 dBm (Bandwidth = 125 kHz, Spreading Factor = 7, DR0)
LoRa Radio Conducted TX Power
(at -40°C) (RG186)
Supports TX power as per ETSI Frequency bands
25 dBm (max entry in Radio TX Power Table)
-3 dBm (min entry in Radio TX Power Table)
LoRa Radio Conducted RX Sensitivity
(RG186)
-125 dBm (Bandwidth = 125 kHz, Spreading Factor = 7, DR0)
-123 dBm (Bandwidth = 250 kHz, Spreading Factor = 7, DR6)
Interfaces
Wired
Ethernet - RJ45 Connector
Wireless
Wireless
Power
Supply Voltage
12V/1A
Power Adapter
External DC Power Supply (has 12V /2A rating) with regional
plug adapter
Security
Wi-Fi
Standards –WEP, WPA, WPA2
Encryption –WEP, TKIP, AES
EAP Types –EAP-FAST, EAP-TLS, EAP-TTLS, PEAP-GTC,
PEAP-MSCHAP, PEAP-MSCHAPv2, PEAP-TLS, LEAP
Software
Operating System
Embedded Linux, 4.x Kernel
https://www.lairdconnect.com/
8
© Copyright 2020 Laird Connectivity.
All Rights Reserved
Americas: +1-800-492-2320
Europe: +44-1628-858-940
Hong Kong: +852 2923 0610
Category
Feature
Specification
LoRa
Packet Network Forwarder with default support for the
following:
▪The Things Network with Semtech Basic Station or UDP
forwarder
▪Stream communications with UDP forwarder
▪ChirpStack with UDP forwarder or Semtech Basic Station
▪Senet through legacy Semtech UDP or proprietary Senet
forwarder
Configuration
Web-based interface via Ethernet/Wi-Fi
Physical
Dimensions
133 x 275 x 30 mm (enclosure only)
Environmental
Operating Temperature
-30° to +70°C
Note: The RG1xx gateway operating temperature range is
limited to -30° to +70°C due to the supplied external
power supply. The RG1xx gateway without the external
power supply is certified for -40° to +85°C.
Regulatory
Approvals (RG186)
CE
Health and Safety –IEC 60950-1 V2.0
Radio –EN300 220-1 V3.1.1 (2017-02); EN300-220-2 V3.1.1
(2017-02)
EMC –EN301 489-1 V2.2.0 (2017-03); EN301 489-3 V2.1.1
(2017-03)
Approvals (RG191)
FCC –Contains FCC ID: SQG-WB50NBT
IC –Contains IC ID: 3147A-WB50NBT
FCC –Contains FCC ID: SQG-1001
IC –Contains IC ID: 31347A-1001
NZ –AS/NZS 4268:2017
AUS –AS/NZS 4268:2017
TWN –NCC LP0002
Malaysia –TBC
Singapore –TBC
Wi-Fi Antenna
Model
Laird MAF94051
Type
Dipole
Connector
RP-SMA
Antenna Gain
2.1 dBi (2.4-2.5 GHz), 2.4 dBi (4.9 GHz) 2.6 dBi (5.25 GHz),
3.4 dBi (5.875 GHz)
LoRa Antenna
Model
Laird 001-0028 (863-870 MHz) used with RG186
Laird 001-0002 (902-928 MHz) used with RG191 plus AS915
and AU923 variants
Type
Dipole
Connector
RP-SMA
Antenna Gain
2.0 dBi (863-870 MHz) used with RG186
2.0 dBi (902-928 MHz) used with RG191 plus AS915 and
AU923 variants
Accessories
Included
1 x 863-870 MHz antenna (with RG186) or 1 x 902-928 MHz
antenna (with RG191, AS915 and AU923 variants)
2 x 2.4/5 GHz Wi-Fi antennas
1 x External DC power adapter
https://www.lairdconnect.com/
9
© Copyright 2020 Laird Connectivity.
All Rights Reserved
Americas: +1-800-492-2320
Europe: +44-1628-858-940
Hong Kong: +852 2923 0610
Category
Feature
Specification
Enclosure
Standard
Moulded plastic housing
Warranty
One-year warranty
IMPORTANT NOTE: The region setting of the radio cannot be changed. The user must purchase the appropriate model for
the desired region of operation and only use the model appropriate for the location in which they will
install the gateway.
Table 1: Ordering information
Part
Number
Description
RG186
Sentrius™ RG191 US (US902-928) 915 MHz Gateway - LoRaWAN, Wi-Fi, and Ethernet –US Power Adapter
RG191
Sentrius™ RG186 Europe (EU868) 868 MHz Gateway - LoRaWAN, Wi-Fi, and Ethernet –EU Power Adapter
455-00028
Sentrius™ RG186 United Kingdom (EU868) 868 MHz Gateway - LoRaWAN, Wi-Fi, and Ethernet –UK Power Adapter
450-0190
Sentrius™ RG191 US (US902-928) 915 MHz Gateway –LoRaWAN, Wi-Fi, and Ethernet –IP67
450-0191
Sentrius™ RG186 Europe (EU868) 868 MHz Gateway – LoRaWAN, Wi-Fi, and Ethernet –IP67
455-00054
Sentrius™ RG191 New Zealand (AS923) 923 MHz Gateway –LoRaWAN, Wi-Fi, and Ethernet –NZ Power Adapter
455-00055
Sentrius™ RG191 Hong Kong (AS923) 923 MHz Gateway –LoRaWAN, Wi-Fi, and Ethernet –HK Power Adapter
455-00056
Sentrius™ RG191 Australia (AU915+AS923) 923 MHz Gateway –LoRaWAN, Wi-Fi, and Ethernet –AU Power Adapter
455-00057
Sentrius™ RG191 US (US902-928) 915 MHz Gateway - LoRaWAN, Wi-Fi, and Ethernet –US Power Adapter
The following regions orderable from - TBD
455-00101
Sentrius™ RG191 Malaysia (AS923) 923 MHz Gateway –LoRaWAN, Wi-Fi, and Ethernet –UK Power Adapter
455-00102
Sentrius™ RG191 Singapore (AS923) 923 MHz Gateway –LoRaWAN, Wi-Fi, and Ethernet –UK Power Adapter
Accessories
690-1002
Pole Mount Bracket - Accessory for 450-0190 or 450-0191
690-1003
Wall Mount Bracket - Accessory for 450-0190 or 450-0191
https://www.lairdconnect.com/
10
© Copyright 2020 Laird Connectivity.
All Rights Reserved
Americas: +1-800-492-2320
Europe: +44-1628-858-940
Hong Kong: +852 2923 0610
To use the gateway, you must power up the gateway and access the web interface via the Ethernet port. To do this, follow
these steps:
1. Follow the label on the box and connect the three antennas. Refer to Antenna Configuration for additional information.
2. Connect the power supply (see #2 in Figure 3).
3. Connect the gateway to your router (#3 in Figure 3) using the Ethernet cable (#1 in Figure 3).
Alternatively use the Wi-Fi Quick Config mechanism. Refer to Wi-Fi Quick Configuration for additional information.
Your gateway is now connected and ready.
Figure 3: Connecting the gateway
To configure the antenna properly, do the following:
1. Attach the two shorter antennas to the 2.4/5.5 GHz (Wi-Fi) ports.
2. Attach the third and longer antenna to the 868 MHz/900 MHz (LoRa) port.
1
2
3
Wi-Fi
LoRa
https://www.lairdconnect.com/
11
© Copyright 2020 Laird Connectivity.
All Rights Reserved
Americas: +1-800-492-2320
Europe: +44-1628-858-940
Hong Kong: +852 2923 0610
Note: This feature only works with firmware version 93.7.2.9 and newer. Please verify your Gateway firmware version
number and, if required, upgrade to a current version. Refer to Updating Gateway Firmware for additional information
regarding this upgrade.
The gateway includes a mode to allow you to configure without ethernet access, in the case that you wish to join a wireless
network.
Apply power to the gateway and allow to start, then perform the following:
1. Depress and hold the user button (see #2 in Figure 2) for seven seconds.
2. From a wirelessly enabled device perform a scan.
3. Connect to the access point rg1xx29378B, where 29378B are the last six digits of the Ethernet MAC address found on
the label on the bottom of the gateway (Figure 4).
The network is secured with WPA2 with a password that is the same as the SSID. We recommend that you change the
default password for security reasons. The password can be changed on the
Wi-Fi > Advanced web page.
Upon logout or client disassociation, Wi-Fi Quick Config shuts down and normal operation resumes.
To log into the gateway web interface, follow these steps:
1. Determine the last three bytes of your gateway’s Ethernet MAC address. This can be found on the label on the bottom
of the gateway; the last three bytes are highlighted (Figure 4).
Figure 4: Bottom label (Standard GW –Left, AS923 & AU915 Region Supported/Latest Version –Right)–last three bytes of
the Ethernet MAC address highlighted
2. Enter the URL into the web browser to access the web interface. For example, for the gateway used in this guide, the
URL is https://rg1xx29378B.local., where “29378B” are the last six digits of the Ethernet MAC address. In Wi-Fi quick
config mode, the gateway can also be accessed via the IP address at https://192.168.1.1
3. Accept the self-signed security certificate in the browser.
4. Click Advanced (Figure 5).
https://www.lairdconnect.com/
12
© Copyright 2020 Laird Connectivity.
All Rights Reserved
Americas: +1-800-492-2320
Europe: +44-1628-858-940
Hong Kong: +852 2923 0610
Figure 5: Web interface –first screen
5. Click Proceed (Figure 6).
Figure 6: Web interface –second screen
6. Log on using the following default credentials:
Username: sentrius
Password: RG1xx
Figure 7: Gateway interface login screen
https://www.lairdconnect.com/
13
© Copyright 2020 Laird Connectivity.
All Rights Reserved
Americas: +1-800-492-2320
Europe: +44-1628-858-940
Hong Kong: +852 2923 0610
After logging in, the program warns you to change the default credentials for security reasons (Figure 8).
Figure 8: Change the default credentials
Only one login session is allowed at a time. If there is another active session active, the program warns you before
allowing you to take over the session (Figure 9).
Figure 9: Active session warning
7. Click Continue to log in.
https://www.lairdconnect.com/
14
© Copyright 2020 Laird Connectivity.
All Rights Reserved
Americas: +1-800-492-2320
Europe: +44-1628-858-940
Hong Kong: +852 2923 0610
The LAN menu allows selections for configuration and status of the IPv4/IPv6 wired network. The current status of the IPv4
network is also displayed. To access this section, click LAN in the page menu.
The first page for configuring the Ethernet LAN connection is the IPv4 Configuration page. There are two basic modes of
operation –DHCP and Static. These are selected in the IP Address Acquisition Method drop-down box (Figure 10). The
gateway factory default setting is DHCP.
Figure 10: IPv4 Configuration page
▪DHCP –When in DHCP mode, all settings are provided by the DHCP server. All configuration settings (except IP
Address Acquisition Method) are greyed out. IP values provided by DHCP are displayed but cannot be changed.
▪Static –When the IP Address Acquisition Method is set to static, all IP settings are fixed and saved in the device. The
external Gateway IP address is optional and may be left blank. DNS Server IP addresses are also optional. Zero, one, or
two DNS servers may be specified.
Select the IPv6 configuration by clicking the IPv6 menu item in the side menu of the LAN view (Figure 10). The IPv6
configuration settings are shown below.
There are two fully supported modes for IPv6 addressing:
▪DHCP –In DHCP mode, all settings are provided through communication with an IPv6 server on the network.
▪Auto –In auto mode, you have the option of selecting the auto DHCP method (either stateless or SLAAC). As of June
2017, IPv6 static mode is only partially supported. Please see the software release notes for current information.
https://www.lairdconnect.com/
15
© Copyright 2020 Laird Connectivity.
All Rights Reserved
Americas: +1-800-492-2320
Europe: +44-1628-858-940
Hong Kong: +852 2923 0610
Figure 11: IPv6 Configuration page
Select the advanced view by clicking the Advanced menu item in the LAN sidebar (Figure 12). The Advanced view shows all
network information provided by the Wi-Fi module in the gateway. Depending on the settings of the network and the gateway,
not all settings may apply to the current mode of operation. This view is intended to support advanced users in troubleshooting
their network.
Figure 12: Advanced view
https://www.lairdconnect.com/
16
© Copyright 2020 Laird Connectivity.
All Rights Reserved
Americas: +1-800-492-2320
Europe: +44-1628-858-940
Hong Kong: +852 2923 0610
By default, the gateway’s Wi-Fi radio is not configured to connect to a Wi-Fi network. The user must access the web interface
on the gateway via the Ethernet interface to setup the Wi-Fi connection.
To setup a Wi-Fi connection, click the Wi-Fi tab in the main menu (Figure 13).
Figure 13: Wi-Fi connection setup
In the sidebar on the left, you can navigate to various Wi-Fi pages and see the status of the Wi-Fi interface. There is also a
button to enable/disable the Wi-Fi radio.
To use the scan function to add a profile, follow these steps:
Connect to a Wi-Fi network –click Scan to scan for nearby Wi-Fi networks. Scanning continues until you click Stop or
click on one of the listed scan results (Figure 14).
Figure 14: Scan function
Click on the applicable scan result.
https://www.lairdconnect.com/
17
© Copyright 2020 Laird Connectivity.
All Rights Reserved
Americas: +1-800-492-2320
Europe: +44-1628-858-940
Hong Kong: +852 2923 0610
In the Wi-Fi profile window, enter the appropriate credential information for your chosen Wi-Fi network (Figure 15).
Figure 15: Wi-Fi profile window
To add a Wi-Fi network profile manually, follow these steps:
Click the LAN button in the main menu, then click the Profiles button in the left menu. This page is useful for adding a
hidden Wi-Fi network that is not broadcasting its SSID (Figure 16).
Figure 16: Wi-Fi profiles page
The profile page shows all Wi-Fi profiles that are saved in the gateway. You can add, activate, or delete the profiles
shown on this page.
Click + Profile to display the Wi-Fi profile dialog (Figure 17).
https://www.lairdconnect.com/
18
© Copyright 2020 Laird Connectivity.
All Rights Reserved
Americas: +1-800-492-2320
Europe: +44-1628-858-940
Hong Kong: +852 2923 0610
Figure 17: Wi-Fi profile dialog
Enter the appropriate information for the new profile.
Click Add.
The Wi-Fi advanced page shows more detailed information about the Wi-Fi radio status and allows the user to configure the
Quick Config AP mode password (Figure 18).
Figure 18: Wi-Fi Advanced page
https://www.lairdconnect.com/
19
© Copyright 2020 Laird Connectivity.
All Rights Reserved
Americas: +1-800-492-2320
Europe: +44-1628-858-940
Hong Kong: +852 2923 0610
The side panel for the LoRa Gateway allows selections for configuration and status of the LoRa network card. The status of
the LoRa Network is also displayed (Figure 19).
Figure 19: LoRa connection setup page
The Gateway ID (also known as the gateway DevEUI), is used to uniquely identify the RG1xx gateway. It is required when
registering the gateway on a LoRa network server. The gateway EUI is also printed on the bottom label of the gateway, with
the label M2 EUI or DevEUI.
Figure 20: Gateway label (Standard GW –Left, AS923 & AU915 Region Supported/Latest Version –Right)
The SentriusTM RG1xx contains multiple preset configurations for connecting to a third-party server or as the basis for a private
network. These presets configure the forwarder and the channel plan.
To apply a preset configuration, follow these steps:
Click the LoRa tab in the main menu. The default page of the LoRa menu is the Presets page (also accessible in the
left side menu of the LoRa pages).
Select the preset from the drop down. Information about this preset is displayed in a panel to the right (Figure 21).
Click Apply to apply the preset configuration. After a few moments, a green confirmation appears on the bottom of the
page.
Note: After applying a preset, further changes can be made on the other screens. Some presets use a custom
forwarder and may not be modified.
Note: The LoRa Region Code is
displayed here. Be sure that
the gateway you are
operating matches the region
in which you are operating it.
https://www.lairdconnect.com/
20
© Copyright 2020 Laird Connectivity.
All Rights Reserved
Americas: +1-800-492-2320
Europe: +44-1628-858-940
Hong Kong: +852 2923 0610
Figure 21: Selecting a preset configuration
Semtech’s Basic Station replaces most other forwarders that were included in prior releases of the gateway. Basic station
uses secure web sockets to communicate with the LoRa Network Server. It also has the capability to connect to a CUPS
server to allow the device to configure the LNS connection remotely. All configuration settings beyond this are handled by the
Lora Network Server. This includes the channel plan. An appropriate channel plan must be selected in the LNS that
corresponds to the region of operation for your specific gateway.
The forwarder page allows configuration of the packet forwarder. The mode allows the user to change to different packet
forwarders.
The user must enter in a valid LNS server to allow for operation as a packet forwarder. The CUPS servers are optional but
should be kept blank if you do not want to communicate with the CUPS servers to provision the LNS certificates.
Figure 22: LNS server

Other manuals for Sentrius RG1 Series

4

This manual suits for next models

11

Other Laird Gateway manuals

Laird Sentrius RG1 Series User manual

Laird

Laird Sentrius RG1 Series User manual

Laird Sentrius RG191+LTE User manual

Laird

Laird Sentrius RG191+LTE User manual

Laird Sentrius RG1 Series User manual

Laird

Laird Sentrius RG1 Series User manual

Laird Sentrius RG1 Series User manual

Laird

Laird Sentrius RG1 Series User manual

Laird Sentrius RG1 Series User manual

Laird

Laird Sentrius RG1 Series User manual

Laird Sentrius RG1xx User manual

Laird

Laird Sentrius RG1xx User manual

Laird Sentrius MG100 Owner's manual

Laird

Laird Sentrius MG100 Owner's manual

Laird Sentrius RG191+LTE User manual

Laird

Laird Sentrius RG191+LTE User manual

Laird Sentrius MG100 User manual

Laird

Laird Sentrius MG100 User manual

Popular Gateway manuals by other brands

Amit RRU-WEM/1158 Operation manual

Amit

Amit RRU-WEM/1158 Operation manual

DBL Technology VoIP FXS+PSTN Gateway user manual

DBL Technology

DBL Technology VoIP FXS+PSTN Gateway user manual

DISCOVER LYNK II manual

DISCOVER

DISCOVER LYNK II manual

RTA 460ESA-N2EW user guide

RTA

RTA 460ESA-N2EW user guide

turck BL20-GW-CANOPEN user manual

turck

turck BL20-GW-CANOPEN user manual

JBM electronics C-130 quick start guide

JBM electronics

JBM electronics C-130 quick start guide

SAGEMCOM FAST 5295 Installation

SAGEMCOM

SAGEMCOM FAST 5295 Installation

NETGEAR CG4500BD installation guide

NETGEAR

NETGEAR CG4500BD installation guide

IFM mobileIoT CR3156 operating instructions

IFM

IFM mobileIoT CR3156 operating instructions

Zte ZXV10 H11X user manual

Zte

Zte ZXV10 H11X user manual

Projectek Networking Electronics BESTip ATA GSM user manual

Projectek Networking Electronics

Projectek Networking Electronics BESTip ATA GSM user manual

Digium G100 SERIES Administrator's manual

Digium

Digium G100 SERIES Administrator's manual

Dinstar FXS user manual

Dinstar

Dinstar FXS user manual

VOPtel GoIP4 user manual

VOPtel

VOPtel GoIP4 user manual

Karel GT20 Technical reference and user's guide

Karel

Karel GT20 Technical reference and user's guide

ActionTec GT701-WG user manual

ActionTec

ActionTec GT701-WG user manual

THOMSON TR-069 Configuration guide

THOMSON

THOMSON TR-069 Configuration guide

Rohde & Schwarz R&S GW5420 installation manual

Rohde & Schwarz

Rohde & Schwarz R&S GW5420 installation manual

manuals.online logo
manuals.online logoBrands
  • About & Mission
  • Contact us
  • Privacy Policy
  • Terms and Conditions

Copyright 2025 Manuals.Online. All Rights Reserved.