manuals.online logo
Brands
  1. Home
  2. •
  3. Brands
  4. •
  5. LEGRAND
  6. •
  7. Intercom System
  8. •
  9. LEGRAND On-Q User manual

LEGRAND On-Q User manual

301 Fulling Mill Road, Suite G
Middletown, PA 17057
Phone (800) 321-2343 / Fax (717) 702-2546
www.onqlegrand.com
Page 1 of 3
INSTRUCTION/INSTALLATION SHEET
Selective Call Intercom Video Door
Unit
IS-0426 REV. O
©Copyright 2008 by On-Q/Legrand All Rights Reserved.
1. Introduction
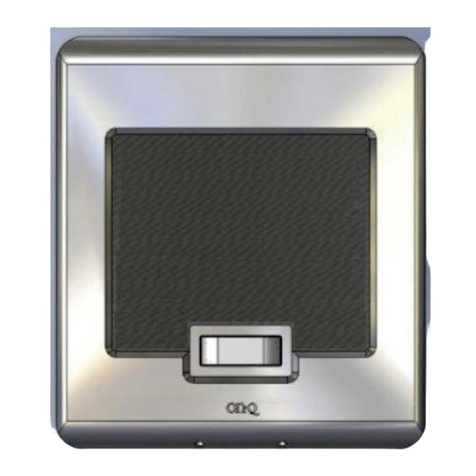
The On-Q /Legrand Selective Call Intercom Video Door Unit, PN IC5003-XX
(see Figure 1), is a weather resistant door unit that allows a visitor to notify
the occupants of their presence by pushing the door chime button. The
occupants can then see who is at the door via the optional On-Q LCD
Console and associated module, initiate two-way communications with the
visitor and optionally open the door (requires separate door release device).
The Door Unit is available in white (-WH), shiny brass (-SB), antique brass (-
AB), brushed stainless (-BS) and oil-rubbed bronze (-OB).
2. Description
The Video Door Unit is a 2-gang product that mounts within a two-gang
electrical box (56” from the floor to the bottom of the box). There is also a
two-gang surface-mount box available (P/N IC5006-BK) for unique or
retrofit installation requirements.
3. Installation
Installation of the Selective Call Video Door Unit is best accomplished at multiple times during new
construction, at “Rough-in” before the drywall and siding is installed, and at “Trim-out” after the drywall is
installed.
A. “Rough-in” steps:
1. Run a Cat 5 cable from the Enclosure where the Selective Call Intercom Module will be installed to the
2 gang box at the Video Door Unit location.
NOTE: A single Video Door Unit in a one Module system may be run up to 650 feet from the Module to
support a gate application. All other Door Units on the system must be within 330 feet (100 meters) of
the Distribution Module.
NOTE: It is important to keep all Category 5e cable runs, regardless of use, at least 12 inches away from
AC electrical cables. If it proves necessary to cross an existing AC cable, do so only at a 90 degree
angle.
B. “Trim-out” steps:
NOTE: All terminations can be correctly completed by following the T568A pin assignments. It is
important that you accurately terminate using T568A at all locations. All terminations on the Selective Call
Intercom System utilize RJ45 jacks. Refer to Figure 2 for correct T568A termination for RJ45 plugs.
RJ-45
Pin
1 – White/Green
2 – Green
3 – White Orange
4 – Blue
5 – White/Blue
6 – Orange
7 – White/Brown
8 – Brown
RJ-45
Pin
1 – White/Green
2 – Green
3 – White Orange
4 – Blue
5 – White/Blue
6 – Orange
7 – White/Brown
8 – Brown
Figure 1
Figure 2
301 Fulling Mill Road, Suite G
Middletown, PA 17057
Phone (800) 321-2343 / Fax (717) 702-2546
www.onqlegrand.com
Page 2 of 3
INSTRUCTION/INSTALLATION SHEET
Selective Call Intercom Video Door
Unit
IS-0426 REV. O
©Copyright 2008 by On-Q/Legrand All Rights Reserved.
NOTE: Make sure that the included weather proofing gasket is placed as shown in Figure 3.
1. As shown in Figure 3, the first step to installing the
Selective Call Video Door Unit is to place the included
rear gasket against the gang or back box, and secure
the gasket in place with the included mounting bracket.
NOTE: Insure that the mounting bracket is installed with
the center tab pointed up, as the Video Door Unit will be
“hung” from this tab in a later step.
NOTE: There are slotted holes in the mounting bracket
to allow for leveling of the Video Door Unit in case the
gang or back box was installed off level.
2. Use the four provided screws to attach the mounting
bracket to the gang or back box.
3. Pull the Cat 5 cable from the enclosure through the mounting bracket and terminate the cable with an
RJ45 plug and insert the plug into the RJ45 jack on the rear of the Video Door Unit (see Figure 4).
Follow the T568A standards described in Figure 2.
NOTE: There is a four position terminal block on the rear
of the Video Door Unit that can be utilized for two
different purposes (see Figure 5). The CHIME output is a
normally open dry contact closure used to ring a
customers 3rd party door chime when the Video Door
Unit button is pressed. The SENSOR input is reserved
for a future application.
4. Hang the Video Door Unit from the top tab on the mounting
bracket and use the provided 1/16” allen wrench to tighten
the two set screws at the bottom of the Video Door Unit.
5. Terminate the other end of the Cat 5 cable, at the Selective
Call Intercom Module, with an RJ45 plug using the T568A
wiring standard (see Figure 6).
6. Insert the RJ45 plug into jack #8
on the SCI Intercom Module
(labeled 8/V1).
7. After all Units and Modules are
connected, apply power to the
Selective Call Intercom Module
and verify system functionality.
All Selective Call Room, Door and Patio Units will be discovered and shown on each Room Unit LCD.
Figure 3
rear
gasket
center tab
mounting
bracket
set screws
RJ45
jack
Figure 4
Figure 5
Camera
301 Fulling Mill Road, Suite G
Middletown, PA 17057
Phone (800) 321-2343 / Fax (717) 702-2546
www.onqlegrand.com
Page 3 of 3
INSTRUCTION/INSTALLATION SHEET
Selective Call Intercom Video Door
Unit
IS-0426 REV. O
©Copyright 2008 by On-Q/Legrand All Rights Reserved.
4. Operation
Please refer to Figure 7 to familiarize yourself with the basic operation of the Selective Call Video Door Unit.
Please refer to the Selective Call System Installation Manual (P/N 1308003) shipped with the Room Unit for
more detailed instructions on how to use any Selective Call Room Unit to configure and personalize the
Selective Call System. Refer to the Selective Call System User Manual (P/N 1308001) shipped with the
Selective Call Module to familiarize yourself with the operation of the Selective Call Intercom System.
NOTE: Refer to the Selective Intercom 8 Location Distribution Module Information Sheet (IS-0385)
shipped with the Distribution Module for information regarding the support for electronic door release
functionality.
Figure 7
Door Chime Button: When a visitor
pushes this button, one of 20 selectable
Door Chimes will be heard throughout the
home at each active intercom unit. The
occupants of the home can then talk to that
Video Door Unit from any Room or enabled
Patio Unit. The visitor will hear the occupant
over the Video Door Unit speaker and be
able to talk to them over the Video Door Unit
microphone. The occupant may also choose
to release the electronic door latch (if
equipped) and let the visitor in.
Speaker
Microphone
Camera
Figure 6

Other LEGRAND Intercom System manuals

LEGRAND Tynetec Advent XT2 User manual

LEGRAND

LEGRAND Tynetec Advent XT2 User manual

LEGRAND ON-Q IC5002-OB User guide

LEGRAND

LEGRAND ON-Q IC5002-OB User guide

LEGRAND IC7000 User manual

LEGRAND

LEGRAND IC7000 User manual

LEGRAND 369205 User manual

LEGRAND

LEGRAND 369205 User manual

LEGRAND 369425 User manual

LEGRAND

LEGRAND 369425 User manual

LEGRAND AI6100M1 User manual

LEGRAND

LEGRAND AI6100M1 User manual

LEGRAND 369339 User manual

LEGRAND

LEGRAND 369339 User manual

LEGRAND EASYKIT Plus User manual

LEGRAND

LEGRAND EASYKIT Plus User manual

LEGRAND 369325 User manual

LEGRAND

LEGRAND 369325 User manual

LEGRAND EASYKIT Essential User manual

LEGRAND

LEGRAND EASYKIT Essential User manual

LEGRAND HPM D642/012R User manual

LEGRAND

LEGRAND HPM D642/012R User manual

LEGRAND 369305 User manual

LEGRAND

LEGRAND 369305 User manual

LEGRAND HPM D642/01 User manual

LEGRAND

LEGRAND HPM D642/01 User manual

LEGRAND AI6100M1 User manual

LEGRAND

LEGRAND AI6100M1 User manual

LEGRAND F9018-BK User manual

LEGRAND

LEGRAND F9018-BK User manual

LEGRAND Bticino Terraneo 342911 User manual

LEGRAND

LEGRAND Bticino Terraneo 342911 User manual

LEGRAND Easy Kit Connected User manual

LEGRAND

LEGRAND Easy Kit Connected User manual

LEGRAND IC5004 Series User manual

LEGRAND

LEGRAND IC5004 Series User manual

LEGRAND CM2001 User manual

LEGRAND

LEGRAND CM2001 User manual

LEGRAND IC7001 User manual

LEGRAND

LEGRAND IC7001 User manual

LEGRAND Belanko 617 013 User manual

LEGRAND

LEGRAND Belanko 617 013 User manual

LEGRAND EASYKIT Connected User manual

LEGRAND

LEGRAND EASYKIT Connected User manual

LEGRAND On-Q inQuire 1000 User manual

LEGRAND

LEGRAND On-Q inQuire 1000 User manual

LEGRAND Easy Kit Connected User manual

LEGRAND

LEGRAND Easy Kit Connected User manual

Popular Intercom System manuals by other brands

Bticino 322020 manual

Bticino

Bticino 322020 manual

Home DP 01 instruction manual

Home

Home DP 01 instruction manual

Bticino Sfera video kit User and installation manual

Bticino

Bticino Sfera video kit User and installation manual

AES MultiCom 500 Installation manual & user instructions

AES

AES MultiCom 500 Installation manual & user instructions

Vimar 819D Installer's guide

Vimar

Vimar 819D Installer's guide

Panasonic VL-MV10 operating instructions

Panasonic

Panasonic VL-MV10 operating instructions

sks HT 4600 installation instructions

sks

sks HT 4600 installation instructions

Chamberlain TAC11 Installation and programming manual

Chamberlain

Chamberlain TAC11 Installation and programming manual

ENFORCER DP-236Q manual

ENFORCER

ENFORCER DP-236Q manual

Toa IP-A1 Series Setup manual

Toa

Toa IP-A1 Series Setup manual

Amphenol Advance IR TSCAN-750 user manual

Amphenol

Amphenol Advance IR TSCAN-750 user manual

Somogyi Elektronic DPV 25 instruction manual

Somogyi Elektronic

Somogyi Elektronic DPV 25 instruction manual

Elvox Vimar K40912 user manual

Elvox

Elvox Vimar K40912 user manual

FARFISA INTERCOMS DM2444 manual

FARFISA INTERCOMS

FARFISA INTERCOMS DM2444 manual

Farfisa SE7PG quick start guide

Farfisa

Farfisa SE7PG quick start guide

urmet domus 1039/74 manual

urmet domus

urmet domus 1039/74 manual

Aiphone JK-1MD Installation and operation manual

Aiphone

Aiphone JK-1MD Installation and operation manual

Bticino 330460 quick start guide

Bticino

Bticino 330460 quick start guide

manuals.online logo
manuals.online logoBrands
  • About & Mission
  • Contact us
  • Privacy Policy
  • Terms and Conditions

Copyright 2025 Manuals.Online. All Rights Reserved.