manuals.online logo
Brands
  1. Home
  2. •
  3. Brands
  4. •
  5. LEGRAND
  6. •
  7. Measuring Instrument
  8. •
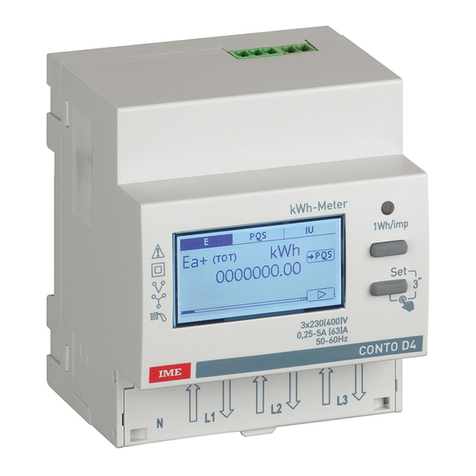
  9. LEGRAND IME NEMO D4 - EC User manual

LEGRAND IME NEMO D4 - EC User manual

LE11393AA -03/21 -02 IM
MFD4ORFCDT1 - MFD4ORFCMT
NEMO D4-EC
Multifunction Easy Connect
Manuale d'installazione • Installation manual •Manuel d'installation
• Installationsanweisungen •Manual de instalación
22
3
Manuale d'installazione • Installation manual • Manuel d'installation • Installationsanweisungen •Manual de instalación
NEMO D4-EC
Multifunction Easy Connect
Sommario
Pericoli e avvertenze 4
Operazioni preliminari 6
Presentazione 7
Installazione 8
Utilizzo 11
Programmazione 17
Funzione di prova 27
Caratteristiche tecniche 33
Elenco abbreviazioni 48
Assistenza 48
Contents
Dangers and warnings 4
Preliminary operations 6
Presentation 7
Installation 8
Use 11
Programming 17
Connection test function 27
Technical characteristics 36
Glossary of abbreviations 48
Assistance 48
Sommaire
Danger et avertissement 4
Opérations préalables 6
Présentation 7
Installation 8
Utilisation 11
Programmation 17
Function de test du raccordement 27
Charactéristiques techniques 39
Lexique des abréviations 49
Assistance 49
Summary
Gefahren und Warnungen 5
Vorarbeiten 6
Presentation 7
Installieren 8
Verwendung 11
Programmierung 17
Verbindungstestfunktion 27
Technische Daten 42
Abkürzungsliste 49
Unterstützung 49
Resumida
Advertencia 5
Operaciones previas 6
Presentación 7
Instalación 8
Utilización Programación 11
Programación 17
Función de prueba de las conexiones 27
Características técnicas 45
Lèxico de las abreviaciónes 50
Assistence 50
4
• Pericoli e avvertenze
Questi apparecchi devono essere montati esclusivamente da professionisti.
Il mancato rispetto delle indicazioni contenute nelle presenti istruzioni solleva il fabbricante da ogni responsabilità.
Rischi di folgorazione, ustioni o esplosione
• L'installazione e la manutenzione di questo apparecchio devono essere eettuate esclusivamente da personale qualicato.
• Prima di qualsiasi intervento sull’apparecchio, escludere gli ingressi di tensione.
• Utilizzare sempre un opportuno dispositivo di rilevamento di tensione per confermare l’assenza di tensione.
• Rimontare tutti i dispositivi, i portelli e i coperchi prima di mettere l’apparecchio sotto tensione.
• Per alimentare questo apparecchio, utilizzare sempre la tensione nominale indicata.
In caso di mancato rispetto di queste precauzioni, si potrebbero subire gravi ferite.
Rischi di deterioramento dell’apparecchio
Attenzione a rispettare:
• Una tensione ai morsetti degli ingressi di tensione (V1,V2,V3 e N) secondo i valori indicati nelle sezione "Caratteristiche tecniche".
• La frequenza di rete a 50 o 60 Hz.
• Dangers and warnings
This equipment must only be mounted by professionals.
The manufacturer shall not be held responsible for failure to comply with the instructions in this manual.
Risk of electrocution, burns or explosion
• The device must only be installed and serviced by qualied personnel.
• Prior to any work on or in the device, isolate the voltage inputs.
• Always use an appropriate voltage detection device to conrm the absence of voltage.
• Put all mechanisms, door and covers back in place before energising the device.
• Always supply the device with the indicated rated voltage.
Failure to take these precautions could cause serious injuries.
Risk of damaging the device
Chek the following:
• The voltage to the voltage-input terminals, (V1,V2,V3 and N) according to the values indicated in the "Technical characteristics" section.
• The frequency of the distribution system (50 or 60 Hz).
• Danger et avertissement
Le montage de ce produit ne peut être eectué que par des professionnels.
Le non respect des indications de la présente notice ne saurait engager la responsabilité du constructeur.
Risque d’électrocution, de brûlures ou d’explosion
• L’installation et l’entretien de cet appareil ne doivent être eectués que par du personnel qualié.
• Avant toute intervention sur l’appareil, coupez les entrées tensions.
• Utilisez toujours un dispositif de détection de tension approprié pour conrmer l’absence de tension.
• Replacez tous les dispositifs, les portes et les couvercles avant de mettre cet appareil sous tension.
• Utilisez toujours la tension assignée appropriée pour alimenter cet appareil.
Si ces précautions n’étaient pas respectées, cela pourrait entraîner des blessures graves.
Risque de détérioration de l’appareil
Veillez à respecter
• Une tension aux bornes des entrées tensions (V1,V2,V3 et N) selon les valeurs indiquées dans la section "Caractéristiques
techniques".
• La plage de fréquence du réseau 50 ou 60 Hz.
5
Manuale d'installazione • Installation manual • Manuel d'installation • Installationsanweisungen •Manual de instalación
NEMO D4-EC
Multifunction Easy Connect
• Gefahren und Warnungen
Diese Geräte dürfen nur von Fachleuten montiert werden.
Die Nichtbeachtung der vorliegenden Anweisungen entbindet den Hersteller von jeglicher Haftung.
Stromschlag-, Verbrennungs-und Explosionsgefahr
• Die Installation und Wartung dürfen nur von qualizierten Fachleuten vorgenommen werden.
• Vor jedem Eingri in das Gerät sind die Spannungseingänge auszuschließen.
• Verwenden Sie immer ein geeignetes Spannungsmessgerät, um die Spannungsfreiheit zu überprüfen.
• Alle Geräte, Türen und Abdeckungen wieder montieren, bevor Sie das Gerät unter Spannung setzen.
• Verwenden Sie immer die angegebene Nennspannung, um das Gerät mit Strom zu versorgen.
Die Nichtbeachtung dieser Vorsichtsmaßnahmen kann zu schweren Verletzungen führen.
Beschädigungsgefahr des Gerätes
Bitte beachten:
• Eine Spannung an den Klemmen der Spannungseingänge (V1,V2,V3 und N) entsprechend den im Kapitel "Technische Daten"
angegebenen Werten.
• Netzfrequenz 50/60 Hz
• Advertencia
El montaje de esto materiales sólo puede ser efectuado por profesionales.
No respectar las indicaciones del presente manual exime de responsabilidad al fabricante.
Riesgo de electrocución, de quemaduras o de explosión
• La instalación y mantenimiento de este aparato debe ser efectuado por personal cualicado.
• Antes de cualquier intevención en el aparato, cortar sus entradas de tensión.
• Utilizar siempe une dispositivo de detección de tensión apropiado para esegurar la ausencia de tensión.
• Volver a colocar todos los dispositivos, tapas y puertas antes de poner el aparato en tensión.
• Utilizar siempre la tensión asignada apropiada para alimentar el aparato.
No respetar estas precauciones podría entrañar un serio riesgo de producir heridas graves.
Riesgo dedeterioros de aparato
Se ha de respetar:
• Una tensión en los bornes de las entradas de tensión (V1, V2, V3 y N) según los valores indicados en la sección "Características
técnicas".
• La frecuencia de red a 50/60 Hz
6
• Operazioni preliminari
Per la sicurezza del personale e del materiale, è indispensabile leggere attentamente il contenuto del presente
libretto prima della messa in servizio.
Al momento del ricevimento della scatola contenente il dispositivo, è necessario vericare i seguenti punti:
- lo stato dell’imballo;
- l’assenza di danneggiamenti o rotture dovuti al trasporto;
- la rispondenza tra codice dell’apparecchio e codice ordinato;
- la presenza nell'imballo sia dell'articolo che del foglio istruzioni.
• Preliminary operations
For personnel and product safety read the contents of these operating instructions carefully before connecting.
Check the following points as soon as you receive the box containing the device:
- the packing is in good condition;
- the product has not been damaged or broken during transport;
- the product reference number conforms to your order;
- the package contains both the item and the operating instructions.
• Opérations préalables
Pour la sécurité du personnel et du matériel, il est impératif de bien s’imprégner du contenu de cette notice avant
la mise en service.
Au moment de la réception du colis contenant le produit, il est nécessaire de vérier les points suivants :
- l’état de l’emballage ;
- le produit n’a pas eu de dommage pendant le transport ;
- la référence de l’appareil est conforme à votre commande
- l’emballage comprend le produit ;
- une notice d’utilisation.
• Vorarbeiten
Für die Sicherheit von Personen und Material ist es unerlässlich, den Inhalt dieser Anleitung vor der Inbetriebnahme aufmerksam
zu lesen. Nach Erhalt der Schachtel mit dem Gerät sind die folgenden Punkte zu überprüfen:
- Zustand der Verpackung;
- Das Fehlen von Beschädigungen oder Bruch durch den Transport;
- die Übereinstimmung zwischen Gerätecode und bestelltem Code;
- Vorhandensein in der Verpackung sowohl des Artikels als auch der Gebrauchsanweisung.
• Operaciones previas
Para la seguridad del personal y del material, será imperativo conocer perfectamente el contenido de este manual
antes de su puesta en funcionamiento.
Al recibir el paquete que contiene el producto será necesario vericar los aspectos siguientes:
- estado del embalaje;
- que el producto no se haya dañado durante el transporte;
- que la referencia del aparato esté conforme con su pedido;
- el embalaje incluye el producto;
- el manual de utilización.
7
Manuale d'installazione • Installation manual • Manuel d'installation • Installationsanweisungen •Manual de instalación
NEMO D4-EC
Multifunction Easy Connect
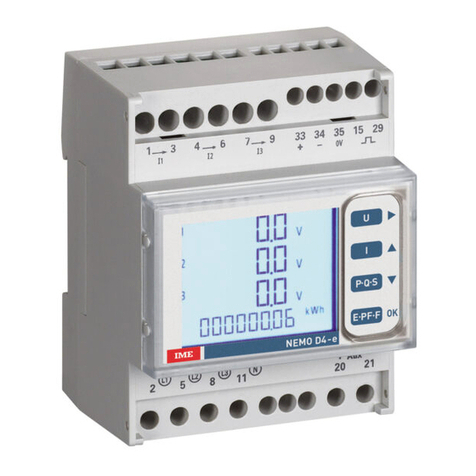
• Presentazione
1. Display LCD retroilluminato
2. Valori
3. Fase
4. Ingresso connessione rapida per sonde Rogowski
5. Morsetti di collegamento uscita impulsi o connessione
Modbus/Mbus
6. Morsetto d'ingresso per il conteggio dell'energia su
doppia taria
7. Unità di misura
8. Tastiera composta da 4 pulsanti a doppia funzionalità
(visualizzazione/congurazione)
9. Visualizzatore del contatore orario e delle energie
•Presentation
1. Backlighted LCD display
2. Values
3. Phase
4. Quick-connection input for Rogowski probes
5. Pulse output connection terminal or Modbus/Mbus
connection
6. Input terminal for energy metering on double tari
7. Measurements units
8. Keypad made up of 4 double function pushbuttons
(display/congurations)
9. Hour meter and energy display
• Présentation
1. Acheur LCD rétroéclairé
2. Values
3. Phase
4. Connexion rapide pour les sondes Rogowski
5. Bornier sortie impulsions ou branchement Modbus/Mbus
6. Bornier entrée pour le comptage de l'énergie en double
tarif
7. Unité de mesure
8. Clavier constitué de 4 boutons à deux fonctions
(visualisation/conguration)
9. Compteurs d'énergie et horaire
• Presentation
1. LCD-Display mit Hintergrudbeleuchtung
2. Werte
3. Phase
4. Schnellanschluss für Rogowski-Sonden
5. Anschlussklemmen Impulsausgang oder Ausgang Modbus/
Mbus
6. Eingangsklemme zum Zählen von Enenergie im Doppeitarif
7. Maßeinheit
8. Tastatur bestehend aus 4 Tasten mit Doppelfunktion
(Display/Konguration)
9. Anzeige des Zeitzählers und der Energien
• Presentación
1. Pantalla LCD retroilluminada
2. Valores
3. Fase
4. Conexión rápida para sondas Rogowski
5. Borne d e conexión de la salida de impulsos o Modbus/
Mbus
6. Borne de entrada para contabilizar la energía en doble
tarifa
7. Unidad de medida
8. Teclado compuesto por 4 botones con doble función
(visualización/conguración)
9. Visualisación del contador horario y de las energias
7
8
9
1
2
6
5
4
NEMO D4 EC
V1 V 2 V 3 N
+
Aux
2 5 8 11 20 21
1 C
+SG
3
8
•Prescrizioni
• Evitare la vicinanza con sistemi generatori di
perturbazioni elettromagnetiche.
•Recommendations
• Avoid proximity to systems which generate
electromagnetic interference.
•Recommandations
• Éviter la proximité avec des systèmes générateurs
de perturbations électromagnétiques
• Rezepte
•Nähe zu Generatorsystemen vermeiden
elektromagnetische Störungen.
•Prescripciones
• Evitar la proximidad con sistemas que generan
interferencias electromagnéticas.
•Collegamento
Per la coppia di serraggio massima dei morsetti vedere
la tabella
•Connection
For the maximum terminal torque see the table
•Raccordement
Pour le couple de serrage maximal des bornes voir le
tableau
•Anschluss
Das maximale Anzugsmoment der Klemmen nden
Sie in der Tabell
•Conexión
Para el par de apriete máximo de los bornes, consultar
la tabla
(-20°C) - (60°C)
ROG630M2: Ø50 mm
ROG1600M2: Ø 100 mm
ROG3200M2: Ø 150 mm
ROG6300M2: Ø 240 mm
CAT III
cl
.
U
Wh(Ea):1
varh(Erv):2
I
ROG630M2:I
min
= 12,5A
I
ref
= 250A I
max
=750A
ROG1600M2:I
min
= 32,5A
I
ref
= 650A I
max
= 1950A
ROG3200M2:I
min
=65A
I
ref
= 1300A I
max
= 3900A
ROG6300M2:I
min
= 125A I
ref
= 2500A I
max
= 7500A
Only MBus
MAX
1 x 2,5 mm2
6,5 / 7 mm
Rigid
1 x 2,5 mm2
Flexible
1 x 1,5 mm2
1 x 4 mm2
2,5mm PH0
Recommended
torque 0,5Nm
max. 0,6Nm
3x230/3x400Vac ±15%
(IEC/EN 62053-21)
(IEC/EN 62053-23
• Installazione • Installation • Installation • Installieren • Instalación
ROGEXTM1
= 1 m
x 3 max.
ROGEXTM3
= 3 m
x 1 max.
ROGEXTM1/M3
ROG630M2
ROG1600M2
ROG3200M2
ROG6300M2
9
Manuale d'installazione • Installation manual • Manuel d'installation • Installationsanweisungen •Manual de instalación
NEMO D4-EC
Multifunction Easy Connect
Aux.: 230 V~ 50/60 Hz;
V1 V 2 V 3 N
+
Aux
2 5 8 11 20 21
3N3E
LOAD
L1
L2
L3
N
F:0,5A gG
CURRENT INPUT
3-3E
ROGOWSKI
COIL
1 C
+SG
I1
I2
I3
• Installazione • Installation • Installation • Installieren • Instalación
• Schema di collegamento •Wiring diagram •Schéma de câblage • Anschlussbilder
• Esquema de conexión
•Nei cablaggi rispettare scrupolosamente lo schema di inserzione; una inesattezza nei collegamenti può pregiudicare
il corretto funzionamento o causare danni allo strumento.
•During wiring carefully comply with the connection diagram; a connection error may aect proper operation, or cause
damage to the device.
•Veuillez respecter scrupuleusement le schéma de connexion; une erreur de connexion peut nuire au bon fonctionne-
ment, ou causer des dommages à l'appareil.
•Beachten Sie bei der Verdrahtung unbedingt das Anschlussschema; Ungenauigkeiten in den Anschlüssen können zu
Fehlbedienungen oder Schäden am Gerät führen.
•En los cableados, se ha de respetar rigurosamente el esquema de inserción; si las conexiones no son precisas, se
puede perjudicar el funcionamiento correcto o causar daños al instrumento.
1 C
E
1
V: 24V d.c.
+
BA
Modbus RS485 MBUS
+SG
Tariff
1 C
1
10
• Installazione • Installation • Installation • Installieren • Instalación
• Schema di collegamento RS485 •RS485 wiring diagram •Schéma de branchement RS485
• Anschlussbilder RS485 • Esquema de conexión RS485
SXIIP
MFD4ORFCDT1
+ –
SG
+ –
SG
+ –
SG
+ –
SG N°1 N°2 N°n
ETHERNET
RJ45
RS-485
(3)
(4)
2
(4) (4) (4)
MFD4ORFCDT1 MFD4ORFCDT1
SXWS10/SXWS32
+ –
SG
+ –
SG
+ –
SG
+ –
SG N°1 N°2 N°n
RS-485
3
(4)
(4) (4) (4)
MFD4ORFCDT1 MFD4ORFCDT1 MFD4ORFCDT1
• Schema di collegamento RS485 Modbus con Mini Web Server
•RS485 Modbus wiring diagram with Mini web Server
•Schéma de branchement RS485 Modbus avec Mini Web Server
• Anschlussbilder RS485 Modbus Mini Web Server
• Esquema de conexión RS485 Modbus con Mini Web Server
(1) BELDEN 9842, BELDEN 3106A (or/equivalent) max. 1000 m, Cat. 6 (FTP/UTP) max. 50 m
(2)• Resistenza di terminazione da120Ω interna allo strumento (impostabile dal menù di SETUP)
• 120Ω terminating resistor inside the instrument (it can be set in the SETUP menu)
• Résistance de terminaison de 120 Ω intégrée à l’instrument (réglable dans le menu de RÉGLAGE)
• 120Ω Abschlusswiderstand intern im Gerät (einstellbar über das SETUP-Menü)
• Resistencia de terminación de120Ω interna en el instrumento (ajustable en el menú SETUP)
(3) Ethernet: Cat. 6 (FTP/UTP)
(4)• Il morsetto "SG" non va assolutamente collegato a terra
• The terminal "SG" must never be earthed
• La borne "SG" ne doit jamais être reliée à la terre
• Die Klemme "SG" darf niemals geerdet werden
• El terminal "SG" nunca debe estar conectado a tierra
A BA
BA
B
MBUS
MASTER
MBUS
MBUS MBUS
(4) Collegamenti non polarizzati. Un cavo telefonico standard a due li(JYStY N*2*0.8 mm)
Non-polarized connections. A two-wire standard telephone cable (JYStY N*2*0.8 mm)
Connexions non polarisées. Un câble téléphonique standard à deux ls(JYStY N*2*0.8 mm)
Nicht polarisierte Verbindungen. Ein zweiadriges Standardtelefonkabel(JYStY N*2*0.8 mm)
Conexiones no polarizadas. Un cable telefónico estándar de dos hilos(JYStY N*2*0.8 mm)
(4)
• Schema di collegamento Mbus
•Mbus Modbus wiring diagram
•Schéma de branchement Mbus
• Anschlussbilder Mbus
• Esquema de conexión Mbus
11
Manuale d'installazione • Installation manual • Manuel d'installation • Installationsanweisungen •Manual de instalación
NEMO D4-EC
Multifunction Easy Connect
• Utilizzo • Use • Utilisation • Verwendung • Utilización
•Navigazione pagine di visualizzazione
Il dispositivo è dotato di una tastiera frontale a 4 tasti a doppia funzionalità (visualizzazione/congurazione) e di un
display LCD retroilluminato, su cui è riportata la funzione eseguita dal tasto corrispondente.
•Navigation display pages
The device is equipped of the keypad with 4 double-function keys (display/congurations) and a backlighted LCD display,
that showing the function performed by the corresponding key .
•Pages d'achage de navigation
L’appareil est équipé du clavier frontal à 4 touches à deux fonctions (visualisation/conguration) et d’un acheur LCD
rétroéclairé indiquant la fonction remplie par la touche correspondante.
•Durchsuchen von Anzeigeseiten
Das Gerät ist mit eine 4-Tasten-Tastatur mit Doppelfunktion (Display/Konguration) und ein hintergrundbeleuchtetes
LCD Display ausgestattet. Hier wird die von der entsprechenden Taste ausgeführte Funktion angezeigt.
•Navegando por páginas de visualización
El dispositivo está equipado un teclado frontal de 4 teclas con doble función (visualización/conguración) y una
pantalla LCD retroiluminada, que muestra la función realizada por la tecla correspondiente.
NEMO D4 EC
Sposta il cursore
Moves the cursor
Déplace le curseur
Cursor verschieben
Mueve el cursor
Funzione Tasti in stato di Modica
Keys function in Edit status
Les Touches fonctionnent en mode d'édition
Die Tasten funktionieren im Bearbeitungsstatus
Función de Teclas en estado de Edición Aumenta il valore
Increases the value
Augmente la valeur
Erhöhen Sie den wert
Aumentar el valor
Diminuisce il valore
Decrease the value
Abaisse la valeur
Verringern Sie den wert
Disminuye el valor
Conferma
Conrm
Conrmation
Bestätigungs
Conrmar
x1
3 sec.
• Azzeramento
• Reset
• Remise à zéro
• Rücksetzen
• Volver a cero
· Azzeramento
· Reset
·
Remise à zéro
·
Rücksetzen
·
Volver a cero
OK
U
I
E PF F
P Q S
12
• Utilizzo • Use • Utilisation • Verwendung • Utilización
x 1
x 2
x 3
x 4
x 5
THD di Tensione
Voltage THD
THD de Tension
THD de Tensión
THD Tensão
Tension - valeur maximale
Voltage - maximum value
Tensione - valore massimo
Tensión - valor máximo
Tension - valeur minimale
Voltage - minimum value
Tensione - valore minimo
Spannung - Mindestwert
Tensión - valor mínimo
Tension composée – Energie active
Linked voltage - Active energy
Tensione concatenata - Energia attiva
Verkettete Spannung - Wirkenergie
Tensión concatenada - Energía activa
Tension simple – Energie active
Phase voltage - Active energy
Tensione di fase - Energia attiva
Phasenspannung - Wirkenergie
Tensión de fase - Energíaactiva
x 1
3sec
x 1
3sec
Remise à zéro
Reset to zero
Reset
Rücksetzen
Volver a cero
Remise à zéro
Reset to zero
Reset
Rücksetzen
Volver a cero
OK
U
I
E PF F
P Q S
U
OK
U
I
E PF F
P Q S
OK
U
I
E PF F
E PF F
E PF F
P Q S
OK
U
I
E PF F
P Q S
OK
U
I
E PF F
P Q S
OK
OK
Spannung - Maximalwert
13
Manuale d'installazione • Installation manual • Manuel d'installation • Installationsanweisungen •Manual de instalación
NEMO D4-EC
Multifunction Easy Connect
• Utilizzo • Use • Utilisation • Verwendung • Utilización
Courant de phase – Energie active
Phase current - Active energy
Corrente di fase - Energia attiva
Phasenstrom - Wirkenergie
Corriente de fase - Energía activa
x 1
x 2
Courant moyen de phase – Energie réactive
Average phase current - Reactive energy
Corrente media di fase - Energia reattiva
Phasenmittelstrom - Blindenergie
Corriente media de fase - Energía reactiva
x 3
Val. Maxi. courant moyen de phase - Energie active
Max. average phase current - Active energy
Picco corrente media di fase - Energia attiva
Mittlere Phasenstromspitze - Reaktive Energie
Corriente máxima media de fase - Energía activa
x 4
Courant du neutre - Moyenne des 3 courants - Energie réactive
Neutral current - Average of the 3 currents - Reactive energy
Correte di neutro - Media delle 3 correnti - Energia reattiva
Neutralstrom - Durchschnitt der 3 Ströme - Blindarbeit
x 5
THD des courants de phase
Phase currents THD
THD-Phasenstrom
THD de las corrientes de fase
OK
U
I
E PF F
P Q S
I
OK
U
I
E PF F
P Q S
OK
U
I
E PF F
P Q S
OK
U
I
E PF F
P Q S
OK
U
I
E PF F
P Q S
E PF F
OK
x 1
3sec
Remise à zéro
Reset to zero
Reset
Rücksetzen
Volver a cero
Corriente de neutro - Promedio de las 3 corrientes - Energía reactiva
THD corrente di fase
14
• Utilizzo • Use • Utilisation • Verwendung • Utilización
x 1
Puissance triphasée active, réactive, apparente et déformante
Active, reactive, apparent and deforming three-phase power
Potenza trifase attiva, reattiva, apparente e distorcente
Aktive, reaktive, scheinbare und verzerrende dreiphasige Leistung
Potencia trifásica activa, reactiva, aparente y deformante
x 2
Puissance active de phase – Energie réactive
Phase active power - Reactive energy
Potenza attiva di fase - Energia reattiva
Potencia activa de fase - Energía reactiva
Wirkphasenleistung - Blindarbeit
x 3
Puissance réactive de phase - Energie active
Phase reactive power - Active energy
Potenza reattiva di fase - Energia attiva
Potencia reactiva de fase- Energía activa
x 4
Puissance apparente de phase – Energie réactive
Phase apparent power - Reactive energy
Potenza apparente di fase - Energia reattiva
Scheinphasenleistung - Blindenergie
x 5
Puissance moyenne active, réactive et apparente - Energie active
Active, reactive and apparent average power - Active energy
Potenza media attiva, reattiva e apparente - Energia attiva
Mittlere Wirk-, Blind- und Scheinleistung - Wirkarbeit
Potencia media activa, reactivay aparente- Energía activa
OK
U
I
E PF F
P Q S
P Q S
OK
U
I
E PF F
P Q S
OK
U
I
E PF F
P Q S
OK
U
I
E PF F
P Q S
OK
U
I
E PF F
P Q S
E PF F
OK
x 1
3sec
Remise à zéro
Reset to zero
Reset
Rücksetzen
Volver a cero
Phasenblindleistung - Wirkenergie
Potencia aparente de fase - Energía reactiva
x 6
Picco di potenza media T1
Power Max. demand T1
Pointe de puissance moyenne T1
Mittlere Leistungsspitze T1
Pico de potencia promedio T1
OK
U
I
E PF F
P Q S
x 7
Picco di potenza media T2
Power Max. demand T2
Pointe de puissance moyenne T2
Mittlere Leistungsspitze T2
Pico de potencia promedio T2
OK
U
I
E PF F
P Q S
E PF F
OK
x 1
3sec
Remise à zéro
Reset to zero
Reset
Rücksetzen
Volver a cero
15
Manuale d'installazione • Installation manual • Manuel d'installation • Installationsanweisungen •Manual de instalación
NEMO D4-EC
Multifunction Easy Connect
• Utilizzo • Use • Utilisation • Verwendung • Utilización
x 4
Energie réactive totale positive - Nombre de remises à zero du compteur
Total positive reactive energy - Number of counter resets
Energia reattiva totale positiva - Numero azzeramenti contatore
Energía reactiva total positiva - Número de restablecimientos del contado
x 3
Energie active totale positive - Nombre de remises à zero du compteur
Total positive active energy - Number of counter resets
Energia attiva totale positiva - Numero azzeramenti contatore
Positive Gesamtwirkleistung - Anzahl der Nullen
x 2
Facteur de puissance de phase - Energie active
Phase power factor - Reactive energy
Fattore di potenza di fase - Energia reattiva
Phasenleistungsfaktor - Blindenergie
Factor de potencia de fase Energía reactiva
x 1
Facteur de puissance triphasée - Fréquence - Compteur horaire
Three-phase power factor - Frequency - Hour counter
Fattore di potenza trifase - Frequenza - Contaore
Dreiphasen-Leistungsfaktor - Frequenz - Betriebsstundenzähler
Factor de potencia trifásico - Frecuencia - Contador horario
x 1
3sec
E PF F
OK
OK
U
I
E PF F
P Q S
OK
U
I
E PF F
P Q S
OK
U
I
E PF F
P Q S
OK
U
I
E PF F
P Q S
E PF F
OK
Remise à zéro
Reset to zero
Reset
Rücksetzen
Volver a cero
Energía activa total positiva -
Número de restablecimientos del contador
Positive Gesamtblindenergie - Anzahl der Nullen
16
• Utilizzo • Use • Utilisation • Verwendung • Utilización
x 5
Energie active totale negative - Nombre de remises à zero du compteur
Total negaive active energy - Number of counter resets
Energia attiva totale negativa - Numero azzeramenti contatore
Negative Gesamtenergie - Anzahl der Nullen des Zählers
Negative Gesamtblindenergie - Anzahl der Nullen
Energía activa total negativa- Número derestablecimientos del contador
x 6
Energie réactive totale negative - Nombre de remises à zero du compteur
Total negaive reactive energy - Number of counter resets
Energia reattiva totale negativa - Numero azzeramenti contatore
Energía reactiva total negativa - Número de restablecimientosdel contador
E PF F
OK
OK
U
I
E PF F
P Q S
OK
U
I
E PF F
P Q S
x 7
Energia attiva positiva T1
Positive active energy T1
Energie active positive T1
Positive Wirkleistung T1
Energía activa positiva T1
Energia attiva positiva T2
Positive active energy T2
Energie active positive T2
Positive Wirkleistung T2
Energía activa positiva T2
x 8
x 9
OK
U
I
E PF F
P Q S
OK
U
I
E PF F
P Q S
Pagina personalizzata
Custom page
Page personnalisée
Eigene Seite
Página personalizada
OK
U
I
E PF F
P Q S
MFD4ORFDT1 MFD4ORFMT1
Comunicazione / Communication / Communication / Kommunikation / Comunicación
Connessione / Connection / Connexion / Anschluss / Conexión
Versione / Version / Version / Version / Versión
17
Manuale d'installazione • Installation manual • Manuel d'installation • Installationsanweisungen •Manual de instalación
NEMO D4-EC
Multifunction Easy Connect
•Programmazione• Programming• Programmation •Programmierung
• Programación
· Premendo contemporaneamente i tasti x 3 sec, si entra in modalità di visualizzazione dei Parametri di Programmazione già impostati
· Pressing the keys simultaneously x 3 sec, you enter the display mode of the programming parameters already set
· En appuyant simultanément sur les touches x 3 sec, vous entrez dans le mode d'achage des paramètres de programmation déjà dénis
· Durch Drücken der Tasten gleichzeitig x 3 sec, Sie gelangen in den Anzeigemodus der bereits eingestellten Programmierparameter
· Presionando las teclas simultáneamente x 3 sec, ingresa al modo de visualización de los parámetros de programación ya congurados
IP Q S
IP Q S
IP Q S
IP Q S
IP Q S
OK
U
I
E PF F
P Q S
+
x 3 sec
•
Nota:
- Vous ne devriez pas être dans le « Logo »
•
Note:
-
You don't have to be on the "Logo" page
-
Sie müssen nicht auf der Seite "Logo" sein
•
Note:
-
Non si deve essere nelle pagina di “Logo”
•
Note:
•
Nota:
- No tiene que estar en la página "Logo tipo"
• Modalità visualizzazione dei Parametri Programmabili già impostati
•Display mode of the Programmable Parameters already Set
•Mode d'achage des Paramètres Programmables dèjà dénis
•Anzeigemodus der bereits eingestellten Programmierbare Parameter
•Modo de visualización de los Parámetros Programables ya congurados
• I Parametri Programmabili sono •The Programmable Parameters are •Les Paramètres Programmables sont
•Die Programmierbare Parameter sind •Los Parámetros Programables son
Modbus/Mbus
Pagina visualizzazione personale / Rete / Tempo d'integrazione delle Correnti e Potenze / Contatore orario / Portata di corrente
Customized display page / Network / Integration time of Currents and Power / Hour run meter / Current rating
Page d'achage personnalisée / Réseau / Temps d'intégration des Courants et Puissances / Compteur horaire /
Capacité de courant
Kundenspezische anzeigeseite / Netzwerk / Integrationzeit für Strommittelwert und Leistungsmittelwert /Stundenzähler / Stromuss
Página de visualización personalizada / Red / Tiempo de integración de la Corriente electrica y Potencias / Contador Horario /
Flujo de corriente
Modbus
Indirizzo di comunicazione / Velocità di comunicazione / Bit di Parità / Resistenza di terminazione
Communication address / Communication speed / Parity Bit / Termination resistance
Adresse de communication / Vitesse de communication / Bit de parité / Résistance de terminaison
Kommunikation adresse / Übertragungschwindigkeit / Paritätsbit / Abschlusswiderstand
Dirección de comunicación / Velocidad de comunicación / Bit de paridad / Resistencia de terminación
Mbus
Indirizzo Primario / Velocità di comunicazione / Indirizzo Secondario
Primary address / Communication speed / Secondary address
Adresse Principale / Vitesse de communication / Adresse Secondaire
Primäre Adresse / Übertragungschwindigkeit / Sekundäre Adresse
Domicilio primario / Velocidad de comunicación / Domicilio secundario
18
•Programmazione• Programming• Programmation •Programmierung
• Programación
• Modica dati di SETUP
•Changing SETUP data
•Modication des données SETUP
•Ändern der Setup-Daten
• Modicación de los datos de conguración
...
· La cifra modicabile lampeggia
· The editable digit ashes
· Le chire éditable clignote
· Die bearbeitbare Zier blinkt
· El dígito editable parpadea
· In SETUP la PASSWORD è richiesta una sola volta
· In SETUP the PASSWORD is required only once
· Dans SETUP, le MOT DE PASSE n’est requis qu’une fois
· Im SETUP wird das PASSWORT nur einmal benötigt
· En la CONFIGURACIÓN la CONTRASEÑA se requiere solo una vez
· I parametri modicabili sono: 1) Scelta obbligata, 2) Inserzione valore numerico
· The modiable parameters are: 1) Obliged Choice, 2) Numeric value entry
· Les paramètres modiables sont: 1) Obligé Choix, 2) Entrée de valeur numérique
· Die veränderbaren Parameter sind: 1) Verpichtet Auswahl, 2) Numerische Werteingabe
· Los parámetros que se pueden modicar son: 1) Opción obligatoria, 2) Entrada de valor numérico
x 1
•
• To access to programming mode - Password 1: PASS = 1000
•
•
Para acceder al modo programación - Contraseña 1: PASS = 1000
•
Pour accéder à la programmation - Mot de passe 1: PASS = 1000
Per accedere alla programmazione - Codice d’accesso 1: PASS = 1000
PASS = 1000
x 1
conferma/
conrm
OK
U
I
E PF F
P Q S
· Aumenta il valore
· Increases the value
· Augmente la valeur
· Erhöhen Sie den Wert
· Aumentar el valor
OK
U
I
E PF F
P Q S
· Premendo contemporaneamente i tasti x 3 sec, si accede alla PASSWORD
· Pressing the keys simultaneously x 3 sec, the PASSWORD is accessed
· En appuyant simultanément sur les touches x 3 sec, vous accédez au MOT DE PASSE
· Durch Drücken der Tasten gleichzeitig x 3 sec, wird auf das PASSWORT zugegrien
· Presionando las teclas simultáneamente x 3 sec, se accede a la CONTRASEÑA.
IP Q S
IP Q S
IP Q S
IP Q S
IP Q S
x 3 sec
OK
U
I
E PF F
P Q S
+
· La PASSWORD è richiesta solo al primo accesso di SETUP
· PASSWORD is required only at the rst SETUP access
· MOT DE PASSE n'est requis qu'au premier accès SETUP
· PASSWORT wird nur beim ersten SETUP-Zugri benötigt
· La CONTRASEÑA se requiere solo en el primer acceso de CONFIGURACIÓN
19
Manuale d'installazione • Installation manual • Manuel d'installation • Installationsanweisungen •Manual de instalación
NEMO D4-EC
Multifunction Easy Connect
· Il valore modicabile lampeggia
· The editable digit ashes
· La valeur modiable clignote
· Der bearbeitbare Wert blinkt
· El valor editable parpadea
· La cifra modicabile lampeggia
· The editable digit ashes
· Le chire éditable clignote
· Die bearbeitbare Zier blinkt
· El dígito editable parpadea
· Cambia la scelta
· Change the choice
· Changer le choix
· Ändern Sie die Auswahl
· Cambiar la elección
· Salva la modica e sposta al setup successivo
· Save the change and move to the next setup
· Enregistrez la modication et passez à la conguration suivante
·Speichern Sie die Änderung und fahren Sie mit dem nächsten Setup fort
· Guarde el cambio y pase a la siguiente conguración
...
· Sposta alla cifra modicata successiva
· Move to the next digit modied
· Déplacer vers le chire suivant modié
·Bewegen Sie zur nächsten Stelle geändert
· Mover a la siguiente gura modicada
· Salvare
· Save
· Sauver
·Speichern
· Salvar
· Aumenta il valore
· Increases the value
· Augmente la valeur
· Erhöhen Sie den Wert
· Aumentar el valor
· Scelta obbligata
· Obliged Choice
· Obligé Choix
· Verpichtet Auswahl
· Opción obligatoria
· Inserzione valore numerico
· Numeric value entry
· Entrée de valeur numérique
· Numerische Werteingabe
·Entrada de valor numérico
1
2
x 1
x 1
OK
U
I
E PF F
P Q S
x 1
conferma
conrm
x 1
OK
U
I
E PF F
P Q S
OK
U
I
E PF F
P Q S
x 1
conferma
conrm
• Come congurare i Parametri Modicabili
•How to congure the Editable Parameters
•Comment congurer les paramètres modiables
•So kongurieren Sie Parameter Editierbare
• Cómo congurar los parámetros editables
•Programmazione• Programming• Programmation •Programmierung
• Programación
• Nota importante:
Ad ogni parametro che si vuole modicare, bisogna sempre premere contemporaneamente i tasti x 3 sec.
• Important note:
To each parameter you want to modifye, always press the x 3 sec keys simultaneously.
• Note importante:
Pour chaque paramètre que vous souhaitez modier, appuyez toujours simultanément sur les touches x 3 sec.
• Wichtiger Note:
Zu jedem Parameter, den Sie ändern möchten, drücken Sie immer gleichzeitig die Tasten x 3 Sekunden.
• Nota importante:
Para cada parámetro que desea modicar, presione siempre las teclas x 3 segundos simultáneamente.
IP Q S
IP Q S
IP Q S
IP Q S
IP Q S
OK
U
I
E PF F
P Q S
+
x 3 sec
20
•Programmazione• Programming• Programmation •Programmierung
• Programación
x 1 (V31)
x 2 (A3)
x 3 (∑W)
x 4 (∑VAr)
x 5 (∑VA)
x 6 (W3)
x 7 (VAr3)
x 8 (VA3)
x 9 (W1)
x 10 (A1)
x 1 (V23)
x 2 (A2)
x 3 (∑W)
x 4 (∑VAr)
x 5 (∑VA)
x 6 (W2)
x 7 (VAr2)
x 8 (VA2)
x 9 (Hz)
x 10 (A1)
•
Page d personnalisée
•C
Kundenspezische anzeigeseite
ustomized display page
•
Pagina visualizzazione personalizzata
•
Página de visualización personalizada
•
•Nota:
- La page personnalisée, deviendr rd à l’allumage du dispositif
• Note:
- The custom page, will become the standard display when the instrument is turned on
•Note:
-La pagina personalizzata, diventerà la visualizzazione standard all’accensione dello strumento
• Note:
- Die vom Anwender kongurierte Seite, zeigt sie als Standardanzeigeseite nach dem Einschalten des Geräts an
• Nota:
•
Ligne 1 - Exemple: Lin1 = V12
• Line 1 - Example: Lin1 = V12
•
Linea 1- Esempio: Lin1 = V12
•
Línea 1 - Ejemplo
: Lin1 = V12
•
Zeile 1 - Beispiel
: Lin1 =
V12
•
•
•
•
•
•
•
•
•
•
x 1 (V12)
x 2 (A1)
x 3 (∑A)
x 4 (∑W)
x 5 (∑VAr)
x 6 (∑VA)
x 7 (W1)
x 8 (VAr1)
x 9 (VA1)
x 10 (∑PF)
OK
U
I
E PF F
P Q S
OK
U
I
E PF F
P Q S
OK
U
I
E PF F
P Q S
OK
U
I
E PF F
P Q S
OK
U
I
E PF F
P Q S
OK
U
I
E PF F
P Q S
Ligne 2 - Exemple: Lin2 = V23
Line 2 - Example: Lin2 = V23
Linea 2- Esempio: Lin2 = V23
Línea 2 - Ejemplo
: Lin2 = V23
Zeile 2 - Beispiel
: Lin2 = V23
Ligne 3 - Exemple: Lin3 = V31
Line 3 - Example: Lin3 = V31
Linea 3- Esempio: Lin3 = V31
Línea 3 - Ejemplo
: Lin3 = V31
Zeile 3 - Beispiel
: Lin3 = V31
- La página personalizada se convertirá en la vista por defecto cuando el instrumento está encendido
x 1
conferma/
conrm
x 1
conferma/
conrm
x 1
conferma/
conrm

Other manuals for IME NEMO D4 - EC

1

This manual suits for next models

2

Other LEGRAND Measuring Instrument manuals

LEGRAND IME Conto D4-Pt User manual

LEGRAND

LEGRAND IME Conto D4-Pt User manual

LEGRAND IME NEMO 96 EC User manual

LEGRAND

LEGRAND IME NEMO 96 EC User manual

LEGRAND RS485 User manual

LEGRAND

LEGRAND RS485 User manual

LEGRAND LEXIC 046 63 User manual

LEGRAND

LEGRAND LEXIC 046 63 User manual

LEGRAND 412015 User manual

LEGRAND

LEGRAND 412015 User manual

LEGRAND Mosaic 0 785 11 User manual

LEGRAND

LEGRAND Mosaic 0 785 11 User manual

LEGRAND MF961ORFCDT User manual

LEGRAND

LEGRAND MF961ORFCDT User manual

LEGRAND LE-412933 User manual

LEGRAND

LEGRAND LE-412933 User manual

LEGRAND LEXIC 046 72 User manual

LEGRAND

LEGRAND LEXIC 046 72 User manual

LEGRAND IME CONTO D2-Pd User manual

LEGRAND

LEGRAND IME CONTO D2-Pd User manual

LEGRAND 430 557 User manual

LEGRAND

LEGRAND 430 557 User manual

LEGRAND IME NEMO 96 EC User manual

LEGRAND

LEGRAND IME NEMO 96 EC User manual

LEGRAND 4 120 15 User manual

LEGRAND

LEGRAND 4 120 15 User manual

LEGRAND IME CONTO D2-Pd User manual

LEGRAND

LEGRAND IME CONTO D2-Pd User manual

LEGRAND IME NEMO 96 EC User manual

LEGRAND

LEGRAND IME NEMO 96 EC User manual

LEGRAND EMDX3 User manual

LEGRAND

LEGRAND EMDX3 User manual

LEGRAND 3522N User manual

LEGRAND

LEGRAND 3522N User manual

LEGRAND 90171180 User manual

LEGRAND

LEGRAND 90171180 User manual

LEGRAND IME NEMO D4-e User manual

LEGRAND

LEGRAND IME NEMO D4-e User manual

LEGRAND Lexic User manual

LEGRAND

LEGRAND Lexic User manual

LEGRAND Raritan PM Series User manual

LEGRAND

LEGRAND Raritan PM Series User manual

LEGRAND EMDX3 User manual

LEGRAND

LEGRAND EMDX3 User manual

LEGRAND 0 435 01 User manual

LEGRAND

LEGRAND 0 435 01 User manual

LEGRAND LG-41492 User manual

LEGRAND

LEGRAND LG-41492 User manual

Popular Measuring Instrument manuals by other brands

Launch X-431 GDS manual

Launch

Launch X-431 GDS manual

BTI Profiline BTI-KLL 20 operating instructions

BTI

BTI Profiline BTI-KLL 20 operating instructions

PSI HX-400 operating instructions

PSI

PSI HX-400 operating instructions

Magnescale DF800S Series instruction manual

Magnescale

Magnescale DF800S Series instruction manual

Vernier Go Direct GDX-SPEC-FUV manual

Vernier

Vernier Go Direct GDX-SPEC-FUV manual

SCS CTC337 Installation, operation and maintenance

SCS

SCS CTC337 Installation, operation and maintenance

PCE Instruments PCE-423 manual

PCE Instruments

PCE Instruments PCE-423 manual

Simmons Venture Series owner's guide

Simmons

Simmons Venture Series owner's guide

BNC 7550 user guide

BNC

BNC 7550 user guide

QEO FET 200 user manual

QEO

QEO FET 200 user manual

Bosch GTL 3 Professional Original instructions

Bosch

Bosch GTL 3 Professional Original instructions

PCB Piezotronics Y393B31 Installation and operating manual

PCB Piezotronics

PCB Piezotronics Y393B31 Installation and operating manual

Seben CO2 Monitor 1200P W instruction manual

Seben

Seben CO2 Monitor 1200P W instruction manual

ReliOn INSIGHT Series installation guide

ReliOn

ReliOn INSIGHT Series installation guide

Circutor CVM-B100 instruction manual

Circutor

Circutor CVM-B100 instruction manual

TSI Instruments IAQ50 owner's manual

TSI Instruments

TSI Instruments IAQ50 owner's manual

KMB SMY-CA operating manual

KMB

KMB SMY-CA operating manual

VCA sound SMART RLT Sport user manual

VCA

VCA sound SMART RLT Sport user manual

manuals.online logo
manuals.online logoBrands
  • About & Mission
  • Contact us
  • Privacy Policy
  • Terms and Conditions

Copyright 2025 Manuals.Online. All Rights Reserved.