manuals.online logo
Brands
  1. Home
  2. •
  3. Brands
  4. •
  5. LEGRAND
  6. •
  7. Switch
  8. •
  9. LEGRAND Celiane CB9050 User manual

LEGRAND Celiane CB9050 User manual

LE14227AB
CB9050 - 0 488 96A - 0 784 58A - 0 791 58LA - 0 792 47A - 5 740 09A/59A - 6 000 64A - 6 001 64A - 6 002 64A - 6 651 22A
6 652 22A - 6 657 22A - 6 658 22A - 7 412 60A - 7 413 60A - 7 414 60A - 7 415 62A - 7 416 62A - 7 417 62A
Dooxie
6 000 64A - 6 001 64A
6 002 64A
Niloé
6 651 22A - 6 652 22A
6 657 22A - 6 658 22A
Valéna Next
7 412 60A - 7 413 60A - 7 414 60A
7 415 62A - 7 416 62A - 7 417 62A
Céliane
CB9050 - 0 488 96A
Mosaic
0 784 58A - 0 791 58LA
0 792 47A
Artéor
5 740 09A/59A
+5°C
+35°C
1 x 2,5 mm²
LED
LED
240 V~
Max. 150 W 100 VA 100 VA 150 VA 150 VA 150 VA
Min. 2 W 2 VA 2 VA 2 VA 2 VA 2 VA
110 V~
Max. 75 W 50 VA 50 VA 75 VA 75 VA 75 VA
Min. 2 W 2 VA 2 VA 2 VA 2 VA 2 VA
2 W 6 W 10 W
• En cas de mauvais fonctionnement de la charge, il est impératif d’utiliser le compensateur 040149 (*).
• Indien de belasting storing vertoont, dan is het noodzakelijk de compensator 040149 (*) te gebruiken.
• In case of load malfunction, use the compensator Cat. No. 040149 (*).
• Sollten Fehlfunktionen auftreten, verwenden Sie den Kompensator Best.Nr. 040149 (*).
• En caso de mal funcionamiento de la carga, es imprescindible utilizar el compensador 040149 (*).
• Em caso de mau funcionamento da carga, utilize o condensador ref. 040149 (*).
• Σε περίπτωση κακής λειτουργίας του συνδεδεμένου φορτίου, χρησιμοποιήστε τον αντισταθμιστή αρ.καταλ. 040149 (*).
• W przypadku nieprawidłowości, zastosuj kompensator 040149 (*).
• V případě že zátěž nepracuje správně použijte kompenzátor obj. č. 040149 (*).
• A terhelés rendellenes működése esetén használjon kompenzátort (kat.szám: 040149).
• Yük arızası durumunda 040149 (*) referanslı kompansatör kullanın.
• Interrupteur automatique sans neutre • Bewegingsdetector zonder neuter • Automatic switch without neutral
• Bewegungsmelder ohne Neutralleiter • Interruptor automático sin neutro • Detetor automático sem neutro
•Ανιχνευτής κίνησης χωρίς ουδέτερο •Łącznik automatyczny bez N •Pohybový senzor bez "N" vodiče
•PIR mozgásérzékelős kapcsoló (2 vezetékes), manuális vezérelhetőséggel •Hareket Sensörü (Nötrsüz)
• Charge mini •Minimale belasting •Minimum load •Minimallast •Carga mínima •Carga minima •Ελάχιστο φορτίο
•Minimalne obciążenie •Minimální zátěž •Minimális terhelés •Minimum yük
FR
DE
GR PL CZ
TR
ES PT
HU
BE GB
•Réglages par défaut •Standaardinstellingen •Default settings •Werkseinstellungen •Conguración por defecto •Congurações
padrão •Εργοστασιακές ρυθμίσεις •Ustawienia fabryczne •Tovární nastavení •Gyári beállítások •Fabrika ayarları
•Champ de détection maximum •Maximaal detectieveld •Maximum detection eld •Detektionsbereich •Campo de detección
máximo •Campo de detecção máximo •Μέγιστο πεδίο ανίχνευσης •Maksymalny obszar detekcji •Maximální oblast detekce
•Érzékelési terület (maximum) •Maksimum algılama alanı
•Précautions d’installation •Voorzorgsmaatregelen bij installatie •Installation precautions •Installationsvorkehrungen
•Precauciones de instalación •Precauções de instalação •Προφυλάξεις κατά την εγκατάσταση •Zalecenia dotycące instalacji
•Doporučení pro instalaci •Telepítési óvintézkedések •Montaj önlemleri
•Boutons de réglages •Instelknoppen •Settings •Einstellungen •Parámetros •Congurações •Ρυθμίσεις •Ustawienia •Nastavení
•Beállítások •Ayarlar
TIME
LUX MAX
5 s
4 m
2
•Bouton poussoir
•Drukknop
•Pushbutton
•Taste
•Pulsador
•Botão
•Μπουτόν
•Przycisk
•Tlačítko
•Nyomógomb
•Buton
LED
MAX
(MAX = Lux OFF)
5 lux
1275 lux
100 300
TIME LUX
5 “
2’ 10’
30’
4 m
6 m
3 m
8 m (PIR)
1,2 m
2
04 6 8
170°
•Réglage sensibilité / Distance de détection •Instelling gevoeligheid/detectieafstand •Sensitivity / detection distance setting •Empndlichkeit / Detektionsbereich •Ajuste sensibilidad / distancia de detección •Conguração da sensibilidade/distância
de detecção •Ρυθμίσεις Ευαισθησίας / Απόστασης ανίχνευσης •Ustawienia czułości / zasięgu •Citlivost/Vzdálenost detekce •Érzékenység / érzékelési távolság beállítása •Hassasiyet / algılama mesafesi ayarı
•Réglage mode d’installation •Instelling van de werkingswijze •Installation mode setting •Einstellung Betriebsart •Ajuste modo de instalación •Conguração do modo de instalação •Ρύθμιση τρόπου εγκατάστασης
•Ustawienia trybu instalacji •Nastavení módu instalace •Üzemmódok beállítása további eszközök csatlakoztathatóságához •Çalışma modu ayarı
•Réglage usine par défaut •Standaardinstelling •Default factory setting
•Werkseinstellung •Ajuste fábrica por defecto •Conguração padrão de fábrica
•Εργοστασιακές ρυθμίσεις •Ustawienia fabryczne •Tovární nastavení
•Gyári alapbeállítások •Fabrika ayarları
•Réglage usine par défaut •Standaardinstelling •Default factory setting
•Werkseinstellung •Ajuste fábrica por defecto •Conguração padrão de fábrica
•Εργοστασιακές ρυθμίσεις •Ustawienia fabryczne •Tovární nastavení
•Gyári alapbeállítások •Fabrika ayarları
•Appui court < 1s
•Kort indrukken < 1s
•Short press < 1s
•Kurzer Tastendruck < 1s
•Presión corta <1s
•Pressão curta < 1s
•Σύντομο πάτημα <1s
•Krótkie naciśnięcie < 1s
•Krátký stisk
•Rövid megnyomás < 1s
•Kısa basın < 1s
•Appui long > 2s
•Lang indrukken > 2s
•Long press > 2s
•Langer Tastendruck > 2s
•Presión larga >2s
•Toque longo > 2s
•Παρατεταμένο πάτημα >2s
•Długie naciśnięcie > 2s
•Dlouhý stisk > 2s
•Hosszú nyomvatartás > 2s
•Uzun basın > 2s
•Appui long > 2s
•Lang indrukken > 2s
•Long press > 2s
•Langer Tastendruck > 2s
•Presión larga >2s
•Toque longo > 2s
•Παρατεταμένο πάτημα >2s
•Długie naciśnięcie > 2s
•Dlouhý stisk > 2s
•Hosszú nyomvatartás > 2s
•Uzun basın > 2s
•Appui long > 2s
•Lang indrukken > 2s
•Long press > 2s
•Langer Tastendruck > 2s
•Presión larga >2s
•Toque longo > 2s
•Παρατεταμένο πάτημα >2s
•Długie naciśnięcie > 2s
•Dlouhý stisk > 2s
•Hosszú nyomvatartás > 2s
•Uzun basın > 2s
•Installation 1 détecteur
•Installatie met 1 detector
•Installation of 1 automatic switch
•Installation von 1 Bewegungsmelder
•Instalación de 1 sensor
•Instalação de 1 interruptor automático
•Τοποθέτηση 1 ανιχνευτή
•Instalacja 1 łącznika automatycznego
•Instalace s 1 senzorem
•1db mozgásérzékelős kapcsoló
beszerelése
•Bir sensör kurulumu
•Clignotement jaune
•Geel knipperen
•Flashing yellow
•Gelb blinkend
•Parpadeo amarillo
•Amarelo a piscar
•Αναβοσβήνει κίτρινο
•Migający żółty
•Bliká žlutě
•Sárga színű villogás
•Yanıp sönen sarı
•Clignotement vert
•Groen knipperen
•Flashing green
•Grün blinkend
•Parpadeo verde
•A picar verde
•Αναβοσβήνει πράσινο
•Migający zielony
•Bliká zeleně
•Zöld színű villogás
•Yanıp sönen yeşil
•Clignotement bleu
•Blauw knipperen
•Flashing blue
•Blau blinkend
•Parpadeo azul
•A piscar azul
•Αναβοσβήνει μπλε
•Migający niebieski
•Bliká modře
•Kék színű villogás
•Yanıp sönen mavi
•Installation 1 détecteur - Mode standard
•Installatie 1 detector - Standaard modus
•Installation of 1 automatic switch - standard mode
•Installation von 1 Bewegungsmelder - Standardmodus
•Instalación 1 sensor - modo estándar
•Instalação de 1 interruptor automático - modo padrão
•Τοποθέτηση 1 ανιχνευτή - λειτουργία standard
•Instalacja 1 łącznika automatycznego - tryb podstawowy
•Instalace jednoho pohybového senzoru
•1db mozgásérzékelős kapcsoló beszerelése
- standard üzemmód
•Tek sensör çalışma modu - standart mod
•Installation avec minuterie modulaire
•Installatie met modulaire timer
•Installation with time-lag switch
•Installation mit Zeitrelais
•Instalación con temporizador modular
•Instalação com interruptor de atraso
•Εγκατάσταση με χρονοδιακόπτη
•Instalacja z wyłącznikiem schodowym modułowym
•Instalace s časovým spínačem
•Beszerelés moduláris időrelével
•Merdiven otomatiği ile çalışma modu
•Installation 1 à 3 détecteurs, avec fonction dérogation temporisée
•Installatie van 1 tot 3 detectoren, met getimede schakelfunctie
•Installation of 1 to 3 automatic switches, with timed override function
•Installation von 1 bis 3 Bewegungsmelder, mit zeitgesteuerter
Override-Funktion
•Instalación de 1 a 3 sensores, con función de anulación temporizada
•Instalação de 1 a 3 interruptores automáticos, com função de
cancelamento temporizado
•Τοποθέτηση 1-3 ανιχνευτές, με λειτουργία χρονικού bypass
•Instalacja od 1 do 3 łączników automatycznych, z funkcją obejścia
czasowego
•Instalace 1 až 3 pohybových senzorů s funkcí časového sepnutí
•1-3db mozgásérzékelős kapcsoló beszerelése, manuálisan is
bekapcsolható időzítéssel
•Zamanlı devre dışı butonu ile 1 ya da 3 sensör çalışma modu
•Clignotement rapide
•Snel knipperen
•Fast ashing
•Schnell blinkend
•Parpadeo rápido
•A piscar rápido
•Αναβοσβήνει γρήγορα
•Szybkie miganie
•Rychlé blikání
•Gyors villogás
•Hızlı yanıp sönme
•Sensibilité
•Gevoeligheid
•Sensitivity
•Empndlichkeit
•Sensibilidad
•Sensibilidade
•Ευαισθησία
•Czułość
•Citlivost
•Érzékenység
•Hassasiyet
•Sensibilité
•Gevoeligheid
•Sensitivity
•Empndlichkeit
•Sensibilidad
•Sensibilidade
•Ευαισθησία
•Czułość
•Citlivost
•Érzékenység
•Hassasiyet
•Sensibilité
•Gevoeligheid
•Sensitivity
•Empndlichkeit
•Sensibilidad
•Sensibilidade
•Ευαισθησία
•Czułość
•Citlivost
•Érzékenység
•Hassasiyet
•Sensibilité
•Gevoeligheid
•Sensitivity
•Empndlichkeit
•Sensibilidad
•Sensibilidade
•Ευαισθησία
•Czułość
•Citlivost
•Érzékenység
•Hassasiyet
•Appui court < 1s
•Kort indrukken < 1s
•Short press < 1s
•Kurzer Tastendruck < 1s
•Presión corta <1s
•Pressão curta < 1s
•Σύντομο πάτημα <1s
•Krótkie naciśnięcie < 1s
•Krátký stisk
•Rövid megnyomás < 1s
•Kısa basın < 1s
3 4
4 m
•Clignotement lent
•Langzaam knipperen
•Slow ashing
•Langsam blinkend
•Parpadeo lento
•A piscar devagar
•Αναβοσβήνει αργά
•Powolne miganie
•Pomalé blikání
•Lassú villogás
•Yavaş yanıp sönme
•Clignotement très lent
•Zeer langzaam knipperen
•Very slow ashing
•Sehr langsam blinkend
•Parpadeo muy lento
•A piscar muito devagar
•Αναβοσβήνει πολύ αργά
•Bardzo powolne miganie
•Velmi pomalé blikání
•Nagyon lassú villogás
•Çok yavaş yanıp sönme
•Clignotement très rapide
•Zeer snel knipperen
•Very fast ashing
•Sehr schnell blinkend
•Parpadeo muy rápido
•A piscar muito rápido
•Αναβοσβήνει πολύ γρήγορα
•Bardzo szybkie miganie
•Velmi rychlé blikání
•Nagyon gyors villogás
•Çok hızlı yanıp sönme
•Appui court < 1s
•Kort indrukken < 1s
•Short press < 1s
•Kurzer Tastendruck < 1s
•Presión corta <1s
•Pressão curta < 1s
•Σύντομο πάτημα <1s
•Krótkie naciśnięcie < 1s
•Krátký stisk
•Rövid megnyomás < 1s
•Kısa basın < 1s
•Validation : Sortir du mode réglage •Bevestiging: Verlaat de instellingsmodus •Save and exit the settings mode
•Speichern und Einstellungsmodus verlassen •Guardar y salir del modo de conguración •Salvar e sair do modo de conguração
•Αποθήκευση και έξοδος από την κατάσταση ρύθμισης •Zapamiętanie i wyjście z trybu ustawień •Uložit nastavení a exit
•Mentés és kilépés a beállításból •Kaydet ve ayarlar modundan çık
•Appui court < 1s
•Kort indrukken < 1s
•Short press < 1s
•Kurzer Tastendruck < 1s
•Presión corta <1s
•Pressão curta < 1s
•Σύντομο πάτημα <1s
•Krótkie naciśnięcie < 1s
•Krátký stisk
•Rövid megnyomás < 1s
•Kısa basın < 1s
6 m 8 m 2 m
4 m
•Validation : Sortir du mode réglage •Bevestiging: Verlaat de instellingsmodus •Save and exit the settings mode
•Speichern und Einstellungsmodus verlassen •Guardar y salir del modo de conguración •Salvar e sair do modo de conguração
•Αποθήκευση και έξοδος από την κατάσταση ρύθμισης •Zapamiętanie i wyjście z trybu ustawień •Uložit nastavení a exit
•Mentés és kilépés a beállításból •Kaydet ve ayarlar modundan çık
...
+
5
(*)
L L
L L
(*) 040149
C10 max.
LL
(*) 040149
C10 max.
•10 max. / 100 m max.
•Installation 1 détecteur mode standard (mode par défaut) •Installatie 1 bewegingsmelder (standaard modus) •Installation of 1
automatic switch - standard mode (default setting) •Installation von 1 Bewegungsmelder - Standardmodus (Werkseinstellung) •
Instalación de 1 sensor en modo estándar (modo por defecto) •Instalação de 1 interruptor automático - modo padrão
(conguração padrão) •Τοποθέτηση 1 ανιχνευτή - λειτουργία standard (εργοστασιακή ρύθμιση) •Instalacja 1 łącznika
automatycznego - tryb podstawowy (ustawienia fabryczne) •Instalace s 1 senzorem - standardní mód (tovární nastavení)
•Egyérzékelős üzemmód - standard (gyári beállítás) •Tek sensör çalışma modu - standart mod (Fabrika ayarı)
•Installation 1 détecteur •Installatie 1 detector •Installation of 1 automatic switch •Installation von 1 Bewegungsmelder •Instalación de un sensor
•Instalação de 1 interruptor automático •Τοποθέτηση 1 ανιχνευτή •Instalacja 1 łącznika automatycznego •Instalace 1 senzoru •Egyetlen mozgásérzékelő
bekötése (2 vezetékes) •Bir sensör kurulumu
•Installation 1 détecteur + bouton(s) poussoir(s) •Installatie van 1 detector + drukknop(pen) •Installation of 1 automatic switch + pushbutton(s) •Installation
von 1 Bewegungsmelder + Taster •Instalaión de un sensor + pulsador(es) •Instalação de 1 interruptor automático + botão(ões) •Τοποθέτηση 1 ανιχνευτή
+ μπουτόν •Instalacja 1 łącznika automatycznego + przycisk(i) •Instalace 1 senzoru + tlačítko(a) •Egyetlen mozgásérzékelő bekötése (2 vezetékes) váltóérintkezős
nyomókkal (NC) •Bir sensör + buton kurulumu
6
(*)
L L
(*) 040149
C10 max.
L L L L L L
C10 max.
•3 max. / 50 m max.
(*) 040149
...
•Installation 1 à 3 détecteurs •Installatie van 1 tot 3 detectoren •Installation of 1 to 3
automatic switches •Installation von 1 bis 3 Bewegungsmelder •Instalación de 1 a 3 sensores
•Instalação de 1 a 3 interruptores automáticos •Τοποθέτηση 1-3 ανιχνευτές •Instalacja od 1
do 3 łączników automatycznych •Instalace 1 až 3 senzorů •Többérzékelős (1-3db) üzemmód
•1 ila 3 sensör çalışma modu
•Installation 1 détecteur •Installatie 1 detector •Installation of 1 automatic switch •Installation von 1 Bewegungsmelder •Instalación de un sensor
•Instalação de 1 interruptor automático •Τοποθέτηση 1 ανιχνευτή •Instalacja 1 łącznika automatycznego •Instalace 1 senzoru •Egyetlen mozgásérzékelő
bekötése (2 vezetékes) •Bir sensör kurulumu
•Installation multiple 2 à 3 détecteurs en parallèle •Meervoudige installatie 2 tot 3 melders in parallel •Multiple installation of 2 to 3 automatic switches in
parallel •Installation von 2 bis 3 Bewegungsmeldern parallel •Instalación múltiple de 2 a 3 detectores en paralelo •Instalação múltipla de 2 a 3 interruptores
automáticos em paralelo •Τοποθέτηση 2-3 ανιχνευτές παράλληλα •Instalacja z równoległym użyciem 2 lub 3 łaczników automatycznych •Instalace 2 až 3
senzorů paralelně •Több mozgásérzékelő bekötése (2 vezetékes) •Paralel bağlantıda 2 ya da 3 sensörün çoklu kurulumu
L L
7
+
C10 max.
L L
•10 max. / 100 m max.
4 126 02
0 047 04
•Installation avec minuterie modulaire •Installatie met modulaire timer •Using with
time-lag switch •Installation mit Zeitrelais •Instalación con temporizador modular
•Usando com interruptor de atraso •Τοποθέτηση με χρονοδιακόπτη
•Użycie wyłącznika schodowego modułowego •Použití s časovým spínačem
•Időrelés üzemmód •Merdiven otomatiği ile çalışma modu
•Mise en service •Inbedrijfstelling •Commisioning •Inbetriebnahme •Puesta en marcha •Comissionamento •Θέση σε λειτουργία •Uruchomienie
•Uvedení do provozu •Üzembe helyezés •Devreye alma
•Mettre hors tension puis installer et raccorder le(s) détecteur(s) et la minuterie modulaire
1•Mettre le(s) détecteur(s) sur
2
•Mettre sous tension le(s) détecteur(s) et la minuterie modulaire - LED : Bleu permanent
3
•Attendre la n de la phase d'initialisation du/des produit(s) - LED : Bleu clignotant
4
•Régler la temporisation : Le temps réglésur la minuterie et sur le(s) détecteur(s) doit être identique (±10%)
5
•De voeding uitschakelen, vervolgens de melder(s) en de modulaire timer installeren en aansluiten
1•De detector(s) inschakelen
2
•De detector(en) en de modulaire timer inschakelen - LED: Permanent blauw
3
•Wachten op het einde van de initialisatiefase van het (de) product(en) - LED: Blauw knipperend
4
•temporisatie instellen: de op de timer en op de detector(en) ingestelde tijd moet identiek zijn (± 10%)
5
•Ensure that the main circuit breaker has been switched o and that devices on the circuit are no longer being powered, then install and connect the
automatic switch(es) and the time-lag switch
1
•Set the automatic switch(es) to
2•Turn the power back on at the main circuit breaker - LED is lit permanent blue
3
•Wait until the LED is ashing blue
4•Time delay setting: the time set on the time-lag switch and on all the automatic switch(es) must be the same (+/-10%)
5
C10 max.
L L L L L L
•10 max. / 100 m max.
4 126 02
0 047 04
L L
N
L
8
•Vergewissern Sie sich, dass der Hauptschutzschalter ausgeschaltet ist und die Geräte nicht mehr unter Spannung stehen; installieren und schließen Sie
dann den/die Bewegungsmelder und das Zeitrelais an.
1
•Stellen Sie den/die Bewegungsmelder auf
2•Schalten Sie den Strom am Hauptschutzschalter wieder ein - die LED leuchtet dauerhaft blau
3
•Warten bis die LED blau blinkt
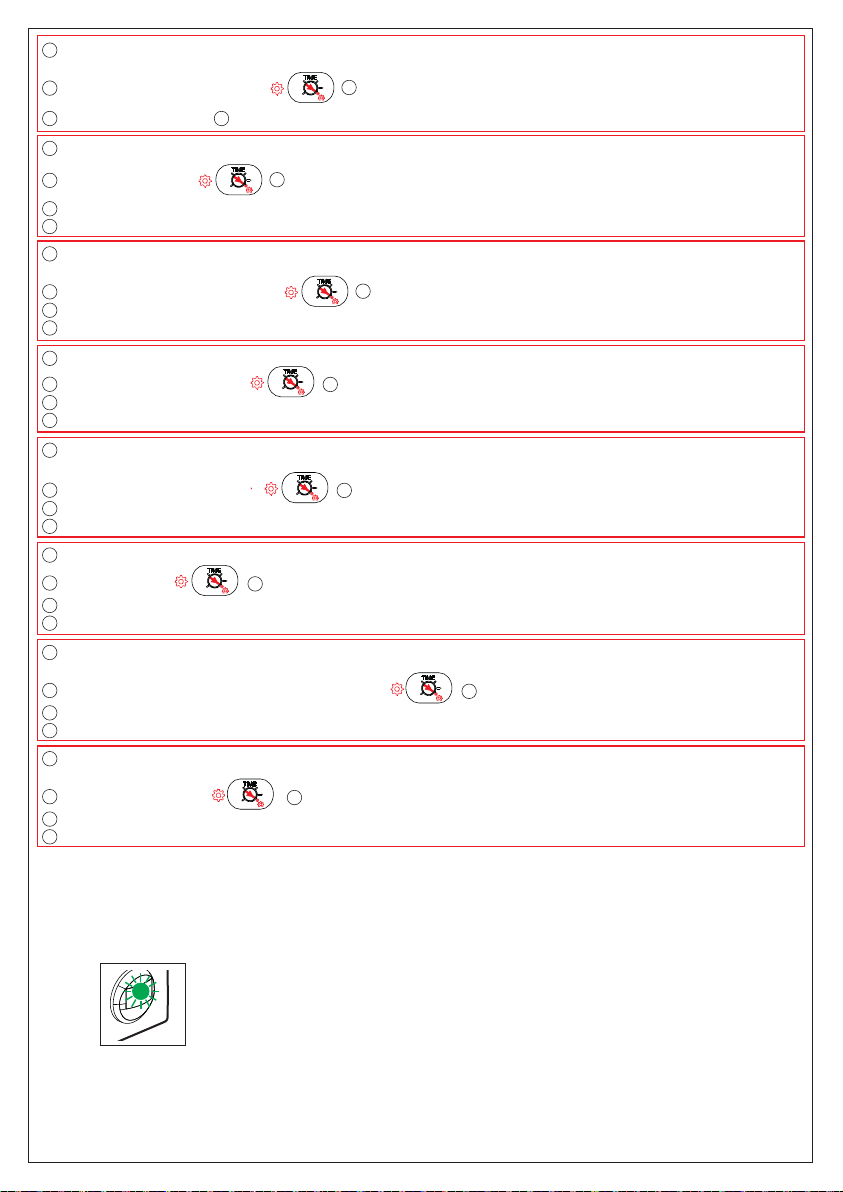
4•Einstellung der Zeitverzögerung: die am Zeitrelais und an allen Bewegungsmelders eingestellte Zeit muss gleich sein (+/-10%)
5
•Asegúrate de que has bajado el interruptor general y que los dispositivos en el circuito ya no reciben alimentación, luego instala y conecta el (los) sensor(es)
y el temporizador modular
1
•Poner el (los) sensor(es) en
2•Subir el interruptor general para que los sensores y el temporizador modular reciban alimentación -
LED: Azul permanente
3
•Esperar el nal de la fase de inicialización del / de los producto(s) - LED: parpadeo azul
4
•Ajustar la temporización: el tiempo en el temporizador y en el (los) sensor(es) tiene que ser el mismo (± 10%)
5
•Certique-se de que o disjuntor principal foi desligado e que os dispositivos no circuito não estão alimentados, então instale e conecte o(s) interruptor(es)
automático(s) e o interruptor de retardo de tempo
1
•Dena o(s) interruptor(es) automático(s) para
2•Ligue a energia novamente no disjuntor principal - o LED está aceso em azul permanente
3
•Aguarde até que o LED esteja piscando em azul
4
•Conguração do atraso de tempo: o tempo denido no interruptor de atraso e em todos os interruptores automáticos deve ser o mesmo (+/-10%)
5
•Κόψτε το ρεύμα και στη συνέχεια εγκαταστήστε και συνδέστε τον (τους) ανιχνευτή (ες) και τον χρονοδιακόπτη
1
•Ρυθμίστε τον (τους) ανιχνευτή (ες) στο
2•Επαναφέρετε το ρεύμα στους ανιχνευτές και στο χρονοδιακόπτη - LED : ανάβει μπλε
3
•Περιμένετε μέχρι το LED να αναβοσβήνει μπλε
4
•Ρύθμιση της χρονοκαθυστέρησης : ο χρόνος που ρυθμίζεται στον χρονοδιακόπτη και τους ανιχνευτές πρέπει να είναι ίδιος (+/-10%)
5
•Upewnij się, że główny wyłącznik prądu został wyłączony i że urządzenia w obwodzie nie są już zasilane, a następnie zainstaluj i podłącz łącznik(i)
automatyczny(e) oraz wyłącznik schodowy modułowy
1
•Ustaw łącznik(i) automatyczne w pozycję
2•Włącz ponownie zasilanie głównym wyłącznikem prądu – dioda LED świeci ciągłym
niebieskim światłem
3
•Poczekaj, aż dioda LED zacznie migać na niebiesko
4
•Ustawienie opóźnienia czasowego: czas ustawiony na wyłączniku schodowym modułowym i na wszystkich łącznikach automatycznych musi być taki sam (+/-10%)
5
•Ujistěte se, že byl vypnut hlavní jistič a že zařízení v obvodu již nejsou napájena, poté nainstalujte a připojte pohybový senzor (senzory) a časový spínač
1
•Nastavte senzor(y) na
2•Znovu zapněte napájení na hlavním jističi - LED svítí trvale modře
3
•Počkejte dokud LED nazačne blikat modře
4
•Nastavení časového zpoždění: čas nastavený na časovém spínači a na všech pohybových senzorech musí být stejný (+/-10 %)
5
•Détection : Lumière ambiante supérieure au réglage (LUX) - LED : Clignotement vert si détection
•Detectie: Omgevingslicht boven de instelling (LUX) - LED: Groen knipperend bij detectie
•Detection: Natural light level is greater than the 'LUX" setting - Flashing green LED when detection
•Detektion: Die natürliche Lichtstärke ist größer als die "LUX"-Einstellung - LED blink grün bei Detektion
•Detección: luz de ambiente superior al ajuste (LUX) - LED: parpadeo verde cuando se detecta
•Detecção: O nível de luz natural é maior do que a conguração 'LUX" - LED verde intermitente durante a detecção
•Ανίχνευση : Το φυσικό φως είναι μεγαλύτερο από τη ρύθμιση LUX - LED : Αναβοσβήνει πράσινο όταν υπάρξει ανίχνευση
•Wykrywanie: poziom światła naturalnego jest większy niż ustawienie „LUX” - miga zielona dioda LED
•Detekce: Úroveň přirozeného světla je vyšší než nastavení „LUX“ - bliká zelená LED při detekci
•Érzékelésnél felvillanó zöld fényjelzés - a beállított értéknél nagyobb környezeti fény esetén
•Doğal ışık seviyesi 'LUX' ayarından daha yüksek olduğu durumda - Algılama sırasında yanıp sönen yeşil LED
•Localisation : Lumière ambiante insusante - LED : Vert permanent
•Locatie: onvoldoende omgevingslicht - LED: permanent groen
•Locator function when natural light level is low - Permanent green LED
•Beleuchtungsfunktion bei geringem Tageslicht - LED leuchtet permanent grün
•Ubicación: luz de ambiante insuciente - LED: verde permanente
•Função localizador quando o nível de luz natural é baixo - LED verde permanente
•Λειτουργία φωτεινού εντοπισμού όταν το φυσικό φως ειναι χαμηλό - LED συνεχές πράσινο
•Funkcja lokalizatora przy słabym oświetleniu naturalnym - Zielona dioda LED
•Funkce lokátoru při nízké úrovni přirozeného světla - stálá zelená LED
•Folyamator zöld fényvisszajelzés - elégtelen környezeti fény esetén
•Doğal ışık seviyesi düşük olduğunda konum belirleme işlevi - Sabit yanan yeşil LED
•Győződjön meg arról, hogy a fő megszakító ki van kapcsolva és az áramkörben lévő eszközök már nincsenek feszültség alatt. Ezután kösse be a
mozgásérzékelős kapcsolót és az időrelét.
1
•Állítsa a mozgásérzékelős kapcsoló potenciométerét ezen pozícióba
2•Helyezze feszültség alá az eszközöket az áramkörhöz tartozó
kismegszakító bekapcsolásával.
3
•A kéken villogó LED jelzi a helyesen beállított üzemmódot.
4
•Időzítés beállítása: az időrelén és a mozgásérzékelős kapcsolókon ugyanazon időzítési értéket állítson be (+/-10%)
5
•Ana sigortanın kapalı olduğundan ve cihazlara artık enerji verilmediğinden emin olun, ardından sensörleri ve zaman gecikmeli anahtarı (merdiven
otomatiği) bağlantılarını yapın
1
•Sensörleri şu şekilde ayarlayın
2•Ana sigortayı tekrar açın - LED sabit bir şekilde mavi yanar
3
•LED mavi renkte yanıp sönene kadar bekleyin
4
•Zaman geciktirme ayarı: zaman gecikmeli anahtarda (merdiven otomatiği) ve tüm sensörlerde ayarlanan süre aynı olmalıdır (+/- %10)
5

This manual suits for next models

19

Other LEGRAND Switch manuals

LEGRAND Wattstopper InteliSwitch TS-400 User manual

LEGRAND

LEGRAND Wattstopper InteliSwitch TS-400 User manual

LEGRAND WNRL64 User manual

LEGRAND

LEGRAND WNRL64 User manual

LEGRAND 488 06 User manual

LEGRAND

LEGRAND 488 06 User manual

LEGRAND Pro 21 7756 28 User manual

LEGRAND

LEGRAND Pro 21 7756 28 User manual

LEGRAND HS4658 User manual

LEGRAND

LEGRAND HS4658 User manual

LEGRAND PRO 21 7756 45 User manual

LEGRAND

LEGRAND PRO 21 7756 45 User manual

LEGRAND AlphaRex3 DY21 GPS/DCF User manual

LEGRAND

LEGRAND AlphaRex3 DY21 GPS/DCF User manual

LEGRAND Valena Allure 7 525 90 User manual

LEGRAND

LEGRAND Valena Allure 7 525 90 User manual

LEGRAND Whad 5-6 kVA User manual

LEGRAND

LEGRAND Whad 5-6 kVA User manual

LEGRAND Excel Life EM883 User manual

LEGRAND

LEGRAND Excel Life EM883 User manual

LEGRAND Pass & Seymour 1595SWT User manual

LEGRAND

LEGRAND Pass & Seymour 1595SWT User manual

LEGRAND 0 648 72L User manual

LEGRAND

LEGRAND 0 648 72L User manual

LEGRAND Valena Life 7 521 88 User manual

LEGRAND

LEGRAND Valena Life 7 521 88 User manual

LEGRAND Pass & Seymour RRW600V User manual

LEGRAND

LEGRAND Pass & Seymour RRW600V User manual

LEGRAND 036 00 User manual

LEGRAND

LEGRAND 036 00 User manual

LEGRAND Wattstopper LMDM-101-R User manual

LEGRAND

LEGRAND Wattstopper LMDM-101-R User manual

LEGRAND The Radiant Collection User manual

LEGRAND

LEGRAND The Radiant Collection User manual

LEGRAND LEXIC 037 23 User manual

LEGRAND

LEGRAND LEXIC 037 23 User manual

LEGRAND 3 109 77 User manual

LEGRAND

LEGRAND 3 109 77 User manual

LEGRAND radiant User manual

LEGRAND

LEGRAND radiant User manual

LEGRAND Pro 21 7756 39 User manual

LEGRAND

LEGRAND Pro 21 7756 39 User manual

LEGRAND Pass & Seymour WattStopper DRCL453P User manual

LEGRAND

LEGRAND Pass & Seymour WattStopper DRCL453P User manual

LEGRAND DW-311 User manual

LEGRAND

LEGRAND DW-311 User manual

LEGRAND Arteor 5 742 70 User manual

LEGRAND

LEGRAND Arteor 5 742 70 User manual

Popular Switch manuals by other brands

Ruijie RG-S5750-H Series Hardware  installation and reference guide

Ruijie

Ruijie RG-S5750-H Series Hardware installation and reference guide

Siemens SENTRON 3KC0 manual

Siemens

Siemens SENTRON 3KC0 manual

SMC Networks SMC8612XL3 F 1.0.1.3 Technical specifications

SMC Networks

SMC Networks SMC8612XL3 F 1.0.1.3 Technical specifications

TRENDnet TK-205K - PS/2 KVM Switch Quick installation guide

TRENDnet

TRENDnet TK-205K - PS/2 KVM Switch Quick installation guide

Festo SMT-8-SL-PS-...-B Series manual

Festo

Festo SMT-8-SL-PS-...-B Series manual

Eaton TM-1-8174 Series Instruction leaflet

Eaton

Eaton TM-1-8174 Series Instruction leaflet

Digi ANYWHEREUSB quick start guide

Digi

Digi ANYWHEREUSB quick start guide

D-Link DGS-1008P Quick installation guide

D-Link

D-Link DGS-1008P Quick installation guide

FLIR LNB3373SB quick start guide

FLIR

FLIR LNB3373SB quick start guide

Planet KVM-810 user manual

Planet

Planet KVM-810 user manual

MaxiiNet Vi3004LV user manual

MaxiiNet

MaxiiNet Vi3004LV user manual

ATEN CS 1642 quick start guide

ATEN

ATEN CS 1642 quick start guide

Intelix AS-2H-WP Installation and operation guide

Intelix

Intelix AS-2H-WP Installation and operation guide

elobau 207KS12N-3 manual

elobau

elobau 207KS12N-3 manual

ZyXEL Communications DIMENSION ES-1016A user guide

ZyXEL Communications

ZyXEL Communications DIMENSION ES-1016A user guide

Rose electronics VISTA DVI Installation and operation manual

Rose electronics

Rose electronics VISTA DVI Installation and operation manual

Blade RackSwitch G8000 installation guide

Blade

Blade RackSwitch G8000 installation guide

Sonoff DIY MINI user manual

Sonoff

Sonoff DIY MINI user manual

manuals.online logo
manuals.online logoBrands
  • About & Mission
  • Contact us
  • Privacy Policy
  • Terms and Conditions

Copyright 2025 Manuals.Online. All Rights Reserved.