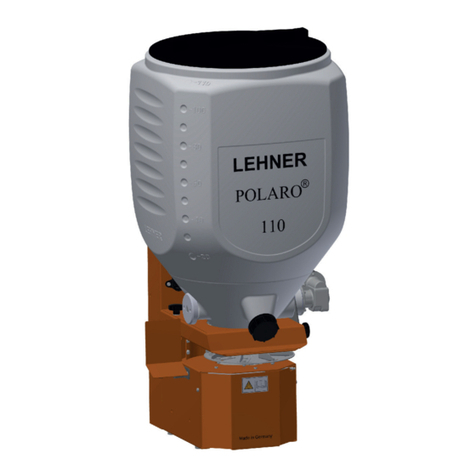
LEHNER SuperVario User manual

1
LEHNER
SuperVario®
Operating manual
Spare parts list
Version 3.0 onwards

2
Your SuperVario®
Heartiest congratulations for choosing your new spreader, the SuperVario®.
Do not use the machine without following the operating manual.
Here you will find all the necessary information.
You will get to know the finer technical details.
You will master your machine and optimise its performance.
Maintenance and care as per the operating manual contributes to security and
preserves the value of your SuperVario®.
Observe the safety instructions.
Commissioning
:
Before commissioning the machine, read through the operating manual and the
safety instructions thoroughly and keep these handy in a safe place so that you can
also have a look later.
Description:
The SuperVario® consists of a solid steel frame, a spreader vessel and the electrical
components. The spreading disc and the slider / proportioning device are a part of
the steel frame. The spreader vessel can be removed easily, which helps cleaning
and maintenance of the proportioning device. The electrical components consist of a
driving motor for the spreading disc, the slider motor, a distributor switch box and the
operating desk with a 2-meter long cable for electric supply. A battery cable and a
control cable are connected in series from the operating desk to the spreader. The
electrics of the SuperVario® are equipped with a speed regulation of the spreader
disc, which is controlled via the operating desk. The speed regulation helps the user
to spread fine seeds and granules of various types and specific weights in different
working widths. The highest rotary speed of approx. 3000 revolutions / min enables
the spreading of spiral corn over a working width of 24 m. If lower working widths are
desired, they can be adjusted by regulating the speed. The least speed of approx.
200 revolutions / min allows the sowing of fine seeds with working width of 2 m or
higher.
Guarantee:
We offer a guarantee of 12 months on the SuperVario®.

3
Assembly:
The SuperVario® can be installed in the front- as well as the rear wheel drive of a
vehicle. May it be a tractor, a cross-country vehicle or a farm motorcycle / ATV.
Installation on soil preparation equipment or a field sprayer is also possible. Since the
SuperVario® can become much heavier during the filling, a solid fastening must be
ensured. The optimum working height of the rocker shovel is 1m. During spreading of
spiral corn on 24 m, the spreader must be installed at a discharge height of 1.30 m.
There are several bores within the frame of the spreader. For fastening, you should
use screws with diameter of 10 mm.
Tray for rejected material:
There are 2 holes with diameters of 6.5 mm, located on the semi-circular longitudinal
tray beside the distributing plate. In order to avoid the spread material from being
thrown back at the driver, the standard longitudinal tray supplied, can be installed.
Electrical connections:
The SuperVario® is supplied with several cables. The 2-lead cable connects the
operating desk to the three-pin plug in the cabin of the tractor (see picture). In this
manner the electric supply of the spreader is established. The 16-lead cable
connects the operating desk to the distributor cabinet on the SuperVario®. Likewise
the battery cable with the holding device and the fuse as well as the cable lugs form
a part of the standard equipment. Using the cable lugs, connect the battery cable to
the battery. Fasten the holding device in the cabin of the tractor. It is intended to be
for insertion of the operating desk. You need this battery cable only when no three-
pin socket is available.
Following is the most important electrical data:
Operating voltage 10 to 15 Volt.
Fuse 25 A
Motor output: 180 W
Range of rotational speed 200 revolutions/min - 3000 revolutions/min.
Current consumption: 15 Ampere during starting,
10 Ampere during normal operation.
Operating temperature: -10°C to + 70°C.
Storage temperature -30°C to + 70°C.

4
If your driving vehicle is not equipped with a generator, make sure that the battery is
in a charged sufficiently. In case of poor electric supply, it may happen that the
desired rotational speed is not attained. Before yourself getting down to extending
the cables, you should consult the manufacturer. With extensions, loss in the output
is to be expected.
Commissioning of the spreader:
All the functional keys are arranged on the front side. The main switch used for
switching on and off, is located on the left, beside the display. When this is operated,
the motor starts and at the same time, the spreading disc and the agitator begin to
rotate immediately.
The Display:
The following events can be indicated in the display.
a) Rotational speed
b) Opening of the slider
c) Error message (Error 1-3). Also see the chapter ‘troubleshooting’.
Using the button located directly to the right of the display, change the function of
rotational speed to Slider opening. The corresponding indication is seen on the
display. For this press only the centre of the button. A pilot lamp shows you the
status. (Above speed indication, below slider opening)
Regulate the continuously variable speed to the adjusted value using the keys – and
+ under the display. The data entered first changes relatively slowly in order to adjust
the values accurately. Pressing the relevant key for a longer time accelerates the
function. By doing so, you can carry out practically fast changes in the speed and the
slider opening. Attention, adjustment begins only on releasing the key.
The right functional key helps in operation of the slider. The symbol of the open slider
is depicted above the key while below it is the symbol of the closed slider. The pilot
lamps help to recognize the corresponding position of the slider. When the slider is
open, an additional symbol is indicated on the display on its left hand side. Attention,
on switching off the mains, the slider is closed automatically. During each insertion of
the control panel, the version of the software is displayed for approx. 1/2 seconds.
(e.g. 3.0)
Reference run of the slider:
The control panel and the slider motor are synchronized with one another at the
factory. If the values are lost over a period of time, carry out a fresh reference run.
Press the keys + and – simultaneously. On doing so, the slider automatically opens
first up to the end and then closes. By doing so, both the positions are stored in the
memory.

5
Regulating the speed:
The rotational sped of the distributor plate can be adjusted in the range 200 – 300
revolutions/min. The value shown in the display is the set value, to which the speed
of the spreading disc is tuned. If as a result of heavy load of the motor or poor electric
supply, the speed of the motor cannot be attained, then on switching the motor on,
the speed actually attained, is displayed. Do not use any other plugs since they often
establish poor contact and have too thin cables; (cigarette lighter, socket – connector
etc.)
Automatic starting:
If starting of the motor becomes difficult on account of the very heavy load, the digital
control starts the motor up to ten times faster. This would give rise to the possibility of
the agitator breaking loose on its own. If this does not work, the motor is switched off.
The message “E 0002” appears on the display. The spreader must be switched off
and rotated manually. Attention - risk of injury!
Error control:
Indication on the display: possible cause:
E001 set position slider motor/ mechanically clamped
Error Description: Adjusted Power supply interrupted
Slider position not attained. Motor defective
Control defective
E002 blocking drive motor Agitator blocked by foreign bodies
Error Description: Motor does (Vessel empty and inspect)
not rotate and will be shut down Power supply interrupted
after ten attempts to start. Motor defective
Control defective
E003 error reference run of the slider - mechanically jammed
Motor Error Description: Slider Wiring defective
does not attain the positions open / closed Motor defective
during the reference run.
Check the Slider unit and clean if necessary. Control defective
Repeat the reference run. +/- Key
Press simultaneously.

6
Fault : possible cause :
There is crackling in the control panel: Defective contact with the power
supply. No indication on the display: + and – keys are interchanged or
The distributor plate does not rotate: the fuse is out of order
Defective contact in the cable or the
Allen screw under the distributor
plate slackened
The agitator does not rotate: Allen screw on the distributor plate is
slackened
Foreign bodies in the agitator
Slider jammed: Spread material jammed between
the slider plates the slider plates (cleaning needs to
be done)
Distributor plate does not attain the : Check the power supply
maximum speed At least 13.0 Volt ar
e required at the
supply of the control panel (in case
of spiral corn,shorten the agiator-
type finger on both sides to half, if
necssesary)

7
Operation:
The spreading width is dependent on the quality of the material to be spread and also
on the speed of the distributor plate. The possible spreading width is directly
proportional to the coarse grained structure of the material. A spreading width of 24
m (depending on the manufacturer) can be achieved with spiral corn but cannot be
achieved with light spreading materials such as seeds due to their low weight. A field
test is absolutely necessary. Two rocker shovels are screwed to the distributor plate
for collecting the material to be spread. These shovels can be adjusted at an angle
with the help of the elongated holes. Please check the proportioning device and the
slider from time to time. Particularly when using spreading materials with a high
content of dust, it can happen that the slider unit gets clogged. In such a case loosen
the Allen screw located immediately above the distributor plate using the Allen key
supplied. Remove the agitator shaft. Then using a 17 mm wrench, loosen the 4
screws on the rectangular plastic ring, which binds the slider and the storage
container. Now the top plate can be removed and the slider unit can be cleaned with
a brush or with compressed air.
With most conventionally used seeds having a corn structure, it is sufficient to have a
lower agitator-type finger in the agitator shaft. Since grazers have very poor flow
behaviour, it is necessary that you install the upper agitator-type finger as well. The
upper finger must then be installed on the one side in the ratio of 2/3 to 1/3 with the
lower finger.
Attention: For spreading grass, it is essential to install a second (upper) agitator-type
finger. For all other products: it is necessary to remove the upper agitator-type finger
and mount the lower centrally on the agitator shaft, or else the speed drops
drastically.
For installing / removing the agitator-type finger, the agitator shaft must be removed.
In case it is not removed, knock it off and bend the drive shaft of the motor. This
leads to early damage to the bearings on the motor. For minor changes of the
agitator-type finger, you can also make use of cutting pliers.
If you mount the agitator-type finger not centrally but to one side, you get a better
agitation. Attention: only with grass, use on one side. Otherwise in case of other
spreading materials, the higher range of speed will not be attained.
Spreading widths and turning operation:
Take the reference values of the spreading width of individual spreading materials
from the attached tables for these materials. In case you turn off the spreader, make
sure that the material to be spread, rolls onto a firm ground, while it falls directly into
the subsoil on your field and does not roll any further. Spreading widths should
therefore be determined on the field. To turn off the spreader, place it in the dispatch
carton. You can then collect the material to be spread and reuse it. It is important that
you let the spreading disc run at the speed at which you run it when in operation.
(suction effect of the locker shovels) At position 0, the sliding doser is closed and
at the position 85, it is completely open.

8
The spreading quantity is determined using the following formula:
Desired quantity of spreading (kg/a) X Speed (km/h) X Spreading width
600
Example:
5.0 kg /ha X 12 km/h X 12 m
600
Now the correct value can be obtained by fresh turning in case of changed scale
settings. However after commencement of the operation the spreading quantity on
the field must be controlled.
Safety regulations:
1. Since the spreader runs very fast and the spreading elements are very sharp, no
repairs must be carried out during its operation.
2. The spreader is accelerated considerably by the rocker shovel. Any stoppage in
the region of spreading is not allowed.
3. The agitator in the storage reservoir runs very rapidly. Under no circumstances
should the container slow down during the operation.
4. During the spreading of granules, the safety regulations of the supplements of the
packing are to be observed.
5. Unscrew the lid to fill the instrument. Only that quantity of spiral corn required for
the short term should be filled. Protective clothing must be worn during filling,
particularly the universal protective hand gloves. The regulations of the spiral corn
manufacturer in connection with the pesticides must be observed.
6. The instrument can be emptied using a bowl. For emptying the remnants, unscrew
the container and clean the instrument with a brush. Add the remnants of the product
into the original packing. These should not be disposed uncontrolled in the
environment.
7. Negative effects of permitted pesticides on the materials used are not known.

9
Box circuit diagramm

10
CE
Declaration of EU-conformity
corresponding to the EU-guidelines
89/392/EWG and 89/336/EWG
We
LEHNER Agrar GmbH
Häuslesäcker 5-9
D-89198 Westerstetten
Tel.: +49 7348 9596-0
Fax: +49 7348 95 96-40
www.lehner.tv
declare with the sole responsibility that the product
SuperVario®
to which this declaration is related, meets the appropriate, essential safety- and
health standards of the EU-guidelines 89/392/EWG und 89/336/EWG as well as the
standards of the other relevant EU-guidelines.
Westerstetten, 19.11.2001
Manfred Lehner
Chief Executive Officer

11
spare parts list SuperVario®
UNIT amount
1
frame 1
2
plastic square plate 150/150 mm 1
3
washer 3
4
fixed washer 1
5
slide plate 1
6
connector link 1
7
slide motor 1
8
screw 3
9
motor angle 1
10
steel square plate 150/150 mm 1
11
hopper base plate 1
12
washer 2
13
screw 2
14
screw 4
15
hopper bracket 1
16
nut 4
17
washer 4
18
plastic knop 2
19
stirring finger 2
20
stirring shaft 1
21
nylon shaft washer 1
22
hold down disc 1
23
washer 2
24
nut 2
25
spreading shovel 2
26
spreading disc 1
27
washer 4
28
lock-nut 4
29
cone point nut 2
30
disc motor 1
31
Mutter 2
32
washer 2
33
slide mechanism cover 1
34
washer 2
35
plastic knob 2
36
hopper seal 1
37
run off cover 1
38
hopper 1
39
hopper lid 1
40
lock-nut 4
41
washer 4
42
supply cable unit (without illustration) 1
43
control panel (without illustration) 1
44
battery cable (without illustration) 1
45
operationg manual (without illustration) 1

12
Other manuals for SuperVario
2
Table of contents
Other LEHNER Spreader manuals

LEHNER
LEHNER Polaro L Datasheet

LEHNER
LEHNER POLARO User manual

LEHNER
LEHNER POLARO E Datasheet

LEHNER
LEHNER SuperVario Guide

LEHNER
LEHNER MiniVario E Datasheet

LEHNER
LEHNER SuperVario X Guide

LEHNER
LEHNER Vento II Guide

LEHNER
LEHNER POLARO Datasheet

LEHNER
LEHNER AgroDos Datasheet

LEHNER
LEHNER POLARO User manual