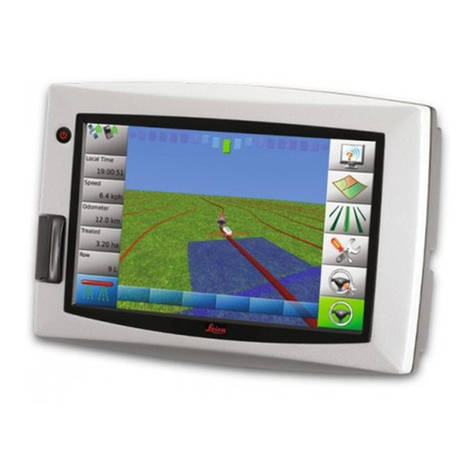
Leica INEX 1-1296 User manual

Installation Manual
Mapping & Guidance Display

iNEX Installation Manual Page 1 Rev 1
Copyright Notice
All rights reserved. No part of this publication may be reproduced, stored in a retrieval
system, or transmitted in any form or by any means, electronic, mechanical
photocopying, recording, or otherwise, without the prior written permission of Leica
Geosystems Pty Ltd.
Disclaimer
No liability is assumed with respect to the use of the information contained herein.
While every precaution has been taken in the preparation of this publication, Leica
Geosystems assumes no responsibility for errors or omissions, nor is any liability
assumed for damages resulting from the use of the information contained herein.
Further this publication and features described herein are subject to change without
notice.
Use of this system is strictly limited to providing steering assistance to the operator
who must remain in control of the vehicle at all times.
Leica Geosystems, including its officers servants and agents, does not make any
representation to any party and will not accept any responsibility or liability whatsoever
for any loss or damage of whatever nature suffered by any such person or corporation
choosing or seeking to use this system or any part thereof.
By use of this system you agree that Leica Geosystems is not liable or responsible for
any damage whatsoever to the vehicle, any property, personal injuries, or death that
may result from the use or abuse of this system.

iNEX Installation Manual Page 2 Rev 1
Leica iNEX Installation Manual
Written for Leica iNEX Mapping & Guidance Display
Part number: 1-1296
Revision: 1
Publication Date: February 2009
Copyright ©2009 Leica Geosystems Pty Ltd. All rights reserved.
Acknowledgements
Windows XP®is registered to Microsoft Corp.
Other products and trademarks mentioned in this manual are the property of
their registered owners.

WARRANTY
iNEX Installation Manual Page 3 Rev 1
Leica Geosystems
International Limited Warranty
EXPRESS WARRANTY FOR HARDWARE. Leica Geosystems AG (“Leica Geosystems”), warrants to the
original end user (“Customer”) that this Product will be free from defects in workmanship and materials, under
normal use, for generally one (1) year, except for (i) DISTO™ products for which two (2) years shall apply, and (ii)
batteries for which ninety (90) days shall apply, unless such warranty period has been extended by Leica
Geosystems, and provided any and all operating and maintenance instructions are strictly respected, in particular
in case of extreme and/or continuous applications/use of the Product. The warranty period begins on the proved
purchase date (or if applicable, date of delivery or date of acceptance report). Leica Geosystems’ sole obligation
under this express warranty shall be, at Leica Geosystems’ sole option and expense, to replace or repair the
Product or part, or refund the purchase price paid for the Product. Leica Geosystems warrants any repaired or
replaced Product or part for a period of ninety (90) days from shipment, or through the end of the original
warranty, whichever is longer. All Products or parts that are replaced become the property of Leica Geosystems.
This express warranty does neither cover consumables, such as reflectors, bulbs and fuses, nor third party
products.
EXPRESS WARRANTY FOR SOFTWARE. For “System Software” (defined as operating software and/or
firmware necessary for switching on and running the Product), all provisions contained in this International Limited
Warranty shall apply as for hardware. With respect to "Application Software” (defined as pre-installed or loadable
on-board software and/or office or PC-based software for particular operations of the Product and/or data), the
warranty provisions contained herein shall expressly not apply. For further information on the scope of the
warranty coverage for Application Software please refer to the correspondent Software License Agreement.
OBTAINING WARRANTY SERVICE. Customer must contact the authorized distributor of Leica Geosystems or,
with the exception of DISTO™ products, Leica Geosystems’ Service Center indicated by Leica Geosystems
within the applicable warranty period to obtain warranty service authorization. Dated proof of original purchase
from Leica Geosystems or its authorized distributor and a description of the defect will be required. Leica
Geosystems is not responsible for Products or parts received without a warranty service authorization. Repaired
or replacement Products will be shipped to Customer at Leica Geosystems’ expense. The repaired product or part
will be shipped as soon as reasonably possible. Leica Geosystems shall not be responsible for any damages
occurring during such shipment. Leica Geosystems shall, at its sole discretion, decide on the place of
performance for work under warranty. For Products forming part of a fixed installation, such place of performance
shall be the site of such installation and Leica Geosystems shall have the right to charge for additional costs for
such services under warranty if the site of the Product is other than where the Product was originally installed or
shipped.
WARRANTY EXCLUSIVE. Customer’s sole remedy for breach of the warranty shall be the express warranty. The
foregoing warranty is exclusive and is in lieu of all other warranties, terms or conditions, express or implied, either
in fact or by operation of law, statutory or otherwise, including warranties, terms or conditions of merchantability,
fitness for a particular purpose, satisfactory quality and non-infringement, all of which are expressly disclaimed.
Leica Geosystems shall not be liable if the alleged defect or malfunction was caused by Customer’s or any other
person’s misuse, neglect, improper installation, unauthorized attempts to open, repair or modify the Product,
inadequate maintenance, disregard of operating instructions, excessive load or stress, normal wear and tear, or
any other cause beyond the range of its intended use, by accident, fire, or other hazards, or other cause not due
or attributable to Leica Geosystems. This warranty does not cover physical damage to the Product or
malfunctions resulting from the use of the Product in conjunction with any sort of ancillary or peripheral equipment
and Leica Geosystems determines that there is no fault with the Product itself.
WARRANTY
iNEX Installation Manual Page 4 Rev 1
LIMITATION OF LIABILITY. LEICA GEOSYSTEMS ALSO EXCLUDES ANY LIABILITY, WHETHER BASED IN
CONTRACT OR TORT (INCLUDING NEGLIGENCE), FOR INCIDENTAL, CONSEQUENTIAL, INDIRECT,
SPECIAL, OR PUNITIVE DAMAGES OF ANY KIND, OR COSTS OF PROCUREMENT OF SUBSTITUTE
PRODUCTS BY CUSTOMER, OR FOR THE LOSS OF REVENUE OR PROFITS, LOSS OF BUSINESS, LOSS
OF INFORMATION OR DATA, OR OTHER INFORMATION OR FINANCIAL LOSS ARISING OUT OF OR IN
CONSEQUENCE WITH THE SALE, INSTALLATION, MAINTENANCE, USE, PERFORMANCE, FAILURE, OR
INTERRUPTION OF THIS PRODUCT, EVEN IF LEICA GEOSYSTEMS OR ITS DISTRIBUTORS HAVE BEEN
ADVISED OF THE POSSIBILITY OF SUCH DAMAGES, AND LIMITS ITS LIABILITY TO REPLACEMENT,
REPAIR, OR REFUND OF THE PURCHASE PRICE PAID, AT LEICA GEOSYSTEMS’ OPTION. THIS
LIMITATION OF LIABILITY FOR DAMAGES WILL NOT BE AFFECTED IF ANY REMEDY PROVIDED HEREIN
SHALL FAIL OF ITS ESSENTIAL PURPOSE.
DISCLAIMER. Should a court of jurisdiction not allow the entire exclusion or limitation of implied warranties or the
limitation of incidental or consequential damages for certain products supplied to consumers, or the limitation of
liability for personal injury, such implied warranties and such liabilities will be limited to the duration of the
applicable express warranty.
GOVERNING LAW AND PLACE OF JURISDICTION. This Limited Warranty shall be governed by the laws of
Switzerland, excluding all conflict of laws principles and excluding the United Nations Convention on the
International Sale of Goods dated 11 April 1980. The ordinary courts at the Leica Geosystems registered office in
Balgach, Switzerland shall be competent. Leica Geosystems shall, at its sole discretion, also be entitled to take
legal action in the competent courts at the Customer’s place of business or domicile. With this Limited Warranty,
Leica Geosystems grants Customer specific legal rights which do not restrict any statutory consumer rights.
Heerbrugg, July 1, 2002

iNEX Installation Manual Page 5 Rev 1

iNEX Installation Manual Page 6 Rev 1
Table Of Contents
1About The Leica iNEX ................................................................................ 8
1.1 Product Description .............................................................................. 8
1.2 Precautions And Safety Measures.......................................................... 8
2Leica iNEX Components............................................................................. 9
2.1 iNEX Display.......................................................................................... 9
2.2 iNEX Vehicle Cable............................................................................... 10
2.3 Power Cable........................................................................................ 11
2.4 AS310 (Optional Component) ............................................................. 11
3System Installation ................................................................................. 12
3.1 Before Installation............................................................................... 12
3.2 Installing The iNEX Display................................................................... 13
3.3 Installing The Power Cable................................................................... 14
3.4 Installing The iNEX Vehicle Cable.......................................................... 15
3.5 Connecting Remote Master ................................................................. 16
3.6 Connecting Remote Input.................................................................... 16
3.7 Connecting The Optional AS310 .......................................................... 17
4Appendix................................................................................................ 18
4.1 Connection Pin Assignments ............................................................... 18

iNEX Installation Manual Page 7 Rev 1

iNEX Installation Manual Page 8 Rev 1
1About The Leica iNEX
1.1 Product Description
The Leica iNEX is a GPS-based guidance system with the capability to
interface to a number of different 3rd party components such as GPS
receivers, rate controllers and steer controllers.
The Leica iNEX is a robust single body computer system manufactured
specifically for use in agriculture. It incorporates an intelligent power
system which protects the computer from abnormal input power often
found in agricultural vehicles.
When coupled with a Leica mojoRTK, the Leica iNEX extends the
capability of the mojoRTK to a large, full colour touch screen,
incorporating additional features including more guidance patterns,
automatic section shutoff and advanced data recording.
1.2 Precautions And Safety Measures
Review all safety information specific to your manufacturer and model
before installing or operating the iNEX.
Do not disassemble or alter the iNEX. Doing so may result in failure,
electric shock, or fire.
Do not subject the iNEX to high levels of moisture. Use the iNEX only
in vehicles with a 12-volt negative ground system.
Follow recommended safety precautions and operating procedures at
all times.
The operator assumes responsibility for the installation and use of the
product.

iNEX Installation Manual Page 9 Rev 1
2Leica iNEX Components
2.1 iNEX Display
a. Power button
b. Brightness down/up
c. Remote buttons 1 to 4
d. Speaker
e. RAM mount
f. USB port
g. Touch screen
h. Display connector (male)
iNEX Description
Power Button
Press to turn iNEX on and off.
Hold for 2 seconds when turning
iNEX on to start Launcher.
Brightness Down/Up
Press repeatedly to turn iNEX
Display backlight brightness down
or up.
Remote Buttons 1 To 4
Four separate buttons which can
be assigned shortcut functions
from within the system.
Speaker
Emits sounds made by the iNEX.
RAM Mount
Mounting point for the iNEX
Display.
USB Port
Used for data transfer and iNEX
software upgrades.
Touch Screen
The iNEX Display is touch sensitive
and is the main user interface.
Display Connector (male)
The connection point for the iNEX
vehicle cabling. Allows easy
movement of system between
vehicles.
a b c d e
fgh

iNEX Installation Manual Page 10 Rev 1
2.2 iNEX Vehicle Cable
a. Display connector (female)
b. Port A (blue)
c. Port B (yellow)
d. Remote Master (brown)
e. CANbus (white)
f. Remote Input (white)
g. Power input connector
h. Port C
Vehicle Cable Description
Display Connector (female)
Connects to the iNEX Display.
Port A (blue)
Serial connection for 3rd party
devices such as steering or rate
controllers.
Port B (yellow)
Serial connection for GPS
receivers or mojoRTK. Also used
for 3rd party devices when
CANbus used for GPS source.
Remote Master (brown)
Detects 12-volt from a master
switch to turn treatment on/off
when configured.
CANbus (white)
Connects to 3rd party CANbus
devices including GPS receivers.
Remote Input (white)
Detects a momentry 12-volt pulse
to trigger a user assigned
shortcut fuction.
Power Input Connector
Connects to the power cable
Port C
Connects to the optional AS310.
a
b
c
d
e
f
g
h

iNEX Installation Manual Page 11 Rev 1
2.3 Power Cable
a. Power connector
b. Red wire (12-volt positive)
c. Black wire (negative ground)
Power Cable Description
Power Connector
Supplies 12-volt power to the
iNEX via the Power Input
connector on the Vehicle cable.
Red Wire (12-volt positive)
Connects to a clean 12-volt power
source, such as directly to a
battery.
Black Wire (negative ground)
Connects to the vehicle's earth.
2.4 AS310 (Optional Component)
The AS310 is an optional component which is required for some 3rd party
rate controllers when automatic section shut-off is being used.
a. Voltage port
b. Data port
AS310 Description
Data Port
Connects to Port C on the iNEX
Vehicle Cable.
Voltage Port
Connects to various automatic
section shut-off interface cables.
ab
abc

iNEX Installation Manual Page 12 Rev 1
3System Installation
3.1 Before Installation
Installation does not require specialist knowledge. However, Leica
Geosystems recommends that installation of the iNEX equipment be
performed by a qualified technician, because installation requires
making electrical connections.
Leica Geosystems is not liable for any damage, faults or risks related to
installation or to the iNEX or your vehicle due to installation.
Leica Geosystems declines all responsibility for any incorrect
information in the iNEX Installation Manual.
The following instructions are to be used as a general guide during the
installation of the iNEX. For more specific instructions, please contact
your point of purchase.
Install the system in a clean and dry workshop environment. Failure to
do so may cause the system to short or promote product malfunction.
Route and secure all cables and wiring to ensure that they do not chafe
or rub, thus causing premature failure.
The average installation time will vary, but it should be approximately
three to four hours per vehicle. The installation time may be more or
less, depending on vehicle type.

iNEX Installation Manual Page 13 Rev 1
3.2 Installing The iNEX Display
1. Read all instructions before attempting installation.
2. Attach the RAM mount arm, and separate RAM mount ball to the
RAM mount on the iNEX Display.
3. Pick a suitable location to mount
the Display by holding it up in
place while checking for visibility
out of the vehicle. The Display
needs to be within easy reach of
the operator when seated in the
normal operating position, and
ideally it will be easily visible in
the forward vision of the
operator.
4. When a suitable location to
mount the Display has been selected, mark the position of where
the RAM mount ball is to be mounted on the vehicle.
Note: There are a number of different RAM mounts available, including clamp on
brackets, which may simplify the installation. RAM mount arms are also available in
a number of different lengths; please contact your point of purchase.
5. Secure the RAM mount ball to the vehicle in the required location.
Important: Use extreme caution whenever drilling holes or attaching
any objects to the vehicle as there may be hidden cables or hoses.
Never drill into the ROP system of any vehicle as this may damage
the integrity of the system. Consult the vehicle’s operating manual
prior to drilling any holes.
6. Attach the Display to the RAM mount ball using the RAM mount arm.
Once the Display is oriented in the correct direction, ensure the RAM
mount is tightly secured.

iNEX Installation Manual Page 14 Rev 1
3.3 Installing The Power Cable
The Power Cable should be connected to a clean 12-volt power system;
however the iNEX will operate between 9 and 16 volts DC and as such will
tolerate normal fluctuations found in a typical vehicle power system.
1. Connect the red wire to a 12-volt positive source.
2. Connect the black wire to the vehicle’s earth.
3. Route the cable into the cab where the iNEX Vehicle Cable will be
installed.
Note: The iNEX is a 12-volt DC (negative-to-earth) system only. Connecting to a
24-volt DC or a positive-to-earth system will cause damage which is not covered by
warranty.
Do not connect the power cable to only one battery of a 24-volt system as this
may cause damage to the vehicle's batteries and connected equipment.
There are a number of other power cable options available, including a
three wire power cable which can be connected to the vehicle ignition to
turn the iNEX on and off with the vehicle’s ignition key.
Also available are power cables terminated with common connections
found in agricultural vehicles, such as the universal three pin circular
connector and the John Deere power strip connector.
For more information on any of these cables, contact your point of
purchase.

iNEX Installation Manual Page 15 Rev 1
3.4 Installing The iNEX Vehicle Cable
1. Connect the Display connector on the vehicle cable to the iNEX
Display. The connectors may need to be twisted until the locating
tabs in the connectors align. Push the connectors firmly together
while twisting the locking ring.
2. After the power cable has been connected to a clean 12-volt source,
it can be connected to the Power input connector using the same
twisting action. When the power connection is made to the iNEX
Display, it will emit two short beeps to indicate it is powered.
3. If using serial NMEA GPS or a mojoRTK, connect the device to Port B
(yellow cable) on the vehicle cable, using the appropriate serial
cable.
4. If using a CANbus NMEA2000 GPS, connect the device to the CANbus
port (white cable).
5. Where required, connect any supported 3rd party rate controller to
Port A (blue cable), using the appropriate serial cable.
6. If using a GPSteer auto steer controller, then it should be connected
to Port A if not being used by a rate controller, and Port B if Port A
is used while Port B is free. Alternatively where both Port A & Port
B are used, a USB to Serial converter cable can be obtained from
your point of purchase.
Note: If you are unsure which cable should be used to connect another device,
contact your point of purchase.

iNEX Installation Manual Page 16 Rev 1
3.5 Connecting Remote Master
The iNEX is designed to sense 12-volts DC from a master switch, which
when configured will activate the treatment recording function on the
iNEX.
It is recommended that the Remote Master is connected to an existing
master switch in the vehicle, however there are many options including
12-volts DC from a master valve, an implement switch or a separate
toggle switch.
1. Connect a wire to the 12-volt positive on/off source, such as an
existing master switch.
2. Connect the other end of the wire to the Remote Master (brown
cable) on the iNEX Vehicle Cable.
3. Consult the iNEX user manual for instruction on configuring the
system to use the Remote Master as the master source.
Note: The iNEX will detect 12-volt positive as the master being on and no power as
the master being off.
3.6 Connecting Remote Input
The Remote Input can be connected to a momentary push-button switch
which can then remotely trigger a user defined function on the iNEX, such
as engage/disengage auto steering.
1. Connect 12-volts to one side of a momentary push-button switch.
2. Connect a wire from the other side of the momentary push-button
switch to the Remote Input (white cable) on the iNEX Vehicle Cable.
3. Consult the iNEX user manual for instruction on configuring the
Remote Button function to be triggered by the Remote Input.
Note: The 12-volts DC supplied to the Remote Master and the Remote Input MUST
be on the same 12-volt DC circuit to which the iNEX is connected.

iNEX Installation Manual Page 17 Rev 1
3.7 Connecting The Optional AS310
The AS310 is required for some installations where automatic section
shut-off is being used. The AS310 converts signals from the iNEX to
output signals which can then be connected to 3rd party rate controllers
and other section control equipment.
1. Mount the AS310 in a suitable out of the
way location.
2. Connect Port C on the iNEX Vehicle Cable
to the Data Port on the AS310. The
connectors may need to be twisted until
the locating tabs in the connectors align.
Push the connectors firmly together
while twisting the locking ring.
3. Connect the required automatic section
control cable to the voltage port on the AS310, using the same
twisting action.

iNEX Installation Manual Page 18 Rev 1
4Appendix
4.1 Connection Pin Assignments
Port A
Pin Function
1 -
2 Receive Data (RxD)
3 Transmit Data (TxD)
4 Data Terminal Ready (DTR)
5 Data Drain (GND)
6 Data Set Ready (DSR)
7 Request to Send (RTS)
8 Clear to Send (CTS)
9 -
Port B
Pin Function
1 -
2 Receive Data (RxD)
3 Transmit Data (TxD)
4 -
5 Data Drain (GND)
6 -
7 -
8 -
9 -

iNEX Installation Manual Page 19 Rev 1
CANbus
Pin Function
1 -
2 CAN A Low
3 CAN A Drain
4 -
5 -
6 -
7 CAN A High
8 -
9 -
Power Input
Pin Function
1 Battery Negative
2 Vehicle Ignition Sense Input
3 Battery Positive For AS310 High Current
4 Battery Positive
Table of contents
Other Leica GPS manuals

Leica
Leica T-Scan5 User manual

Leica
Leica MojoMINI User manual

Leica
Leica GPS1200 Series Product manual

Leica
Leica MojoMINI Installation and operating manual

Leica
Leica mojo3D User manual

Leica
Leica MX400 User manual

Leica
Leica SR20 User manual

Leica
Leica GPS System 500 User manual

Leica
Leica GPS1200 Series User manual

Leica
Leica MojoMINI User manual

Leica
Leica Digilux 2 User manual

Leica
Leica MK8 User manual

Leica
Leica RX1250 SmartRover User manual

Leica
Leica DistoX2 User manual

Leica
Leica GPS1200 Series User manual

Leica
Leica GPS1200+ Instructions for use

Leica
Leica GPS500 User manual

Leica
Leica T-Scan 5 User manual

Leica
Leica mojo3D User manual

Leica
Leica GPS1200+ Product manual