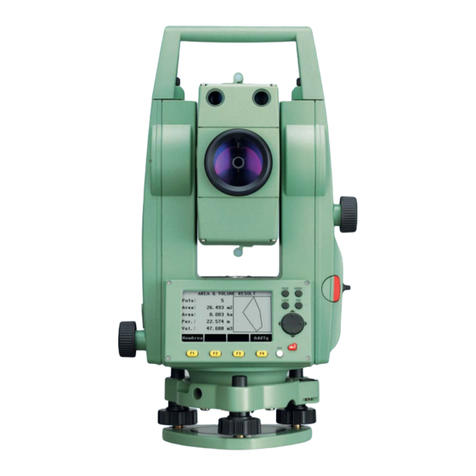
Leica GPS1200 Series User manual

GPS1200
System Field Manual 1
Version 1.1
English

IGPS1200
Introduction
Introduction
Purchase Congratulations on the purchase of a GPS1200 Series instrument.
)To use the product in a permitted manner, please refer to the detailed safety direc-
tions in the User Manual.
Product identifica-
tion
The model and the serial number of your product are indicated on the type plate.
Enter the model and serial number in your manual and always refer to this informa-
tion when you need to contact your agency or Leica Geosystems authorized service
workshop.
Type: _____________________
Serial No.: _____________________
Software-Version: _____________________

Introduction GPS1200 II
Symbols The symbols used in this manual have the following meanings:
Trademarks • Windows (registered trademark of Microsoft Corporation)
• Bluetooth (registered trademark of Bluetooth SIG, Inc.)
All other trademarks are the property of their respective owners.
Type Description
)Important paragraphs which must be adhered to in practice as
they enable the product to be used in a technically correct and
efficient manner.

IIIGPS1200
Table of Contents
Table of Contents
In this manual Chapter Page
1 How to Use this Manual 1-1
2 User Interface 2-1
3 Equipment Setup 3-1
4 Determining Antenna Heights 4-1
5 Manage... - Getting Started 5-1
6 Manage...\Jobs 6-1
7 Manage...\Data 7-1
8 Manage...\Codelists 8-1
9 Coding 9-1
10 Manage...\Coordinate Systems 10-1
11 Manage...\Configuration Sets 11-1

1-1GPS1200
How to Use this Manual
1 How to Use this Manual
)It is recommended to set-up the instrument while reading through this manual.
Path Main Menu: Manage...\Data stands for this working sequence:
From the Main Menu select Manage... and then select Data.
Screen CONFIGURE General Menu describes the name of the screen.
Page Screens can have more than one page. Units page describes a specific page of a
screen. For example: ’...in CONFIGURE Units & Formats, Units page...’.
Fields and options Fields displayed on the screen are described as <Coord System:> or <Coord
System: Swiss>, if ’Swiss’ is the selected coordinate system.
XX The characters XX are used as placeholders for screen names or multiple options
that are all covered by a general description of appearance or functionality.
Example 1: STAKEOUT XX Stakeout indicates that the explanation
provided is valid for the screens STAKEOUT Polar Stakeout
and STAKEOUT Orthogonal Stakeout.

How to Use this Manual GPS1200 1-2
Keys Two different types of keys can be found on the instrument. These are fixed keys
and softkeys.
Example 2: In REFLINE Define Reference, Reference page, <Task: XX
Line> indicates that the explanation provided is valid for the
options <Task: Measure to Line>, <Task: Stake to Line> and
<Task: Gridstake Line>.
Type Description
Fixed keys Keys which can be pressed on the keyboard, for example:
• Function keys F1-F6.
• Function keys F7-F12.
• Alphanumeric keys.
•ESC, USER, PROG,CE, ENTER, SHIFT.
• Arrow keys.
Softkeys Displayed on the screen, can be selected by using the
assigned fixed key. For example CONT (F1). The assigned
fixed key is shown in brackets.

1-3GPS1200
How to Use this Manual
)Throughout the manual, stepwise instructions are used. Keys to be pressed within
these instructions are indicated as for example ENTER, CONT (F1) or SHIFT INDIV
(F5).
Index The index is at the back of the manual.
Menu tree The menu tree helps finding a topic graphically.
MAIN MENU
|
|—— SURVEY
|
|
|—— PROGRAMS...
|
|
|—— MANAGE...
|
||
||——JOBS
|
)Keys, fields and options on the screens which are considered as self-explanatory are
not explained.
Validity of this
manual
• This manual applies to all GPS1200 instruments. Differences between the
various models are marked and described.

How to Use this Manual GPS1200 1-4
• The RX1200 is available as RX1210 or RX1220 and with touch screen function-
ality as RX1210T or RX1220T. The names RX1210 and RX1220 are used
throughout the manual and may also represent the T models. Only use the
supplied stylus on the touch screens of the T models.
• This manual covers standard real-time surveying applications. Refer to the GPS
Technical Reference Manual for information about other functionality available.
Available docu-
mentation Name of documentation Description
GPS1200 User Manual Provides an overview of the system together with
technical data and safety directions.
Name of documentation Description
GPS1200 System Field
Manual
Describes the general working of the system in
standard use. Intended as a quick reference field
guide.

1-5GPS1200
How to Use this Manual
Format of the docu-
mentation
The GPS1200 CD contains the entire documentation in electronic format. All
manuals are also available in printed form except for the GPS1200 Technical Refer-
ence Manual.
GPS1200 Application
Programs Field Manual
Describes specific onboard application programs in
standard use. Intended as a quick reference field
guide.
GPS1200 Technical
Reference Manual
Overall comprehensive guide to the system and
program functions. Included are detailed descriptions
of special software/hardware settings and soft-
ware/hardware functions intended for technical
specialists.
Name of documentation Description

How to Use this Manual GPS1200 1-6

User Interface GPS1200 2-2
2.1 Keyboard
Keyboard
a) Function keys F1-F6
b) Alpha keys
c) CAPS
d) Hot keys F7-F12
e) SPACE, SHIFT
f) ENTER
g) Arrow keys
h) CE, ESC, USER, PROG
i) Numeric keys
GPS12 010
a
b
g
f
e
c
d
h
F2F1 F3 F4 F5 F6
F7
ASDFGHJ K L
W
Q
ER
789
456
123
0.
TYU IO
P
ZXCVBNM
F8 F9 F10 F11 F12
CE ESC
USER PROG
ON
SHIFT
SPACE
CAPS
OFF
PgDn
PgUp
i

2-3GPS1200
User Interface
Keys Key Function
Function keys F1-
F6
Correspond to the six softkeys that appear on the bottom of the
screen when the screen is activated.
Alpha keys To type letters.
CAPS Switches between upper case to lower case letters.
Hot keys F7-F12 User definable keys to execute chosen commands or access
chosen screens.
SPACE Enters a blank.
SHIFT Switches between the first and the second level of function
keys.
ENTER • Selects the highlighted line and leads to the next logical
dialogue/menu.
• Starts the edit mode for edit fields.
• Opens a choicelist.
Arrow keys Move the focus on the screen.
CE • Clears all entry at the beginning of user input.
• Clears the last character during user input.

User Interface GPS1200 2-4
Key combinations
ESC Leaves the current menu or dialogue without storing any
changes made.
USER Calls the user defined menu.
PROG (ON) • If the receiver is off: to turn the receiver on.
• If the receiver is on: press at any time to access menu to
select an application program.
Numeric keys To type numbers.
Key Function
Keys Function
PROG plus USER Turns instrument off.
SHIFT Pages up.
SHIFT Pages down.

2-5GPS1200
User Interface
2.2 Screen
Screen
Elements of the
screen
a) Time
b) Caption
c) Title
d) Screen area
e) Message line
f) Icons
g) ESC
h) SHIFT icon
i) CAPS
j) Softkeys
a
g
h
j
i
b
c
d
e
k
f
GPS12 129
Element Description
Time The current local time is shown.
Caption Shows location either in Main Menu, under PROG key or
USER key.
Title Name of the screen is shown.

User Interface GPS1200 2-6
Screen area The working area of the screen.
Message line Messages are shown for 10 s.
Icons Shows current status information of the instrument. Refer to
"2.4 Icons". Can be used with touch screen.
ESC Can be used with touch screen. Same functionality as the fixed
key ESC. The last operation will be undone.
Scroll bar Scrolls the screen area up and down.
SHIFT icon Shows the status of the SHIFT key; either first or second level
of softkeys is selected. Can be used with touch screen and has
the same functionality as the fixed key SHIFT.
CAPS The caps mode for upper case letters is active.The caps mode
is activated and deactivated by pressing the CAPS key.
Softkeys Commands can be executed using F1-F6 keys. The
commands assigned to the softkeys are screen dependent.
Can be used directly with touch screen.
Element Description

2-7GPS1200
User Interface
2.3 General Operating Principles
Keyboard and
touch screen
The user interface is operated either by the keyboard or by the touch screen with
supplied stylus.
The workflow is the same for keyboard and touch screen. The difference is the way
information is selected and entered.
Operation by keyboard
Information is selected and entered using the keys. Refer to "2.1 Keyboard" for a
detailed description of the keys on the keyboard and their function.
Operation by touch screen
Information is selected and entered on the screen using the supplied stylus.
Operation Description
To select an item Tap on the item.
To start the edit mode in
input fields
Tap on the input field.
To highlight an item or
parts of it for editing
Drag the supplied stylus from the left to the right.

User Interface GPS1200 2-8
Select from a menu .
Edit an entire value
in input fields
.
To accept data entered
into an input field and exit
the edit mode
Tap somewhere else on the screen outside of the input
field.
Operation Description
Appearance Description
To select an item from a menu, do one of the following:
Move the focus to the item. ENTER or CONT (F1).
OR
Type the complete selection number in front of the
item. ENTER or CONT (F1) are not required.
OR
Tap on the item.
Appearance Description
1. Highlight the field.
2. Type numeric and/or alphanumeric characters to
overwrite.

2-9GPS1200
User Interface
Edit an individual
character in input
fields
.
Access special
alphanumeric char-
acters for input
3. ENTER or tap outside of the field.
Appearance Description
A character can be inserted or overwritten. The proce-
dure is the same for both cases.
1. Highlight the field.
2. For the keyboard: ENTER. The edit mode is acti-
vated where additional functions like insert and
overwrite are available.
3. For the touch screen: Highlight the characters to
be changed.
4. Type numeric and/or alphanumeric characters.
5. ENTER or tap outside of the field.
Step Description
1. Highlight the input field.
Other manuals for GPS1200 Series
4
Table of contents
Other Leica Receiver manuals

Leica
Leica GPS1200 Series User manual

Leica
Leica GMX902 GG User manual

Leica
Leica Zeno 10 User manual

Leica
Leica GR30 Reference guide

Leica
Leica GPS900 Series Product manual

Leica
Leica GR10 Quick start guide
Leica
Leica TPS400 Series User manual

Leica
Leica GS14 User manual

Leica
Leica GS16 User manual

Leica
Leica Viva GNSS User manual

Leica
Leica GMX902 GG User manual
Leica
Leica iCON gps 70 User manual

Leica
Leica GGo4 Instruction Manual

Leica
Leica GS10 User manual

Leica
Leica GM30 User manual

Leica
Leica GRX1200 series User manual

Leica
Leica GS14 User manual

Leica
Leica iCON gps 60 Manual
Leica
Leica GS15 User manual

Leica
Leica Viva GNSS User manual