Viva GNSS, Introduction 2
Introduction
To use the product in a permitted manner, please refer to the detailed safety instruc-
tions in the Leica CS10/CS15 User Manual, the Leica GS10/GS15 User Manual, Leica
GS14 User Manual and the Leica GS25 User Manual.
For detailed descriptions of all functions and settings of the product and applications,
please refer to the Leica Viva Series Technical Reference Manual.
Purpose of this
manual
This Getting Started Guide is intended as a quick field reference manual for immedi-
ately getting started with your Leica Viva Series equipment. The manual explains what
you can find in your container, how everything fits together and how to get started
on the basic applications.
Quick references to
specific topics
myWorld@Leica Geosystems (https://myworld.leica-geosystems.com) offers a
wide range of services, information and training material.
With direct access to myWorld, you are able to access all relevant services whenever
it is convenient for you, 24 hours a day, 7 days per week. This increases your efficiency
and keeps you and your equipment instantly updated with the latest information from
Leica Geosystems.
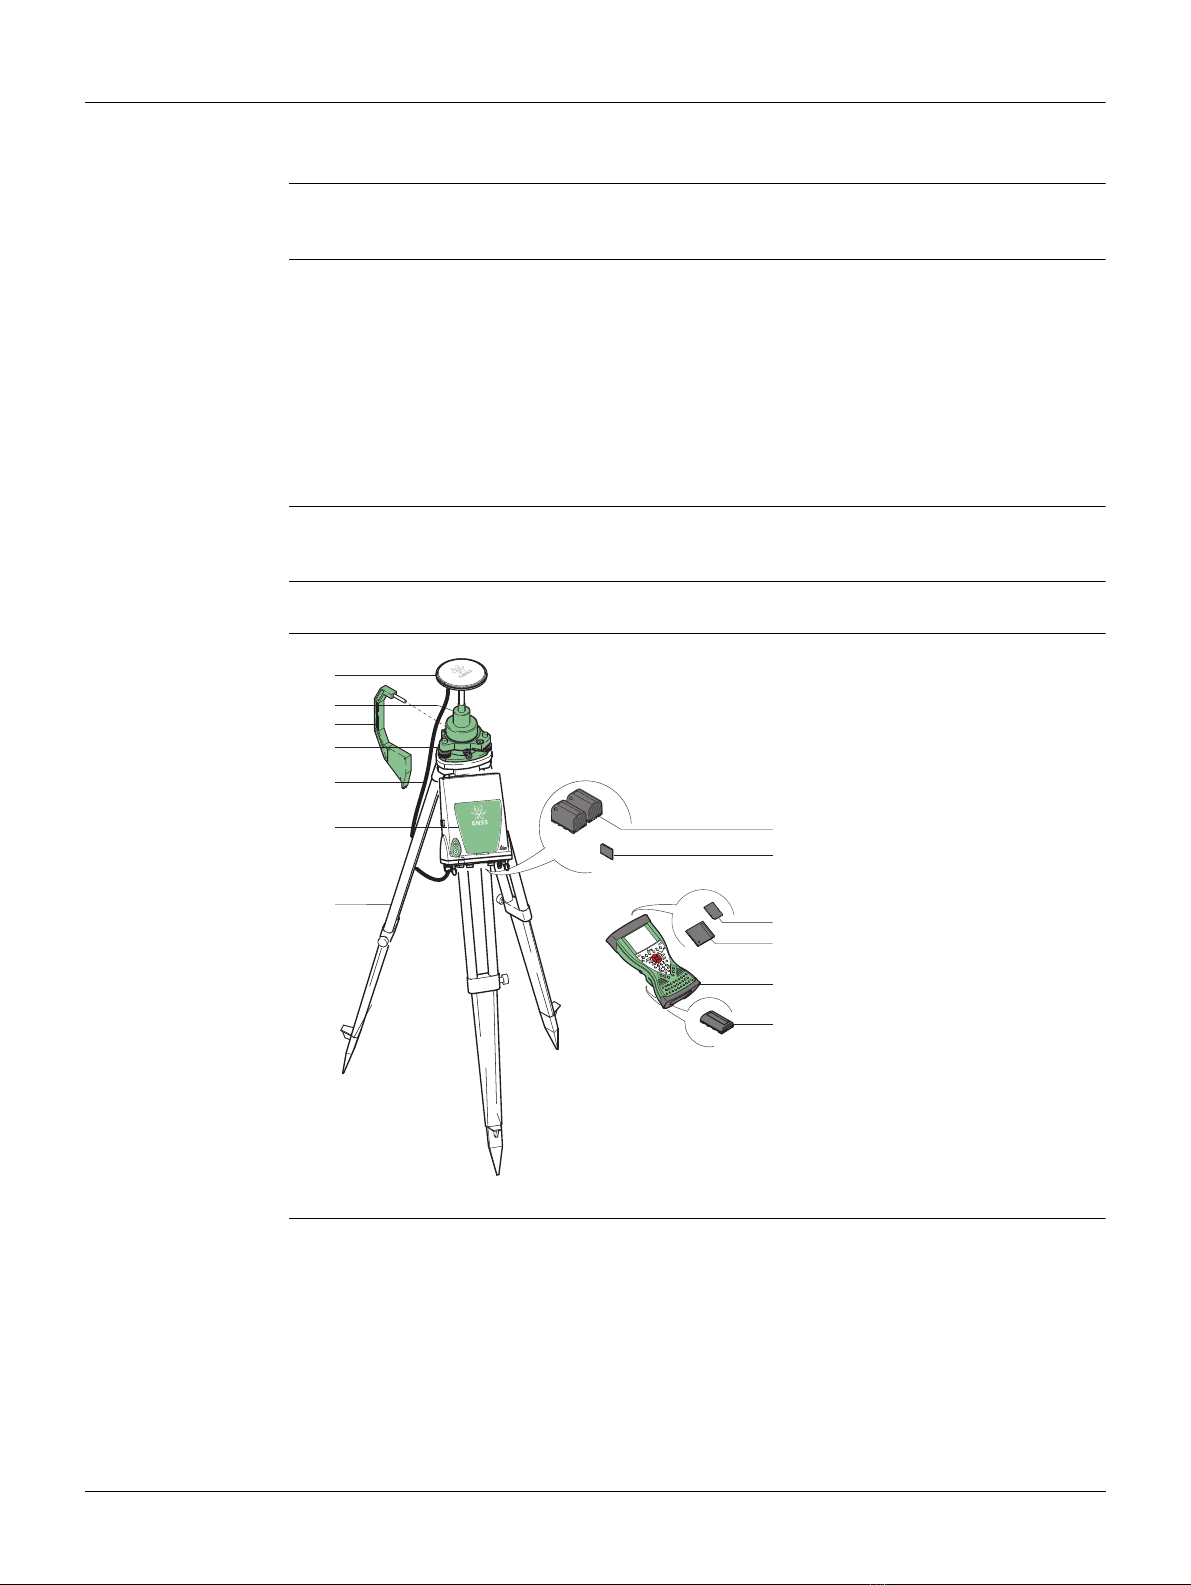
Topic Refer to
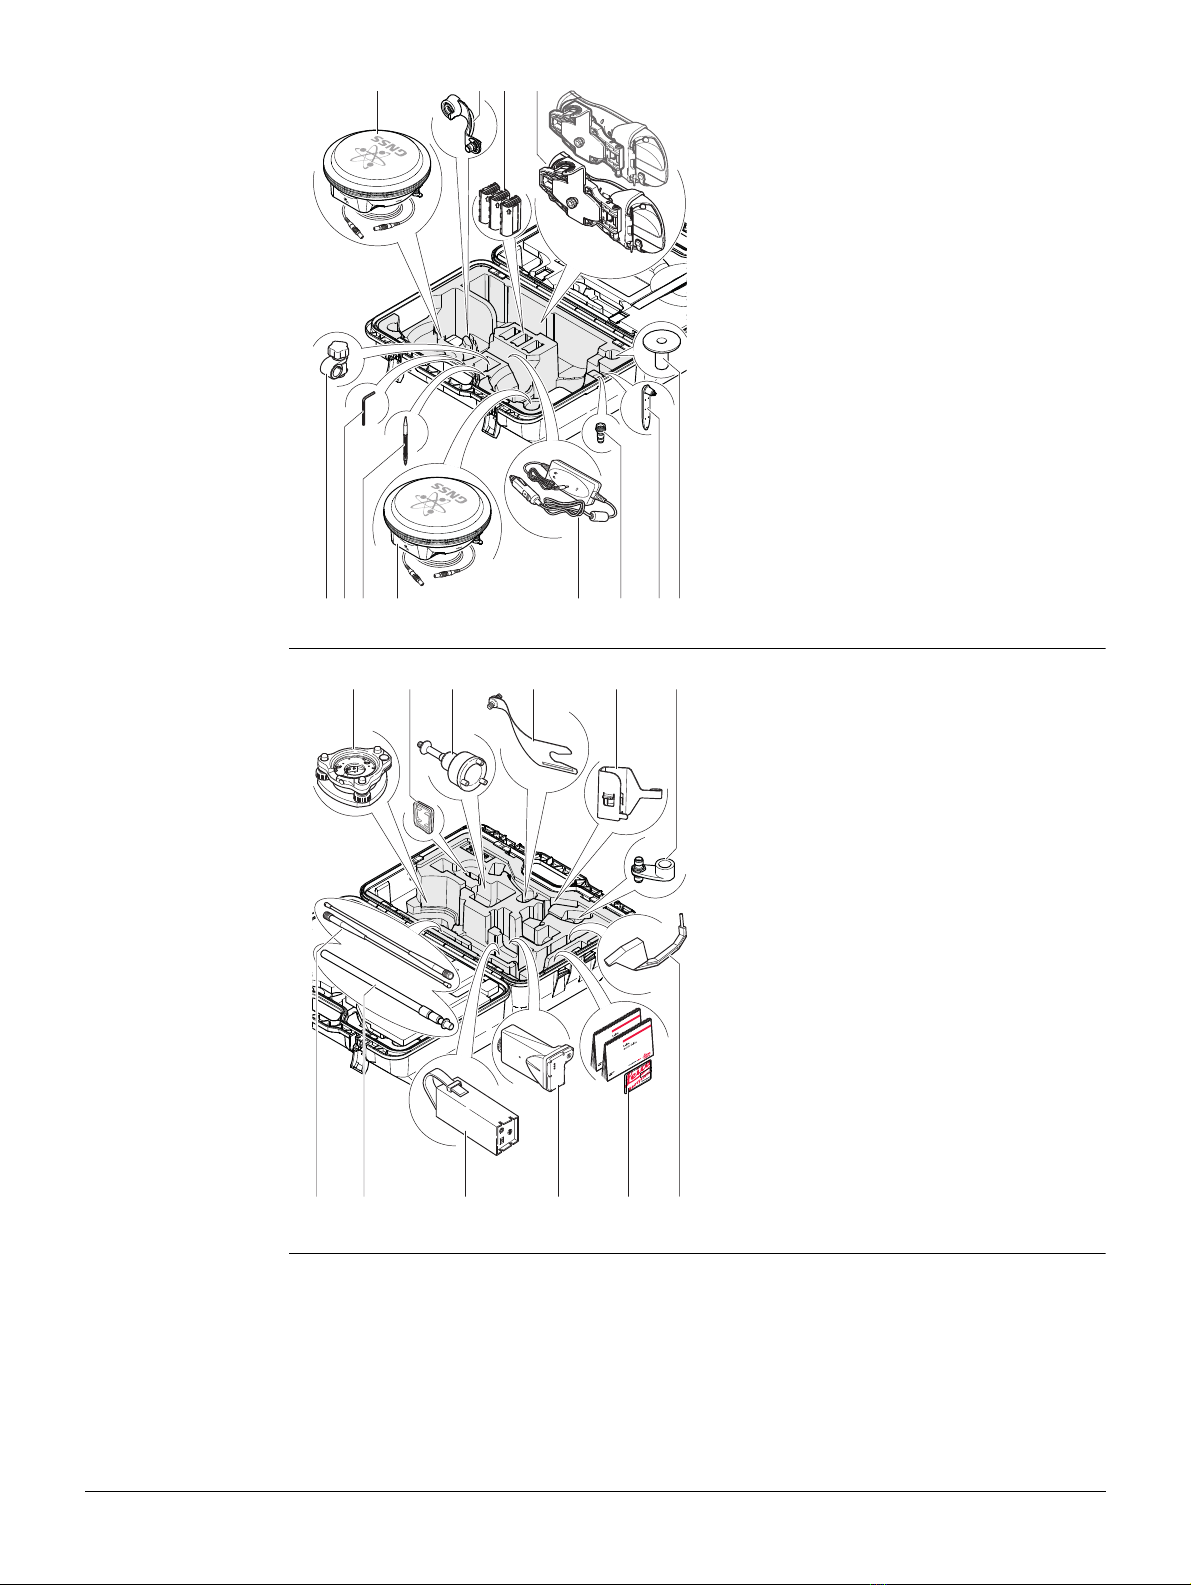
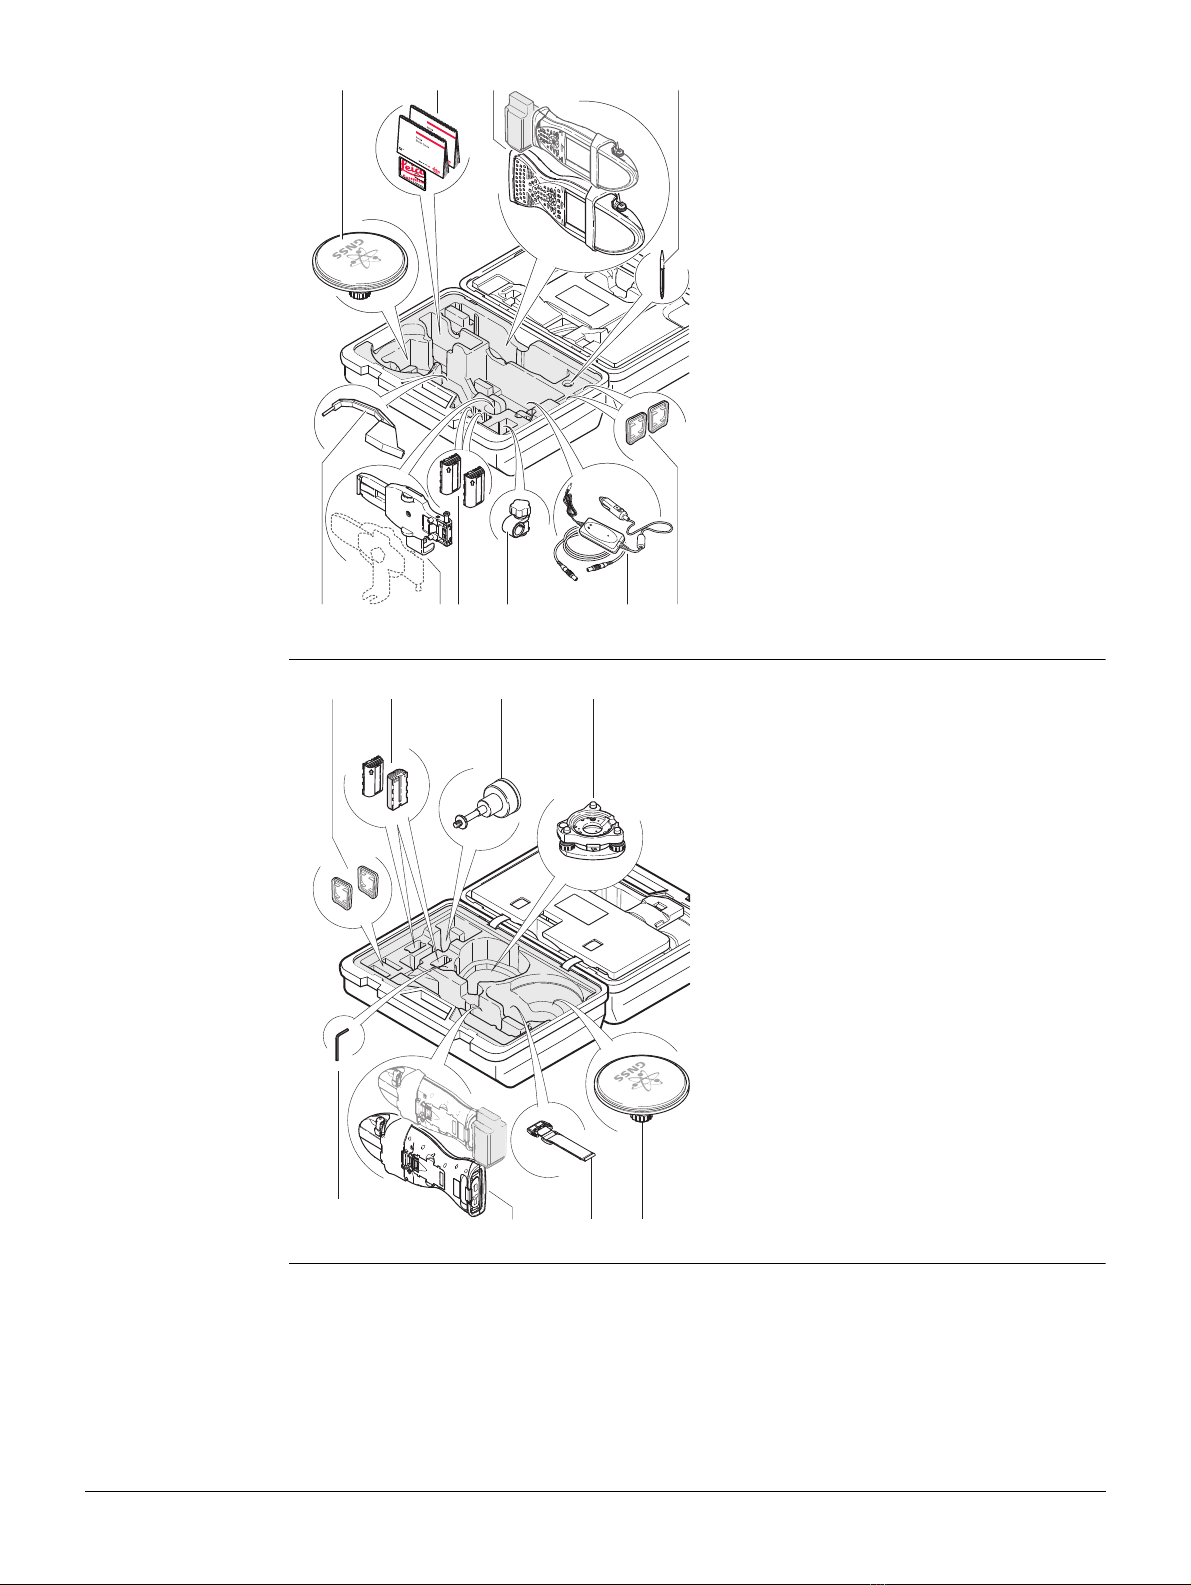
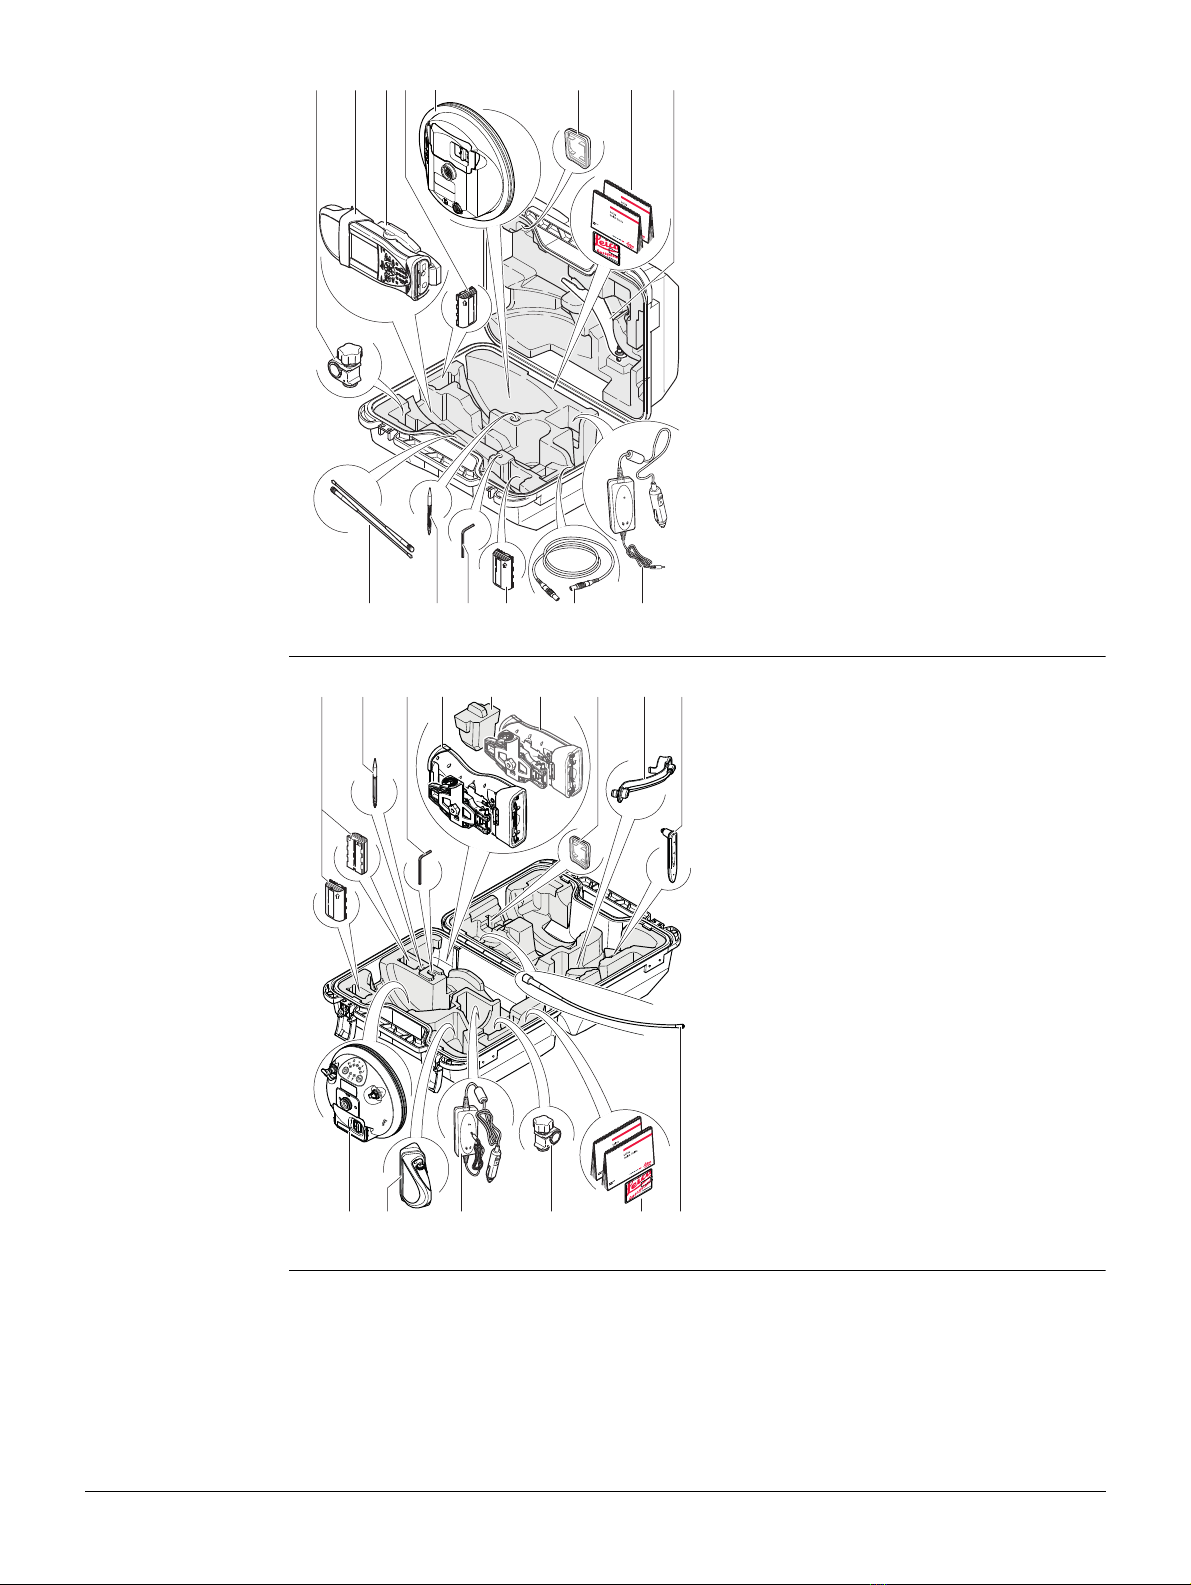
What’s in my container? Chapter 1.1
How does the equipment all fit together? Chapter 1.2
What is this first screen I see when I turn on my instrument? Chapter 2.1
How do I get to the Main Menu? Chapter 2.1
How do I select things and move around the screens? Chapter 2.2
What are wizards? Chapter 2.2
How do I get started with jobs and codelists? Chapter 3
How to use the applications? Chapter 4
Service Description
myProducts Simply add all Leica Geosystems products that you and your
company own. View detailed information on your products, buy
additional options or Customer Care Packages (CCPs), update your
products with the latest software and keep up-to-date with the
latest documentation.
myService View the service history of your products in Leica Geosystems
Service Centers and detailed information on the services performed
on your products. For your products that are currently in Leica
Geosystems Service Centers view the current service status and the
expected end date of service.
mySupport Create new support requests for your products that will be answered
by your local Leica Geosystems Support Team. View the complete
history of your Support and view detailed information on each
request in case you want to refer to previous support requests.
myTraining Enhance your product knowledge with the Leica Geosystems Campus
- Information, Knowledge, Training. Study the latest online training
material or download training material on your products. Keep up-
to-date with the latest News on your products and register for Semi-
nars or Courses in your country.