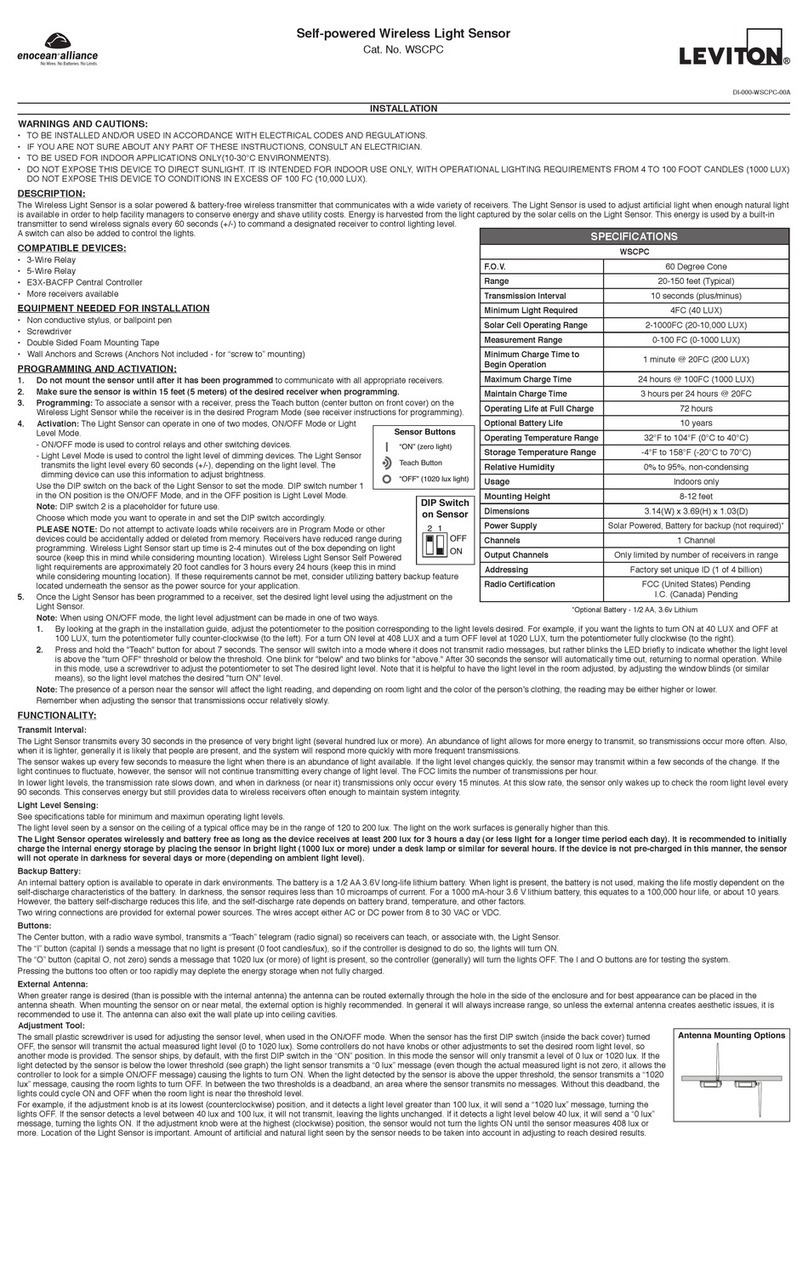
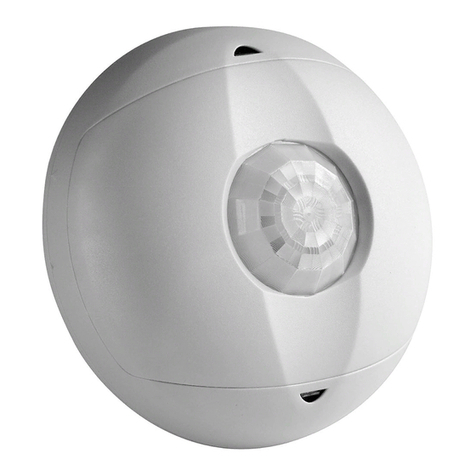
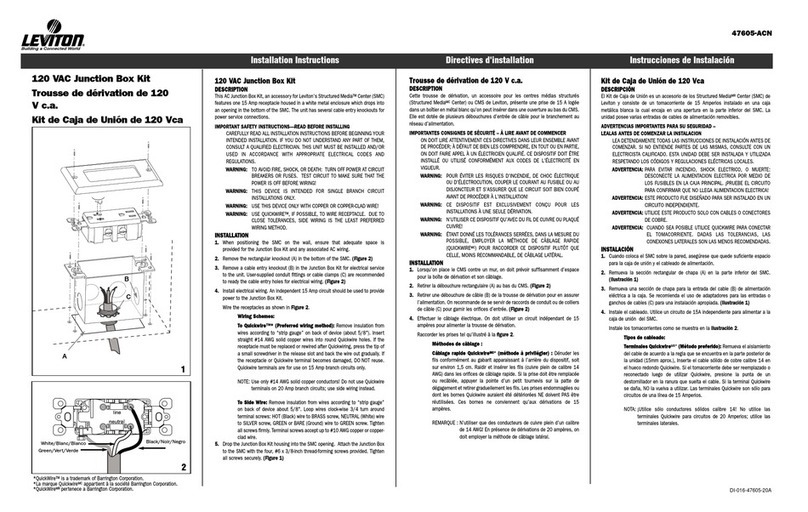
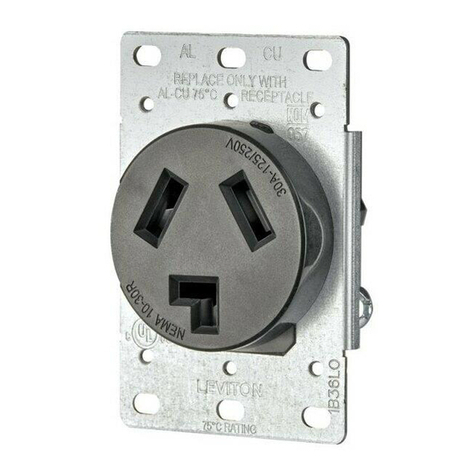
manuals.online logo
Brands
  1. Home
  2. •
  3. Brands
  4. •
  5. Leviton
  6. •
  7. Accessories
  8. •
  9. Leviton 31A00-8 User manual

Leviton 31A00-8 User manual

EXTENDED RANGE
TEMPERATURE AND HUMIDITY SENSOR
Cat. No. 31A00-8
Installation Instructions
ENGLISH
DI-021-EM318-00A
FIGURE 1 – MODEL 31A00-8 CONNECTIONS
DESCRIPTION
The Model 31A00-8 Extended Range Temperature and Humidity Sensor is used for sensing temperatures from -40
o
F - 120
o
F when connected to an Leviton Home Control System with
Firmware Version 2.8 or higher. It can also be used for reporting the relative humidity from 0 to 100 percent. The Model 31A00-8 features a new, high accuracy temperature sensor.
The temperature can be used to activate programs for controlling temperatures in attics, garages, greenhouses, basements, wine cellars, coolers, and freezers. The temperature
can be displayed on the console or touchscreen, or spoken over the telephone. It can also report, log, alert, or generate an alarm if the temperature reaches freeze conditions or if
the temperature goes above the high setpoint or drops below the low setpoint programmed in the system.
High and low humidity limits can be set for taking action (i.e. turning on the bathroom vent fan, running a/c in de-humidication mode, turning on humidier in heating mode, etc.)
or reporting high or low humidity conditions in homes, greenhouses, wine cellars, coolers, humidors, etc. Controlling humidity is particularly helpful in combating the growth of
mold in vulnerable areas of the home, such as bathrooms, basements, attics, etc.
When used outdoors, the Model 31A00-8 should be mounted under an overhang to protect it from direct sunlight and rain. It is coated with a sealant to withstand outdoor
moisture. The outdoor temperature and/or humidity can be displayed on the console or touchscreen, or spoken over the telephone. Furthermore, the outdoor temperature can be
displayed on a Leviton communicating thermostat. Automation programs, macros, and indoor appliances can be controlled based on the outdoor temperature and/or humidity.
INSTALLATION
1. Each Model 31A00-8 requires one zone input on the Leviton controller or Expander Module for temperature. The Model 31A00-8 can not be connected to a zone on an
Expansion Enclosure (i.e. Model 17A00) for temperature. It also requires one zone input for humidity. Run a 4-conductor wire from the controller location to each Model 31A00-
8. The humidity sensor can be used without using the temperature sensor.
2. Mount the Model 31A00-8 using the supplied wall anchors, screws, and mounting bracket (if desired). For optimal temperature and humidity readings, mount it vertically so
that the white arrow (silk-screened onto the board) points upward as shown in FIGURE 1. The plastic enclosure must be mounted so that the airow slots are at the top and
bottom. Connect to controller as shown in FIGURE 1.
3. Program the zone type for the temperature output (T) as an "Extended Range" device: ER Outdoor Temperature (Type 85), ER Temperature (Type 86), or Temperature Alarm
(Type 87) based on the application.
4. Program the zone type for the humidity output (H) as Humidity (Type 84).
CALIBRATION
The temperature sensor in the Model 31A00-8 is shipped from the factory adjusted to its optimal setting. If however, the temperature reading seems to differ from the ambient
temperature, you may adjust the output of the Model 31A00-8 to compensate for the difference. The current temperature output may be raised between 1o F and 4o F or lowered
between 1o F and 5o F.
To make an adjustment, use the rotary switch labeled "Temp Adjust". Place a small screwdriver in the slot on the rotary switch and turn it to the appropriate setting 0-9.
By default, the rotary switch is set to "0" which means no change. A setting from 1-4 will adjust the current temperature by +1o F through +4o F, respectively. A setting from 5-9 will
adjust the current temperature by -5o F through -1o F, respectively.
SPECIFICATIONS
Dimensions: 2.75W x 2.75H x 1D
Temperature Range: -40o F - 120o F
Humidity Range: 0% - 100% relative humidity
Current Consumption: 15mA maximum
WARNINGS AND CAUTIONS
• Read and understand all instructions. Follow all warnings and instructions marked on the product.
• Do not use this product near water - e.g., near a tub, wash basin, kitchen sink or laundry tub, in a
wet basement, or near a swimming pool.
• Never push objects of any kind into this product through openings, as they may touch dangerous
voltages.
• SAVE THESE INSTRUCTIONS.
WARNINGS AND CAUTIONS
• Never install communications wiring or components during a lightning storm.
• Never install communications components in wet locations unless the
components are designed specically for use in wet locations.
• Never touch uninsulated wires or terminals unless the wiring has been
disconnected at the network interface.
• Use caution when installing or modifying communications wiring or
components.
(31I00-8)
RED
BLACK YELLOW
GREEN
YELLOW
BLACK
RED
GREEN
GND TH
12V
+4-5
-4
1
2
3
4
-2
9
0
6
7
8
-3
5
-1 0
+2
+3
+1
TEMP ADJUST
INSTALLATION
WEB VERSION
For Technical Assistance Call: 800-824-3005 - www.leviton.com
© 2013 Leviton Mfg. Co., Inc.
FOR CANADA ONLY
For warranty information and/or product returns, residents of Canada should contact Leviton in writing at Leviton Manufacturing of Canada Ltd to the attention of the Quality
Assurance Department, 165 Hymus Blvd, Pointe-Claire (Quebec), Canada H9R 1E9 or by telephone at 1 800 405-5320.
DI-021-EM318-00A
FCC Compliance
This equipment has been tested and found to comply with the limits for a Class B digital device, pursuant to part 15 of the FCC Rules. These limits are designed to provide
reasonable protection against harmful interference in a residential installation. This equipment generates, uses and can radiate radio frequency energy and, if not installed
and used in accordance with the instructions, may cause harmful interference to radio communications. However, there is no guarantee that interference will not occur in a
particular installation. If this equipment does cause harmful interference to radio or television reception, which can be determined by turning the equipment off and on, the user is
encouraged to try to correct the interference by one or more of the following measures:
• Reorient or relocate the receiving antenna.
• Increase the separation between the equipment and receiver.
• Connect the equipment into an outlet on a circuit different from that to which the receiver is connected.
• Consult the dealer or an experienced radio/TV technician for help.
LEVITON LIMITED WARRANTY
Leviton warrants to the original consumer purchaser and not for the benet of anyone else that products manufactured by Leviton under the Leviton brand name (“Product”) will be free from
defects in material and workmanship for the time periods indicated below, whichever is shorter: • OmniPro II and Lumina Pro: three (3) years from installation or 42 months from manufacture date.
• OmniLT, Omni IIe, and Lumina: two (2) years from installation or 30 months from manufacture date. • Thermostats, Accessories: two (2) years from installation or 30 months from manufacture date.
• Batteries: Rechargeable batteries in products are warranted for ninety (90) days from date of purchase. Note: Primary (non-rechargeable) batteries shipped in products are not warranted.
Products with Windows® Operating Systems: During the warranty period, Leviton will restore corrupted operating systems to factory default at no charge, provided that the product has been used as
originally intended. Installation of non-Leviton software or modication of the operating system voids this warranty. Leviton’s obligation under this Limited Warranty is limited to the repair or replacement,
at Leviton’s option, of Product that fails due to defect in material or workmanship. Leviton reserves the right to replace product under this Limited Warranty with new or remanufactured product.
Leviton will not be responsible for labor costs of removal or reinstallation of Product. The repaired or replaced product is then warranted under the terms of this Limited Warranty for the remainder of
the Limited Warranty time period or ninety (90) days, whichever is longer. This Limited Warranty does not cover PC-based software products. Leviton is not responsible for conditions or applications
beyond Leviton’s control. Leviton is not responsible for issues related to improper installation, including failure to follow written Installation and operation instructions, normal wear and
tear, catastrophe, fault or negligence of the user or other problems external to the Product. To view complete warranty and instructions for returning product, please visit us at www.leviton.com.
COPYRIGHT AND TRADEMARK INFORMATION
This document and all its contents herein are subject to and protected by international copyright and other intellectual property rights and are the property of Leviton
Manufacturing Co., Inc, its subsidiaries, afliates and/or licensors. © 2013 Leviton Manufacturing Co., Inc. All rights reserved.
Use herein of third party trademarks, service marks, trade names, brand names and/or product names are for informational purposes only, are/may be the trademarks of their
respective owners; such use is not meant to imply afliation, sponsorship, or endorsement.
No part of this document may be reproduced, transmitted or transcribed without the express written permission of Leviton Manufacturing Co., Inc.
WEB VERSION

Other Leviton Accessories manuals

Leviton QuickPlate 5EA20-1 User manual

Leviton

Leviton QuickPlate 5EA20-1 User manual

Leviton D4200 User manual

Leviton

Leviton D4200 User manual

Leviton 47605-ACN User manual

Leviton

Leviton 47605-ACN User manual

Leviton OSC10-M0W User manual

Leviton

Leviton OSC10-M0W User manual

Leviton ODS15-GDW User manual

Leviton

Leviton ODS15-GDW User manual

Leviton ODSOD-ID Owner's manual

Leviton

Leviton ODSOD-ID Owner's manual

Leviton ODS10-ID Series User manual

Leviton

Leviton ODS10-ID Series User manual

Leviton ODS0D-ID-TD Operation manual

Leviton

Leviton ODS0D-ID-TD Operation manual

Leviton 5206-S00 User manual

Leviton

Leviton 5206-S00 User manual

Leviton ZW15R User manual

Leviton

Leviton ZW15R User manual

Leviton IPP0R User manual

Leviton

Leviton IPP0R User manual

Leviton Intellect ZL00J-T02 User manual

Leviton

Leviton Intellect ZL00J-T02 User manual

Leviton OSC04-R Series User manual

Leviton

Leviton OSC04-R Series User manual

Leviton OSW12-M0W User manual

Leviton

Leviton OSW12-M0W User manual

Leviton 47606-BNP User manual

Leviton

Leviton 47606-BNP User manual

Leviton OSFHS-IxW User manual

Leviton

Leviton OSFHS-IxW User manual

Leviton Decora ODSIO-ID Series User manual

Leviton

Leviton Decora ODSIO-ID Series User manual

Leviton OMNISTAT2 Mounting instructions

Leviton

Leviton OMNISTAT2 Mounting instructions

Leviton 8200 User manual

Leviton

Leviton 8200 User manual

Leviton Decora ODS15-IDx User manual

Leviton

Leviton Decora ODS15-IDx User manual

Leviton 241R User manual

Leviton

Leviton 241R User manual

Leviton 1x6 Passive Audio Module User manual

Leviton

Leviton 1x6 Passive Audio Module User manual

Leviton Decora DI-N0X-ODS15-00A User manual

Leviton

Leviton Decora DI-N0X-ODS15-00A User manual

Leviton OSC05-R User manual

Leviton

Leviton OSC05-R User manual

Popular Accessories manuals by other brands

Quincy lab 140AE-1 operating manual

Quincy lab

Quincy lab 140AE-1 operating manual

HomePro ZIR000 user manual

HomePro

HomePro ZIR000 user manual

DOL 20SCR Technical user guide

DOL

DOL 20SCR Technical user guide

RAB Smart Task installation manual

RAB

RAB Smart Task installation manual

Kemppi KMS 300 quick guide

Kemppi

Kemppi KMS 300 quick guide

Stearns 57,500 Series Installation and service instructions

Stearns

Stearns 57,500 Series Installation and service instructions

iGuzzini TWILIGHT COPENAGHEN manual

iGuzzini

iGuzzini TWILIGHT COPENAGHEN manual

Adelaide Annexe & Canvas Avan Deluxe installation guide

Adelaide Annexe & Canvas

Adelaide Annexe & Canvas Avan Deluxe installation guide

OHAUS 5000 instruction manual

OHAUS

OHAUS 5000 instruction manual

HOME8 WLS1300 quick start guide

HOME8

HOME8 WLS1300 quick start guide

MAXBOTIX MaxSonar quick start guide

MAXBOTIX

MAXBOTIX MaxSonar quick start guide

ioSmart iSmart56 Installation and user guide

ioSmart

ioSmart iSmart56 Installation and user guide

Focusrite Scarlett 18i8 user guide

Focusrite

Focusrite Scarlett 18i8 user guide

Velleman ED38105 user manual

Velleman

Velleman ED38105 user manual

JumpSport SkyBounce user manual

JumpSport

JumpSport SkyBounce user manual

Prima-Temp PRIYA Instructions for use

Prima-Temp

Prima-Temp PRIYA Instructions for use

Tefcold BC85I-BC85I W user manual

Tefcold

Tefcold BC85I-BC85I W user manual

Vaisala WMS302 user guide

Vaisala

Vaisala WMS302 user guide

manuals.online logo
manuals.online logoBrands
  • About & Mission
  • Contact us
  • Privacy Policy
  • Terms and Conditions

Copyright 2025 Manuals.Online. All Rights Reserved.