LG-Nortel iPecs LIP-8012D User manual

LIP-8012D &
8024D
User Guide

Revision History
Issue Date Remark
1 Au 8 Initial Releas
Disposal of your old appliance
-out
symbol is
2. A
ed of
l
The our
elp
4. F
d
e,
ice
g. 0 e
1. When the crossed
wheeled bin
attached to a product,
it means the product is
covered by the
European Directive
2002/96/EC.
ll electrical and
electronic products
should be dispos
separately from the
municipal waste stream
via designated
collection facilities
appointed by
government or the loca
authorities.
correct disposal of y
old appliance will h
prevent potential
negative consequences
for the environment
and human health.
or more detailed
information about
disposal of your ol
appliance, please
contact your city offic
waste disposal serv
or the shop where you
Copyright© 2008 LG-Nortel Co. Ltd. All Rights Reserved
This material is copyrighted by LG-Nortel Co. Ltd. Any unauthorized reproductions,
use or disclosure of this material, or any part thereof, is strictly prohibited and is a
violation of Copyright Laws. LG-Nortel reserves the right to make changes in
specifications at any time without notice. The information furnished by LG-Nortel in
this material is believed to be accurate and reliable, but is not warranted to be true
in all cases. LG-Nortel and iPECS are trademarks of LG-Nortel Co. Ltd. All other
brand and product names are trademarks or registered trademarks of their
respective companies.

purchased the product.

Important Safety Information
To prevent unexpected danger or damage please read this information before
installing or attempting to repair you phone. Warning and Caution information is
provided to alert the consumer of known dangers:
Warning: To reduce the possibility of electric shock, do not expose your
phone to high humidity areas, such as a bathroom, swimming area, etc.
Caution: Use only LG-Nortel approved batteries and desktop chargers to
avoid the damage to the phone. Using other batteries or chargers voids
your warranty and may cause an explosion.
1. Only trained
personnel shall inst ice
the phone.
2. Do not spill liquid
phone. If so, call th
this may result i
3. If you see smoke
during use, unplug
the phone line. Call
immediately.
4. If the power adapter is used, do not
touch the plug
result in a fire or an
equipment damage
6. Do not use the p
thunderstorm. Ligh
result in fire, severe
acoustic shock.
7. Do not use th
power cord or wall
This may result in f
shock.
1. Ensure that c
phone cords. This m
result in equipment
2. The ear-piece ho
device which may a
metal objects. Keep lear of
such objects an
3. Avoid placing the
that is excessively d
subject to vibration
4. Choose a site for is
well-ventilated and
5. Do not plug mult o
one power outlet. T e
plug overheatin fire
or plug pack failure
6. Do not put heavy
phone.
7. Do not drop or th
8. Static electri
damage electronic c
9. Keep out of direc
from heat.
10. No user-service
not insert a screwd
objects into the pho e
electric shock or da nt
and will render the
11. Clean the phon
cloth only. Do not u le liquids
such as petrol,
this may cause a fir
discoloration or
not clean with wax ducts as
these may ente
cause operation to le.
and qualified service
all, replace or serv
life water on the
e service center as
n fire or electric shock.
or smell something
the power cord and
the service center
with wet hands. This may
electric shock or
.
hone during a
tning strike may
electrical or
e power adapter if the
outlet is damaged.
ire or an electric
hildren do not pull on
ay injure children or
damage.
uses a magnetic
ttract pins or small
headset c
d check before use.
phone in an area
usty, damp or
.
the phone that
dry.
iple plug-packs int
his may result in th
g and may result in a
.
things on the
row the phone.
city discharge will
omponents.
t sunlight and away
able parts inside. Do
river or any metal
ne. This may caus
mage the equipme
warranty void.
e with a soft, dry
se volati
alcohol, or acetone as
e or result in
damage to plastics. Do
or silicon pro
r the equipment and
become unstab

LIP-8012D & LIP-8024D User Guide Issue 1
i August, 2008
TABLE OF CONTENTS
1. INTRODUCTION...............................................................
1.1 General..................................................................
1.2 Feature Information ...................................................
1.3 Feature Groupings ....................................................
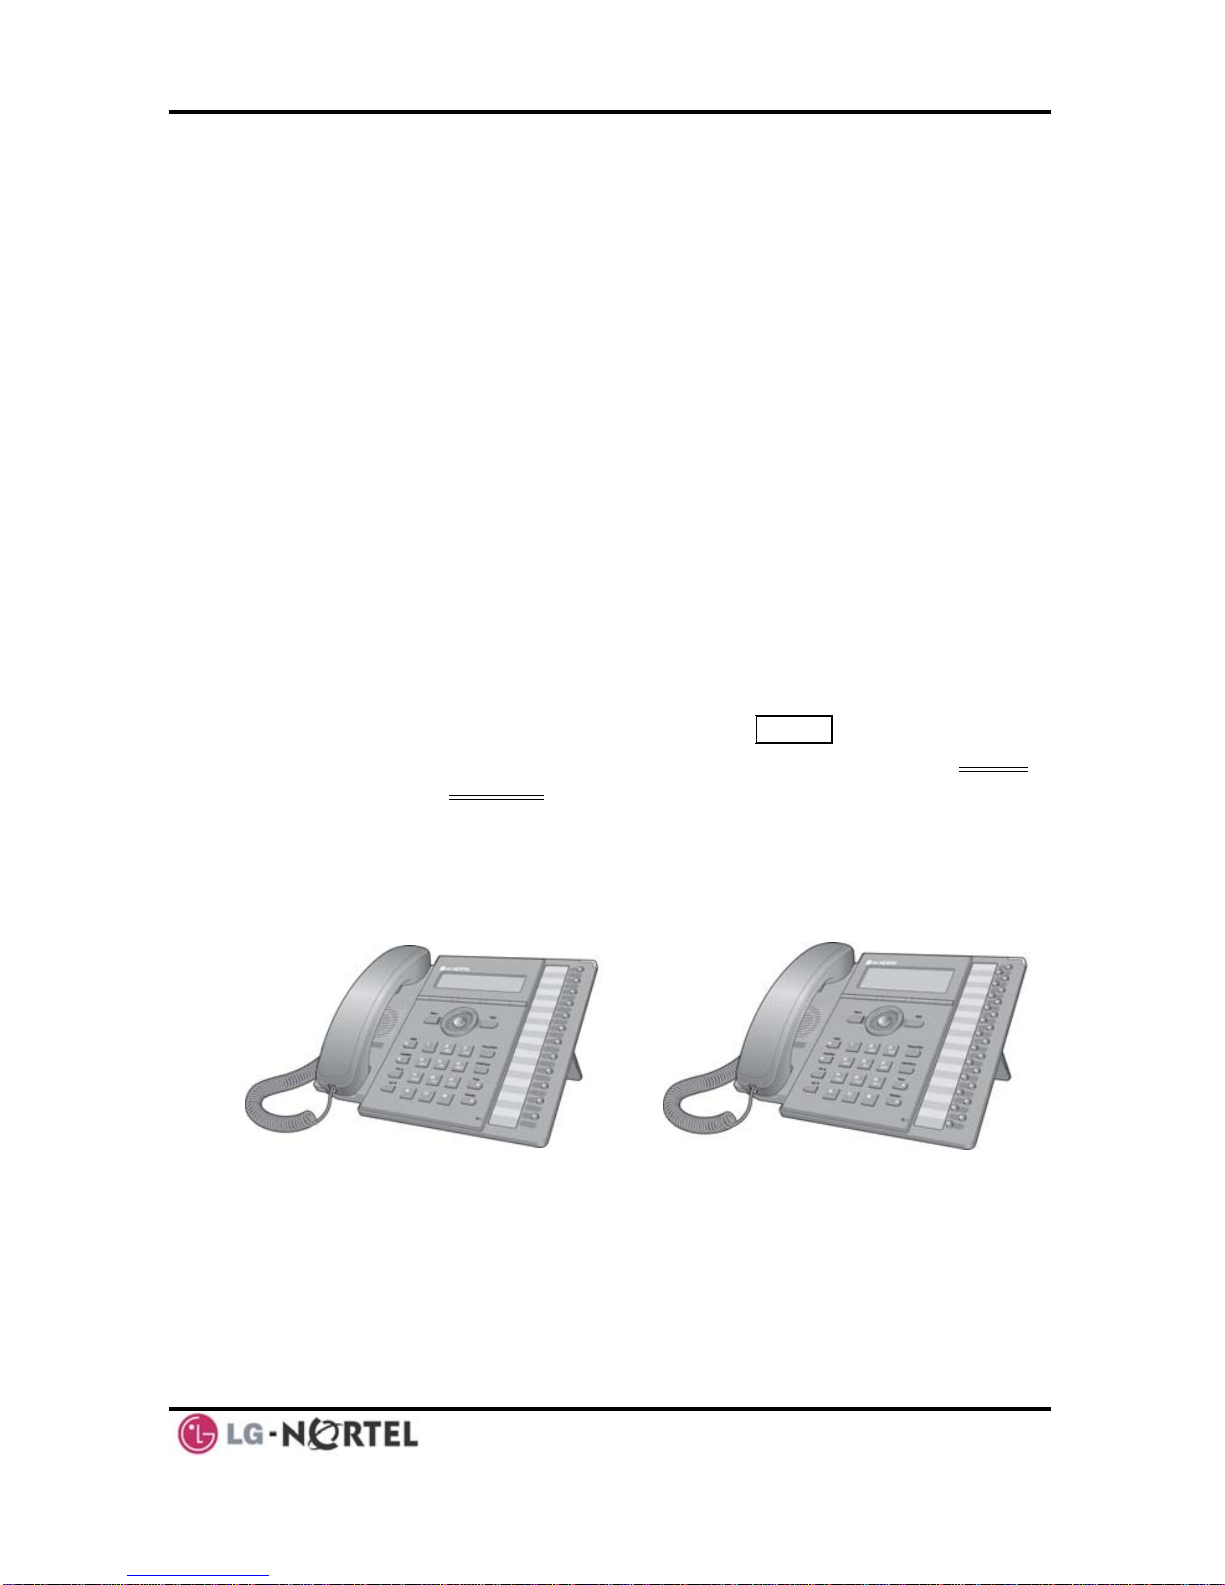
1.4 iPECS LIP-8012D & 8024D Phone Description .............................................
1.5 LIP-8012D & 8024D Phone Installation .......................................................3
1.5.1 Phone Connections .........................................
1.5.2 Wiring Connectors ......................................................................
1.5.3 Power..........................................................
1.5.4 Wall Mount....................................................
2. LCD, SPEAKERPHONE &RELATED FEATURES ...............
2.1 Using the Display Menu ..............................................
2.1.1 Phone Setting ...........................................................................6
2.1.2 Conference Room ......................................................................8
2.1.3 ICM SMS.................................................................................8
2.1.4 Network Config. .........................................................................9
2.1.5 Attendant menu ..............................................
2.2 Using the Speakerphone ............................................. 0
2.3 Using a Bluetooth Wireless Headset (LIP-8024D only) .................................. 11
2.4 Using a Serial DSS.............................................................................13
3. RECEIVING CALLS .....................................................................................15
3.1 Answering a Call While Idle................................................................... 15
3.2 Responding to a Call While Busy ............................................................16
3.3 Using Answering Machine Emulation (AME)............................................... 16
3.4 Differential Ring Signals .......................................................................17
3.5 Answering Calls at Night ......................................................................18
3.6 Answering Calls to Other Stations ........................................................... 18
3.7 Using Do-Not-Disturb (DND) to Block Incoming Calls .................................... 19
3.8 Forwarding Calls................................................................................ 19
3.8.1 Forwarding calls to another Station or Voice Mail ............................... 19
3.8.2 Forwarding calls to an external number........................................... 21
3.8.3 Forwarding callers to a Text Message ............................................ 22
4. PLACING A CALL .......................................................................................25
4.1 Internal Calls .................................................................................... 25
.............................1
...........................1
...........................1
...........................1
2
...........................3
4
...........................4
...........................5
.............................6
...........................6
...........................9
.........................1

LIP-8012D & LIP-8024D User Guide Issue 1
ii August, 2008
4.1.1 Using Camp-On when calling a busy station..................................... 25
4.1.2 Leaving a Message Wait ............................................................26
...................................................................................26
CO/VoIP calls..................................................... 26
4.2.2 Waiting for the next available CO/IP line.......................................... 28
5.2
5.3
5.4
5.5
6.
7.
8.
8.4
8.5
8.6
4.2 External Calls
4.2.1 Placing external
4.2.3 Account Codes: Tracking External calls for billing .............................. 28
4.2.4 Disable dialing from your phone.................................................... 28
4.2.5 Temporarily override dialing restrictions at a phone ............................ 29
4.3 Using Directory.................................................................................. 29
4.3.1 Using Last Number Redial (LNR) .................................................. 29
4.3.2 Using and Entering Saved Number Dial ..........................................30
4.3.3 Using System Speed Dial Numbers ...............................................30
4.3.4 Using and Entering Station Speed Dial Numbers ............................... 30
4.3.5 Using Dial by Name and Entering Your Name ................................... 32
4.3.6 Using Automatic Called Number Redial (ACNR) ................................33
5. TRANSFER,CONFERENCE &OTHER CALL HANDLING.................................35
5.1 Call Transfer: Sending a call to a different destination ...................................35
Call Hold: Placing a call in a waiting state .................................................. 35
Broker Call: Switching between two calls...................................................36
Joining Multiple People in a Conference.................................................... 36
5.4.1 Setting up a Conference Room.....................................................37
Call Park: Placing a call on Hold to Page................................................... 38
5.6 Two-Way Record: Recording a call.......................................................... 38
SEND &RETRIEVE MESSAGES...................................................................39
6.1 Responding to a Station Message Waiting Indication ....................................39
6.2 Getting Voice Mail Messages................................................................. 40
6.3 Sending and Receiving Short Text Messages ............................................. 41
REMOTE SYSTEM ACCESS.........................................................................43
7.1 Direct Inward System Access (DISA) .......................................................43
7.2 Mobile Phone Extension....................................................................... 43
.......................................................................................45MC.FEATURESIS
8.1 Call Log .......................................................................................... 45
8.2 Contrast ..........................................................................................47
8.3 Background Music and Music on Hold ...................................................... 47
Using Internal, External and Meet-Me Paging ............................................. 47
.....................................................................48Push o-Talk (PTT) Page-T
Wake-Up Alarm .................................................................................49
8.7 Alarm/Door Bell .................................................................................49
8.8 Power Fail Transfer (PFT) .................................................................... 50

LIP-8012D & LIP-8024D User Guide Issue 1
iii August, 2008
8.9
8.10
9.
9.1
9.2
10.
10.1
10.2
APPEND
APPEND
System Voice Memo ........................................................................... 50
Hot Desk .........................................................................................51
PBX, CENTREX &ISDN FEATURES ...........................................................53
Access PBX or Centrex features............................................................. 53
Access the ISDN Network..................................................................... 53
9.2.1 Using the Keypad facility to access ISDN features.............................. 53
9.2.2 Using ISDN Supplementary Services ............................................. 54
9.2.3 Activating ISDN Caller ID Restriction..............................................54
FEATURES &FLEX .....................................................................55BUTTONS
Entering Station Program Data............................................................... 55
Assigning Features to Flex Buttons .........................................................55
IX AFLEXIBLE NUMBERING PLAN .......................................................56
IX BUSER PROGRAM CODES..............................................................59

LIP-8012D & LIP-8024D User Guide Issue 1
1 August, 2008
1.INTRODUCTION
1.1 General
Your telephone is connected to an advanced-
technology, highly-versatile, fully-featured telecom
system designed to make office communications easy
and productive. Employing state-of-the-art Voice over
Internet Protocol (VoIP) technology, voice and data
converge on a single IP packet network. Because each
iPECS Phone is an IP appliance, it can be moved easily
throughout the office LAN and maintain normal
operation.
1.2 Feature Information
We have taken every effort to make this user guide
simple and straightforward. The guide starts with the
simpler operations of the iPECS Phone Speakerphone,
moves on to receiving and placing calls, and then to
more advanced features. Each section includes a brief
and basic description of each feature and step-by-step
operation instructions.
The operations shown in this guide use the System’s
base default Numbering Plan. Your specific Numbering
Plan may be different. Some features may not be
available for you to access or may be subject to certain
limitations based on the set-up of the System.
Under certain operating conditions, this equipment may
not be able to make emergency calls. Alternative
arrangements should be made for access to emergency
services.
1.3 Feature Groupings
Every effort has been taken to divide the features into a
logical and consistent sequence so that features can be
quickly located.
Features have been divided into groups, Receiving
Calls, Placing Calls etc. Within each group, features are
1. Introduction

LIP-8012D & LIP-8024D User Guide Issue 1
2 August, 2008
arranged according to the difficulty of operation and
frequency of use.
1.4 iPECS LIP-8012D
n button in the lower center of the Phone
u to move through the menu choices when
n three selections are available.
& 8024D Phone Description
The iPECS LIP-8012D and LIP-8024D Phones (shown)
incorporate the latest in VoIP technology and user
interface to provide you with a cost effective, simple to
use, productive communications tool. It includes a large
3-line (LIP-8012D) or 4-line (LIP-8024D) 24-character
per line LCD (refer to Phone Diagrams, next page). The
bottom line of the display is an interactive menu
accessed with the 3 Soft buttons just below the display.
he NavigatioT
allows yo
more tha
Features and functions of your iPECS are accessed
either using the Fixed or Flexible buttons or by selecting
a menu item using the Soft buttons. In the remainder of
this User Guide, the Fixed or Flexible buttons are shown
with a box surrounding the BUTTON designation while
Soft button menu selections are shown with a double
underline.
iPECS LIP-80
The LCD display screens shown in this User Guide are
captured from the LIP-8024D. The screen may differ
slightly in the LIP-8012D.
12D iPECS LIP-8024D

LIP-8012D & LIP-8024D User Guide Issue 1
3 August, 2008
1.5 LIP-8012D & 80
t (ex., POE8), LIP Phones and series
onsoles can derive power from the Ethernet port.
ower cord, and LAN cable to
e phone.
1.5.1 Phone Connections
The LIP-8012D and LIP-8024D each have 2 RJ-45 and
10/100 Base-T LAN connection ports (refer to following
graphic). One port is for connecting to the LAN (‘D’ in
graphic), and the other can be connected to a desktop
data device such as a PC (‘B’ in graphic), or another
LAN interface terminal (refer to iPECS Hardware and
Installation Manual).
iPECS LIP-8024D Diagram
24D Phone Installation
LIP Phones and Consoles can be connected to any
standard 10/100 Base-T Ethernet switch port (shown in
graphic). When connected to an 802.3af compliant
switch por
c
When LAN power is not available, the optional AC/DC
adaptor must be used. The following image shows how
to connect the handset, p
th

LIP-8012D & LIP-8024D User Guide Issue 1
4 August, 2008
(
A
)
(B)
(C)
(D)
1.5.2
he “LAN” port is connected to the
ove for the single port Phones.
1.5.3
her 802.3af compliant switch.
If using the AC/DC Adapter, after connecting the Phone
to the LAN, the Adapter’s DC voltage plug is inserted
into the power-input jack in the underside of the Phone.
One end of the AC power cord is inserted into the
mating receptacle of the AC Adapter, and the other end
is inserted into the AC power outlet.
iPECS LIP-8012D & 8024D Connections
Wiring Connectors
The LIP-8012D & LIP-8024D each have two (2) 10/100
Base-T Ethernet ports, a “LAN” port and a “PC” port. An
intelligent switch, which implements voice packet priority,
connects the two (2) ports. This permits the LAN to be
shared between the LIP Phone and the desktop PC or
other Ethernet terminal without significant affect on the
voice or data traffic. T
LAN as described ab
The “PC” port is connected to a desktop device using
any standard straight through category 5 cable.
Power
All LIP-8000 series phones can be powered by the
AC/DC Adapter-K- (48 VDC @0.3A) or over the LAN
cable using the POE8 or ot

LIP-8012D & LIP-8024D User Guide Issue 1
5 August, 2008
NOTE—LIP-8000 series consoles are power
the flat
ed through
used to connect the console to the IP
phone (shown). Up to 2(without LIP-8048DSS) or 4(with
LIP-8048DSS) consoles can be chain-link connected to
the phone.DSS Connection to IP Phone
1.5.4
cable
Wall Mount
The LIP-8000 series phones can be wall mounted as
needed. The following instructions describe how to
perform a wall mount installation. For more information
on installing your LIP-8000 series phone, refer to the
iPECS Hardware Description and Installation Manual.
•Ma (2) 7mm holes for plastic wall
anchors.
•Insert the
tighten th
inch) of the screw exposed.
•Slide the
the phone
•NOTE—It
tighten or
rk and drill two
two (2) anchors into the holes and insert and
e each screw leaving about 2.5 mm (1/8-
LIP-8000 phone over the screws and assure
is secure.
may be necessary to remove the phone and
loosen the screws for a secure mounting.

LIP-8012D & LIP-8024D User Guide Issue 1
6 August, 2008
2.LCD, SPEAKERPHONE &RELATED FEATURES
2.1 Using the Display Menu
The Liquid Crystal Display (LCD) of the iPECS LIP-
2.1.1 Phone Setting
8012D has three lines, and the LIP-8024D has four lines
of 24 characters each. The LCD is used to convey
information to you. It provides the date, time and station
number on the display while idle. It will also provide
called/calling name/number display, feature status and
an interactive menu to guide you through feature access
and User Program selections:
2. LCD, Speakerphone
& Related Features
To activate the Display Menu:
•Press MENU button,
•Press the Navigation up/down buttons and press the
OK Soft button to select,
OR
•Dial the associated digit (Menu selections shown):
1. PHONE SETTIN
2. CONFERENCE OOM PGM
3. ICM SMS
BACK OK
G
R
4. NETWORK CONFIG
0. ATTENDANT
BACK OK
To
•
configure the Phone:
Press MENU button and 1 (Phone Setting),
•The following menu displays:
1. STATION NAME PROGRAM
2. ICM RING
3. CO RING
BACK OK

LIP-8012D & LIP-8024D User Guide Issue 1
7 August, 2008
4. PASSWORD
5. LA G
6. STA RI
PROGRAM
NGUA E PROGRAM
NG DOWNLOAD
BACK OK
7. BACKLIGHT
8. FONT PROGRAM
BACK OK
•Station N
the keypa kspace/delete a
character), then press the OK
ame Program—Input up to 12 digits using
d (press DND button to bac
Soft button. To input
ect ABC>
e (ex., for ‘a’, press 2 button
ex., for ‘b’, press
oacter of a button, press
e button 3 times (ex., for ‘f’, press the 3
•ICM Ring se Next
characters:
Press the second Soft button to seloor abc> mode,
oTo input the first character of a button, press
the button 1 tim
once),
oTo input the second character of a button,
press the button 2 times (
n twice.the 2 butto
To input the third char
th
button three times.
/CO Ring—U Soft button to move
through li t of ring types, and press OKsSoft button to
select.
•Passwor urrent password and
press the K
d Program—Enter the c
OSoft button, then enter the new password
and press the OK Soft but
guage Program—Uston.
•Lan e Navigation up/down buttons
to highlight available languages supported, and press
OK Soft button to select. osition (5-•Station Ring Download—Select the ring p
ss the8) and select the ring file; pre SAVE Soft button
•Backligh ect
the opera acklight, and press the OK
to select.t—Use Navigation up/down buttons to sel
tion of the b Soft
button to
Font Program— Use Navigation up/down buttons to
select the LCD Font, and press the OK
select.
•Soft button to
select.

LIP-8012D & LIP-8024D User Guide Issue 1
8 August, 2008
2.1.2 Conference Room
nference rooms.
2. 3
S messages to other stations and
To retrieve a SMS message:
•Press MENU button and 3 (ICM SMS),
•1. SEND MESSAGE
The following menu displays:
2. IN BOX(03)
BACK OK
•Press the Navigation up/down keys to highlight and
then press the OK Soft button to select,
OR
•Dial the number associated to the selection (2); the
messages will display.
To send a SMS message: ,
•
•Select Mode - select 1 if resending a previous message
or select 2 if sending a new message,
Enter the Station•range (ex., 100-105=100105),
•Enter message (if in mode 2),
Press the OK Soft button.
The User can create and delete Co
1. ICM SMS
The user can send SM
retrieve received SMS messages.
To configure a
•Press MENU button and 2 (Conference Room),
•The follo ROOM
2. DELETE CONF ROOM
wing menu displays:
1. CREATE CONF
•BACK
OK
•e OK
Press the Navigation up/down keys to highlight and
then press th Soft button to select,
OR
•Dial t e n d to the selection,
•Enter e
•Press he
h umber associate
th room number and dial the password,
t OK Soft button.
Conference Room:

LIP-8012D & LIP-8024D User Guide Issue 1
9 August, 2008
2.1.4
The User can review the current network configuration
twork configuration.
ystem
Network Config.
or modify a new phone ne
2.1.5 Attendant menu
The Attendant menu is only available on the S
Attendant phone.
To s:
•Press MENU Config),
access Network Config. setting
button and 4 (Network
•Enter the pa following will
display: MF
MFIM # ANGE[#]
ssword (default=147*); the
IM #[1/2] ?
1 - CH
•s the # key to toggle between multiple profiles
xt
Pres
(MFIM),
•Press the VOL STbuttons to advance to the ne
network configuration item,
•Press the HOLD/SAVE button to save each setting.
To set de ttings:
•In Netwo
fault Config. se
rk Config. Menu, use VOL STbuttons to
locate the Default Config. Screen (shown),
SET DEFAULT CONFIG(DOT:*)
•Press the * key.
To exit Config. settings:
•Press the SPEAKER button,
•Press the *
•Press the # e phone with new
setting.
key to exit, or
key to Reset/Reboot th
To
•the following will
access the Attendant menu:
Press MENU button and 5 (Attendant);
display: 1. DATE/TIME SET
2. SET ICM ONLY MODE
3. RESTORE COS
BACK OK

LIP-8012D & LIP-8024D User Guide Issue 1
10 August, 2008
2.2
(except
receive or
you may switch between the handset and
ng a call. By keeping the handset
p Listen feature is activated, which
going
p’ to
listen to both sides of the conversation without
terfering with the conversation.
tion using the Speakerphone, Mute
Using the Speakerphone
Activate the iPECS Speakerphone at any time
for Paging) in place of lifting the handset to
place calls.
Additionally,
Speakerphone duri
Off-hook, the Grou
provides incoming audio over the speaker with out
audio from the handset. This permits a local ‘grou
4. MONITOR CONF ROOM
ROOM5. DELETE CONF
BACK OK
•Date/Time Set—Enter mm/dd/yy, and press OK Soft
K
button; enter hh/mm, and press OSoft button.
tion Range for ICM
the OK
•Set ICM Only Mode—Dial the Sta
only calls (ex., 103-108=103108), and press
•COS—Dial the Station Range for COS
restoring (e 8), and press the OK
Soft button.
Restore x., 103-108=10310
Soft button.
•Monitor Conference Room—Enter the Conference e
Room number to view the number of attendees in th
Conference Room.
•Delete Conference Room—Enter the Conference
Room number and press the OK Soft button to delete.
in
While in a conversa
the microphone using the MUTE button. When Mute is
active, the MUTE button LED will be illuminated. To turn
off Mute, press the MUTE button again..
With Auto Speaker Select, activating or accessing a
its button will activate the
When using a Headset, the SPEAKER button controls the
feature by pressing
Speakerphone automatically.
ON/OFF-hook state for the phone.

LIP-8012D & LIP-8024D User Guide Issue 1
11 August, 2008
To use the Speak place a call:
•Press SPEAKE , the phone goes off-hook and sends
erphone to answer or
R
audio to the ophone.
To
speaker and the micr
control the volume of the Speakerphone or handset:
•Press the ▼VOLUME ▲button.
To Mu
•Ebutton.
te the microphone:
Select the MUT
To
•
turn off Mute (turn the microphone ON):
Press the MUTE button.
To all:
•
activate Group Listen while on an active handset c
Press the SPEAKER button.
2.3 Using a Bluet oth Wireless Headset (LIP-8024D only)
LIP-8024D may be equipped with a
roximately 10 meters) and maintain a
o
The iPECS
Bluetooth Unit (BTU) allowing you to use a wireless
headset that supports Bluetooth version 2.0. Using a
headset permits you to move freely around the phone
within app(
conversation. Before using the headset, the headset
must be “paired” with the BTU, and then the headset
must be enabled for use. Operation of the iPECS LIP-
8024D with the headset is the same as with the
Speakerphone; press the Speaker button to activate the
BTU to go ON and OFF-hook.
NOTE—When in pairing mode, the phone and the
Bluetooth unit should be within 1 meter proximity.
To pair the wir
•Press the eless headset to the BTU:
HEADSET button,
•Dial 3,
•Press the HOLD/SAVE button.
To enable/disable the wireless headset:
•Set the Bl etooth headset to pairing mode,
•Press the u
TRANS/PGM button,
•Dial *8,
•Dial 1 (enable),

LIP-8012D & LIP-8024D User Guide Issue 1
12 August, 2008
NOTE—When the BTU is used for a call, the Speaker
button LED will illuminate and the speaker mode
the phone handset is taken off-
ice path will directly
e Speaker
cannot be used. If
hook while in BT mode, the vo
be connected to the handset; press th
button to activate the BTU headset.
•Press the HOLD/SAVE button,
•Press the Next soft button,
Press the OK•soft button,
Enter the PIN code referring to the Blueto•oth headset
•
manual (default=0000),
Press OK Soft button.
To unpair the BTU headset:
•set to pairing mode,Set the Bluetooth head
•Press the TRANS/PGM button,
•Dial *8,
Dial 2 (disable),•
T c tion:
•Press the TRANS/PGM button,
•Press the OK soft button.
o heck BTU paired informa
•Dial *8,
•Dial 3,
•Press the OK soft button.
To use the B
•Press th
TU headset:
e SPEAKER button,
OR
•Press th
•Place ca
To answer a
•When a
present
•Press th
button,
OR
•Lift the
e Call Start button on the BTU headset,
ll as you normally would.
call with the BTU headset:
n incoming call is received, ringing will be
at the Station and the BT headset,
e BT Call Start button, or press the Speaker
handset.

LIP-8012D & LIP-8024D User Guide Issue 1
13 August, 2008
2.4 Us g
P-8012LSS, and LIP-8048DSS
ith the LIP-8012D or LIP-8024D
ial
acities with the iPECS System to
refer to iPECS Manual). The following
ont and rear view of each.
ot use a serial
in a Serial DSS
The LIP-8012DSS, LI
can be connected w
using the RS-232 cable. Be sure to verify the ser
DSS and LSS cap
ensure usability (
graphics show the fr
NOTE—A Linked Pair slave station cann
DSS.
LSS
IP-8012DSS LIP-8012LD
LIP-8048DSS
Other manuals for iPecs LIP-8012D
2
This manual suits for next models
1
Table of contents
Other LG-Nortel IP Phone manuals

LG-Nortel
LG-Nortel IP8840 User manual

LG-Nortel
LG-Nortel IP8830 User manual

LG-Nortel
LG-Nortel IP8820 User manual

LG-Nortel
LG-Nortel iPecs LIP-8012D User manual

LG-Nortel
LG-Nortel IP8820 User manual

LG-Nortel
LG-Nortel LDP-7016D User manual

LG-Nortel
LG-Nortel IP8820 User manual

LG-Nortel
LG-Nortel iPECS LIP-8040L User manual

LG-Nortel
LG-Nortel LIP-6812 User manual

LG-Nortel
LG-Nortel LIP-8012 User manual