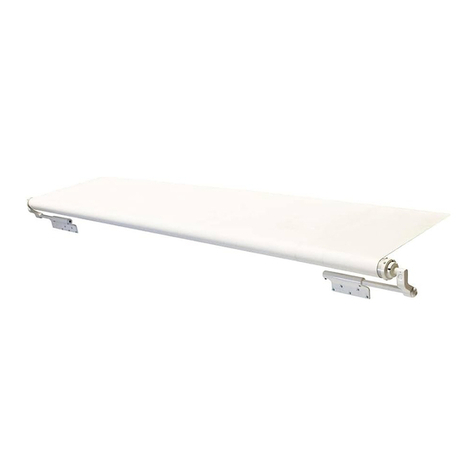
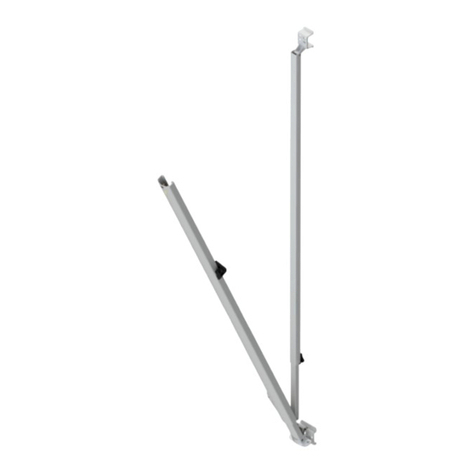
Lippert Solera Power User manual

1
lippert.com 432-LIPPERT (432-547-7378) Rev: 02.28.23
Solera®
Universal Hardware
Power Awning to
Solera 12V Power Awning
(For Aftermarket Application)
CCD-0001282
Solera®
Universal
Hardware
Power Awning to
Solera 12V Power Awning
(For Aftermarket Applications)
Table of Contents
Introduction ............................................ 2
System Information .................................... 2
Safety Information ..................................... 2
Parts List ................................................ 2
Preparation ............................................. 3
Resources Required ................................... 3
Conversion ............................................. 3
Wiring ................................................... 9
Operation ............................................. 10
Extending the Awning ............................... 10
Retracting the Awning ............................... 10
Adjusting Pitch ....................................... 10
Troubleshooting Chart ............................... 11
Troubleshooting ...................................... 12
Manual Override ..................................... 12
Maintenance .......................................... 12
Fabric Care .......................................... 12

2
lippert.com 432-LIPPERT (432-547-7378) Rev: 02.28.23
Solera®
Universal Hardware
Power Awning to
Solera 12V Power Awning
(For Aftermarket Application)
CCD-0001282
Introduction
System Information
The Solera®12V Power Awning features an internal
motor to steadily operate the awning. Additionally, the
pitch arm assembly allows for rain dump and adjustable
pitch features. The pitch arm assembly also provides
added stability.
NOTE: The Lippert Solera Universal Hardware kit for a
power to power conversion will ONLY t Dometic and
Carefree awnings.
Additional information about this product can be obtained
from lci1.com/support or by using the LippertNOW app. Re-
placement kits can be ordered from https://store.lci1.com/
or by using the LippertNOW app.
The LippertNOW app is available for free on Apple App
Store® for iPhone® and iPad® and also on Google Play™
for Android™ users.
App Store® and iPad® are registered trademarks of Apple Inc.
Google Play™ and Android™ are trademarks of Google Inc.
Safety Information
Warning, Caution and Danger symbols indicate that an
installation procedure has a safety risk involved and may cause
death, serious injury or property damage if not performed
safely and within the parameters set forth in this manual.
MOVING PARTS CAN PINCH, CRUSH OR CUT. KEEP
CLEAR AND USE CAUTION.
FAILURE TO USE THE INSTALLED SAFETY FEATURES
MAY RESULT IN DEATH, SERIOUS INJURY, DAMAGE TO
THE UNIT AND/OR VOIDING A WARRANTY.
Power awnings that contain springs use tension for ease
of operation and can be harmful to the end user should the
stored tension come unbound. Cotter pins are installed and
MUST be used to contain the tension when the system is
being serviced.
Parts List
Solera 12V Tall Arm (69”) Flat Adjustable Pitch Arms require:
• 69” of unobstructed area from the awning rail straight down.
• Minimum clearance of 4” between the awning rail and the
top of the entry door.
Universal Kit #Universal Kit # Description
434723 Solera Power 12V 69” Kit, Black
434724 Solera Power 12V 69” Kit, White

3
lippert.com 432-LIPPERT (432-547-7378) Rev: 02.28.23
Solera®
Universal Hardware
Power Awning to
Solera 12V Power Awning
(For Aftermarket Application)
CCD-0001282
Preparation
Resources Required
• Additional Qualied Assistants
• Cordless or Electric Drill or Screw Gun
• Appropriate Drive and Drill Bits
• Socket Wrench
• ⁄” Socket
• Rivet Gun
• Locking Pliers
• Chop Saw
• Cordless Battery
• Wire Stripper
• Wire Crimper
• Ladder
• Silicone Sealant
• Non-permanent Method of Marking
Conversion
Dometic Power Awning to
Solera®12V Power Awning
NOTE: Click the following link to see the video on this
conversion procedure: https://youtu.be/n50vm-lelAg
NOTE: All screws supporting the awning assembly MUST
have a backer within the structure of the wall of the unit.
Refer to the unit manufacturer for proper location.
NOTE: This manual will refer to the “drive side” and “idler
side” throughout for various instructions. The “drive side” is
the right hand side of the awning when facing the awning
from the exterior of the unit. The “idler side” is the left
hand side of the awning when facing the awning from the
exterior of the unit.
1. Using a non-permanent method of marking, draw a
vertical line along the inside of both the drive and idler
side support arm assemblies. This will act as a guideline
for re-installation.
2. With the awning fully extended, remove the 2 screws
securing the awning fabric to the awning rail.
3. If equipped, remove drip cap from the end of the awning
rail on the end of the unit that the awning assembly will be
removed from.
4. If equipped, remove the wire covers from the
mount arms.
5. Remove all fasteners from the lower and middle sections
of both the drive and idler mount arms.
NOTE: Do NOT remove the upper fasteners of the mount
arms at this time.
6. With the power disconnected, pull the wiring out of the
sidewall and disconnect all leads from the unit wires.
NOTE: Be sure to check both drive and idler arms for
wiring to be disconnected.
7. Connect the motor leads to a cordless battery and
retract the awning so that approximately 12” of awning
fabric remains extended.

4
lippert.com 432-LIPPERT (432-547-7378) Rev: 02.28.23
Solera®
Universal Hardware
Power Awning to
Solera 12V Power Awning
(For Aftermarket Application)
CCD-0001282
15. Using a ⁄” socket, remove the bolt securing the idler
head to the support arm assembly and detach the head
from the support arm assembly.
16. With a rm grip on the roll tube and the idler head
rmly secured with locking pliers, remove the cotter pin
from the end cap.
THESPRINGISUNDEREXTREMETENSION.IMPROPER
HANDLING COULD CAUSE DEATH, SERIOUS INJURY
OR PROPERTY DAMAGE.
8. For both the drive and idler side support arm
assemblies, secure the outer arm to the mount arm using
the nylon ties provided.
IF NOT PROPERLY SECURED, THE SUPPORT ARMS
CAN KICK OUT DUE TO PRESSURE FROM THE GAS
STRUT, WHICH MAY RESULT IN SERIOUS INJURY OR
PROPERTY DAMAGE.
9. With additional assistants holding the support arm
assemblies, remove the upper fasteners from both the
drive and idler mount arms. Pull the nylon ties tight.
10. Carefully slide the entire awning assembly along the
awning rail until the polycord clears the channel.
11. Place the awning assembly on a clean, level surface
that is free of any debris that might scratch or damage the
roll tube or fabric.
NOTE: Contact Dometic before installation to verify the
version of awning to be converted. Newer versions may not
need spring pins inserted into the tube to later release tension.
12. On the idler support arm assembly, insert a cotter pin
into the end cap to lock the spring head in place.
13. On the drive support arm assembly, drill out the rivets
securing the end cap to the roll tube.
14. Completely detach the support arm assembly and
internal motor from the roll tube.
NOTE: Padding the locking pliers will prevent the
scratching of components.
17. Carefully release the tension by slowly unwinding the
spring head.
18. Drill out the rivets securing the end cap to the roll tube.
19. Completely detach the idler end cap and spring
assembly from the roll tube.
20. Unroll the fabric. Still working on the idler side of the
roll tube, slide the fabric towards the drive side of the roll
tube so it is well out of way.
21. Using the tape provided, align one edge of the tape
with the edge of the roll tube and wrap the tape around
the roll tube.
NOTE: This provides the guideline for cutting the roll
tube.Click the link to see the video on this procedure:
https://youtu.be/n50vm-lelAg.
22. Using a chop saw, cut the roll tube along the edge of
the tape applied in the previous step.
NOTE: Sharp edges and/or burrs MUST be led down.
23. Secure both drive and idler Solera end caps to the roll
tube with the provided rivets.
NOTE: It may be necessary to drill out the previous holes
in order to accommodate the larger-sized rivets.
24. Center the fabric on the roll tube and secure each end
by installing the provided ¼” pan head screw through the
polycord into the roll tube.
25. Re-roll the fabric after it is centered and cut off the extra polycord.
26. Insert the shaft of the Solera idler head assembly into
the end cap. Align the holes and secure with the provided
#8 - 32 x ½” wax screw.
27. Insert the shaft of the Solera drive head assembly into the
end cap. Align the holes and secure with the provided #8 - 32
x ½” wax screw.
NOTE: Keep the head of the wax screw ⁄” from fastened to
avoid compromising the structural integrity of the wax screw.
5
lippert.com 432-LIPPERT (432-547-7378) Rev: 02.28.23
Solera®
Universal Hardware
Power Awning to
Solera 12V Power Awning
(For Aftermarket Application)
CCD-0001282
28. With additional assistants holding the support arm
assemblies, insert the polycord into the awning rail channel
and slide the Solera awning assembly along the awning
rail.
29. Place the drive side support arm assembly directly
under the awning rail so the top of the mount arm is
touching the bottom of the rail.
NOTE: Support arm should be installed so that it covers
holes of the original awning, but no lower than 3” below the
awning rail. Seal old holes with sealant.
30. Align the drive side support arm assembly to cover
the holes on the unit at the bottom of the arm. Make sure
the assembly is parallel with the corresponding guideline
marked in Step 1.
NOTE: There may still be a hole showing at the top of the
arm due to the width of the angle brackets.
31. Secure the upper section of the mount arm to the unit
with 2 of the provided #14 x 1 ¼” screws.
NOTE: Silicone sealant MUST be used on all screws and
holes to prevent water from inltrating the unit.
32. Repeat Steps 29-31 for the idler side support arm
assembly.
33. Cut the nylon ties containing the support arm
assemblies.
34. At the drive side support arm assembly, connect
the motor leads to a cordless battery and fully extend
the awning.
35. Remove the wire covers to expose the lower and middle
sections of the mount arm.
NOTE: If the power leads exiting the unit do not align with
the hole in the wall mount arm, a new hole must be drilled
out on the wall mount arm PRIOR to securing the lower and
middle sections of the arm so as not to damage the unit.
36. Secure the lower and middle sections of the drive side
mount arm to the unit with the provided #14 x 1 ¼” screws
or rivets. Make sure the arms are square on the wall of
the unit. (There will be 2 screws in the lower holes and 2
screws in the middle holes.)
Fig.1
NOTE: For units with berglass sidewalls, Lippert requires
the use of rivets for securing the lower and middle sections
of the mount arm.
37. Repeat Steps 35-36 for the idler side mount arm.
NOTE: Before proceeding, see the Wiring section to
complete installation.
38. Extend and retract the awning several times to ensure
that the fabric is square on the roll tube. Secure the fabric
in the awning rail no more than 1” inside the edge of the
fabric on both ends using a #6 x ½” hex head screw.
Install the screw down through the awning rail into the
fabric and the polycord.
39. If previously equipped, reinstall drip caps.
Carefree Power Awning to
Solera®12V Power Awning
NOTE: All screws supporting the awning assembly MUST
have a backer within the structure of the wall of the unit. Refer
to the unit manufacturer for proper location.
NOTE: This manual will refer to the “drive side” and “idler
side” throughout for various instructions. The “drive side” is
the right hand side of the awning when facing the awning
from the exterior of the unit. The “idler side” is the left hand
side of the awning when facing the awning from the exterior
of the unit.
1. Using a non-permanent method of marking, draw a
vertical line along the inside of both the drive side and
Other manuals for Solera Power
2
This manual suits for next models
2
Table of contents
Other Lippert Accessories manuals

Lippert
Lippert Solera Power Installation instructions

Lippert
Lippert Solera 5000 Series User manual

Lippert
Lippert Solera 5000 Series Installation instructions

Lippert
Lippert Solera 5000 Series User manual

Lippert
Lippert Solera Classic Awning Installation instructions

Lippert
Lippert Solera Slider User manual

Lippert
Lippert 2021130655 Installation instructions

Lippert
Lippert SureShade Power Bimini Instruction Manual

Lippert
Lippert Solera Classic User manual

Lippert
Lippert Solera Classic Awning Use and care manual