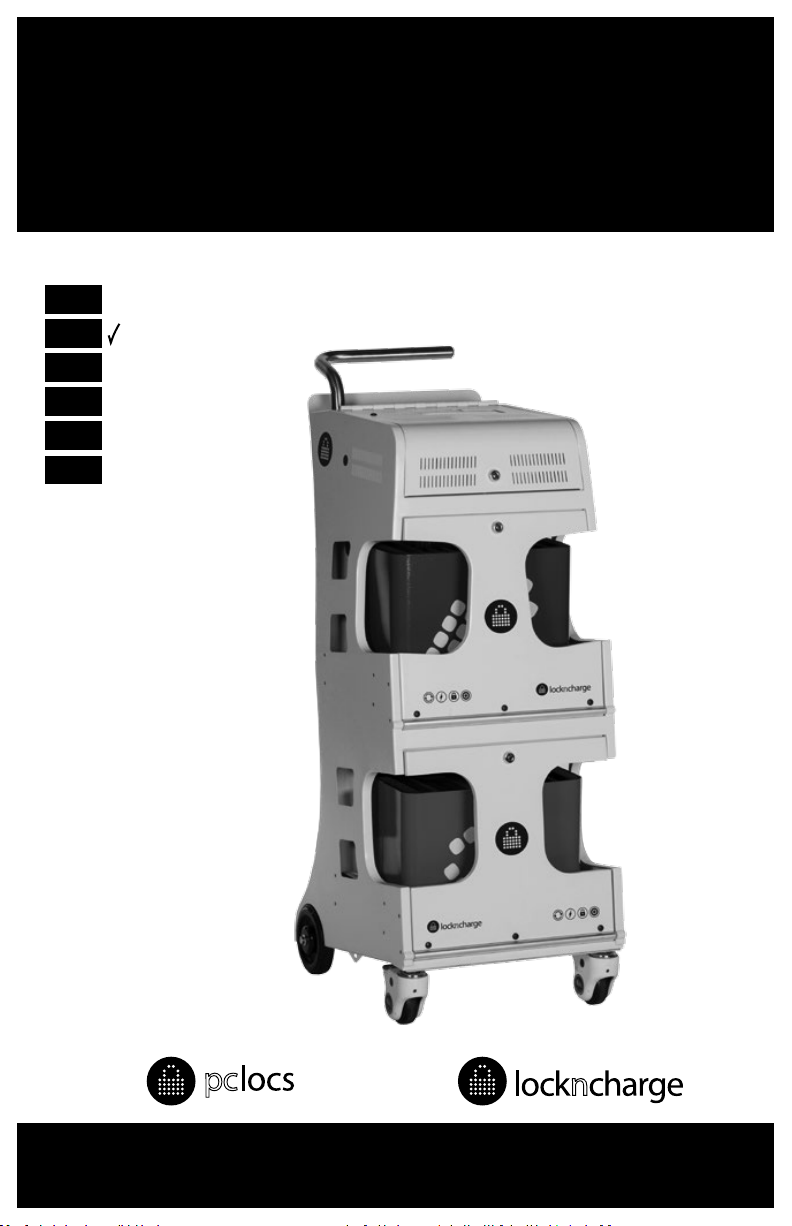
LocknCharge PC Locs iQ 16 Cart User manual

iQ 16 Cart™
USER INSTRUCTIONS
www.pclocs.com.au www.lockncharge.com
ENG
ESP
PRT
FRA
DEU
ITA

iQ 16 Cart™
Congratulaons on your purchase.
Follow these instrucons for easy and fast set-up of your iQ16.
STEP 1.
Un-pack the iQ 16 Cart and
accessories.
STEP 2.
Rout the power cable through the rear of the iQ 16 Cart and up to
the top compartment.
PC Locs, LocknCharge and the Padlock device are Trademarks of IWS Global Pty Ltd.
Copyright IWS Global Pty Ltd, May 2014.
iPad and iTunes are trademarks of Apple Inc.
Disclaimer.
This informaon is the intellectual property of IWS Global Pty Ltd and may not be distributed, duplicated
or copied in part or full without the wrien permission. Since the use of this informaon, the equipment
connected and the condions by which any IWS Global product is used is beyond the control of IWS Global,
it is the obligaon of the owner and/or user to determine the correct and safe use of any equipment and
product. To the extent that the law permits, any liability which may be incurred as a result of the use or
future use of a product manufactured or sold by IWS Global is limited to the cost of repairing or replacing the
failed product or component at the discreon of IWS Global either within, or outside of warranty periods,
and does not extend to any loss or damage which may be caused as a consequence of misuse or failure of
the equipment or product or the informaon contained herein. IWS Global shall not in any event be liable for
economic loss of prots, indirect, special, bodily injuries or consequenal damages.

INSTRUCTION MANUAL
STEP 3 - Aaching the iQ 16 Sync Charge Box (iQ 16 SCB).
Aach the iQ 16 SCB onto the 2 key-hole screws in the top shelf. Plug the power cord into the iQ 16 SCB.
STEP 4 - Aaching the USB cables to the iQ 16 SCB and roung the cables.
The USB cables aached closest to the back of the
Cart, should route to the boom tray and through
the middle grommet.
The USB cables aached closest to the front of the
Cart, should route to the top tray and through the
le and right grommets.

iQ 16 Cart™
STEP 5.
Aaching the cables to the iPad devices (up to 16).
Insert the iPad devices into the
baskets and place the baskets in
the drawers.
The USB cables hang from the
swivel clips. Connect each plug to
a device in the basket.
Slide the baskets into the drawers
and close the doors. Lock the doors.
STEP 6 - Sync and/ or charge the devices.
Plug in the power cable to a wall socket and. Switch the power on. The LED will illuminate on the iQ 16 SCB
Sync Staon depending on the operaon you are performing.
Note: Refer to the Instrucons for operang your iQ 16 SCB for syncing & charging operaons.
Plug the USB B ‘host’ cable into
the iQ 16 SCB Sync Staon.
Red = Charge mode
Green = Sync mode

INSTRUCTION MANUAL
STEP 9 - Installing the oor plate and lock-down chain kit.
STEP 7 - Locking the castor to prevent movement.
Unlocked. Press ‘ON’ to lock. Press ‘OFF’ to unlock.
STEP 8 - Adjusng the door pressure.
There are two screws on each hinge to adjust the tension on the hinge (1 and 2) - this prevents the doors
from slamming open.
Use a 2mm allen key to ghten or loosen the screw (do not over-ghten).
Tools required:
• Masonry hammer-drill
• 10mm masonry drill bit
• Pencil and ruler/ tape
• Hammer
• 13mm and 17mm spanners
The Security Chain Kit contains the following:
• 1 x 3 holed Anchor Plate and security chain
• 3 x 55mm long, 8mm Anchor Bolts
• 3 x Shear nuts and washers
• 1 x RR Lock and key set
1
2

iQ 16 Cart™
Move the iQ 16 Cart to where you intend to store and secure it.
Note: It is best if the Floor Plate is as close as possible to a wall to reduce the hazard or tripping and injury.
Aach the end of the chain to the steel loop with the padlock and posion the plate end in the desired
posion on the oor.
Note: If mounng on carpet, you will need to cut out the carpet from the area where the oor plate aaches,
otherwise the carpet will wrap around the drill when drilling.
Mark the centre of each of the
3 holes using the oor plate as a
guide.
Drill a 10mm hole through each of
the 3 marked centres to a depth
of 50mm.
Insert the anchor bolts with the
nuts aached into the holes
through the oor plate. Using
the 13mm spanner, progressively
ghten down each of these anchor
nuts so that all three bolts are rmly
anchored into the concrete.
Now undo each of the three nuts and in
their place thread on the three silver shear-
nuts. Ensure that the ‘cone’ is down and the
hexagonal nut is up. Using the 17mm spanner,
ghten down the three shear-nuts unl the
hexagonal ‘head’ shears o, leaving just the
cone ‘base’.
Aach the security chain through the
steel loop under the side of the trolley
using the padlock.
Note: there is a lock-down loop on both
sides of the iQ 16 Cart.

INSTRUCTION MANUAL
Warranty
PC Locs/LocknCharge warrants the product to be free of defects in design, materials, assembly and crasmanship
for a period of twelve months from the date of purchase to the original retail purchaser. Evidence of original
purchase will be required to obtain warranty service.
In the event that a defect, malfuncon or failure occurs or is discovered during the warranty period,
PC Locs/LocknCharge will repair or replace, at its opon, the products which in the reasonable judgment of PC
Locs/LocknCharge are deemed defecve. All transportaon costs shall be borne by the owner and the risk of
loss shall be upon the party iniang the transportaon.
The warranty does not apply to any product that has been subject to misuse, tampering, neglect, or accident or as
a result of unauthorized alteraons or repairs to the product. The warranty is in lieu of all warranes expressed or
implied, including the implied warranes of merchantability and tness for a parcular purpose which are expressly
excluded or disclaimed. In no event will PC Locs/LocknCharge, their directors, ocers, employees, or agents be
liable for any harm, consequenal, incidental, third party, special or indirect damages whatsoever arising out of the
use or inability to use the products even if PC Locs/LocknCharge has been advised of the possibility of such damages.
PC Locs/LocknCharge obligaon is strictly and exclusively limited to the replacement or repair of any defecve
products. Some states do not allow the exclusion or limitaon of incidental or consequenal damages, so the
above limitaon or exclusion may not apply to you.
Troubleshoong
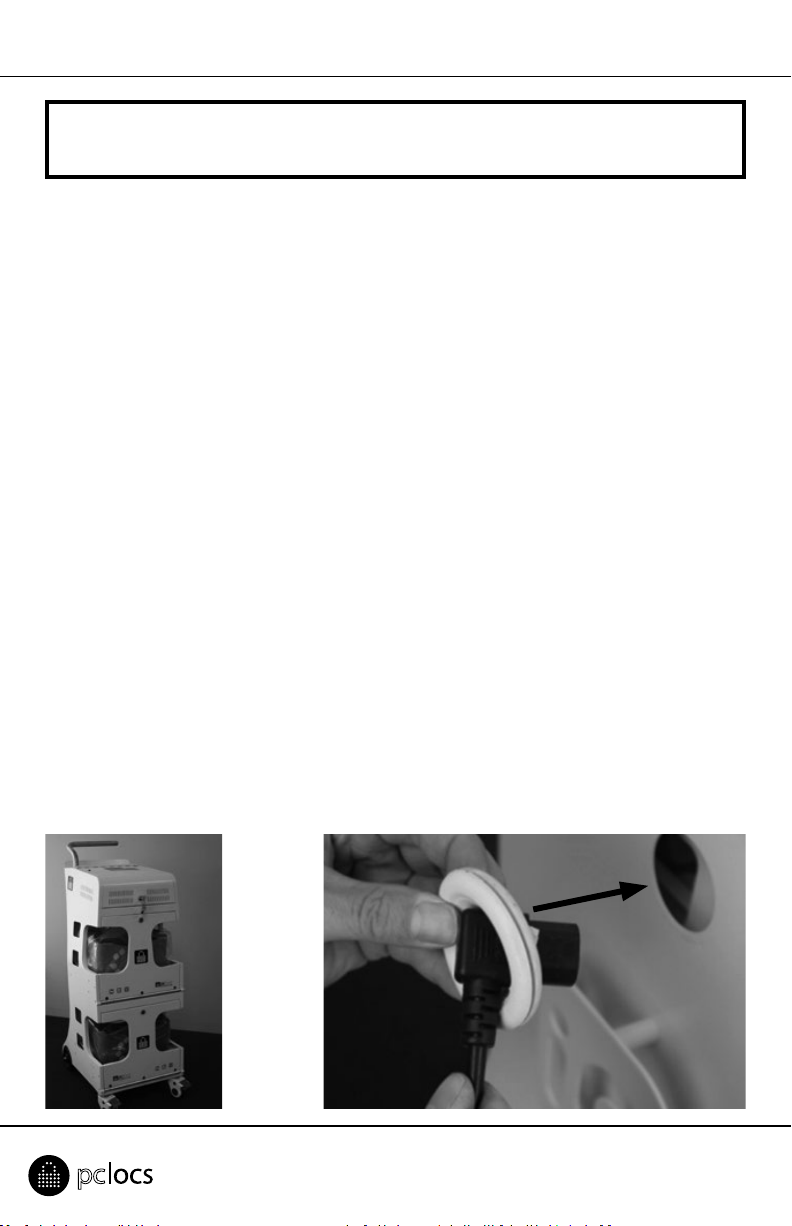
1. If no lights are illuminated with the iQ 16 Sync Charge Box is switched ON, check that the power cable
is fully inserted into the iQ 16 Sync Charge Box socket and the other end is fully inserted into the mains
power socket and the mains power switch is ON.
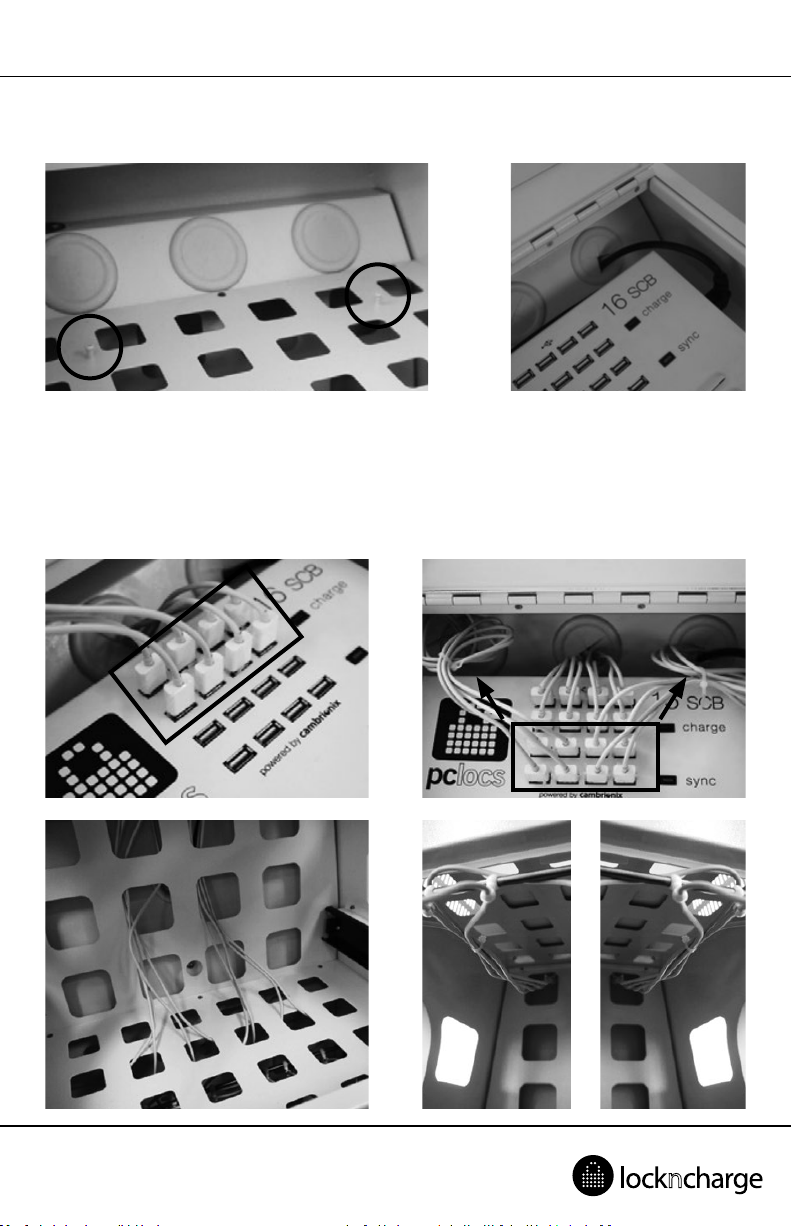
2. To check the iQ 16 Sync Charge Box is operang correctly, switch the iQ 16 Sync Charge Box OFF. Remove
all connected USB cables and switch back ON again. Both the Charge light and the Sync light should
inially illuminate but the Sync light will exnguish aer a short delay. This is normal operaon.
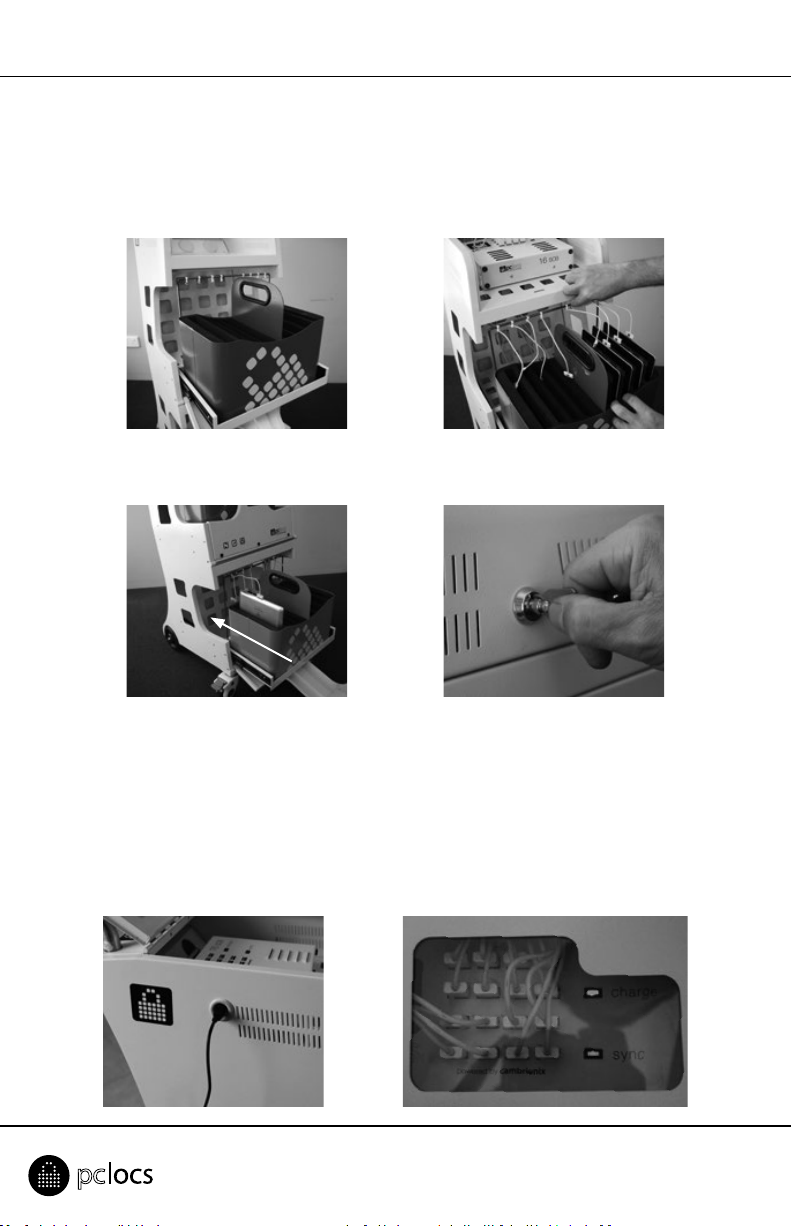
3. If the iQ 16 Sync Charge Box is operang normally but the devices cannot be charged, check the USB
cables connecng to the devices are of the correct type and quality and not damaged.
4. If the iQ 16 Sync Charge Box is operang normally but the devices cannot be synchronized, check the
USB cables connecng to the devices are of the correct type and quality and not damaged.
5. Any other issues relang to synchronizaon problems should be referred to your IT department or
provider of synchronizaon soware.

www.pclocs.com.au www.lockncharge.com
Compliances and Approvals

iQ 16 Cart™
BEDIENUNGSANLEITUNG
ENG
ESP
PRT
FRA
DEU
ITA
www.pclocs.com.au www.lockncharge.com

iQ 16 Cart™
PC Locs, LocknCharge und die Padlock-Vorrichtung sind Marken der IWS Global Pty Ltd. Copyright
IWS Global Pty Ltd, Mai 2014.
Haungsausschluss
Diese Informaonen sind geisges Eigentum von IWS Global Pty Ltd. Sie dürfen ohne vorherige schriliche
Genehmigung weder teilweise noch vollständig verteilt, reproduziert oder kopiert werden. Da die Nutzung
dieser Informaonen, die angeschlossenen Geräte und die Einsatzbedingungen für IWS Global-Produkte
sich außerhalb der Kontrolle von IWS Global benden, obliegt die richge und sichere Nutzung aller Geräte
und Produkte der Verantwortung der jeweiligen Eigentümer bzw. Anwender. Innerhalb der gesetzlichen
Vorschrien ist jede Haung als Folge des Gebrauchs oder des späteren Gebrauchs eines Produkts, das durch
IWS Global hergestellt oder verkau wurde, begrenzt auf die Kosten der Reparatur oder des Austausches
des fehlerhaen Produkts oder einer fehlerhaen Komponente im Ermessen von IWS Global innerhalb
oder außerhalb der Garanezeit. Eine Haung für eventuelle Verluste oder Schäden infolge unsachgemäßer
Handhabung oder eventueller Fehler von Geräten, Produkten oder hier gegebenen Informaonen ist
ausgeschlossen. IWS Global haet in keinem Fall für wirtschaliche Verluste durch entgangene Gewinne,
indirekte oder spezielle Körperverletzungen oder Folgeschäden.
SCHRITT 1:
Entpacken Sie den Wagen und das Zubehör.
Herzlichen Glückwunsch zu Ihrem Kauf.
Folgen Sie diesen Anweisungen für eine einfache und zügige Inbetriebnahme.

BEDIENUNGSANLEITUNG
SCHRITT 3: Geräte synchronisieren und/oder auaden
Stecken Sie das Netzkabel in eine Steckdose. Schalten Sie das Gerät ein. Die iQ 16 SCB-LED leuchtet in
Abhängigkeit von der eingestellten Betriebsart.
Hinweis: Folgen Sie der IQ 16 SCB-Bedienungsanleitung für das Synchronisieren und Auaden.
Stecken Sie das USB-B-Hostkabel
in die iQ 16 SCB Sync Staon.
Rot = Lademodus
Grün = Synchronisierungsmodus
SCHRITT 2: Kabel mit bis zu 16 iPad-Geräten verbinden
Setzen Sie die iPad-Geräte in die
Körbe ein. Setzen Sie dann die
Körbe in die Schubladen.
Die USB-Kabel hängen an
Drehclips. Verbinden Sie jedes
Gerät im Korb mit einem USB-
Stecker.
Schieben Sie die Körbe in die
Schubladen, und schließen Sie die
Türen.
Akvieren Sie die Türverschlüsse.

iQ 16 Cart™
SCHRITT 6: Bodenplae und Sicherheitskeensatz installieren
SCHRITT 4: Rollen verriegeln zum Schutz vor Bewegungen
Freigegeben: Drücken Sie zur Verriegelung das
Pedal mit der Aufschri „ON“
herunter.
Drücken Sie zur Entriegelung das
Pedal mit der Aufschri „OFF“
herunter.
SCHRITT 5: Türdruck anpassen
Jede Türangel bietet zwei Schrauben, mit denen Sie die Spannung am Scharnier (1 und 2) einstellen können,
damit sich die Türen nach dem Schließen nicht önen.
Verwenden Sie einen 2-mm-Inbusschlüssel zum Anziehen/Lösen der Schrauben. Ziehen Sie die Schrauben
nicht zu fest an.
Benögte Werkzeuge:
• Bohrhammer
• Steinbohrer 10 mm
• S und Lineal oder Maßband
• Hammer
• Schraubenschlüssel 13 mm und 17 mm
Der Sicherheitskeensatz umfasst Folgendes:
• 1x Ankerplae mit drei Löchern und
Sicherheitskee
• 3x Ankerbolzen 8 mm, Länge 55 mm
• 3x Abreißmuern und Unterlegscheiben
• 1x Vorhängeschloss und Schlüsselsatz
1
2

BEDIENUNGSANLEITUNG
Rollen Sie den Wagen an den vorgesehenen Ort für die Lagerung und Sicherung.
Hinweis: Die Bodenplae sollte möglichst nahe einer Wand gelegt werden, um die Stolper- und
Verletzungsgefahr zu reduzieren.
Befesgen Sie das Ende der Sicherheitskee mit dem Vorhängeschloss an der Stahlöse, und richten Sie das
Plaenende in der gewünschten Posion am Boden aus.
Hinweis: Bei einer Montage auf Teppichboden sollten Sie aus ausreichend Platz für die Bodenplae
herausschneiden, da sich sonst der Teppichboden um den Bohrer wickeln kann.
Markieren Sie mithilfe der
Bodenplae als Vorlage das
Zentrum der zu bohrenden drei
Löcher.
Bohren Sie durch jede der drei
Markierungen ein 10-mm-Loch
bis zu einer Tiefe von 50 mm.
Führen Sie die Ankerbolzen mit beigefügten Muern durch
die Bodenplae in die Bohrlöcher ein. Ziehen Sie mithilfe des
13-mm-Schraubenschlüssels alle Ankermuern gleichmäßig
fest, sodass alle drei Bolzen fest im Beton verankert sind.
Lösen Sie nun die drei Muern und drehen Sie an dieser
Stelle die drei silberfarbenen Abreißmuern ein. Stellen
Sie sicher, dass der „Kegel“ nach unten zeigt und die
Sechskantmuer oben liegt. Ziehen Sie mithilfe des 17-mm-
Schraubenschlüssels die drei Abreißmuern fest, bis die
sechseckigen „Köpfe“ abreißen und nur die Kegelbasis bleibt.
Befesgen Sie die Sicherheitskee mit
dem Vorhängeschloss an der Stahlöse an
der Unterseite des Wagens.
Hinweis: Stahlösen zur Befesgung
benden sich an beiden Seiten des iQ 16
Cart.

iQ 16 Cart™
Fehlerbehebung
1. Wenn bei eingeschalteter iQ 16 Sync Charge Box keine Lampen leuchten, prüfen Sie das Netzkabel auf
festen Halt in der Fassung der iQ 16 Sync Charge Box und der Steckdose, und überprüfen Sie den Ein/
Ausschalter.
2. Um die iQ 16 Sync Charge Box auf korrekten Betrieb zu überprüfen, schalten Sie diese zunächst AUS.
Enernen Sie alle angeschlossenen USB-Kabel und schalten Sie das Gerät wieder EIN. Sowohl die
Ladeleuchte als auch die Sync-Leuchte sollten sofort aueuchten, die Sync-Leuchte erlischt jedoch nach
kurzer Zeit. Dies gehört zum normalen Betrieb.
3. Falls die iQ 16 Sync Charge Box normal arbeitet, jedoch die Geräte nicht geladen werden, prüfen Sie, ob
die USB-Kabel zu den Geräten qualitav einwandfrei und unbeschädigt sind.
4. Falls die iQ 16 Sync Charge Box normal arbeitet, jedoch die Geräte nicht synchronisiert werden, prüfen
Sie, ob die USB-Kabel zu den Geräten qualitav einwandfrei und unbeschädigt sind.
5. Alle anderen Synchronisaonsprobleme sollten Sie mit Ihrer IT-Abteilung oder Ihrem Anbieter von
Synchronisaonssoware sprechen.
Garane
PC Locs/LocknCharge garanert dem Endverbraucher, der Originalprodukte in Einzelhandel erwirbt, dass
diese für den Zeitraum von zwölf Monaten ab dem Erstverkaufsdatum frei von Entwicklungs-, Material-
und Herstellungsfehlern sind. Zur Inanspruchnahme der Garaneleistung ist ein Nachweis über das
Erstverkaufsdatum vorzulegen.
Sollte in der Garanezeit ein Defekt, eine Störung oder ein Ausfall aureten, wird PC Locs/LocknCharge nach
einer Prüfung die als fehlerha bestägten Produkte in eigenem Ermessen reparieren oder ersetzen. Alle
Transportkosten sind vom Eigentümer zu tragen. Das Transportrisiko trägt die versendende Partei.
Die Garane gilt nicht für Produkte, die missbräuchlich eingesetzt, manipuliert, vernachlässigt, durch
einen Unfall beschädigt oder unautorisiert verändert bzw. repariert wurden. Mit Ausnahme des gesetzlich
geregelten Umfangs handelt es sich bei dieser Garane um eine ausschließliche Garane. Sie enthält keine
sonsgen ausdrücklichen oder sllschweigenden Garanen, einschließlich aber nicht ausschließlich der
Zusicherung der Markähigkeit und Eignung für einen besmmten Zweck. PC Locs/LocknCharge oder seine
Direktoren, Führungskräe, Arbeitnehmer oder Vertreter übernehmen keine Haung für direkte, indirekte,
zufällige, mielbare, beiläuge oder Folgeschäden, die direkt oder indirekt auf die Nutzung der Produkte
zurückzuführen sind, selbst wenn PC Locs/LocknCharge auf die Möglichkeit solcher Schäden hingewiesen wurde.
Die Verpichtungen von PC Locs/LocknCharge beschränken sich strikt und ausschließlich auf den Austausch
oder die Reparatur defekter Produkte. Da manche Landesgesetze die Ausschließung oder Einschränkung
der Haung für beiläuge Schäden oder Folgeschäden nicht zulassen, gelten die obigen Einschränkungen
eventuell nicht für Sie.

BEDIENUNGSANLEITUNG
Länderzulassungen

www.pclocs.com.au www.lockncharge.com

iQ 16 Cart™
INSTRUCCIONES PARA EL
USUARIO
ENG
ESP
PRT
FRA
DEU
ITA
www.pclocs.com.au www.lockncharge.com

iQ 16 Cart™
PASO 1.
Desempaquete el carro y los accesorios.
Enhorabuena por su compra.
Siga estas instrucciones para instalar de forma fácil y rápida su iQ 16 Cart.
PC Locs, LocknCharge y el disposivo Padlock son marcas comerciales de IWS Global Pty Ltd.
Derechos de autor de IWS Global Pty Ltd, mayo de 2014.
Descargo de responsabilidad.
Esta información es propiedad intelectual de IWS Global Pty Ltd y no se puede distribuir, duplicar o copiar,
parcial o totalmente, sin tener autorización por escrito. Puesto que el uso de esta información, los equipos
conectados y las condiciones bajo las cuales se usa cualquier producto de IWS Global son circunstancias
ajenas a la voluntad de IWS Global, el dueño o el usuario enen la obligación de determinar el uso correcto
y seguro de cualquier equipo y producto. En la medida que lo permita la ley, cualquier responsabilidad en la
que se pueda incurrir como resultado del uso o el uso futuro de un producto fabricado o vendido por IWS
Global, se limita al coste de reparar o reemplazar el producto o componente averiado según el criterio de
IWS Global, ya sea dentro o fuera de los periodos de garana, y no se exende a ninguna pérdida o daño que
puedan ser causados como consecuencia del mal funcionamiento o el uso indebido del equipo, producto o la
información aquí incluida. IWS Global no será responsable en ningún caso de ningún daño por lucro cesante,
daño indirecto, daño especial, daño consecuente o lesión corporal.

MANUAL DE INSTRUCCIONES
PASO 3 – Sincronizar y/o cargar los disposivos.
Enchufe el cable de alimentación a una toma de corriente. Encienda la unidad. Los indicadores LED se
encenderán en la estación de sincronización iQ 16 SCB dependiendo de la operación que esté realizando.
NOTA: consulte las instrucciones para operar la iQ 16 SCB durante las operaciones de sincronización y carga.
Conecte el cable USB B ‘host’ en
la estación de sincronización iQ
16 SCB.
Rojo = Modo de carga
Verde = Modo de sincronización
PASO 2.
Conectar los cables a los disposivos iPad (hasta 16).
Inserte los disposivos iPad en las
bandejas y coloque las bandejas
en los cajones.
Los cables USB cuelgan de los
clips pivotantes. Conecte cada
conector a un disposivo en la
bandeja.
Deslice las bandejas en los cajones
y cierre las puertas.
Cierre las puertas.

iQ 16 Cart™
PASO 6 - Instalación de la placa de anclaje y el kit de la cadena de seguridad.
PASO 4 - Bloqueo de las ruedas para evitar el movimiento.
Desbloqueado. Presione ‘ON’ para bloquear. Presione ‘OFF’ para desbloquear.
PASO 5 - Ajuste de la presión de la puerta.
Hay dos tornillos en cada bisagra para ajustar la tensión en la bisagra (1 y 2); esto evita que las puertas se
abran de golpe.
Use una llave Allen de 2 mm para apretar o aojar el tornillo (procure no apretar demasiado).
Herramientas necesarias:
• Taladro percutor para hormigón
• Broca para hormigón de 10 mm
• Lapicero y regla o cinta métrica
• Marllo
• Llaves de 13 mm y 17mm
El kit de la cadena de seguridad conene lo
siguiente:
• Placa de anclaje perforada 1 x 3 y cadena de
seguridad
• 3 pernos de anclaje de 8 mm y 55 mm de largo
• 3 tuercas de seguridad para cizallar y arandelas
• 1 candado y juego de llaves
1
2
Table of contents
Languages:
Other LocknCharge Batteries Charger manuals

LocknCharge
LocknCharge ECO Safe Charge User manual

LocknCharge
LocknCharge Carrier 30 Cart User manual

LocknCharge
LocknCharge ECO Smart Charge ELE-00396-01 User manual

LocknCharge
LocknCharge Joey 30 User manual

LocknCharge
LocknCharge PUTNAM 18C User manual

LocknCharge
LocknCharge PUTNAM 8 CHARGING STATION User manual

LocknCharge
LocknCharge Joey 10 Charging Station User manual

LocknCharge
LocknCharge iC 10 User manual

LocknCharge
LocknCharge FUYL Tower 15 User manual

LocknCharge
LocknCharge iQ Wall Cages User manual