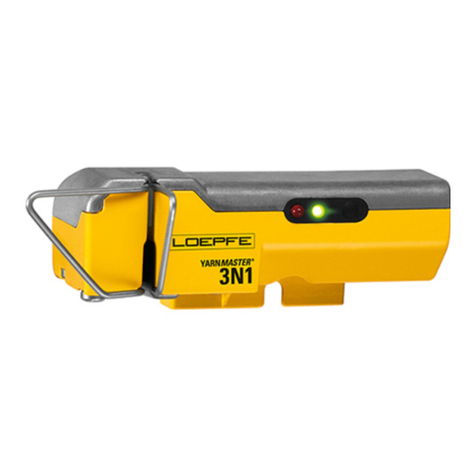
Loepfe YARNMASTER ZENIT+ User manual

YARNMASTER ®ZENIT
50418003 en
V 5.9.x.x / 11.2018
Operation of LZE-V
Quick Guide


Loepfe Brothers Ltd.
Kastellstrasse 10
8623 Wetzikon / Switzerland
Phone +41 43 488 11 11
Fax +41 43 488 11 00
E-Mail service@loepfe.com
Internet www.loepfe.com
This Instruction Manual is protected by copyright.
Complete or partial reproduction and dissemination of this
Instruction Manual to third parties – even in form of extracts
– as well as the use and /or disclosure of the contents are not
allowed without the written approval of Loepfe Brothers Ltd.,
except for internal purposes.
YarnMaster®is a registered trademark of Loepfe Brothers Ltd.
in Switzerland and / or in other countries.
© 2018 Loepfe Brothers Ltd., Switzerland


Table of Contents
1 Important Information 6
2 Explanation of Symbols 6
3 Start-up 6
4 Central Unit LZE-V 7
5 User Interface / Navigation 8
6 Function Buttons 9
7 Language Selection 10
8 Login / Access Level 10
9 Logout 11
10 Change Password 11
11 Set Date and Time 11
12 Check and Complete Base Settings 12
13 Firmware Update 14
14 Create / Change Article 16
15 Copy Article 17
16 Define a Group 18
17 Start Group 19
18 Test Mode 21
19 Save Data 22
20 Factory Reset 24
21 Restart 24
22 Installation 25
23 Connections LZE-V 26

Quick Guide YM Zenit+
6
1 Important Information
This Quick Guide contains the most important information required for set-up and operation of
yarn clearer system YarnMaster Zenit+.
See the Online Help which can be called up via the touchscreen with the Help button for
more information on the individual functions of the yarn clearer.
The complete Instruction Manual for Loepfe yarn clearer system Zenit+can be found on the
enclosed USB stick.
The yarn clearer system YarnMaster Zenit+must only be operated by authorized persons.
Authorized persons are persons qualified and trained for operation and maintenance of the yarn
clearer system.
Prior to any work, the personnel must have thoroughly read and understood Chapter 1 and 2
“General” and “Safety” of the Instruction Manual and thoroughly follow the instructions.
Assembly and initial start-up are performed by an authorized service technician of the winding
machine manufacturer or a service technician of Loepfe Brothers Ltd. For information concern-
ing installation and connections, see Chapters 21 and 22.
2 Explanation of Symbols
In this Instruction Manual, safety information is marked with symbols and signal words.
The safety information must be strictly observed to prevent accidents, personal injuries and
damage to property.
3 Start-up
If anything is not clear, contact the supervisor or supplier for your own safety.
Useful hints and recommendations.
Indicates an imminently hazardous situation which will result in death or
serious injury.
DANGER
Indicates a potentially hazardous situation which may result in damage to
property.
ATTENTION
Indicates a potentially hazardous situation which may result in damage to
7
Quick Guide YM Zenit+
4 Central Unit LZE-V
1 User interface
2 USB interface
Monitor Operation/entry is performed by applying light pressure on
the touch-sensitive screen (touch-screen) of the monitor.
USB Interface USB interface for import / export of settings and data; and for
screenshots.
12
ATTENTION!
Risk of damage by incorrect handling of
surface!
»Operation by tapping with the finger or a blunt,
non-metal object (e.g. tablet pen)
»Clean monitor with a soft cloth
»Remove severe contamination with a moist cloth.
»Do NOT use a pointed, metallic object as this could
damage the monitor surface!
»Do NOT clean monitor with aggressive cleaners!

Quick Guide YM Zenit+
8
5 User Interface / Navigation
1 Main navigation
2 Menu contents (list, overview, details)
3 Navigation path
4 Selection bar for group/ spindle or article
5 Message window
6 Messages requiring intervention
7 Data selection filter (Dashboard, Monitoring and Quality menus)
8 Login / access level
9 Language selection
10 Online help
11 Action buttons / function buttons
12 Connection status (Ethernet / MillMaster TOP / Remote / Data Exist)
13 Active user level / logged on user
14 Date / time
15 Software version
16 Switch-over Loepfe / Savio GUI (only LZE-V Faceless)
516 6
3
7 8 9 10
1
4
2
11
12
13
14
15

9
Quick Guide YM Zenit+
6 Function Buttons
Language selection
Login / access level
Online help
List of messages
requiring intervention
Create screenshot /
save on USB stick
Create reports /
save on USB stick
Data export / import
Back
Next
Edit settings
Confirm selection / input
Cancel selection / input
Undo input
Copy article
Start lot / group
Stop lot / group
Adjust
(groups / spindles in production)
Reset monitoring data /
quality data
Change password
Logout / user logout
Add user
Delete user
Acknowledge last message
Acknowledge all messages
Firmware Update
Input information

Quick Guide YM Zenit+
10
7 Language Selection
1. Tap Language button.
8 Login / Access Level
1. Tap Login button.
3. Tap password input field.
5. Confirm entry with .
2. Select user.
4. Enter password
»Foreman password = 12911291
»Operater password = 47114711
2. Select desired operator language.
6. Confirm password / Login with .
The Foreman password is required for most of the actions described below!

11
Quick Guide YM Zenit+
9 Logout
10 Change Password
SERVICE > Setup >Date and Time
1. Activate the Edit mode with .
2. Enter date / day.
3. Enter time (hour, minutes, seconds).
4. Confirm each entry with .
5. Save date and time with .
11 Set Date and Time
6. Confirm pop-up “Save date and time settings” with .
The access privileges are reset to “Guest”.
It is recommended to change these pass-
words after startup and in regular intervals!

Quick Guide YM Zenit+
12
SETTINGS > Machine
12 Check and Complete Base Settings
1. Activate the edit mode with .
2. Check and complete the base settings as follows:
Machine Type Read only
Machine Name Enter name (optional)
MillMaster Link On / Off
Total Spindles Enter total number of
winding units of machine
Yarn Count Unit Select unit (z.B. Nm, Ne)
Sensing Head Type Installed sensing head type
(D, DF, DFP)
Splice Check Length Use default setting
Previous Shift km / kg
>Default Group Settings
1. Activate the edit mode with .
2. Accept / change default settings.
3. Save settings with .
4. Confirm pop-up “Save machine settings” with .
5. Return to the overview with .
3. Save settings with .
4. Confirm pop-up “Save machine settings” with .
5. Return to the overview with .
> Base Settings

13
Quick Guide YM Zenit+
> Default Data Acquisition
1. Activate the edit mode with .
2. Accept / change default settings.
3. Save settings with .
4. Confirm pop-up “Save machine settings” with .
5. Return to the overview with .

Quick Guide YM Zenit+
14
Perform the firmware update
If the versions do not match (e.g., after a master module or a sensing head exchange), the cor-
responding firmware update must be performed:
1. Activate the edit mode with .
2. Start the Master Module update with .
»The status of the update is displayed in the progress bar.
SERVICE >System >Firmware Update
13 Firmware Update
Master Module, Bootloader and Firmware Versions
The versions shown in the “Master Module” field and in the “Spindles” field
must match the versions shown in the “Firmware Archive” field.
Red version number: versions do not match
Grey version number: TK is offline
It can take some time (30s) until the update is terminated and the respec-
tive next update button becomes active!

15
Quick Guide YM Zenit+
4. After a successful firmware update, both progress bars show 100%.
5. Terminate edit mode with .
3. Start the TK (Bootloader / Firmware) update with .
»The status of the update is displayed in the progress bar.
»(Update Firmware) is displayed for all sensing heads which do not match.
»is displayed after a successful update.

Quick Guide YM Zenit+
16
14 Create / Change Article
SETTINGS > Article (List)
1. Double-clicking an article in the list opens the over-
view of the respective clearer parameters.
6. Save changed article or discard changes .
Class Matrix
Tapping the class fields (D class, F class, Splice class) activates or deactivates class clearing
for these fields.
Clearing is active
Clearing is not active
3. Change settings and confirm with .
4. Return to the overview with .
5. Repeat this action until all setting blocks have been defined.
»All changed setting blocks are highlighted yellow in the overview.
2. Activate the edit mode with .

17
Quick Guide YM Zenit+
15 Copy Article
1. Select an article (e.g., CO NE40 TOP9).
2. Clicking the Copy button opens the Copy window.
7. Select save mode:
»Overwrite currently selected article.
»or assign the changed settings to another article (assign new article name, if necessary).
8. Confirm changes with .
3. Select the target article (existing settings are overwritten during copying).
4. Enter new article name (e.g. DOM) if required.
5. Confirm inputs with .
On principle, clearer settings can also be changed for groups in production.
Production continues with the changed settings! Monitoring and quality
data are reset.
The articles marked are articles predefined in the factory.
They can not be changed, they can only be used as templates.

Quick Guide YM Zenit+
18
16 Define a Group
SETTINGS >Group (List)
1. Double-clicking a group in the list opens the overview
of the respective group settings.
2. Activate the edit mode with .
> SETTINGS Optional
8. Accept / change default settings.
>Data Acquisition
9. Accept / change default settings.
10. Save group settings with .
> SETTINGS Group
3. First Spindle / Last Spindle: Enter spindle range (first
and last spindle of the group).
4. Pilot Spindles: Accept / change default.
5. Sensing Head Type: Select installed sensing head type.
6. Lot: Enter a lot name (optional).
7. Article: Select an article.

19
Quick Guide YM Zenit+
17 Start Group
SETTINGS >Group (List)
1. Select group.
2. Start group with .
»(Adjust) is displayed for all sensing heads.
3. Confirm pop-up “Start Group” with .
Spindle adjustment is started.
»“Production” is displayed in column “Status” and “Active” in column “Adjust”.
4. Start and monitor the respective number of pilot spindles individually.
»The “Ad” display goes out for each pilot spindle when adjustment is terminated.
After successful adjustment of all pilot spindles:
»“Completed” is displayed in column “Adjust”.
»The “Ad” display goes out for each non-pilot spindle when adjustment is terminated.

Quick Guide YM Zenit+
20
5. Start remaining spindles
»If Reset Fine Adjust was selected in “Start Group”, an
adjustment will also be performed for each non-pilot
spindle.
If “Completed [x]” is displayed after adjustment, it was not possible to
complete adjustment with all pilot spindles (in this case it is recommend-
ed to repeat adjustment with other pilot spindles!)
The other spindles may be started only when adjustment status “Com-
pleted” is displayed!
Other manuals for YARNMASTER ZENIT+
1
Table of contents
Other Loepfe Industrial Equipment manuals

Loepfe
Loepfe YARNMASTER 3N1 Install guide

Loepfe
Loepfe YarnMaster Zenit User manual

Loepfe
Loepfe YARNMASTER 1N1 User manual

Loepfe
Loepfe YARNMASTER 3N1 Install guide

Loepfe
Loepfe YARNMASTER 1N1 User manual

Loepfe
Loepfe YARNMASTER 3N1 Install guide

Loepfe
Loepfe YARNMASTER 3N1 Install guide

Loepfe
Loepfe YarnMaster PRISMA User manual