manuals.online logo
Brands
  1. Home
  2. •
  3. Brands
  4. •
  5. LSC
  6. •
  7. Lighting Equipment
  8. •
  9. LSC 6125000100 User manual

LSC 6125000100 User manual

EN Getting started
NL Aan de slag
FR Démarrage
DE Erste Schritte
PL Rozpoczęcie
CZ Začínáme
IT Iniziare
SK Začíname
ES Empezando
PT Iniciando
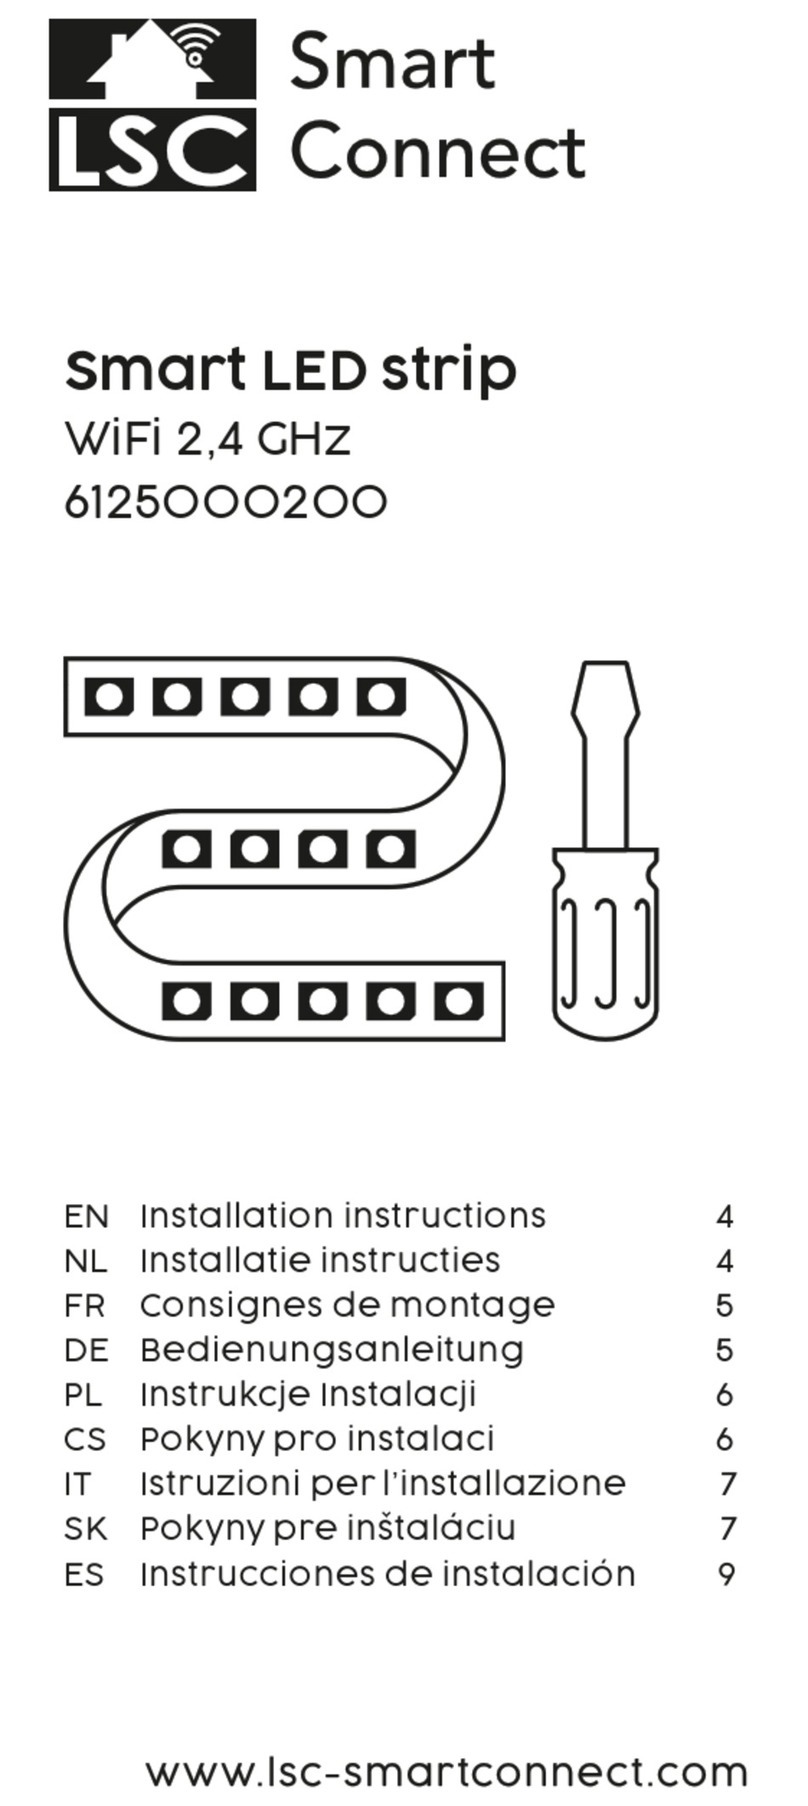
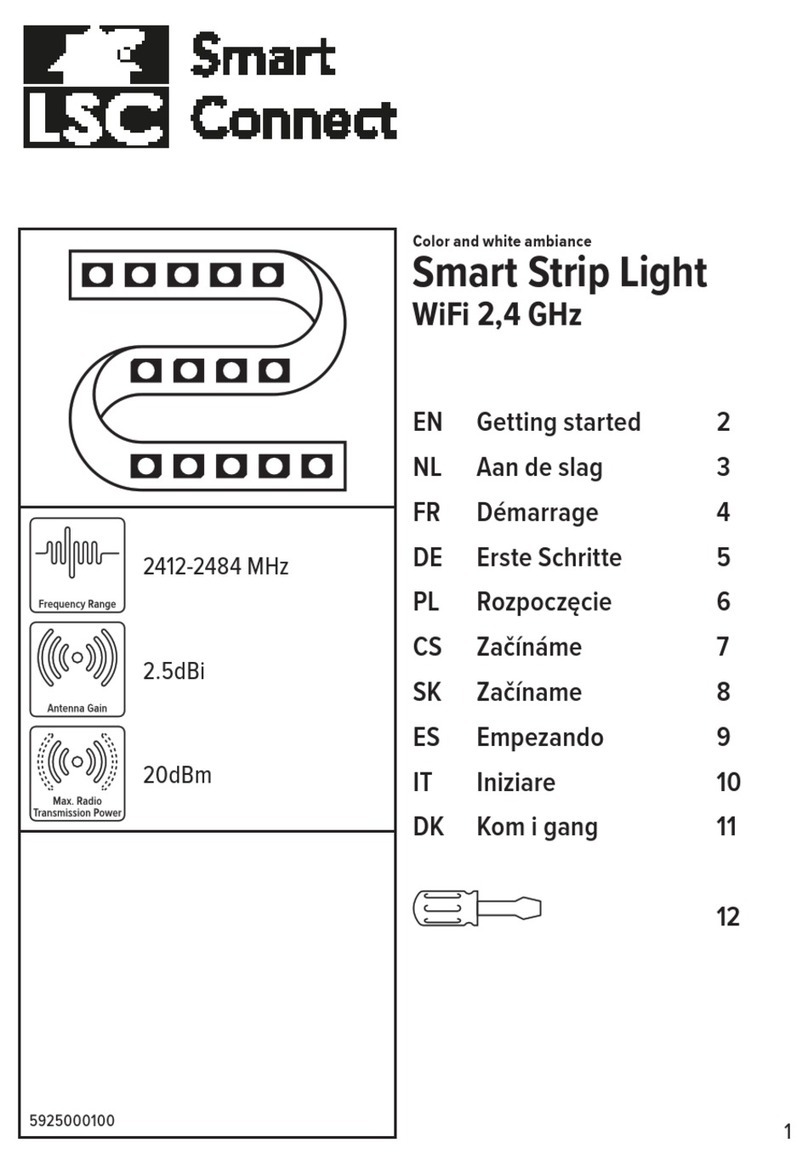
Smart LED strip
WiFi 2,4 GHz
6125000100
www.lsc-smartconnect.com
EN Getting started
Before you start adding this LSC Smart Connect product, write down the name and
password, including spaces and capital letters, of your WiFi network. Make sure
you have a strong Wi-Fi signal.
Note: This item only works on 2.4GHz WiFi network, not on 5GHz WiFi network. If
you get a message that the product only works on 2.4 GHz networks, then you
need to change your network's Wi-Fi frequency to 2.4 GHz in the settings menu of
the router. Please contact your internet provider for this.
1. Download the LSC Smart Connect app from the Google Play Store, the Apple Store
or scan the QR code.
2. Open the app. Are you using the app for the first time? Then follow the instructions
on the screen to create your account.
3. Turn the device on. Do you have bluetooth on your phone and is it turned on? Then a
connection is made automatically. Can't connect automatically? Then add this
device by touching the + (top right corner of the screen). Follow the prompts to
complete the installation. For more information, see our website:
www.lsc-smartconnect.com
4. Reset: You may need to reset the product first. You do this by turning the lamp on /
o / 3 times. The lamp will start blinking. Then proceed with step 3.
NL Aan de slag
Noteer voordat u begint met het toevoegen van dit LSC Smart Connect product de
naam en het wachtwoord, inclusief spaties en hoofdletters, van uw WiFi-netwerk.
Zorg voor een sterk Wi-Fi signaal.
Opmerking: dit item werkt alleen op een 2.4 GHz wifi-netwerk, niet op een 5 GHz
WiFi-netwerk. Krijgt u de melding dat het product alleen op 2.4GHz-netwerken
werkt, dan moet u de wifi-frequentie van uw netwerk naar 2.4 GHz wijzigen in het
menu voor instellingen van de router. Neem hiervoor contact op met uw
internetprovider.
1. Download de LSC Smart Connect app van de Google Play Store, de Apple Store of
scan de QR-code.
2. Open de app. Gebruikt u de app voor de eerste keer? Volg dan de instructies op het
scherm om uw account aan te maken.
3. Zet het apparaat aan. Heb je bluetooth op je telefoon en staat deze aan? Er wordt
dan automatisch een verbinding tot stand gebracht. Kunt u niet automatisch
verbinding maken? Voeg vervolgens dit apparaat toe door de + (rechterbovenhoek
van het scherm) aan te raken. Volg de aanwijzingen om de installatie te voltooien.
Voor meer informatie, zie onze website: www.lsc-smartconnect.com
4. Reset: Mogelijk moet u het product eerst resetten. Dit doe u door de lamp 3 keer
aan/uit te zetten. De lampje begint te knipperen. Ga dan verder met stap 3.
Démarrage
Avant de commencer à ajouter ce produit LSC Smart Connect, écrivez le nom et le
mot de passe, y compris les espaces et les majuscules, de votre réseau WiFi.
Assurez-vous d'avoir un fort signal Wi-Fi.
Remarque: Cet élément fonctionne uniquement sur le réseau WiFi de 2,4 GHz, pas
sur le réseau WiFi 5GHz. Si vous recevez un message que le produit fonctionne
uniquement sur des réseaux de 2,4 GHz, vous devez modifier la fréquence Wi-Fi de
votre réseau à 2,4 GHz dans le menu Paramètres du routeur. Veuillez contacter
votre fournisseur Internet pour cela.
1. Téléchargez l'application LSC Smart Connect à partir de Google Play Store, Apple
Store ou Scannez le code QR.
2. Ouvrez l'application. Utilisez-vous l'application pour la première fois? Suivez
ensuite les instructions à l'écran pour créer votre compte.
3. Allumez l'appareil. Avez-vous le Bluetooth sur votre téléphone et est-il activé ?
Ensuite, une connexion est établie automatiquement. Vous ne pouvez pas vous
connecter automatiquement ? Ajoutez ensuite cet appareil en touchant le + (coin
supérieur droit de l'écran). Suivez les instructions pour terminer l'installation. Pour
plus d'informations, consultez notre site Web : www.lsc-smartconnect.com
4. Réinitialiser : vous devrez peut-être d'abord réinitialiser le produit. Pour ce faire,
allumez / éteignez / 3 fois la lampe. La lampe commencera à clignoter. Passez
ensuite à l'étape 3.
FR
DE
Getting started
Before you start adding this LSC Smart Connect product, write down the name and
password, including spaces and capital letters, of your WiFi network. Make sure
you have a strong Wi-Fi signal.
Note: This item only works on 2.4GHz WiFi network, not on 5GHz WiFi network. If
you get a message that the product only works on 2.4 GHz networks, then you
need to change your network's Wi-Fi frequency to 2.4 GHz in the settings menu of
the router. Please contact your internet provider for this.
1. Download the LSC Smart Connect app from the Google Play Store, the Apple Store
or scan the QR code.
2. Open the app. Are you using the app for the first time? Then follow the instructions
on the screen to create your account.
3. Turn the device on. Do you have bluetooth on your phone and is it turned on? Then a
connection is made automatically. Can't connect automatically? Then add this
device by touching the + (top right corner of the screen). Follow the prompts to
complete the installation. For more information, see our website:
www.lsc-smartconnect.com
4. Reset: You may need to reset the product first. You do this by turning the lamp on /
o / 3 times. The lamp will start blinking. Then proceed with step 3.
Aan de slag
Noteer voordat u begint met het toevoegen van dit LSC Smart Connect product de
naam en het wachtwoord, inclusief spaties en hoofdletters, van uw WiFi-netwerk.
Zorg voor een sterk Wi-Fi signaal.
Opmerking: dit item werkt alleen op een 2.4 GHz wifi-netwerk, niet op een 5 GHz
WiFi-netwerk. Krijgt u de melding dat het product alleen op 2.4GHz-netwerken
werkt, dan moet u de wifi-frequentie van uw netwerk naar 2.4 GHz wijzigen in het
menu voor instellingen van de router. Neem hiervoor contact op met uw
internetprovider.
1. Download de LSC Smart Connect app van de Google Play Store, de Apple Store of
scan de QR-code.
2. Open de app. Gebruikt u de app voor de eerste keer? Volg dan de instructies op het
scherm om uw account aan te maken.
3. Zet het apparaat aan. Heb je bluetooth op je telefoon en staat deze aan? Er wordt
dan automatisch een verbinding tot stand gebracht. Kunt u niet automatisch
verbinding maken? Voeg vervolgens dit apparaat toe door de + (rechterbovenhoek
van het scherm) aan te raken. Volg de aanwijzingen om de installatie te voltooien.
Voor meer informatie, zie onze website: www.lsc-smartconnect.com
4. Reset: Mogelijk moet u het product eerst resetten. Dit doe u door de lamp 3 keer
aan/uit te zetten. De lampje begint te knipperen. Ga dan verder met stap 3.
Démarrage
Avant de commencer à ajouter ce produit LSC Smart Connect, écrivez le nom et le
mot de passe, y compris les espaces et les majuscules, de votre réseau WiFi.
Assurez-vous d'avoir un fort signal Wi-Fi.
Remarque: Cet élément fonctionne uniquement sur le réseau WiFi de 2,4 GHz, pas
sur le réseau WiFi 5GHz. Si vous recevez un message que le produit fonctionne
uniquement sur des réseaux de 2,4 GHz, vous devez modifier la fréquence Wi-Fi de
votre réseau à 2,4 GHz dans le menu Paramètres du routeur. Veuillez contacter
votre fournisseur Internet pour cela.
1. Téléchargez l'application LSC Smart Connect à partir de Google Play Store, Apple
Store ou Scannez le code QR.
2. Ouvrez l'application. Utilisez-vous l'application pour la première fois? Suivez
ensuite les instructions à l'écran pour créer votre compte.
3. Allumez l'appareil. Avez-vous le Bluetooth sur votre téléphone et est-il activé ?
Ensuite, une connexion est établie automatiquement. Vous ne pouvez pas vous
connecter automatiquement ? Ajoutez ensuite cet appareil en touchant le + (coin
supérieur droit de l'écran). Suivez les instructions pour terminer l'installation. Pour
plus d'informations, consultez notre site Web : www.lsc-smartconnect.com
4. Réinitialiser : vous devrez peut-être d'abord réinitialiser le produit. Pour ce faire,
allumez / éteignez / 3 fois la lampe. La lampe commencera à clignoter. Passez
ensuite à l'étape 3.
Erste Schritte
Bevor Sie anfangen, dieses LSC Smart Connect-Produkt hinzuzufügen, notieren Sie
sich den Namen und das Kennwort, einschließlich Leerzeichen und Großbuchstaben,
aus Ihrem WLAN-Netzwerk. Stellen Sie sicher, dass Sie ein starkes Wi-Fi-Signal haben.
Hinweis: Dieser Artikel funktioniert nur auf einem 2,4-GHz-WiFi-Netzwerk, einem
nicht 5-GHz-WiFi-Netzwerk. Wenn Sie eine Nachricht erhalten, dass das Produkt
nur auf 2,4 GHz-Netzwerken arbeitet, müssen Sie die Wi-Fi-Frequenz Ihres
Netzwerks im Menü Router-Einstellungen in 2,4 GHz ändern. Wenden Sie sich an
Ihren Internetanbieter dafür.
1. Laden Sie die LSC Smart Connect-App aus dem Google Play Store, dem Apple Store
oder scannen Sie den QR-Code herunter.
2. Önen Sie die App. Verwenden Sie die App zum ersten Mal? Befolgen Sie dann den
Anweisungen auf dem Bildschirm, um Ihr Konto zu erstellen.
3. Schalten Sie das Gerät ein. Hast du Bluetooth auf deinem Handy und ist es
eingeschaltet? Dann wird automatisch eine Verbindung hergestellt. Automatische
Verbindung nicht möglich? Fügen Sie dann dieses Gerät hinzu, indem Sie auf das +
(obere rechte Ecke des Bildschirms) tippen. Folgen Sie den Anweisungen, um die
Installation abzuschließen. Weitere Informationen finden Sie auf unserer Website:
www.lsc-smartconnect.com
4. Zurücksetzen: Möglicherweise müssen Sie das Produkt zuerst zurücksetzen. Sie
tun dies, indem Sie die Lampe dreimal ein- / ausschalten. Die Lampe beginnt zu
blinken. Fahren Sie dann mit Schritt 3 fort.
Rozpoczęcie
Przed rozpoczęciem dodawania tego LSC Smart Connect Product, zapisz nazwę i
hasło, w tym spacje i wielkie litery sieci WIFI. Upewnij się, że masz silny sygnał
Wi-Fi.
UWAGA: Ten przedmiot działa tylko na sieci WIFI 2.4 GHz, a nie w sieci WiFi 5 GHz.
Jeśli otrzymasz wiadomość, że produkt działa tylko w sieciach 2.4 GHz, musisz
zmienić częstotliwość Wi-Fi swojej sieci do 2,4 GHz w menu ustawień routera.
Skontaktuj się z dostawcą internetowym.
1. Pobierz LSC Smart Connect App z sklepu Google Play, sklep Apple lub zeskanuj kod QR.
2. Otwórz aplikację. Czy używasz aplikacji po raz pierwszy? Następnie postępuj
zgodnie z instrukcjami wyświetlanymi na ekranie, aby utworzyć konto.
3. Włącz urządzenie. Czy masz w telefonie bluetooth i czy jest włączony? Następnie
połączenie jest nawiązywane automatycznie. Nie możesz połączyć się
automatycznie? Następnie dodaj to urządzenie, dotykając + (prawy górny róg
ekranu). Postępuj zgodnie z instrukcjami, aby zakończyć instalację. Więcej
informacji można znaleźć na naszej stronie internetowej: www.lsc-smartconnect.com
4. Resetowanie: może być konieczne uprzednie zresetowanie produktu. Robisz to
włączając/wyłączając lampę/3 razy. Lampka zacznie migać. Następnie przejdź do
kroku 3.
PL
CZ
Erste Schritte
Bevor Sie anfangen, dieses LSC Smart Connect-Produkt hinzuzufügen, notieren Sie
sich den Namen und das Kennwort, einschließlich Leerzeichen und Großbuchstaben,
aus Ihrem WLAN-Netzwerk. Stellen Sie sicher, dass Sie ein starkes Wi-Fi-Signal haben.
Hinweis: Dieser Artikel funktioniert nur auf einem 2,4-GHz-WiFi-Netzwerk, einem
nicht 5-GHz-WiFi-Netzwerk. Wenn Sie eine Nachricht erhalten, dass das Produkt
nur auf 2,4 GHz-Netzwerken arbeitet, müssen Sie die Wi-Fi-Frequenz Ihres
Netzwerks im Menü Router-Einstellungen in 2,4 GHz ändern. Wenden Sie sich an
Ihren Internetanbieter dafür.
1. Laden Sie die LSC Smart Connect-App aus dem Google Play Store, dem Apple Store
oder scannen Sie den QR-Code herunter.
2. Önen Sie die App. Verwenden Sie die App zum ersten Mal? Befolgen Sie dann den
Anweisungen auf dem Bildschirm, um Ihr Konto zu erstellen.
3. Schalten Sie das Gerät ein. Hast du Bluetooth auf deinem Handy und ist es
eingeschaltet? Dann wird automatisch eine Verbindung hergestellt. Automatische
Verbindung nicht möglich? Fügen Sie dann dieses Gerät hinzu, indem Sie auf das +
(obere rechte Ecke des Bildschirms) tippen. Folgen Sie den Anweisungen, um die
Installation abzuschließen. Weitere Informationen finden Sie auf unserer Website:
www.lsc-smartconnect.com
4. Zurücksetzen: Möglicherweise müssen Sie das Produkt zuerst zurücksetzen. Sie
tun dies, indem Sie die Lampe dreimal ein- / ausschalten. Die Lampe beginnt zu
blinken. Fahren Sie dann mit Schritt 3 fort.
Rozpoczęcie
Przed rozpoczęciem dodawania tego LSC Smart Connect Product, zapisz nazwę i
hasło, w tym spacje i wielkie litery sieci WIFI. Upewnij się, że masz silny sygnał
Wi-Fi.
UWAGA: Ten przedmiot działa tylko na sieci WIFI 2.4 GHz, a nie w sieci WiFi 5 GHz.
Jeśli otrzymasz wiadomość, że produkt działa tylko w sieciach 2.4 GHz, musisz
zmienić częstotliwość Wi-Fi swojej sieci do 2,4 GHz w menu ustawień routera.
Skontaktuj się z dostawcą internetowym.
1. Pobierz LSC Smart Connect App z sklepu Google Play, sklep Apple lub zeskanuj kod QR.
2. Otwórz aplikację. Czy używasz aplikacji po raz pierwszy? Następnie postępuj
zgodnie z instrukcjami wyświetlanymi na ekranie, aby utworzyć konto.
3. Włącz urządzenie. Czy masz w telefonie bluetooth i czy jest włączony? Następnie
połączenie jest nawiązywane automatycznie. Nie możesz połączyć się
automatycznie? Następnie dodaj to urządzenie, dotykając + (prawy górny róg
ekranu). Postępuj zgodnie z instrukcjami, aby zakończyć instalację. Więcej
informacji można znaleźć na naszej stronie internetowej: www.lsc-smartconnect.com
4. Resetowanie: może być konieczne uprzednie zresetowanie produktu. Robisz to
włączając/wyłączając lampę/3 razy. Lampka zacznie migać. Następnie przejdź do
kroku 3.
Začínáme
Než začnete přidat tento LSC Smart Connect produkt, proveďte si poznámku jména
a hesla, včetně mezer a velkých písmen z vaší sítě Wi-Fi. Ujistěte se, že máte silný
signál Wi-Fi.
Poznámka: Tento článek funguje pouze na 2,4 GHz WiFi síti, ne-5 GHz WiFi sítě.
Pokud se zobrazí zpráva, že produkt pracuje pouze na sítích 2,4 GHz, musíte změnit
frekvenci Wi-Fi sítě v menu nastavení směrovače v 2,4 GHz. Obraťte se na svého
poskytovatele internetu.
1. Stáhněte aplikaci LSC Smart Connect aplikace z obchodu Google Play, Apple Store
nebo Skenovat QR kód.
2. Otevřete aplikaci. Používáte aplikaci poprvé? Poté postupujte podle pokynů na
obrazovce a vytvořte svůj účet.
3. Zapněte zařízení. Máš v telefonu bluetooth a je zapnutý? Poté se automaticky
vytvoří připojení. Nemůžete se připojit automaticky? Poté toto zařízení přidejte
klepnutím na + (pravý horní roh obrazovky). Dokončete instalaci podle pokynů. Pro
více informací navštivte naše webové stránky: www.lsc-smartconnect.com
4. Resetovat: Možná budete muset nejprve resetovat produkt. Provedete to 3x
zapnutím / vypnutím / lampou. Kontrolka začne blikat. Poté pokračujte krokem 3.
SK
IT
Rozpoczęcie
Przed rozpoczęciem dodawania tego LSC Smart Connect Product, zapisz nazwę i
hasło, w tym spacje i wielkie litery sieci WIFI. Upewnij się, że masz silny sygnał
Wi-Fi.
UWAGA: Ten przedmiot działa tylko na sieci WIFI 2.4 GHz, a nie w sieci WiFi 5 GHz.
Jeśli otrzymasz wiadomość, że produkt działa tylko w sieciach 2.4 GHz, musisz
zmienić częstotliwość Wi-Fi swojej sieci do 2,4 GHz w menu ustawień routera.
Skontaktuj się z dostawcą internetowym.
1. Pobierz LSC Smart Connect App z sklepu Google Play, sklep Apple lub zeskanuj kod QR.
2. Otwórz aplikację. Czy używasz aplikacji po raz pierwszy? Następnie postępuj
zgodnie z instrukcjami wyświetlanymi na ekranie, aby utworzyć konto.
3. Włącz urządzenie. Czy masz w telefonie bluetooth i czy jest włączony? Następnie
połączenie jest nawiązywane automatycznie. Nie możesz połączyć się
automatycznie? Następnie dodaj to urządzenie, dotykając + (prawy górny róg
ekranu). Postępuj zgodnie z instrukcjami, aby zakończyć instalację. Więcej
informacji można znaleźć na naszej stronie internetowej: www.lsc-smartconnect.com
4. Resetowanie: może być konieczne uprzednie zresetowanie produktu. Robisz to
włączając/wyłączając lampę/3 razy. Lampka zacznie migać. Następnie przejdź do
kroku 3.
Začínáme
Než začnete přidat tento LSC Smart Connect produkt, proveďte si poznámku jména
a hesla, včetně mezer a velkých písmen z vaší sítě Wi-Fi. Ujistěte se, že máte silný
signál Wi-Fi.
Poznámka: Tento článek funguje pouze na 2,4 GHz WiFi síti, ne-5 GHz WiFi sítě.
Pokud se zobrazí zpráva, že produkt pracuje pouze na sítích 2,4 GHz, musíte změnit
frekvenci Wi-Fi sítě v menu nastavení směrovače v 2,4 GHz. Obraťte se na svého
poskytovatele internetu.
1. Stáhněte aplikaci LSC Smart Connect aplikace z obchodu Google Play, Apple Store
nebo Skenovat QR kód.
2. Otevřete aplikaci. Používáte aplikaci poprvé? Poté postupujte podle pokynů na
obrazovce a vytvořte svůj účet.
3. Zapněte zařízení. Máš v telefonu bluetooth a je zapnutý? Poté se automaticky
vytvoří připojení. Nemůžete se připojit automaticky? Poté toto zařízení přidejte
klepnutím na + (pravý horní roh obrazovky). Dokončete instalaci podle pokynů. Pro
více informací navštivte naše webové stránky: www.lsc-smartconnect.com
4. Resetovat: Možná budete muset nejprve resetovat produkt. Provedete to 3x
zapnutím / vypnutím / lampou. Kontrolka začne blikat. Poté pokračujte krokem 3.
Začíname
Skôr ako začnete pridať tento produkt LSC Smart Connect, vykonajte poznámku
názvu a hesla, vrátane medzier a veľkých písmen z vašej siete Wi-Fi. Uistite sa, že
máte silný signál Wi-Fi.
POZNÁMKA: Tento článok funguje len na WiFi WiFi 2,4 GHZ, sieti WiFi, ktorý nie je
5 GHZ. Ak sa zobrazí správa, že produkt funguje len na sieťach 2,4 GHz, musíte
zmeniť frekvenciu Wi-Fi vašej siete v ponuke Nastavenia smerovača v 2.4 GHz.
Obráťte sa na svojho poskytovateľa internetu.
1. Stiahnite si aplikáciu LSC Smart Connect z obchodu Google Play, Apple Store alebo
Skenovať QR kód.
2. Otvorte aplikáciu. Používate aplikáciu prvýkrát? Ak chcete vytvoriť svoj účet,
postupujte podľa pokynov na obrazovke.
3. Zapnite zariadenie. Máš v telefóne bluetooth a je zapnutý? Potom sa spojenie
vytvorí automaticky. Nedá sa pripojiť automaticky? Potom pridajte toto zariadenie
dotykom na + (pravý horný roh obrazovky). Dokončite inštaláciu podľa pokynov.
Viac informácií nájdete na našej webovej stránke: www.lsc-smartconnect.com
4. Resetovať: Možno budete musieť najskôr resetovať produkt. Urobíte to tak, že lampu
zapnete / vypnete / 3 krát. Kontrolka začne blikať. Potom pokračujte krokom 3.
Iniziare
Prima di iniziare ad aggiungere questo prodotto LSC Smart Connect, annotare il
nome e la password, inclusi gli spazi e le lettere maiuscole, della rete WiFi.
Assicurati di avere un forte segnale Wi-Fi.
Nota: questo articolo funziona solo sulla rete WiFi da 2,4 GHz, non sulla rete WiFi
da 5 GHz. Se si ottiene un messaggio che il prodotto funziona solo su reti 2.4 GHz, è
necessario modificare la frequenza wi-fi della rete a 2,4 GHz nel menu Impostazioni
del router. Si prega di contattare il proprio fornitore Internet per questo.
1. Scarica l'app LSC Smart Connect da Google Play Store, Apple Store o scansiona il
codice QR.
2. Apri l'app. Stai usando l'app per la prima volta? Quindi seguire le istruzioni sullo
schermo per creare il tuo account.
3. Accendere il dispositivo. Hai il bluetooth sul telefono ed è acceso? Quindi viene
stabilita automaticamente una connessione. Non riesci a connetterti
automaticamente? Quindi aggiungi questo dispositivo toccando il + (angolo in alto
a destra dello schermo). Segui le istruzioni per completare l'installazione. Per
ulteriori informazioni, visitare il nostro sito Web: www.lsc-smartconnect.com
4. Ripristina: potrebbe essere necessario ripristinare prima il prodotto. Puoi farlo
accendendo / spegnendo la lampada / 3 volte. La spia inizierà a lampeggiare.
Quindi procedere con il passaggio 3.
Empezando
"Antes de comenzar a agregar este producto LSC Smart Connect, anote el nombre y
la contraseña, incluidos los espacios y las letras mayúsculas, de su red WiFi.
Asegúrese de tener una señal de Wi-Fi fuerte.
Nota: este artículo solo funciona en la red WiFi de 2.4GHz, no en la red WiFi de 5
GHz. Si recibe un mensaje que el producto solo funciona en las redes de 2.4 GHz,
debe cambiar la frecuencia Wi-Fi de su red a 2.4 GHz en el menú de configuración
del enrutador. Póngase en contacto con su proveedor de Internet para esto.
1. Descargue la aplicación LSC Smart Connect de la tienda de Google Play, la Apple
Store o escanee el código QR.
2. Abra la aplicación. ¿Estás usando la aplicación por primera vez? Luego siga las
instrucciones en la pantalla para crear su cuenta.
3. Encienda el dispositivo. ¿Tienes bluetooth en tu teléfono y está encendido? A
continuación, se realiza una conexión automáticamente. ¿No puedes conectarte
automáticamente? Luego agregue este dispositivo tocando el + (esquina superior
derecha de la pantalla). Siga las instrucciones para completar la instalación. Para
obtener más información, consulte nuestro sitio web: www.lsc-smartconnect.com
4. Restablecer: es posible que primero deba restablecer el producto. Para ello,
encienda / apague / encienda la lámpara 3 veces. La lámpara comenzará a
parpadear. Luego continúe con el paso 3.
Iniciando
"Antes de começar a adicionar este produto LSC Smart Connect, anote o nome e a
senha, incluindo espaços e letras maiúsculas, da sua rede Wi-Fi. Certifique-se de
ter um sinal Wi-Fi forte.
Nota: Este item funciona apenas na rede WiFi de 2,4 GHz, não na rede WiFi de 5
GHz. Se você receber uma mensagem de que o produto funciona apenas em redes
de 2,4 GHz, será necessário alterar a frequência WiFi da sua rede para 2,4 GHz no
menu de configurações do roteador. Entre em contato com seu provedor de
Internet para isso.
1. Baixe o aplicativo LSC Smart Connect da Google Play Store, Apple Store ou
digitalize o código QR.
2. Abra o aplicativo. Está usando o aplicativo pela primeira vez? Em seguida, siga as
instruções na tela para criar sua conta.
3. Ligue o dispositivo. Você tem bluetooth no seu telefone e está ligado? Uma
conexão é então feita automaticamente. Não consegue se conectar
automaticamente? Em seguida, adicione este dispositivo tocando no + (canto
superior direito da tela). Siga as instruções para completar a instalação. Para obter
mais informações, consulte nosso site: www.lsc-smartconnect.com
4. Redefinir: Talvez seja necessário redefinir o produto primeiro. Para fazer isso, ligue
/ desligue / ligue a lâmpada 3 vezes. A lâmpada começará a piscar. Em seguida,
continue com o passo 3.
Začíname
Skôr ako začnete pridať tento produkt LSC Smart Connect, vykonajte poznámku
názvu a hesla, vrátane medzier a veľkých písmen z vašej siete Wi-Fi. Uistite sa, že
máte silný signál Wi-Fi.
POZNÁMKA: Tento článok funguje len na WiFi WiFi 2,4 GHZ, sieti WiFi, ktorý nie je
5 GHZ. Ak sa zobrazí správa, že produkt funguje len na sieťach 2,4 GHz, musíte
zmeniť frekvenciu Wi-Fi vašej siete v ponuke Nastavenia smerovača v 2.4 GHz.
Obráťte sa na svojho poskytovateľa internetu.
1. Stiahnite si aplikáciu LSC Smart Connect z obchodu Google Play, Apple Store alebo
Skenovať QR kód.
2. Otvorte aplikáciu. Používate aplikáciu prvýkrát? Ak chcete vytvoriť svoj účet,
postupujte podľa pokynov na obrazovke.
3. Zapnite zariadenie. Máš v telefóne bluetooth a je zapnutý? Potom sa spojenie
vytvorí automaticky. Nedá sa pripojiť automaticky? Potom pridajte toto zariadenie
dotykom na + (pravý horný roh obrazovky). Dokončite inštaláciu podľa pokynov.
Viac informácií nájdete na našej webovej stránke: www.lsc-smartconnect.com
4. Resetovať: Možno budete musieť najskôr resetovať produkt. Urobíte to tak, že lampu
zapnete / vypnete / 3 krát. Kontrolka začne blikať. Potom pokračujte krokom 3.
Iniziare
Prima di iniziare ad aggiungere questo prodotto LSC Smart Connect, annotare il
nome e la password, inclusi gli spazi e le lettere maiuscole, della rete WiFi.
Assicurati di avere un forte segnale Wi-Fi.
Nota: questo articolo funziona solo sulla rete WiFi da 2,4 GHz, non sulla rete WiFi
da 5 GHz. Se si ottiene un messaggio che il prodotto funziona solo su reti 2.4 GHz, è
necessario modificare la frequenza wi-fi della rete a 2,4 GHz nel menu Impostazioni
del router. Si prega di contattare il proprio fornitore Internet per questo.
1. Scarica l'app LSC Smart Connect da Google Play Store, Apple Store o scansiona il
codice QR.
2. Apri l'app. Stai usando l'app per la prima volta? Quindi seguire le istruzioni sullo
schermo per creare il tuo account.
3. Accendere il dispositivo. Hai il bluetooth sul telefono ed è acceso? Quindi viene
stabilita automaticamente una connessione. Non riesci a connetterti
automaticamente? Quindi aggiungi questo dispositivo toccando il + (angolo in alto
a destra dello schermo). Segui le istruzioni per completare l'installazione. Per
ulteriori informazioni, visitare il nostro sito Web: www.lsc-smartconnect.com
4. Ripristina: potrebbe essere necessario ripristinare prima il prodotto. Puoi farlo
accendendo / spegnendo la lampada / 3 volte. La spia inizierà a lampeggiare.
Quindi procedere con il passaggio 3.
ES Empezando
"Antes de comenzar a agregar este producto LSC Smart Connect, anote el nombre y
la contraseña, incluidos los espacios y las letras mayúsculas, de su red WiFi.
Asegúrese de tener una señal de Wi-Fi fuerte.
Nota: este artículo solo funciona en la red WiFi de 2.4GHz, no en la red WiFi de 5
GHz. Si recibe un mensaje que el producto solo funciona en las redes de 2.4 GHz,
debe cambiar la frecuencia Wi-Fi de su red a 2.4 GHz en el menú de configuración
del enrutador. Póngase en contacto con su proveedor de Internet para esto.
1. Descargue la aplicación LSC Smart Connect de la tienda de Google Play, la Apple
Store o escanee el código QR.
2. Abra la aplicación. ¿Estás usando la aplicación por primera vez? Luego siga las
instrucciones en la pantalla para crear su cuenta.
3. Encienda el dispositivo. ¿Tienes bluetooth en tu teléfono y está encendido? A
continuación, se realiza una conexión automáticamente. ¿No puedes conectarte
automáticamente? Luego agregue este dispositivo tocando el + (esquina superior
derecha de la pantalla). Siga las instrucciones para completar la instalación. Para
obtener más información, consulte nuestro sitio web: www.lsc-smartconnect.com
4. Restablecer: es posible que primero deba restablecer el producto. Para ello,
encienda / apague / encienda la lámpara 3 veces. La lámpara comenzará a
parpadear. Luego continúe con el paso 3.
PT Iniciando
"Antes de começar a adicionar este produto LSC Smart Connect, anote o nome e a
senha, incluindo espaços e letras maiúsculas, da sua rede Wi-Fi. Certifique-se de
ter um sinal Wi-Fi forte.
Nota: Este item funciona apenas na rede WiFi de 2,4 GHz, não na rede WiFi de 5
GHz. Se você receber uma mensagem de que o produto funciona apenas em redes
de 2,4 GHz, será necessário alterar a frequência WiFi da sua rede para 2,4 GHz no
menu de configurações do roteador. Entre em contato com seu provedor de
Internet para isso.
1. Baixe o aplicativo LSC Smart Connect da Google Play Store, Apple Store ou
digitalize o código QR.
2. Abra o aplicativo. Está usando o aplicativo pela primeira vez? Em seguida, siga as
instruções na tela para criar sua conta.
3. Ligue o dispositivo. Você tem bluetooth no seu telefone e está ligado? Uma
conexão é então feita automaticamente. Não consegue se conectar
automaticamente? Em seguida, adicione este dispositivo tocando no + (canto
superior direito da tela). Siga as instruções para completar a instalação. Para obter
mais informações, consulte nosso site: www.lsc-smartconnect.com
4. Redefinir: Talvez seja necessário redefinir o produto primeiro. Para fazer isso, ligue
/ desligue / ligue a lâmpada 3 vezes. A lâmpada começará a piscar. Em seguida,
continue com o passo 3.
EN Installation instructions
NL Installatie instructies
FR Consignes de montage
DE Bedienungsanleitung
PL Instrukcje Instalacji
CZ Pokyny pro instalaci
IT Istruzioni per l’installazione
SK Pokyny pre inštaláciu
ES Instrucciones de instalación
PT Instruções de instalação
Smart LED strip
WiFi 2,4 GHz
6125000100
EN Installation instructions
NL Installatie instructies
FR Consignes de montage
DE Bedienungsanleitung
PL Instrukcje Instalacji
CZ Pokyny pro instalaci
IT Istruzioni per l’installazione
SK Pokyny pre inštaláciu
ES Instrucciones de instalación
PT Instruções de instalação
4
5
L
1 2
3
67
1x 5m
8x
1x1x CR2025 - 3,3 Volt
24 V/DC
< 1550 MM >
< 100 MM >
< 5 METER >
2
1
EN - Installation Instructions
Please read the Safety Instructions first.
1. Clean the surface
2. Measure the desired lenght
3. Cut to size
4. Install the clips
5. Peel o protective foil and put the strip in place
6. Connect strip to the controller
7. Use 3M tape to mount the controller to
any surface (1)
8. Connect controller to the DC adapter (2)
Remote control instructions
The remote control uses a button battery (CR2025 - 3 V). When
the remote control is not in use, it is automatically in standby
mode. The battery life under normal use is at least six months.
The battery can be replaced by an equivalent type.
NL - Installatie instructies
Lees eerst de veiligheid instructie.
1. Maak het oppervlak schoon
2. Meet de gewenste lengte
3. Knip de gewenste lengte af
4. Installeer de clips
5. Verwijder de beschermfolie en plak de strip op zijn plek
6. Verbind de strip met de controller
7. Gebruik de 3M plakstrip om de controller
vast te zetten (1)
8. Verbind de controller met de DC adapter (2)
Instructies afstandsbediening
De afstandbediening werkt op een knoop batterij (CR2025 - 3 V).
Wanneer de afstandbediening niet in gebruik is staat deze
automatisch op stand-by modus. De levensduur van de batterij
bij normaal gebruik is ten minste zes maanden. De batterij kan
vervangen worden door een gelijk type.
FR - Consignes de montage
Veuillez lire les consignes de sécurité préalablement à
toute utilisation.
1. Nettoyez la surface
2. Mesurez la longueur désirée
3. Couper à la bonne taille
4. Installez les clips
5. Décollez le film protecteur et mettez la bande en place
6. Connectez la bande au contrôleur
7. Utilisez du ruban adhésif 3M pour monter le contrôleur
sur toute surface (1)
8. Connectez le contrôleur à l'adaptateur CC (2)
Instructions de la télécommande
La télécommande utilise une pile bouton (CR2025 - 3 V). Lorsque
la télécommande n'est pas utilisée, elle est automatiquement en
mode veille. La durée de vie de la batterie en utilisation normale
est d'au moins six mois. La batterie peut être remplacée par une
batterie de type équivalent.
DE - Bedienungsanleitung
Bitte lesen Sie zuerst die Sicherheitshinweise
1. Reinigen Sie die Oberfläche
2. Messen Sie die gewünschte Länge
3. Zuschneiden
4. Installieren Sie die Clips
5. Schutzfolie abziehen und Streifen auflegen
6. Verbinden Sie die Leiste mit dem Controller
7. Verwenden Sie 3M-Klebeband, um den Controller zu
montieren jede Oberfläche (1)
8. Verbinden Sie den Controller mit dem DC-Adapter (2)
Anweisungen zur Fernbedienung
Die Fernbedienung verwendet eine Knopatterie (CR2025 - 3 V).
Wenn die Fernbedienung nicht verwendet wird, befindet sie sich
automatisch im Standby-Modus. Die Batterielebensdauer beträgt
bei normalem Gebrauch mindestens sechs Monate. Die Batterie
kann durch einen gleichwertigen Typ ersetzt werden.
PL - Instrukcje Instalacji
Przeczytaj najpierw Instrukcje bezpieczeństwa.
1. Oczyść powierzchnię
2. Zmierz żądaną długość
3. Przytnij na wymiar
4. Zainstaluj klipsy
5. Zdejmij folię ochronną i umieść pasek na miejscu
6. Podłącz pasek do kontrolera
7. Użyj taśmy 3M, aby zamontować kontroler do
dowolna powierzchnia (1)
8. Podłącz kontroler do zasilacza DC (2)
Instrukcje zdalnego sterowania
Pilot wykorzystuje baterię guzikową (CR2025 - 3 V). Gdy pilot nie
jest używany, automatycznie przechodzi w tryb czuwania.
Żywotność baterii przy normalnym użytkowaniu wynosi co
najmniej sześć miesięcy. Baterię można zastąpić równoważnym
typem.
CZ - Pokyny pro instalaci
Nejprve si přečtěte bezpečnostní pokyny.
1. Očistěte povrch
2. Změřte požadovanou délku
3. Nakrájejte na požadovanou velikost
4. Nainstalujte spony
5. Sundejte ochrannou fólii a vložte proužek na místo
6. Připojte proužek k ovladači
7. Použijte 3M pásku k připevnění ovladače
jakýkoli povrch (1)
8. Připojte ovladač k adaptéru DC (2)
Pokyny k dálkovému ovládání
Dálkový ovladač používá knoflíkovou baterii (CR2025 - 3 V). Když
dálkové ovládání nepoužíváte, je automaticky v pohotovostním
režimu. Životnost baterie při běžném používání je minimálně šest
měsíců. Baterii lze vyměnit za ekvivalentní typ.
IT - Istruzioni per l’installazione
Si prega di leggere prima le istruzioni di sicurezza.
1. Pulisci la superficie
2. Misurare la lunghezza desiderata
3. Tagliare a misura
4. Installare le clip
5. Staccare la pellicola protettiva e posizionare la striscia
6. Collegare la striscia al controller
7. Utilizzare nastro 3M su cui montare il controller
qualsiasi superficie (1)
8. Collegare il controller all'adattatore CC (2)
Istruzioni di controllo remoto
Il telecomando utilizza una batteria a bottone (CR2025 - 3 V).
Quando il telecomando non è in uso, è automaticamente in
modalità standby. La durata della batteria in condizioni di utilizzo
normale è di almeno sei mesi. La batteria può essere sostituita
con un tipo equivalente.
SK - Pokyny pre inštaláciu
Najprv si prečítajte bezpečnostné pokyny.
1. Vyčistite povrch
2. Odmerajte požadovanú dĺžku
3. Nakrájajte na požadovanú veľkosť
4. Nainštalujte spony
5. Odlepte ochrannú fóliu a vložte prúžok na miesto
6. Pripojte prúžok k ovládaču
7. Na pripevnenie ovládača použite 3M pásku
akýkoľvek povrch (1)
8. Pripojte ovládač k adaptéru DC (2)
Pokyny pre diaľkové ovládanie
Diaľkové ovládanie používa gombíkovú batériu (CR2025 - 3 V).
Keď diaľkový ovládač nepoužívate, je automaticky v
pohotovostnom režime. Životnosť batérie pri bežnom používaní
je minimálne šesť mesiacov. Batériu je možné vymeniť za
ekvivalentný typ.
ES - Instrucciones de instalación
Por favor, lea las instrucciones de seguridad primero.
1. Limpiar la superficie
2. Mide el largo deseado
3. Cortar a medida
4. Instale los clips
5. Retire la lámina protectora y coloque la tira en su lugar.
6. Conecte la tira al controlador
7. Use cinta 3M para montar el controlador en
cualquier superficie (1)
8. Conecte el controlador al adaptador de CC (2)
Instrucciones de control remoto
El mando a distancia utiliza una pila de botón (CR2025 - 3 V).
Cuando el control remoto no está en uso, está automáticamente
en modo de espera. La duración de la batería en condiciones
normales de uso es de al menos seis meses. La batería puede
ser reemplazada por un tipo equivalente.
PT - Instruções de instalação
Leia primeiro as instruções de segurança.
1. Limpe a superfície
2. Meça o comprimento desejado
3. Corte ao tamanho
4. Instale os clipes
5. Retire a película protetora e coloque a tira no lugar
6. Conecte a tira ao controlador
7. Use fita 3M para montar o controlador para
qualquer superfície (1)
8. Conecte o controlador ao adaptador DC (2)
Instruções de controle remoto
O controle remoto usa uma bateria de botão (CR2025 - 3 V).
Quando o controle remoto não está em uso, ele fica automatica-
mente no modo de espera. A vida útil da bateria em uso normal é
de pelo menos seis meses. A bateria pode ser substituída por um
tipo equivalente.
EN - Installation Instructions
Please read the Safety Instructions first.
1. Clean the surface
2. Measure the desired lenght
3. Cut to size
4. Install the clips
5. Peel o protective foil and put the strip in place
6. Connect strip to the controller
7. Use 3M tape to mount the controller to
any surface (1)
8. Connect controller to the DC adapter (2)
Remote control instructions
The remote control uses a button battery (CR2025 - 3 V). When
the remote control is not in use, it is automatically in standby
mode. The battery life under normal use is at least six months.
The battery can be replaced by an equivalent type.
NL - Installatie instructies
Lees eerst de veiligheid instructie.
1. Maak het oppervlak schoon
2. Meet de gewenste lengte
3. Knip de gewenste lengte af
4. Installeer de clips
5. Verwijder de beschermfolie en plak de strip op zijn plek
6. Verbind de strip met de controller
7. Gebruik de 3M plakstrip om de controller
vast te zetten (1)
8. Verbind de controller met de DC adapter (2)
Instructies afstandsbediening
De afstandbediening werkt op een knoop batterij (CR2025 - 3 V).
Wanneer de afstandbediening niet in gebruik is staat deze
automatisch op stand-by modus. De levensduur van de batterij
bij normaal gebruik is ten minste zes maanden. De batterij kan
vervangen worden door een gelijk type.
FR - Consignes de montage
Veuillez lire les consignes de sécurité préalablement à
toute utilisation.
1. Nettoyez la surface
2. Mesurez la longueur désirée
3. Couper à la bonne taille
4. Installez les clips
5. Décollez le film protecteur et mettez la bande en place
6. Connectez la bande au contrôleur
7. Utilisez du ruban adhésif 3M pour monter le contrôleur
sur toute surface (1)
8. Connectez le contrôleur à l'adaptateur CC (2)
Instructions de la télécommande
La télécommande utilise une pile bouton (CR2025 - 3 V). Lorsque
la télécommande n'est pas utilisée, elle est automatiquement en
mode veille. La durée de vie de la batterie en utilisation normale
est d'au moins six mois. La batterie peut être remplacée par une
batterie de type équivalent.
DE - Bedienungsanleitung
Bitte lesen Sie zuerst die Sicherheitshinweise
1. Reinigen Sie die Oberfläche
2. Messen Sie die gewünschte Länge
3. Zuschneiden
4. Installieren Sie die Clips
5. Schutzfolie abziehen und Streifen auflegen
6. Verbinden Sie die Leiste mit dem Controller
7. Verwenden Sie 3M-Klebeband, um den Controller zu
montieren jede Oberfläche (1)
8. Verbinden Sie den Controller mit dem DC-Adapter (2)
Anweisungen zur Fernbedienung
Die Fernbedienung verwendet eine Knopatterie (CR2025 - 3 V).
Wenn die Fernbedienung nicht verwendet wird, befindet sie sich
automatisch im Standby-Modus. Die Batterielebensdauer beträgt
bei normalem Gebrauch mindestens sechs Monate. Die Batterie
kann durch einen gleichwertigen Typ ersetzt werden.
PL - Instrukcje Instalacji
Przeczytaj najpierw Instrukcje bezpieczeństwa.
1. Oczyść powierzchnię
2. Zmierz żądaną długość
3. Przytnij na wymiar
4. Zainstaluj klipsy
5. Zdejmij folię ochronną i umieść pasek na miejscu
6. Podłącz pasek do kontrolera
7. Użyj taśmy 3M, aby zamontować kontroler do
dowolna powierzchnia (1)
8. Podłącz kontroler do zasilacza DC (2)
Instrukcje zdalnego sterowania
Pilot wykorzystuje baterię guzikową (CR2025 - 3 V). Gdy pilot nie
jest używany, automatycznie przechodzi w tryb czuwania.
Żywotność baterii przy normalnym użytkowaniu wynosi co
najmniej sześć miesięcy. Baterię można zastąpić równoważnym
typem.
CZ - Pokyny pro instalaci
Nejprve si přečtěte bezpečnostní pokyny.
1. Očistěte povrch
2. Změřte požadovanou délku
3. Nakrájejte na požadovanou velikost
4. Nainstalujte spony
5. Sundejte ochrannou fólii a vložte proužek na místo
6. Připojte proužek k ovladači
7. Použijte 3M pásku k připevnění ovladače
jakýkoli povrch (1)
8. Připojte ovladač k adaptéru DC (2)
Pokyny k dálkovému ovládání
Dálkový ovladač používá knoflíkovou baterii (CR2025 - 3 V). Když
dálkové ovládání nepoužíváte, je automaticky v pohotovostním
režimu. Životnost baterie při běžném používání je minimálně šest
měsíců. Baterii lze vyměnit za ekvivalentní typ.
IT - Istruzioni per l’installazione
Si prega di leggere prima le istruzioni di sicurezza.
1. Pulisci la superficie
2. Misurare la lunghezza desiderata
3. Tagliare a misura
4. Installare le clip
5. Staccare la pellicola protettiva e posizionare la striscia
6. Collegare la striscia al controller
7. Utilizzare nastro 3M su cui montare il controller
qualsiasi superficie (1)
8. Collegare il controller all'adattatore CC (2)
Istruzioni di controllo remoto
Il telecomando utilizza una batteria a bottone (CR2025 - 3 V).
Quando il telecomando non è in uso, è automaticamente in
modalità standby. La durata della batteria in condizioni di utilizzo
normale è di almeno sei mesi. La batteria può essere sostituita
con un tipo equivalente.
SK - Pokyny pre inštaláciu
Najprv si prečítajte bezpečnostné pokyny.
1. Vyčistite povrch
2. Odmerajte požadovanú dĺžku
3. Nakrájajte na požadovanú veľkosť
4. Nainštalujte spony
5. Odlepte ochrannú fóliu a vložte prúžok na miesto
6. Pripojte prúžok k ovládaču
7. Na pripevnenie ovládača použite 3M pásku
akýkoľvek povrch (1)
8. Pripojte ovládač k adaptéru DC (2)
Pokyny pre diaľkové ovládanie
Diaľkové ovládanie používa gombíkovú batériu (CR2025 - 3 V).
Keď diaľkový ovládač nepoužívate, je automaticky v
pohotovostnom režime. Životnosť batérie pri bežnom používaní
je minimálne šesť mesiacov. Batériu je možné vymeniť za
ekvivalentný typ.
ES - Instrucciones de instalación
Por favor, lea las instrucciones de seguridad primero.
1. Limpiar la superficie
2. Mide el largo deseado
3. Cortar a medida
4. Instale los clips
5. Retire la lámina protectora y coloque la tira en su lugar.
6. Conecte la tira al controlador
7. Use cinta 3M para montar el controlador en
cualquier superficie (1)
8. Conecte el controlador al adaptador de CC (2)
Instrucciones de control remoto
El mando a distancia utiliza una pila de botón (CR2025 - 3 V).
Cuando el control remoto no está en uso, está automáticamente
en modo de espera. La duración de la batería en condiciones
normales de uso es de al menos seis meses. La batería puede
ser reemplazada por un tipo equivalente.
PT - Instruções de instalação
Leia primeiro as instruções de segurança.
1. Limpe a superfície
2. Meça o comprimento desejado
3. Corte ao tamanho
4. Instale os clipes
5. Retire a película protetora e coloque a tira no lugar
6. Conecte a tira ao controlador
7. Use fita 3M para montar o controlador para
qualquer superfície (1)
8. Conecte o controlador ao adaptador DC (2)
Instruções de controle remoto
O controle remoto usa uma bateria de botão (CR2025 - 3 V).
Quando o controle remoto não está em uso, ele fica automatica-
mente no modo de espera. A vida útil da bateria em uso normal é
de pelo menos seis meses. A bateria pode ser substituída por um
tipo equivalente.

Other LSC Lighting Equipment manuals

LSC MANTRA LITE User manual

LSC

LSC MANTRA LITE User manual

LSC CIP-39900AT User manual

LSC

LSC CIP-39900AT User manual

LSC MANTRA LITE User manual

LSC

LSC MANTRA LITE User manual

LSC Atom 12/24 User manual

LSC

LSC Atom 12/24 User manual

LSC Light Station User manual

LSC

LSC Light Station User manual

LSC maXim User manual

LSC

LSC maXim User manual

LSC Smart Connect 3008407 User manual

LSC

LSC Smart Connect 3008407 User manual

LSC Smart Connect 6125000200 User manual

LSC

LSC Smart Connect 6125000200 User manual

LSC Gen VI Owner's manual

LSC

LSC Gen VI Owner's manual

LSC REDBACK REDPLATE User manual

LSC

LSC REDBACK REDPLATE User manual

LSC 970800 User manual

LSC

LSC 970800 User manual

LSC Mantra Wing User manual

LSC

LSC Mantra Wing User manual

LSC Minim User manual

LSC

LSC Minim User manual

LSC SC-816 User manual

LSC

LSC SC-816 User manual

Popular Lighting Equipment manuals by other brands

Ballard Designs Grant Swing Arm Sconce quick start guide

Ballard Designs

Ballard Designs Grant Swing Arm Sconce quick start guide

Visual Comfort Armato KW 3612 Assembly instructions

Visual Comfort

Visual Comfort Armato KW 3612 Assembly instructions

Current Arize Element L1000 Gen2 installation guide

Current

Current Arize Element L1000 Gen2 installation guide

Bresser BR-49RGB instruction manual

Bresser

Bresser BR-49RGB instruction manual

Malmbergs EMDS4/1H/AT/MH instruction manual

Malmbergs

Malmbergs EMDS4/1H/AT/MH instruction manual

avide ACLO Series user manual

avide

avide ACLO Series user manual

X-Rite Examolite TC-440B Operation manual

X-Rite

X-Rite Examolite TC-440B Operation manual

Miboxer Mi Light K1 instruction manual

Miboxer

Miboxer Mi Light K1 instruction manual

Steren LAM-510 user manual

Steren

Steren LAM-510 user manual

PLACES OF STYLE 791700 operating instructions

PLACES OF STYLE

PLACES OF STYLE 791700 operating instructions

Luxonic HI-MAX LAC360064 user manual

Luxonic

Luxonic HI-MAX LAC360064 user manual

Eagle L104A product manual

Eagle

Eagle L104A product manual

Eurolux H80SQ quick start guide

Eurolux

Eurolux H80SQ quick start guide

ADJ FLAT PAR TW12 user manual

ADJ

ADJ FLAT PAR TW12 user manual

DS Produkte LED6 instructions

DS Produkte

DS Produkte LED6 instructions

Chauvet Professional Rogue R3 Beam Quick reference guide

Chauvet Professional

Chauvet Professional Rogue R3 Beam Quick reference guide

GAME OF BRICKS 20th Anniversary Edition Snowspeeder 75259 instruction manual

GAME OF BRICKS

GAME OF BRICKS 20th Anniversary Edition Snowspeeder 75259 instruction manual

Chauvet Intimidator Wave 360 IRC Quick reference guide

Chauvet

Chauvet Intimidator Wave 360 IRC Quick reference guide

manuals.online logo
manuals.online logoBrands
  • About & Mission
  • Contact us
  • Privacy Policy
  • Terms and Conditions

Copyright 2025 Manuals.Online. All Rights Reserved.