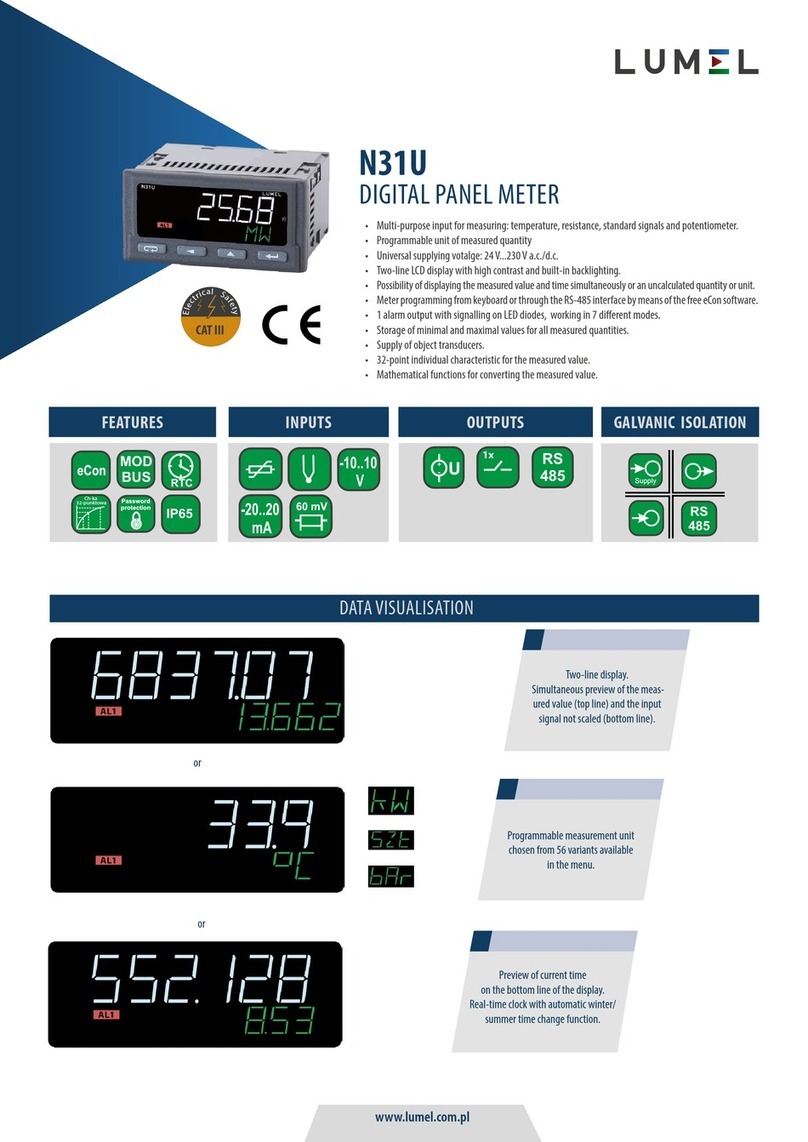
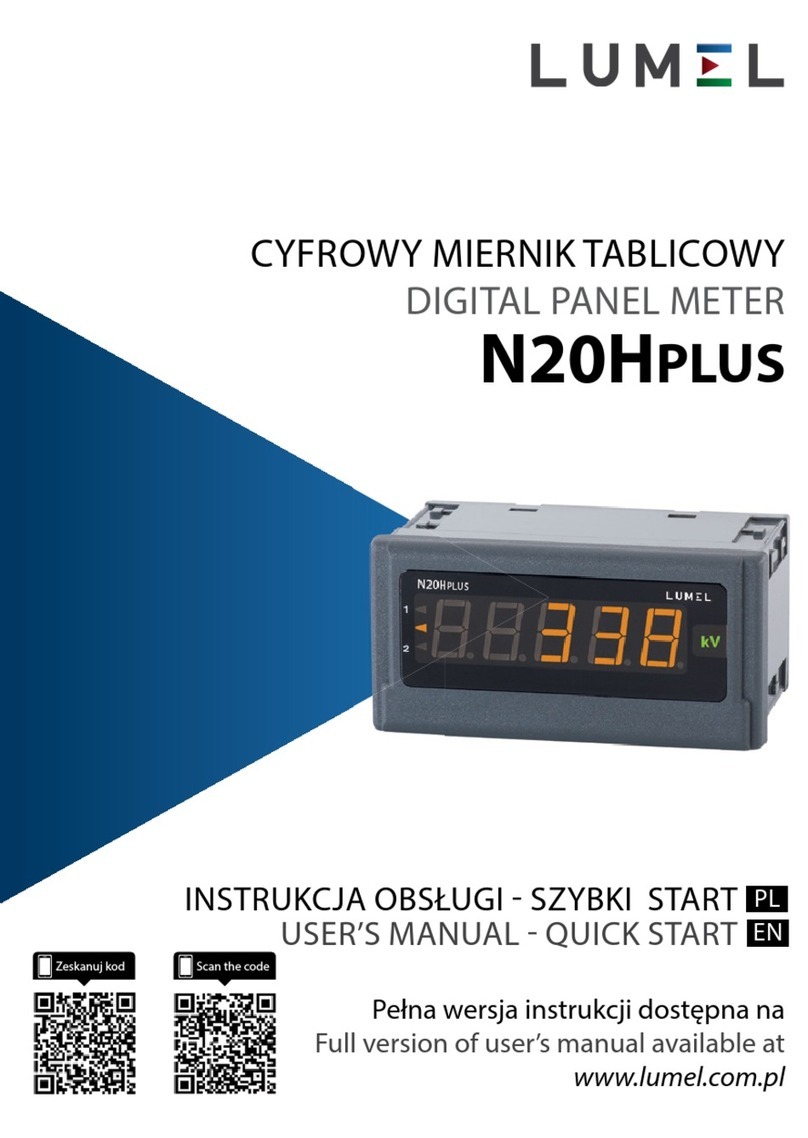
Lumel N30U User manual

CYFROWY MIERNIK TABLICOWY
DIGITAL PANEL METER
N30U
INSTRUKCJA OBSŁUGI - SZYBKI START
Pełna wersja instrukcji dostępna na
Full version of user’s manual available at
www.lumel.com.pl
USER’S MANUAL - QUICK START PL
EN
Zeskanuj mnie
Zeskanuj kod Scan the code

2
pl
1. WYMAGANIA PODSTAWOWE,
BEZPIECZEÑSTWO U¯YTKOWANIA
W zakresie bezpieczeństwa użytkowania miernik odpowiada
wymaganiom normy PN-EN 61010-1.
- szczególnie ważne, należy zapoznać się przed podłą-
czeniem miernika. Nieprzestrzeganie uwag oznaczonych
tym symbolem może spowodować uszkodzenie miernika.
- należy zwrócić uwagę, gdy miernik pracuje niezgodnie
z oczekiwaniami.
Uwagi dotyczące bezpieczeństwa:
· montażu i instalacji połączeń elektrycznych powinna dokonać
osoba z uprawnieniami do montażu urządzeń elektrycznych,
· przed włączeniem miernika należy sprawdzić poprawność
połączeń,
· miernik jest przeznaczony do instalowania i używania w przemysło-
wych elektromagnetycznych warunkach środowiskowych,
· w instalacji budynku powinien być wyłącznik lub wyłącznik
automatyczny, umieszczony w pobliżu urządzenia, łatwo dostępny
dla operatora i odpowiednio oznakowany.
2. MONTA¯
Miernik posiada listwy rozłączne z zaciskami śrubowymi, które umożli-
wiają przyłączenie przewodów zewnętrznych o przekroju 2,5 mm2.
W tablicy należy przygotować otwór o wymiarach 92+0,6 ´ 45+0,6 mm.
Grubość materiału z którego wykonano tablicę nie powinna przekra-
czać 6 mm. Miernik należy mocować od przodu tablicy z odłączonym
napięciem zasilania. Przed włożeniem do tablicy zwrócić uwagę na po-
prawne ułożenie uszczelki. Po włożeniu do otworu, miernik umocować
w tablicy za pomocą uchwytów (rys. 1).

3
pl
Rys. 2. Wymiary gabarytowe
2.2. Schematy podłączeñ zewnêtrznych
Patrz str. 24.
2.1. Wyprowadzenia sygnałów
Patrz str.24
Rys. 1. Mocowanie miernika

4
pl
3. OBS£UGA
3.1. Opis wyświetlacza
Rys. 5. Opis płyty czołowej miernika
3.2. Komunikaty po włączeniu zasilania
Po włączeniu zasilania miernik wyświetla nazwę miernika N30-U,
a następnie wersję programu w postaci r x.xx – gdzie x.xx jest nume-
rem aktualnej wersji programu lub numerem wykonania specjalnego.
Następnie miernik dokonuje pomiarów i wyświetla wartość sygnału
wejściowego. Przy wyświetlaniu wartości miernik automatycznie usta-
wia pozycję przecinka, przy czym format (liczba miejsc po przecinku)
może zostać ograniczona przez użytkownika.
3.3. Funkcje przycisków
- przycisk akceptacji:
Þ wejście w tryb programowania (przytrzymanie przez około 3 sekundy),
Þ poruszanie się po menu – wybór poziomu,
Þ wejście w tryb zmiany wartości parametru,
Þ zaakceptowanie zmienionej wartości parametru,
Þ zatrzymanie pomiaru – podczas trzymania przycisku wynik na
wyświetlaczu nie jest aktualizowany.
Pomiar jest nadal wykonywany.

5
pl
- przycisk zwiększania wartości:
Þ wyświetlanie wartości maksymalnej. Naciśnięcie przycisku powo-
duje wyświetlanie wartości maksymalnej przez około 3 sekundy,
Þ wejście do poziomu grupy parametrów,
Þ poruszanie się po wybranym poziomie,
Þ zmiana wartości wybranego parametru - zwiększanie wartości,
- przycisk zmiany cyfry:
Þ wyświetlanie wartości minimalnej. Naciśnięcie przycisku powoduje
wyświetlanie wartości minimalnej przez około 3 sekundy,
Þ wejście do poziomu grupy parametrów,
Þ poruszanie się po wybranym poziomie,
Þ zmiana wartości wybranego parametru – przesunięcie się
na kolejną cyfrę,
- przycisk rezygnacji:
Þ wejście do menu podglądu parametrów miernika (przytrzymanie
przez około 3 sekundy),
Þ wyjście z menu podglądu parametrów miernika,
Þ rezygnacja ze zmiany parametru,
Þ bezwzględne wyjście z trybu programowania (przytrzymanie
przez około 3 sekundy).
Wciśnięcie kombinacji przycisków i przytrzymanie około
3 sekund powoduje kasowanie sygnalizacji alarmów. Operacja ta dzia-
ła wyłącznie przy włączonej funkcji podtrzymania.
Wciśnięcie kombinacji przycisków powoduje kasowanie
wartości minimalnej.
Wciśnięcie kombinacji przycisków powoduje kasowanie
wartości maksymalnej.
Wciśnięcie i przytrzymanie około 3 sekund przycisku powoduje
wejście do matrycy programowania. Matryca programowania może zo-
stać zabezpieczona kodem bezpieczeństwa.
Wciśnięcie i przytrzymanie przez około 3 sekundy przycisku
powoduje wejście do menu podglądu parametrów miernika. Po menu
podglądu należy poruszać się za pomocą przycisku i.
W menu tym dostępne są wszystkie programowalne parametry mierni-
ka w trybie tylko do odczytu. Menu Ser nie jest dostępne w tym trybie.
Wyjście z menu podglądu odbywa się za pomocą przycisku .

6
pl
Rys. 6. Algorytm obsługi miernika N30U
W menu podglądu symbole parametrów są wyświetlane na przemian
z ich wartością. Rys. 6 przedstawia algorytm obsługi miernika.

7
pl
3.4. Programowanie
Naciśnięcie przycisku i przytrzymanie go przez około 3 sekundy
powoduje wejście do matrycy programowania. Jeżeli wejście jest zabez-
pieczone hasłem wówczas jest wyświetlony symbol kodu bezpieczeń-
stwa SEC na przemian z ustawioną wartością 0. Wpisanie poprawnego
kodu powoduje wejście do matrycy, wpisanie błędnego kodu powodu-
je wyświetlenie napisu ErCod. Na rysunku 8 przedstawiono matrycę
przejść w trybie programowania. Wyboru poziomu dokonuje się za pomo-
cą przycisku , natomiast wejście i poruszanie się po parametrach
wybranego poziomu odbywa się za pomocą przycisków i
. Symbole parametrów są wyświetlane na przemian z ich aktualną wartoś-
cią. W celu zmiany wartości wybranego parametru należy użyć przycisku
. Aby zrezygnować ze zmiany parametru należy użyć przycisku
. W celu wyjścia z wybranego poziomu należy wybrać symbol
----- i nacisnąć przycisk . Aby wyjść z matrycy programowania do
pomiaru należy wcisnąć przycisk przez około 1 sekundę. Wów-
czas pojawi się napisu End na czas około 3 sekund i miernik przejdzie
do wyświetlania wartości mierzonej. W przypadku pozostawienia mier-
nika w trybie programowania parametróe po upływie czasu 30 sekund
nastąpi automatyczne opuszczenie trybu programowania (parametru,
następnie menu) i przejście do wyświetlania wartości mierzonej.
3.4.1 Sposób zmiany wartości wybranego parametru.
W celu zwiększenia wartości wybranego parametru należy wcisnąć
przycisk . Jednokrotne wciśnięcie przycisku powoduje zwięk-
szenie wartości o 1. Zwiększenie wartości przy wyświetlanej cyfrze 9
powoduje ustawienie 0 na tej cyfrze (lub znaku minus w przypadku
najstarszej cyfry wyświetlacza). Zmiana pozycji kursora następuje po
przyciśnięciu przycisku .
W celu zaakceptowania nastawionego parametru należy wcisnąć przy-
cisk . Nastąpi wtedy zapisanie parametru i wyświetlanie jego
symbolu na przemian z nową wartością. Wciśnięcie przycisku w
trakcie zmiany wartości parametru spowoduje zrezygnowanie z zapisu.

8
pl
Rys. 7. Matryca programowania
FUnCt
Funkcje
matema-
tyczne
3.4.2 Zmiana wartości zmiennoprzecinkowych
Zmiana wykonywana jest w 2 etapach (przejście do następnego etapu
następuje po wciśnięciu przycisku ):
1) ustawienie wartości z zakresu -19999...99999 analogicznie jak dla
wartości całkowitych;

9
pl
4. DANE TECHNICZNE
Zakresy pomiarowe. Tablica 1
Rodzaj wejścia Zakres wskazań
(zakres znamionowy) Klasa
Pt100
-205...855°C (- 200...850°C)
0,1
Pt500
Pt1000
400 W0...410 W (0...400 W)
4000 W0...4010 W (0...4000 W)
Termopara typu J -200..1200 °C (-100..1200 °C)
Termopara typu K -200..1370 °C (-100..1370 °C)
Termopara typu N -200..1300 °C (-100..1300 °C)
Termopara typu E -200..1000 °C (-100..1000 °C)
Termopara typu R -50..1768 °C (-50..1760 °C)
Termopara typu S -50..1768 °C (-50..1760 °C)
Wejście napięciowe 0...10 V -13...13 V (-10...10 V)
Wejście prądowe -24...24 mA (- 20...20 mA)
Wejście napięciowe 60 mV -10...63 mV (0...60 mV)
Aktualny czas 00,00...23,59 0,5 sekun-
dy/dobę
2) ustawienie pozycji kropki (00000., 0000.0, 000.00, 00.000, 0.0000);
przycisk przesuwa kropkę w lewo, natomiast przycisk
przesuwa kropkę w prawo;
Wciśnięcie przycisku w trakcie zmiany wartości parametru spo-
woduje zrezygnowanie z zapisu.
Błędy dodatkowe:
- od kompensacji automatycznej temperatury spoiny odniesienia 1°C
- od kompensacji automatycznej rezystancji przewodów dla termorezystorów
0,5°C
- od kompensacji automatycznej rezystancji przewodów dla pomiaru rezystancji
0,2 W
- od zmian temperatury: dla wyjść analogowych 50 % klasy / 10 K
dla wejść analogowych 100 % klasy / 10 K

10
pl
Wyjścia przekaźnikowe: - przekaźniki, styki beznapięciowe
zwierne, obciążalność 250 V~/0,5A~
- przekaźniki, styki beznapięciowe przełączane obciążalność 250 V~/0,5A~
(opcja)
Wyjścia analogowe (opcja): - programowalne prądowe 0/4...20 mA
Rezystancja obciążenia 500 W
- programowalne napięciowe 0..10 , Rezystancja obciążenia ³ 500 W
Wyjście zasilania pomocniczego: 24 V d.c./30 mA
Wyjście alarmowe OC (opcja): Wyjście typu OC pasywne
npn. 30 V d.c./30 mA.
Interfejs szeregowy: S-485 (opcja) Protokół transmisji: MODBUS RTU
Błąd wyjścia analogowego: 0,2% zakresu
Stopień ochrony zapewniany przez obudowę:
od strony czołowej IP65; od strony zacisków IP10
Masa: < 0,2 kg Wymiary: 96 ´ 48 ´ 93 mm
Warunki odniesienia i znamionowe warunki użytkowania:
- napięcie zasilania: 85..253 V d.c./a.c. 40..400 Hz lub
20..40 V a.c. (40..400 Hz), 20...60 V d.c.
- temperatura otoczenia: -25...23...+55oC
- temperatura magazynowania: -30...+70oC
- wilgotność: 25...95% (niedopuszczalne skroplenia)
- pozycja pracy: dowolna
- pobór mocy < 6 VA
Normy spełniane przez miernik
Kompatybilność elektromagnetyczna:
l Odporność na zakłócenia wg PN-EN 61000-6-2
l Emisja zakłóceń wg PN-EN 61000-6-4
Wymagania bezpieczeństwa:
według normy PN-EN61010-1
l Izolacja między obwodami: podstawowa,
l kategoria instalacji: III,
l stopień zanieczyszczenia: 2,
Parametry wejść:
- rezystancja wejścia napięciowego [V]: > 1 M W
- rezystancja wejścia prądowego [mA]: 12 ±1 W%
- natężenie prądu płynącego przez rezystor termometryczny 270 ± 10 uA
- rezystancja przewodów łączących rezystor termometryczny z przetwornikiem: <10 W

11
pl
*- tylko po uzgodnieniu z producentem
MIERNIK CYFROWY N30U X X XX XX X X
Napięcie zasilania:
85... 253 V a.c. (45...65 Hz) lub d.c. ........................ 1
20...40V a.c. (40...400 Hz ), 20...60 V d.c. ............... 2
Dodatkowe wyjścia:
brak ................................................................................. 0
wyjście OC, RS-485, wyjścia analogowe ........................ 1
wyjście OC, RS-485, wyjścia analogowe, wyjścia prze-
kaźnikowe przełączne ..................................................... 2
Jednostka:
numer kodu jednostki wg tab. 3 ............................................ XX
Wykonanie:
standardowe .................................................................................. 00
specjalne* .................................................................................... XX
Wersja językowa:
polska .................................................................................................... P
angielska ............................................................................................... E
inna* ...................................................................................................... X
Próby odbiorcze:
bez dodatkowych wymagań ........................................................................ 0
z atestami Kontroli Jakości ........................................................................... 1
wg uzgodnień z odbiorcą* ........................................................................... X
5. KOD WYKONAÑ
Tablica 2
l maksymalne napięcie pracy względem ziemi:
- dla obwodu zasilania 300 V,
- dla pozostałych obwodów 50 V.
l Wysokość npm: < 2000 m.

12
pl
Kod podświetlanej jednostki Tablica 3
Kod Jednostka Kod Jednostka
00 brak jednostki 29 %
01 V 30 %RH
02 A 31 pH
03 mV 32 kg
04 kV 33 bar
05 mA 34 m
06 kA 35 l
07 W36 s
08 kW 37 h
09 MW 38 m3
10 var 39 obr
11 kvar 40 szt
12 Mvar 41 imp
13 VA 42 rps
14 kVA 43 m/s
15 MVA 44 l/s
16 kWh 45 obr/min
17 MWh 46 rpm
18 kvarh 47 mm/min
19 Mvarh 48 m/min
20 kVAh 49 l/min
21 MVAh 50 m3/min
22 Hz 51 szt./h
23 kHz 52 m/h
24 W53 km/h
25 kW54 m3/h
26 oC55 kg/h
27 oF56 l/h
28 K XX na zamówienie 1)
1) - po uzgodnieniu z producentem

EN
13
1. BASIC REQUIREMENTS, OPERATIONAL
SAFETY
In the safety service scope, the N30O meter meets the requirements
of the EN 61010-1 standard.
Mentioned below applied symbols mean:
- especially important, one must acquaint with this information
before connecting the meter. The non-observance of notices
marked by this symbol can occasion injures of the personnel
and a damage of the instrument.
- one must take note of this when the instrument is working
inconsistently to the expectations. Possible consequences
if disregarded.
Observations concerning the operational safety
· All operations concerning transport, installation, and commissioning
as well as maintenance, must be carried out by qualified, skilled
personnel, and national regulations for the prevention of accidents
must be observed.
· Before switching the meter on, one must check the correctness
of connections.
· The meter is designed to be installed and exploited in
electromagnetic industrial environment conditions.
· When connecting the supply, one must remember that a switch or a
circuit-breaker should be installed in the building. This switch should
be located near the device, easy accessible by the operator, and
suitably marked as an element switching the meter off.
· Non-authorized removal of the housing, inappropriate use, incorrect
installation or operation, creates the risk of injury to personnel or
meter damage.
For more detailed information, please study the User’s Manual.

EN
14
Fig. 2. Overall Dimensions
Fig. 1. Meter Fixing
2. INSTALLATION
The meter has separable strips with screw terminals, which enable the
connection of external wires of 1.5 mm2 cross-section for input signals
and 2.5 mm2 for other signals.
One must prepare a hole of 92+0,6 ´ 45+0,6 mm in the panel, which the
thickness should not exceed 6 mm.
The meter is adapted to be mounted in a panel. The meter must be
introduced from the panel front with disconnected supply voltage. Be-
fore the insertion into the panel, one must check the correct placement
of the seal. After the insertion into the hole, fix the meter by means of
clamps (fig.1).
2.1. Lead-out of Signals
See page 24.
2.2. Examples of Connections
See page 24.

EN
15
3. SERVICE
3.1. Display Description
Fig. 5. Description of the Meter Frontal Plate
3.2. Messages after Switching the Supply on
After switching the supply on, the meter displays the meter name N30U
and next the program version in the „r x.xx” shape – where x.xx is the
number of the current program version or the number of a custom-ma-
de execution. Next, the meter carries out measurements and displays
the value of the input signal. The meter sets up automatically the de-
cimal point position when displaying the value. The format (number of
places after the decimal point) can be limited by the user.
3.3. Functions of Buttons
- Acceptation button:
Þ entry in programming mode (press and hold down ca 3 seconds),
Þ moving through the menu – choice of level,
Þ entry in the mode changing the parameter value,
Þ acceptation of the changed parameter value,
Þ stop the measurement – when holding down the button, the result
on the display is not updated.
The measurement is still carried out.

16
pl
- button increasing the value:
Þ display of maximal value, The pressure of the button causes
the display of the maximal value during ca 3 seconds,
Þ entry in the level of the parameter group,
Þ moving through the selected level,
Þ change of the selected parameter value – increasing the value.
- button changing the digit:
Þ display of minimal value, The pressure of the button causes
the display of the minimal value during ca 3 seconds,
Þ entry in the level of parameter group,
Þ moving through the selected level,
Þ change of selected parameter value – shift on the next digit,
- resignation button:
Þ entry in the menu monitoring the meter parameters (by holding
down ca 3 seconds),
Þ exit from the menu monitoring meter parameters,
Þ resignation of the parameter change,
Þ absolute exit from the programming mode (holding down
ca 3 seconds).
The pressure of the button combination and holding
them down ca 3 seconds, causes the reset of alarm signaling. This
operation acts only when the support function is switched on.
The pressure of the button combination causes the era-
sing of the minimal value.
The pressure of the button combination causes the era-
sing of the maximal value.
The pressure and holding down the button ca 3 seconds cau-
ses the entry in the programming matrix. The programming matrix can
be protected by the safety code.
The pressure and holding down the button during 3 seconds
causes the entry in the menu monitoring meter parameters. One must
move through the monitoring menu by means of and
buttons. In this menu, all programmable meter parameters are only ava-
ilable for readout. In this mode, the menu Ser is not available. The exit

EN
17
from the monitoring menu is carried out by means of the button.
In the monitoring menu, parameter symbols are displayed alternately
with their values.
The service algorithm of the meter is presented on the fig. 6.
Fig.6. Service Algorithm of the N30U Meter

EN
18
3.4. Programming
The pressure of the button and holding it down through ca 3
seconds causes the entry to the programming matrix. If the entry is pro-
tected by a password, then the safety code symbol SEC is displayed
alternately with the set value 0. The write of the correct code causes the
entry in the matrix, the write of an incorrect code causes the display of
the ErCod symbol. The matrix of transitions to the programming mode
is presented on the fig. 8. The choice of the level is made by means of
the button, however the entry and moving through the para-
meters of the chosen level is carried out by means of the and
buttons. Parameter symbols are displayed alternately with their
current values. In order to change the value of the chosen parameter,
one must use the button. For resignation from change, one must
use the button. In order to exit from the chosen level, one must
chose the ----- symbol and press the button. To exit from the
programming matrix, one must press the button during ca 1
second. Then, the symbol End appears for ca 3 seconds and the meter
transits to the display of the measured value. In case of leaving the
meter in the parameter programming mode, the automatic abandon of
the programming mode follows (parameter, and next the menu) after 30
seconds and the meter transits to display the measured value.
3.4.1. Value Change Way of the Selected Parameter
In order to increase the value of the selected parameter, one must
press the button. A single pressure of the button, causes the
increase of the value of 1. The increase of value when displaying the
digit 9 causes the set of 0 on this digit. The change of the digit follows
after pressing the button. In order to accept the set parameter,
one must hold down the button. Then, the write of the parameter
follows and the display of its symbol, alternately with the new value. The
pressure of the button during the change of the parameter value
will cause the resignation of the write.

EN
19
FUnCt
Mathema-
tical
functions
Fig. 7. Programming Matrix.

EN
20
3.4.2. Changing Floating-Point Values
The change is carried out in two stages (the transition to the next stage
follows after pressing the button):
1) setting the value from the range -19999M...99999, similarly as for
integral values;
2) setting of the decimal point position (00000., 0000.0, 000.00,
00.000, 0.0000); the button shifts the decimal point to the
left, however the button shifts the decimal point to the right;
The pressure of the button during the change of the parameter
value will cause the resignation of the write.
4. TECHNICAL DATA
Measuring Ranges. Table 1
Kind of input Indication range Class
Pt100
-205...855°C (- 200...850°C)
0.1
Pt500
Pt1000
400 W0...410 W (0...400 W)
4000 W0...4010 W (0...4000 W)
Thermocouple of J type -200...1200 °C (-100...1200 °C)
Thermocouple of K type -200...1370 °C (-100...1370 °C)
Thermocouple of N type -200...1300 °C (-100...1300 °C)
Thermocouple of E type -200...1000 °C (-100...1000 °C)
Thermocouple of R type -50...1768 °C (-50...1760 °C)
Thermocouple of S type -50...1768 °C (-50...1760 °C)
Voltage input 0...10 V -13...13 V (-10...10 V)
Current imput -24...24 mA (- 20...20 mA)
Voltage input 60 mV -10...63 mV (0...60 mV)
Current time 00.00...23.59 0.5 sec/24 h
Other manuals for N30U
1
Table of contents
Languages:
Other Lumel Measuring Instrument manuals

Lumel
Lumel N20 User manual

Lumel
Lumel NR30 series User manual

Lumel
Lumel N32H User manual

Lumel
Lumel ND10 TYPE User manual

Lumel
Lumel NR30 series User manual

Lumel
Lumel NC 10 300A User manual

Lumel
Lumel ND40 User manual

Lumel
Lumel NR30BAC User manual

Lumel
Lumel N32O User manual

Lumel
Lumel N20HPLUS User manual
Popular Measuring Instrument manuals by other brands

P3 International
P3 International P4460 Operation manual

SATA
SATA AE5809 user manual

ASCO POWER TECHNOLOGIES
ASCO POWER TECHNOLOGIES SIGMA Hand-held quick start guide

VOLTCRAFT
VOLTCRAFT VC-330 operating instructions

Rhopoint
Rhopoint NOVO-GLOSS operating instructions

LumaSense technologies
LumaSense technologies IMPAC IN 9 plus manual