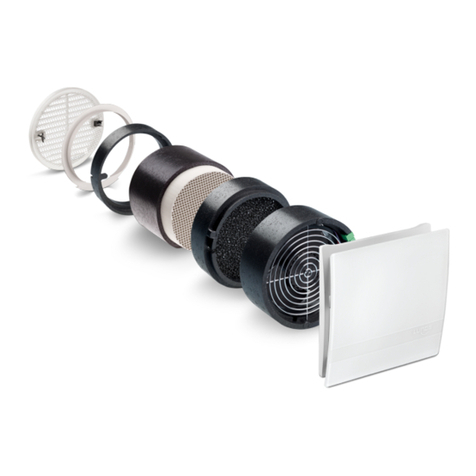
Lunos Skalar Series Manual

1
Silvento concealed variant clamped-ventilator
- Replaces Skalar-; Skalar-V...; Skalar-2V... -
Installation directions
- Please pass on to the user -
Ventilator installation
as extractor hood is
not permitted here
The German VDE 100
regulation permits installa-
tion in bath and shower
room area 1.
Ventilator
Area 1
Area
. 5 mm
Area 0
Contents:
Notes on these installation instructions
Safety precautions
Technical specifications, waste disposal
Dimensional drawings
Possible installation positions
Installation examples
Parts supplied
Dismounting „Skalar“ and installation also in new constructions
Electrical connection, wiring diagrams
Run-out setting
Filter change, cleaning
Accessory and replacement parts
Page:
1
1
3
3
4
5
5-7
8-9
10
10
10
Notes on these instructions
• Read these instructions carefully and completely prior to starting installation! The general safety precautions and
safety symbols with notes in the text must be observed
• When installation has been completed, pass these directions on to the user (renter, owner, block manager or
other)
S mbols in these directions:
Danger! Assembly work is only to be carried out on the ventilator when it is separated from the line voltage!
The ventilator is protectively insulated to protective class II, the protective conductor is not needed!
This symbol warns on danger of injury
This symbol warns on danger of injury by electricity
Safet precautions
Caution! Electrical connection is only to be made by authorised skilled personnel and under observance of
current VDE 0100 regulations of the German Electrical Engineering Association!
Caution! This piece of equipment is not to be operated (filter change, cleaning) by children or persons who
cannot operate it properly because of their physical, sensorial or mental ability, or their inexperience or lack of
appropriate knowledge.
Ventilators involved in off-air exhaust must always be supplied with a functioning flow-in of outside air.

2
Technical specifications
Electrical connections
Voltage supply: 30 V AC 50 Hz
Control voltage (ventilator type … FK): 1 V DC
Protection class: II
Protection type: IP X4
Admissable for use in area 1 of wet rooms
Silvento
t pe
Volumen
flow
Power
consumption
Sound-
pressure
level
Run-out time Interval Inverse
operation
Movement
sensor
Humidiy
control range
V
1)
or KL
)
[m³/h] [W] [dB(A)] [min.] [h] [% rh]
30/60/100 30/60/100 4.9/10.5/36.5 4/35/44
30/60B 30/60 4.9/10.5 4/35 yes
30/60ZII 30/60 4.9/10.5 4/35 6/ 15
3)
4 yes
30/60BZII 30/60 4.9/10.5 4/35 6/ 15
3)
4 yes yes
60ZII 60 10.5 35 6/ 15
3)
4 yes
60BZII 60 10.5 35 6/ 15
3)
4 yes yes
30/100ZII 30/100 4.9/36.5 35/44 6/ 15
3)
4 yes
30/100BZII 30/100 4.9/36.5 35/44 6/ 15
3)
4 yes yes
100ZII 100 36.5 44 6/ 15
3)
4 yes
100BZII 100 36.5 44 6/ 15
3)
4 yes yes
30-60 FK 30/40/50/60 5.3/7. /8.9/10.9 4/ 7/3 /35 50 - 70
General
All ventilators are equipped with a Class G (EN 779) filter and a filter change display.
Ventilators of the “Silvento” series fulfil all requirements:
- of DIN 18017-3; Allgemeine Bauaufsichtliche Zulassung Z-51.1- 15
- for low voltage (CE) acc. to EC Directives ( 006/95/EG)
- for electromagnetic compatibility (CE) acc. to EC Directives ( 004/108/EG)
Waste disposal
Sort the packaging for appropriate disposal. Observe current requirements should you want to dispose of
the ventilator. Within the framework of the Electrical and Electronic Device Act (ElektroG), the return of this
device free of charge is guaranteed at your local turn-in center.
Footnotes: 1) Silvento V units are ventilator inserts that additionally require either a concealed housing or surface-mount housing.
) Silvento KL units are complete single pipe ventilators that are clamped in the curtain wall construction. Silvento KL single pipe ventilators fit in concealed
housings of LUNOS Skalar versions.
3) The updated DIN 18017-3 requires the removal of a further 15 m³ air over the ventilation system after switching off the fan.
4) 30 min run-out time

3
Conical exhaust vent nozzle for DN 75 to DN 80
Break off the stems ( x) for
installation un 3/LB and 3/LS
housings
60 mm
3 mm
69 mm
1 0 mm
Grip 1:
bis 4 mm
Grip 2:
ab 57 mm
No grip possible bet-
ween 4 and 57 mm
5,5 mm
06 mm
Flap valve
Through-the-wall housing
Caution: Correct the flap valve position and seating if appropriate (see page 5)
Dimensional drawings:
Possible installation positioning for duct mounting

4
With fire-protected housing
With St rofoam housing Clamping housing onl
Installation in housing 3/LS or 3/LB
UP-Clamped-ventilators can replace all build-in versions of the “Skalar” series!
These installation examples are therefore onl a few of man possibilities
Installation in housing 3/LB
2-room ventilator
Installation in housing 3/LS
Installation examples

5
Disassembl of “Skalar” and installation also in rising buildings
Parts supplied
Disassembl of „Skalar“
1. Make the ventilator dead.
. Clap the front cover plate up. Unscrew the
central screw. Take the cover frame off.
3. Unscrew the locking screws so far that the
ventilator insert can be removed. If appropri-
ate, draw the slide nozzle off. The slide noz-
zle is still on the flex tube.
4. Remove the power supply terminal from the
ventilator unit. Remove the power supply
terminal from the mains cable.
5. Take the flap valve out of the nozzle.
Assembl
For installation in through-the-wall hous-
ings 3/LS, 3/LB, 3/LS 2, 3/LB 2:
Adhere the seal that is supplied to the ventila-
tor insert exhaust vent opening (remove pro-
tective film + stick on)
1a
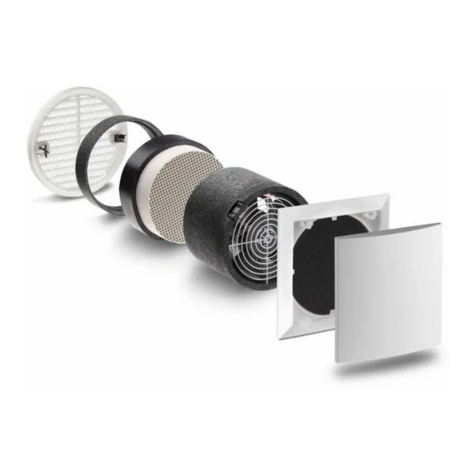
Check deliver for completeness and undamaged condition!
Filter
Front cover plate
Grid cover frame
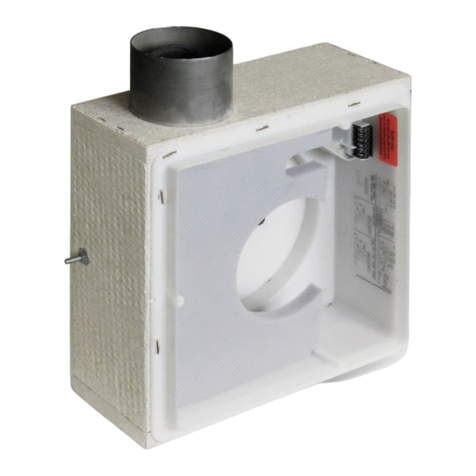
Ventilator insert
for clamped-
ventilator
Incl. screws for connecting grid
cover frame to ventilator insert
Seal (stick on when
replacing a Skalar-V...)
Power supply terminal
Sound insulation (not
with -room ventilators)
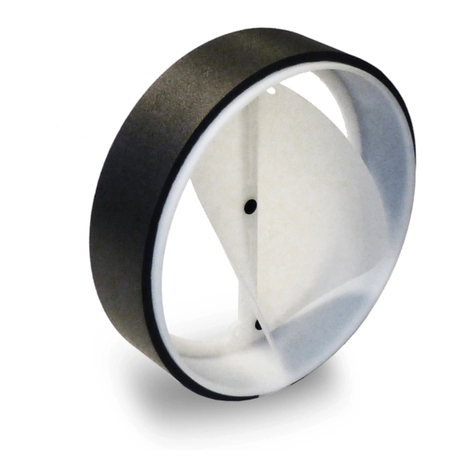
Slide nozzle with flap valve (for rising
building)
1
Installation of clamped-ventilator
Connection to the main line
• Connect flex tube to the main line
• Fix the slide nozzle to the flex tube
• Seal connections with adhesive tape or cir-
clips
Make the wall cut-out
• Mount the curtain wall facing
• Fix the flex tube and mains cable in the wall
opening in easy reach
1b
Main line
DN 80 Flex tube (75)
approx. 50 - 100 cm
DN 75
DN 80
Exhaust
nozzle
Width 1 cm
Height 3
Pushbutton*
Illuminated display*
*Illuminated display and pushbutton
are located in the grid cover frame in
case of fans with motion detector

6
Fit the clamped-ventilator insert in the wall
cut-out:
• Insert the ventilator unit in the wall cut-out
(correct flap valve position and seating if ap-
propriate! See the bottom diagram)
Insertion in through-the-wall housings
3/LS, 3/LB, 3/LS 2, 3/LB 2:
• Push the ventilator unit in the through-the-
wall housing while pressing the mains cable
back in the duct
4a
Mains Connection:
Fasten the power supply terminal to the mains
cable as shown in the appropriate wiring dia-
gram (see “Wiring diagrams”).
Caution! The mains cable must be dead!
2
Top view of power
supply terminal
L
L1
L
N
F+
F-
Plug the power suppl terminal on and
latch on behind the notched hook 3
Lock the power supply
terminal in behind the
notched hook
4b
Correct the flap valve position and seating
(important for ceiling installation)
• In the installed condition, the flap valve in the
exhaust nozzle must close because of its
own weight. The flap valve can be drawn out
from the inside for corrections.
Right Wrong
Flap valve ‘‘DOWN‘‘
inscription
Correction
Break off the
guide stems
Mains cable
Installation
housing
Stick seal to exhaust
opening (see dia-
gram 1 )!
Push the ex-
haust nozzle on
to the stop
Duct

7
Fixing the ventilator insert
• Screw the fixing screws moderately tight with
a screwdriver
• The clamps come out automatically and lay
themselves from behind at the curtain wall
facing or in the recesses in the plaster frame
of housings 3/LS, 3/LB, 3/LS and 3/LB
• With a through-the-wall housing, screw-
fastening can be made using the flange
boreholes in the plaster frame. Screws +
accessories are not supplied for this.
Decor plate assembl :
• Fix and align the grid cover frame to the ven-
tilator insert with the screws supplied
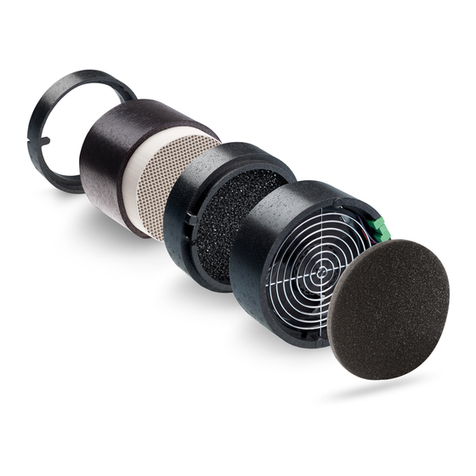
• Insert the filter
• Set on and lock the front cover plate
Caution!
Always install the grid cover frame and front
cover plate according to the built-in position of
the ventilator
5
6
Flange bore-
holes (4 x)
Clamp
Filter
Front cover plate
Grid cover frame
Fitting the motion-detector circuit board to
the decor plate :
• Plug the display board cable in
• Fasten the grid cover frame to the ventilator
insert with the screws supplied and align it
so that the cable lies under the motion-
detector circuit board (do not clamp it in)
• Insert the filter
• Put on and lock the front cover plate
Plug in motion-detector circuit board:
Plug Coupling
Motion-detector circuit board
plugged in:
Motion-detector circuit board
plugged in and cables for motion-
detector circuit board plugged in
correctly
Plug with coupling
Cable for motion-
detector circuit
board
Control
Grid cover frame
Front cover plate
Motion-detector
circuit board

8
Electrical connections - Wiring diagrams
L
N
1
2 3
4 5
• One-step operation, switchable to 60 m
3
/h
(Ventilator types ... 30/60)
5/W
Bridge Bridge
5/W
Bridge
• Two-step operation, switchable to 60 m
3
/h and 100 m
3
/h
ON/OFF (Ventilator types ... 30/60)
5/W
Bridge
5/W
Bridge
Room illumination
Room illumination
Room illumination
• Continuous operation 30 m
3
/h, switchable to 60m
3
/h or
100 m
3
/h (Ventilator types ... 30/60)
• Run-out time controlled 60 m
3
/h or 100 m
3
/h
(Ventilator types ... 60ZII; ... 100ZII)
• Continuous operation 30 m
3
/h, with switchable run-out
time controlled 60m
3
/h or 100 m
3
/h
(Ventilator types ... 30/60ZII; ... 30/100ZII)
With movement detector
Note: For all circuits with movement detector
(Ventilator types … 60BZII; ... 100BZII; … 30/60BZII;
...30/100BZII;… 30/60B)
• Three-step operation, continuous operation 30 m
3
/h,
switchable to 60 m
3
/h and 100 m
3
/h
(Ventilator types ... 30/60)
Note: Connection to light not possible
Two-room ventilator with run-out time:
• Run-out time controlled 100 m
3
/h, switch-off in each of 2
rooms (Ventilator types ... 100ZII)
• Continuous operation 40 m
3
/h with run-out time controlled
100 m
3
/h, switch-off in each of 2 rooms
(Ventilator types ... 30/100ZII)
7
6 With remote control (ventilator types ... F)
Note: Other circuits, e.g. via L1 or L2, are possible. Remote
control alwa s has priorit
0 ≤ V:
> ≤ 4 V:
> 4 ≤ 6 V:
> 6 ≤ 8 V:
> 8 ≤10 V:
> 10 ≤1 V:
Ventilator operation
acc. to switch position
Ventilator OFF
30 m³/h
40 m³/h
50 m³/h
60 m³/h Room 1
60 m³/h
Room
40 m³/h
5/W
Bridge
5/W
Bridge
100 m
3
/h
(instead of L1
to L ) only
with ventilator
type 30/60)
Safet Precautions:
Caution! Carry out installation work on the ventilator only
when it is separated from the mains voltage! The ventilator
is protectively insulated according to protective class II,
the protective conductor connection is not needed.
Ensure that all connecting cables to the ventilator are
dead before connecting it! (Separate from the mains with
at least a 3 mm contact space, e.g. electric fuse).
Each circuit belonging to the ventilator must be equipped
with fault current protection (e.g. FI switch).
Electrical connection only by an electrician!
Additional installations and/or electrical components are not
permitted!
Wiring diagrams for further ventilator functions on request!

9
9 10
Two room ventilator
• One step operation, switchable to 100 m
3
/h from two
rooms (ventilator type ... 30/60)
5/W
Bridge
5/W
Bridge
Room illumination
Room 1
60 m³/h
Room
40 m³/h
5/W
Bridge
5/W
Bridge
Room 1
40 or 60
m³/h
Room illumination
9 Two room ventilator
• Continuous operation 60 m
3
/h, switchable to 100 m
3
/h
from two rooms (ventilator type ... 30/60)
Room
0 or 40
m³/h
Humidit control (ventilator t pes...FK)
Room
illuminati-
on
Switch
LUNOS type 5/W FK
Order no.: 039 840
Caution! Ventilators with humidit control optimall adjust the ex-
haust air volume flow b means of the room air humidit and
temperature
LOWERING OPERATION:
Volume flow 30 m³/h, independent of the room air humidity and room temperature; func-
tion active only in the "winter months" October to April
HUMIDITY CONTROL:
Volume flow 30/40/50/60 m³/h, humidity control active; function active only in the "winter
months" October to April.
The fan has an automatic summer/winter switchover. The illumi-
nated display lights up green with active humidity control and red
with clogged filter. The fan runs from May to September in sum-
mer operation and from October to April in winter operation. Using
an integrated supply-voltage-independent clock, the fan "knows"
which month it is. During the cold season and the transitional pe-
riod, an excess humidification of the apartment is prevented and
thus building damage and mold avoided. The system is controlled
automatically and, by means of continuous adaptation of the ex-
haust air volume flow to the room air humidity and room tempera-
ture, it guarantees optimum comfort in the room to be ventilated.
In this way, only as much ventilation as necessary, but as little
ventilation as possible, is ensured and thus energy is saved. The
fan never switches off completely in order to ensure a minimum
air change. During summer months, the increased exterior air hu-
midity does not make an increased level of ventilation appropriate.
The automatic summer/winter changeover is overridden by opera-
tion with the rocker switch Sl of the switch 5/W FK.
Switch 5/W FK
(front view)
8
Rocker switch function description S II:
Required ventilation ON:
Volume flow 60 m³/h, possible coupling of the light level.
The ventilation with 60 m³/h, by means of a priority control circuit, overrides the operating
modes "Lowering operation" and "Humidity control", as well as the automatic summer/
winter changeover.
Required ventilation OFF:
Fan runs in automatic summer/winter operation according to setting of the rocker switch S I.
Rocker switch function description S l:
Remote control: Ventilator type ... FK is remote controllable via the F+ and F- connections and with 0 to 1 V.
0 ≤ V: Ventilator operation according to the mains connection; > ≤ 4 V: ventilator OFF; > 4 ≤ 6 V: 30 m
3
/h; > 6 ≤ 8 V:
40 m
3
/h; >8 ≤ 10 V: 50 m
3
/h; > 10 ≤ 1 V: 60 m
3
/h
Temperature switch-off: The ventilator switches off when the room temperature drops below 15°C for more than
1 hour and so helps to avoid freezing of the heating. When 17°C is exceeded, it switches on again.
Note: LUNOS standardly supplies an adhesive label set for marking switch positions when series switches from
an installation-switch manufacturer are used.
10
E 1 8/05.11
LUNOS Lüftungstechnik GmbH für Raumluftsysteme
Wilhelmstr. 31-34
13593 Berlin
Germany
Tel.: 0 30 / 36 0 01 - 0
Fax:
0 30 / 36 0 01 - 89
Mail:
Site: http://www.lunos.de
Filter change
• Continuous red light up of
illuminated display indicates
a dirty filter
• Take of the front cover
plate, remove filter. Insert
new or cleaned filter. Dirty
filters can be cleaned, e.g.
in a washing machine.
• Operate button for 3 sec-
onds with a pencil or similar
to turn off the display illumi-
nation
• Replace the front cover
plate
Never operate the s stem
without a filter!
Illuminated
display Button
Front cover plate
Grid cover frame
Filter
Run-out time setting: For ventilators with run-out time 5/ZII
Caution! Onl adjust the switch when ventilator is in the dead condition!
Factor settings :
To change settings:
1. Take the front cover plate off
. Draw the cap off of the electrics housing
3. Make the wanted settings
4. Re-assemble in the opposite succession
• Switch-on delay 1 0 sec
• Run-out time 15 min
• Inverse operation OFF
• Interval switching OFF
White toggle switch
Remove cap with
a screwdriver
Electrics housing
Cap
Interval ON every 4 hrs for 30 min *
Interval OFF
Run-out time 15 min
Run-out time 6 min
Inverse operation 30 min after run-
down after the room is left *
Inverse operation OFF
Switch-on delay 1 0 sec
Switch-on delay 0 sec
Accessor and replacement parts
Filter, pack of 3 /FSI-R Order no. 039 7 1
Silvento decor plate incl. filter display /S Order no. 039 551
Silvento decor plate with movement detector /SB Order no. 039 578
Illuminated display Button
Ventilator with movement detector:
Button and illuminated display are in the grid cover frame
Ventilator with step switching, run-out time or
humidit control: Button and illuminated display
are in the electrics housing
Cleaning
Wipe the front cover plate and grid cover frame with a dry, soft cloth when appropriate.
Filter change and cleaning are not to be carried out by children or people who cannot manage this with certainty
because of their physical, sensorial or mental ability, or their inexperience or lack of appropriate knowledge
* I
ndependent of the set
adjusted run-out time
This manual suits for next models
2
Table of contents
Other Lunos Fan manuals

Lunos
Lunos RA 15-60 User manual

Lunos
Lunos RA 15-60 User manual

Lunos
Lunos e2 Series User manual

Lunos
Lunos 9/WDS ABL User manual

Lunos
Lunos Ne t Series User manual

Lunos
Lunos 9/WDS ABL User manual

Lunos
Lunos Silvento EC User manual

Lunos
Lunos e2 mini User manual

Lunos
Lunos Silvento AC Use and care manual

Lunos
Lunos e2 mini User manual
Popular Fan manuals by other brands

Vortice
Vortice RXC/Hi Series Installation, operation and maintenance manual

Craftmade
Craftmade PU52OB5 installation guide

Kichler Lighting
Kichler Lighting Sterling Manor instruction manual

Emerson
Emerson HIGHPOINT CF205GES01 owner's manual

KLASS Fan
KLASS Fan MOVERICK user manual

Fresh
Fresh Intellivent Sky manual