Luxli TIMPANI2 User manual

USER MANUAL

2
Conduct an orchestra of lights.
Precautions
The Luxli Orchestra series can produce a dazzling symphony of light. Synchronize LED light units
of all sizes, choose from millions of possible colors, apply lighting effects from four selectable
modes, and control them instantly with the powerful Composer mobile app.
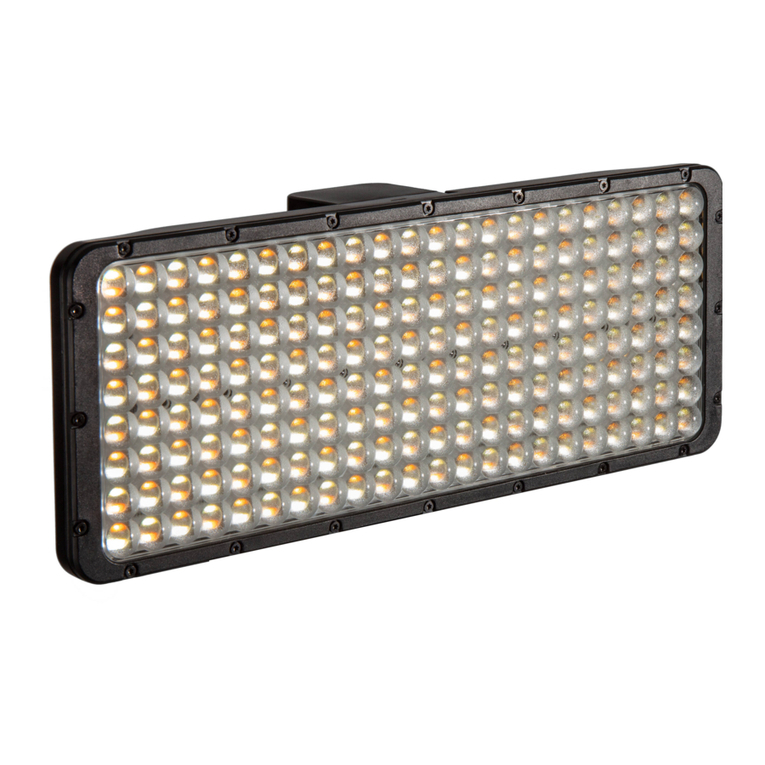
The Timpani²features Luxli’s signature versatile and highly accurate RGBAW LED panel. It offers
CCT,HSL,Gel Filter,HFR, and Effects operating modes that provide remarkable control over each
variable with an easy-to-use interface.The light is equipped with Bluetooth 5 that pairs with your
tablet or smartphone with Luxli’s Composer mobile app from up to 100 feet. DMX 512 support
features master/slave mode that allows you to attach up to 512 Timpanis and other compatible
Orchestra-series lights,and control all the operation modes from a single unit.Whether controlled
via the app, the intuitive interface on the unit itself,or DMX,the Timpani²will illuminate your creative
vision with endless possibilities.
For the latest version of the Composer mobile app,rmware updates, as well as videos and ideas
for creative uses for the Timpani², visit luxlilight.com.
• Keep this product away from water and ammable gases or liquids.
• Use only the correct, recommended voltage.
• Do not attempt to disassemble or repair this product.
• Clean this product with only a soft, dry cloth.
•
To avoid damage to this product, be careful not to overtighten or improperly thread any of
the threaded ttings.
• All images are for illustrative purposes only.

3
Overview
Front:
1. Diffuser
2. Diffuser thumbscrews
3. Tilt lock handle
4. Tilt control screw
5. Center mounting screw
6. Outer mounting screw
7. Locking handle
8. 5/8 in. receiver
3
2
4
21
86 75

4
Back:
1. Removable handle
2. 4-pin power input
3. Manufacturer’s service port
4. 5-pin DMX input
5. 5-pin DMX output
6. Bluetooth antenna
7.
User interface (see Interface Overview p. 9 )
DC 12.5–30 V SERVICE DMX IN DMX OUT
MODE
TIMPANI2
1
65432 7

5
Power supply:
1. 4-pin power output
2. V-mount battery plate
Also included:
• 4-pin XLR cable
• AC cable (3-Prong US - C5 Connector)
3. Battery release button
4. AC power input
• Photometric calibration results data sheet
1
2
3
4

6
Setting Up the Timpani²
Attaching the Tilt Lock Handle
The tilt lock handle can be attached to either side of the Timpani².To attach the handle, follow
these steps:
Mounting the Timpani² to a Light Stand
Loosen the mounting lock and place the receiver over the light stand’s 5/8-inch pin.Tighten the
handle until secure.
Note: If you’re unable to turn the tilt lock handle 360°, pull the handle out, reposition it,and push
it back in until it reengages.
1.
Place the Timpani² and yoke facedown on
a at surface.
2.
Use the included hex key to remove one of
the tilt control screws,and replace it with the
tilt lock handle. Screw in the handle so the
threads are engaged, but don’t tighten it.
3.
Use the hex key to tighten the control screw
on the other side of the yoke. Tighten it
enough until there is some resistance while
tilting the Timpani² in the yoke.
4. Tighten the handle until the yoke is locked
and secure.
Note: If the yoke seems too loose when the tilt lock handle is disengaged, use the hex key to
slightly tighten the control screw opposite the handle.

7
Reversing the Receiver’s Locking Handle
For mounting and handling convenience, you can change the side the locking handle is on:
Install the Diffuser
The Timpani² includes a medium-density diffuser.
1.
Remove the Timpani² from the light stand
and place it facedown on a at surface.
2.
Use a hex key to unscrew the center and
outer mounting screws.
3.
Turn the receiver so the handle is on the
opposite side.
4.
Replace the center and outer mounting
screws.Make sure the mounting screw is in
the center of the receiver, and the stabilizer
screw is on the side.Tighten until rm.
1. Partially screw in the lower thumbscrew.
2.
Set the diffuser’s slot down onto the
thumbscrew, and press the diffuser against
the panel.
3.
Screw in and tighten the upper thumbscrew
and then tighten the lower thumbscrew.

8
Powering the Timpani²
Battery Power
1. Connect the 4-pin XLR cable to the power supply and the Timpani².
2. Slide a V-mount battery into the power supply’s battery plate until it locks into place.
To remove the battery, press the battery release, and slide it off the plate.
AC Power
1. Connect the 4-pin XLR cable to the power supply and the Timpani².
2. Connect the AC cable to the power supply and a power outlet.
Important! If the power supply is connected to both a 26 V battery and an AC power source, the
power supply will draw from the 26 V battery instead of the AC power.
To preserve battery life,connect a 26 V battery to the power supply only when you intend to use it.

9
Interface Overview
1 . Intensity Dial
In all operation modes,the Intensity dial adjusts to the intensity from 100% to 0% in 1% increments.
In all operation modes, press the Intensity dial to toggle between the set intensity and 0%.
2 . Power Button
Press to power on or off.
3 . Mode Selector
Cycles through the ve operating modes: CCT, HSL, Filter, HFR, and Effects.
4 . Function Buttons
The function buttons implement the action or access the menu indicated on the LCD screen
next to the button.
5 . Adjustment Dial
In all operation modes, the Adjustment dial changes the value of the highlighted function.
MODE
1 2 3 4 5

10
User Interface
1 . Intensity
2 . Bluetooth Indicator
3 . Power Display (see below)
4 . Functions
Displays the available actions for each
operating mode or screen.Press the button
next to the function to select it.
5 . Menu Button
Switches to the main menu (see Main
Menu below).
Power Display
Batteries with SMBUS data communication
The Timpani² displays an estimated time
remaining at the top of the screen.
Batteries without SMBUS data communication
The Timpani² displays the actual voltage of the
power source.This allows you to gauge the
remaining battery power.
32%
3900K
+/- GREEN
0%
CCT
32% 24.2V
32% 3h 31m
32% 24.2V
1 2 3 4
5

11
Operating Modes
CCT Mode
1 . Intensity
2 . CCT
•
Select any color temperature from 2800 to
10,000 K in 50 K increments.
• Press the Adjustment dial to toggle
between 3200 and 5600 K.
3 . Tint (+/− Green) Screen
•
The +/− Green function lets you match
the Timpani²’s color to an existing light
source by adjusting the green/magenta
saturation level.This is useful when shooting
under uorescent lights.
•
Sets the green/magenta saturation level in
1% increments from +100% (full plus green)
to −100% (full minus green).
32%
3900K
+/- GREEN
0%
CCT
32% 24.2V
1 2 3

12
HSL Mode
Scroll through the entire color wheel and adjust the saturation level and base white point.
Every color of the visible spectrum is available. In HSL mode, you can create accent lighting as
well as dramatic lighting effects for photography and video.
The LCD panel displays the position on the color wheel in degrees, along with a color wheel
screen indicator.
Color saturation can be adjusted from 100% to 0% in 1% increments.
1 . Crosshair
• Shows current position on the color
graph.
2 . Hue
•
Use the Adjustment dial to scroll through
the color spectrum in 1° increments.
The crosshair icon moves horizontally to
represent the location of the hue on the
color wheel.
• The icon conveniently loops from 360° to 0° when scrolling through the color wheel.
3 . Saturation
• Use the Adjustment dial to set the saturation of the hue from 100% to 0% in 2% increments.
The crosshair icon moves vertically to represent the level of saturation.
• Press the Hue button to return to the hue adjust screen.
Note:The intensity function remains active,and you can independently adjust the Timpani²’s
brightness while in Saturation mode.
100
SAT
HUE
169
WHITE P.
6500K
32% 24.2V
1 32

13
4 . White point
•
Adjusts the base white point of HSL
mode to add a tint to a custom color
temperature.The Timpani² will calculate
the resulting color as the saturation level
and hue are adjusted.
•
Press the function button next to “White
P.” and use the Adjustment dial to set
the base color temperature from 3000 to
10,000 K in 50 K increments.
• Press the Hue or Saturation buttons to
resume operating in HSL mode.
Note: HSL mode at 0% saturation is not
designed as an alternative to CCT mode.
To illuminate a subject in a light with 0%
saturation, use CCT mode.
100
SAT
HUE
169
WHITE P.
6500K
32% 24.2V
4

14
Filter Mode
The Timpani² is loaded with 150 digital gel lters. This mode allows you to match the color
temperature of your other lights, and then add a gel for a touch of color to a background or
an accent light.The Timpani² uses the setting from CCT mode to calculate the precise color
temperature of the gel as it would appear on the actual light.
1 . Filter Name and Color Preview
• The LCD displays the lter number and
the name along with a color preview of
the gel.
2 . Base CCT Level
•
Press the CCT function button to adjust
the base color temperature with the
Adjustment dial.
• Adjust the base color temperature from
2800 to 10,000 K in 50 K increments
without leaving Filter mode.The LCD
continues to display the current lter
number.
3 . Gel Number
•
Press the Gel function button to change
the active lter.
• Use the Adjustment dial to scroll through
the 150 gel lters.
Medium Purple
Mauve
Bright Pink
Follies Pink
Rose Pink
Smokey Pink
Scarlet
S. Rose Pink
Bright Rose
CCT
54
GEL
3900K
32%
54
24.2V24.2V24.2V
1 32

15
High Frame Rate (HFR) Mode
Activating HFR mode sets one of the ve diodes
to remain constantly on. Use HFR mode to
prevent banding when you’re shooting at a
high frame rate.
Use the Adjustment dial to scroll through the
five options: Cold White, Warm White, Red,
Green, and Blue.
The Intensity dial turns HFR mode on and off.
Important!
•
There is no brightness adjustment in HFR
mode. The active diodes are at 100%
brightness.
•
CCT, HSL,and Filter mode adjustments are
not available in HFR mode.
32%
High Frame Rate mode
Cold white
Off
24.2V24.2V

16
Effects Mode
The Timpani² is loaded with 10 animated
effects. Each effect has multiple settings that
can be adjusted in the Edit menu.
Effect Screen
1 . List of Effects
Use the Adjustment wheel to scroll through the
list.
2 . Play button
• The Play button starts the effect.
The Stop button stops the effect.
3 . Edit button
• Opens the Edit menu (see below).
Edit Menu
The Timpani² displays the changes in real time
as you modify them, so you can experiment
with the settings while running the effect.
4.
Scroll to the setting you want to edit, and
press Select.
5.
A new screen will open where you can
modify that setting.
6. Press the Conrm button to apply the new
setting.The settings screen will close, and
the Edit menu will reappear.
To return to the Edit menu and the previous
setting without saving the changes, press the
Back button.
Press the Back button again to return to the
Effect screen.
32%
CCT Chase
Color chase
Explosion
Fire
Fireworks
Lightning
24.2V
32%
SELECT
BACK
Campfire
Breeze
Fire type
Wind type
24.2V24.2V24.2V
Fire type
Candle
Campfire
Bonfire
CONFIRM
BACK
1
4
5 6
32

17
Description of the Effects
CCT Chase
A continuous loop that changes between two preset color temperatures. Good for simulating
a sunrise, sunset, or a change from cloudy to sunny weather in real time. Since the sequence
loops, you can shoot multiple takes without reprogramming the light.
CCT Start: Selects the color temperature at the beginning of the sequence (2400 to 10,000 K).
CCT Stop: Selects the nal color temperature of the sequence (2400 to 10,000 K).
+/− Green: Sets the green/magenta (tint) saturation level in 1% increments from +100% (green)
to −100% (magenta).
Time Unit: Select between seconds and minutes for the time loop.
Time/Loop: Select how many seconds or minutes the loop will last (1 to 160).
Color Chase
A continuous loop that moves through the color wheel between two selected colors. Since the
sequence loops, you can shoot multiple takes without reprogramming the light.
Hue Start: Selects the color at the beginning of the sequence (0° to 360°).
Hue Stop: Selects the nal color of the sequence (0° to 360°).
Saturation: Determines the color intensity from 100% (full color) to 0% (white light).
Time Unit: Select between seconds and minutes for the time loop.
Time/Loop: Select the duration in seconds or minutes for each loop (1 to 160).

18
Explosion
Simulates the light from explosions.The Timpani² generates random-length pulses and strobes
within a range of programmed hues.
Hue Min. (0 to 360): Set the bottom limit on the color wheel of usable hues.
Hue Max. (0 to 360): Set the top limit on the color wheel of usable hues.
Explosions/Minute: Sets how many separate explosions occur each minute (1 to 360).
Duration (%): Set the percentage of time the light is illuminated for each pulse or strobe (5% to 95%).
Fire
Simulates the light of a candle, campre, or bonre in various wind conditions.
Fire Type: Changes the color temperature to simulate a candle, campre, or bonre.
Wind Type: Changes the intensity and speed of icker to simulate the light with no wind, or in a
breeze, wind, or storm.
Fireworks
Uses random bursts of color to simulate reworks. Colors and timing of each ash are random.
Explosions/Minute: Sets how many ashes will occur per minute (1 to 50).
Duration (%): Determines the percentage of time the light is illuminated in each cycle. Select
from a range of 5% (shortest duration) to 95% (longest duration).
Lightning
Simulates lightning by creating random short and long bursts of light.
CCT: Selects the color temperature of the lightning ashes (3000 to 10,000 K in 50 K increments).
Interval(s): Sets the interval of seconds between lightning ashes (1 to 60).

19
Paparazzi
Simulates the random ring of multiple camera ashes.
Intensity: Higher intensity increases the number of random ashes per second (0 to 100).
Bulb Type: Determines the length of each ash. Slow is the longest duration. Modern is the shortest
duration. Choose from Slow, Medium, Fast, and Modern.
CCT: Sets the color temperature of the ashes from 2800 to 10,000 K.
+/− Green: Sets the green/magenta (tint) saturation level in 1% increments from +100% (green)
to -100% (magenta).
Pulse
Creates a steady pulse at a programmable rate.This effect is like the strobe effect (below), but
the light fades on and off.
Hue: Selects the light color (0 to 360).
Saturation: Determines the color intensity from 100% (full color) to 0% (white light).
Pulses/Minute: Sets how many times the light will pulse each minute (1 to 200).

20
Siren
Simulates emergency lights, like a police car or ambulance.
Colors: Select the color combination of ashing lights. Choose red, blue, and white; red and
blue; red and white; blue and white; blue; red; or SAE Amber.
Flash/Cycle: Set the number of times each individual color will ash within the cycle. Choose
from 1 to 4 times per cycle.
Cycles/Minute: Determines how many repetitions of the cycle will occur each minute. Choose
from 10 to 360.
Duration (%): Determines the percentage of time the light is illuminated in each cycle. Select
from a range of 10% (shortest duration) to 90% (longest duration).
Strobe
Creates a steady ashing light at a programmable rate.
Hue: Selects the light color (0 to 360).
Saturation: Determines the color intensity from 100% (full color) to 0% (white light).
Frequency: Changes the number of ashes per second (1 to 25).
Duration (%): Determines the percentage of time the light is illuminated in each cycle. Select
from a range of 10% (shortest duration) to 90% (longest duration).
Other manuals for TIMPANI2
1
This manual suits for next models
1
Table of contents
Other Luxli Lighting Equipment manuals

Luxli
Luxli CELLO 2 User manual

Luxli
Luxli ORC-CELLO-M2 User manual

Luxli
Luxli Timpan-1x1 User manual

Luxli
Luxli TIMPANI2 User manual

Luxli
Luxli Taiko User manual

Luxli
Luxli ORC-TAIKO-2x1 User manual

Luxli
Luxli ORC-CELLO-10-DK User manual

Luxli
Luxli ORCHESTRA Series User manual

Luxli
Luxli VIOLA 2 User manual

Luxli
Luxli SFT-50R User manual