Luxli VIOLA 2 User manual

USER MANUAL

2
Conduct an orchestra of lights.
Precautions
The Luxli Orchestra series can produce a dazzling symphony of light. Synchronize LED light units
of all sizes, choose from millions of possible colors, apply lighting effects from four selectable
modes, and control them instantly with the powerful Conductor mobile app.
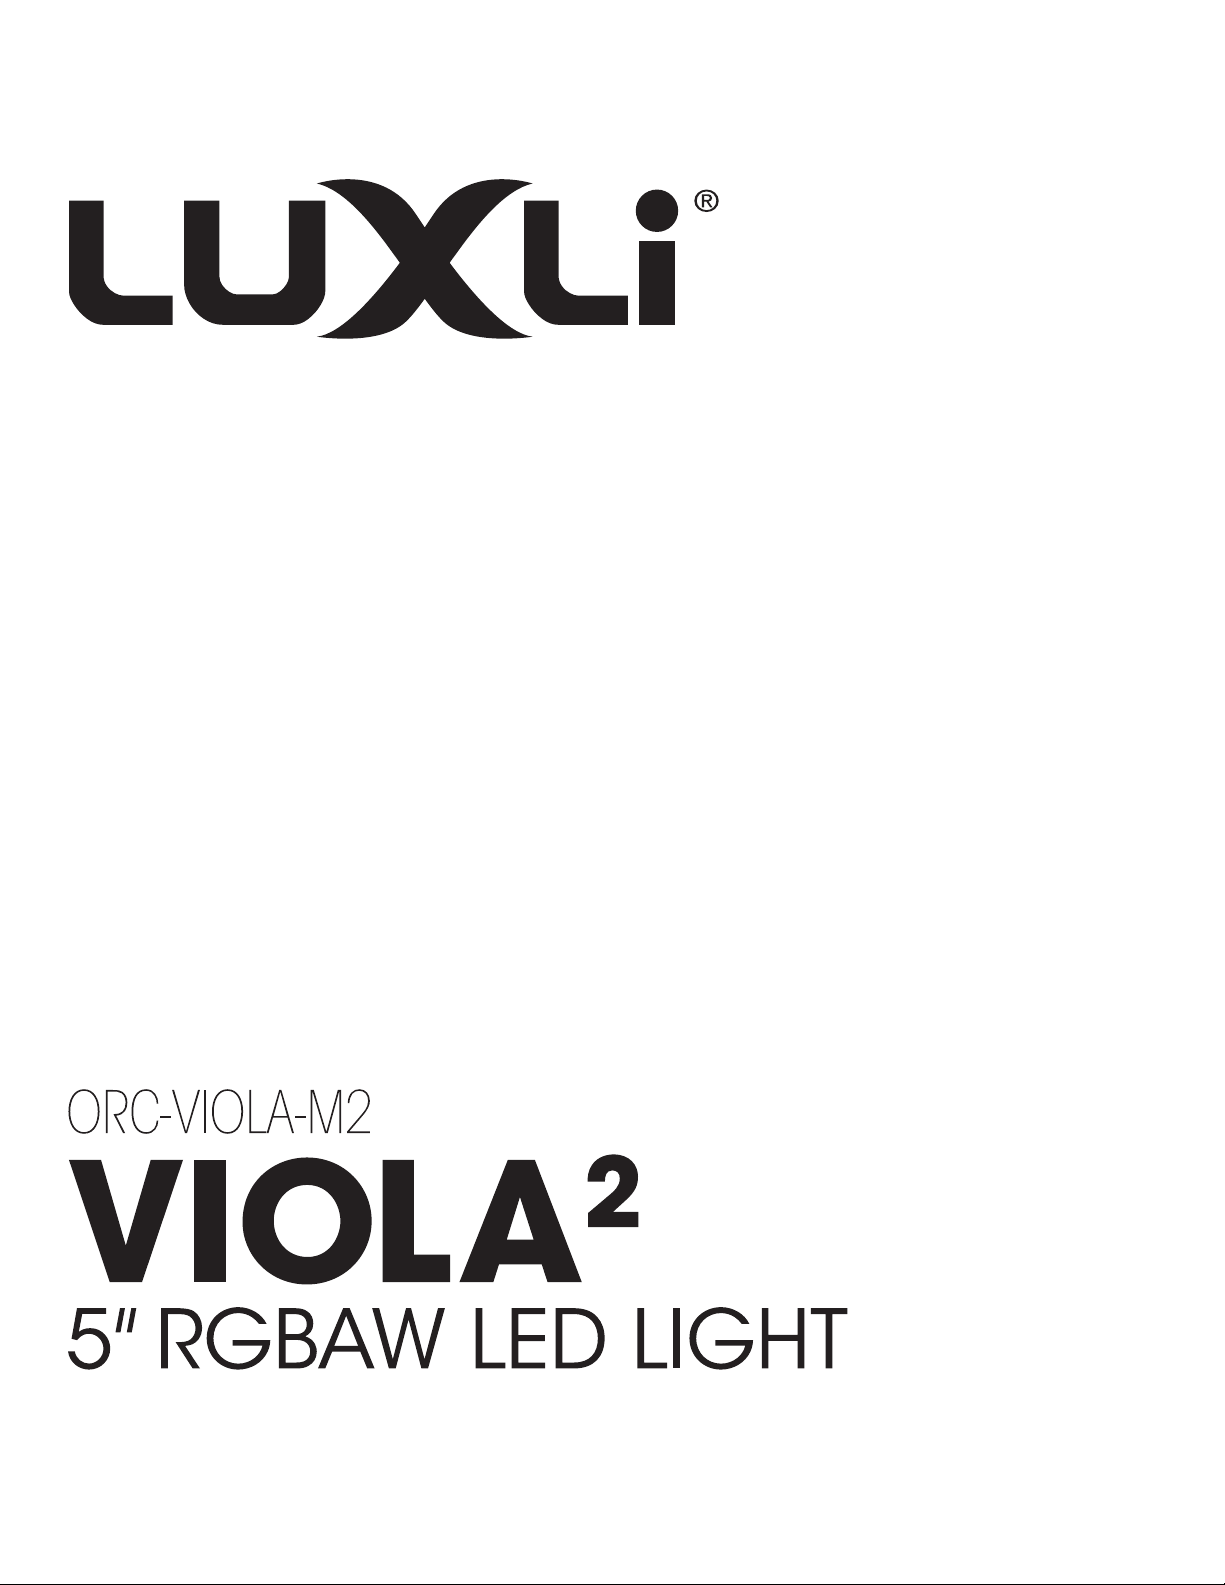
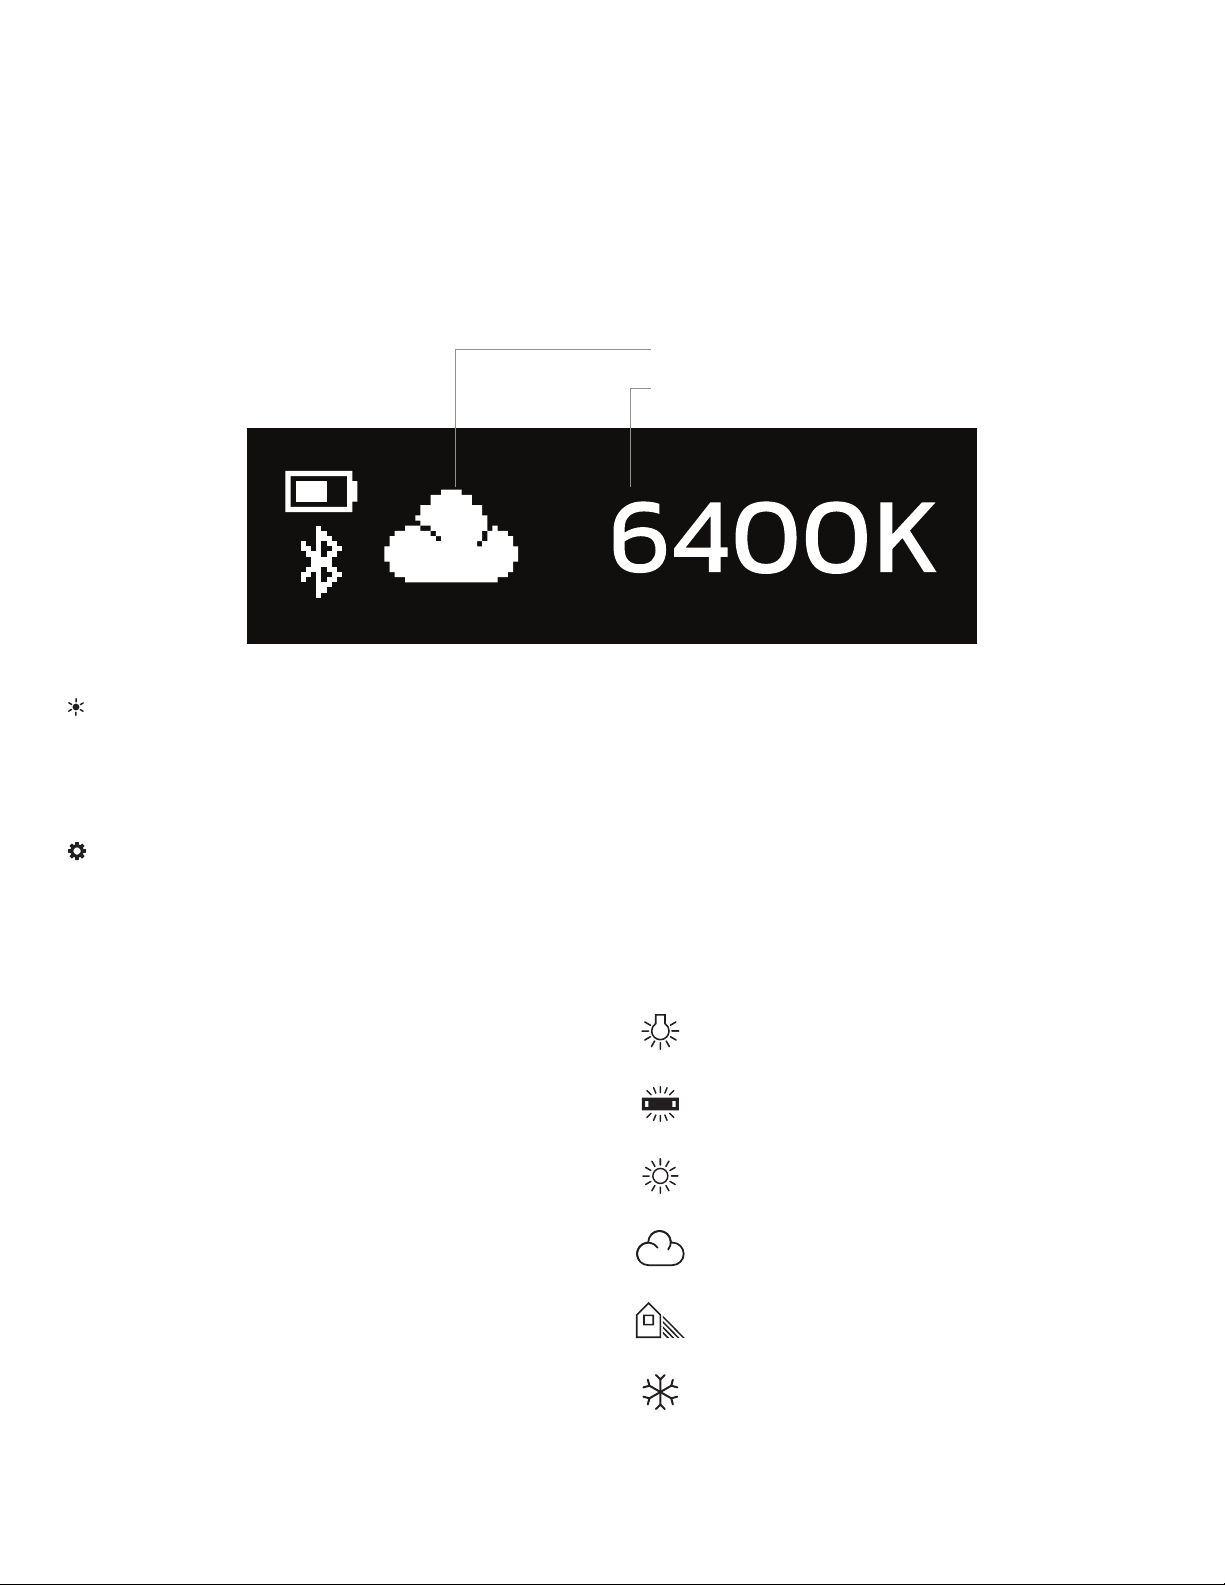
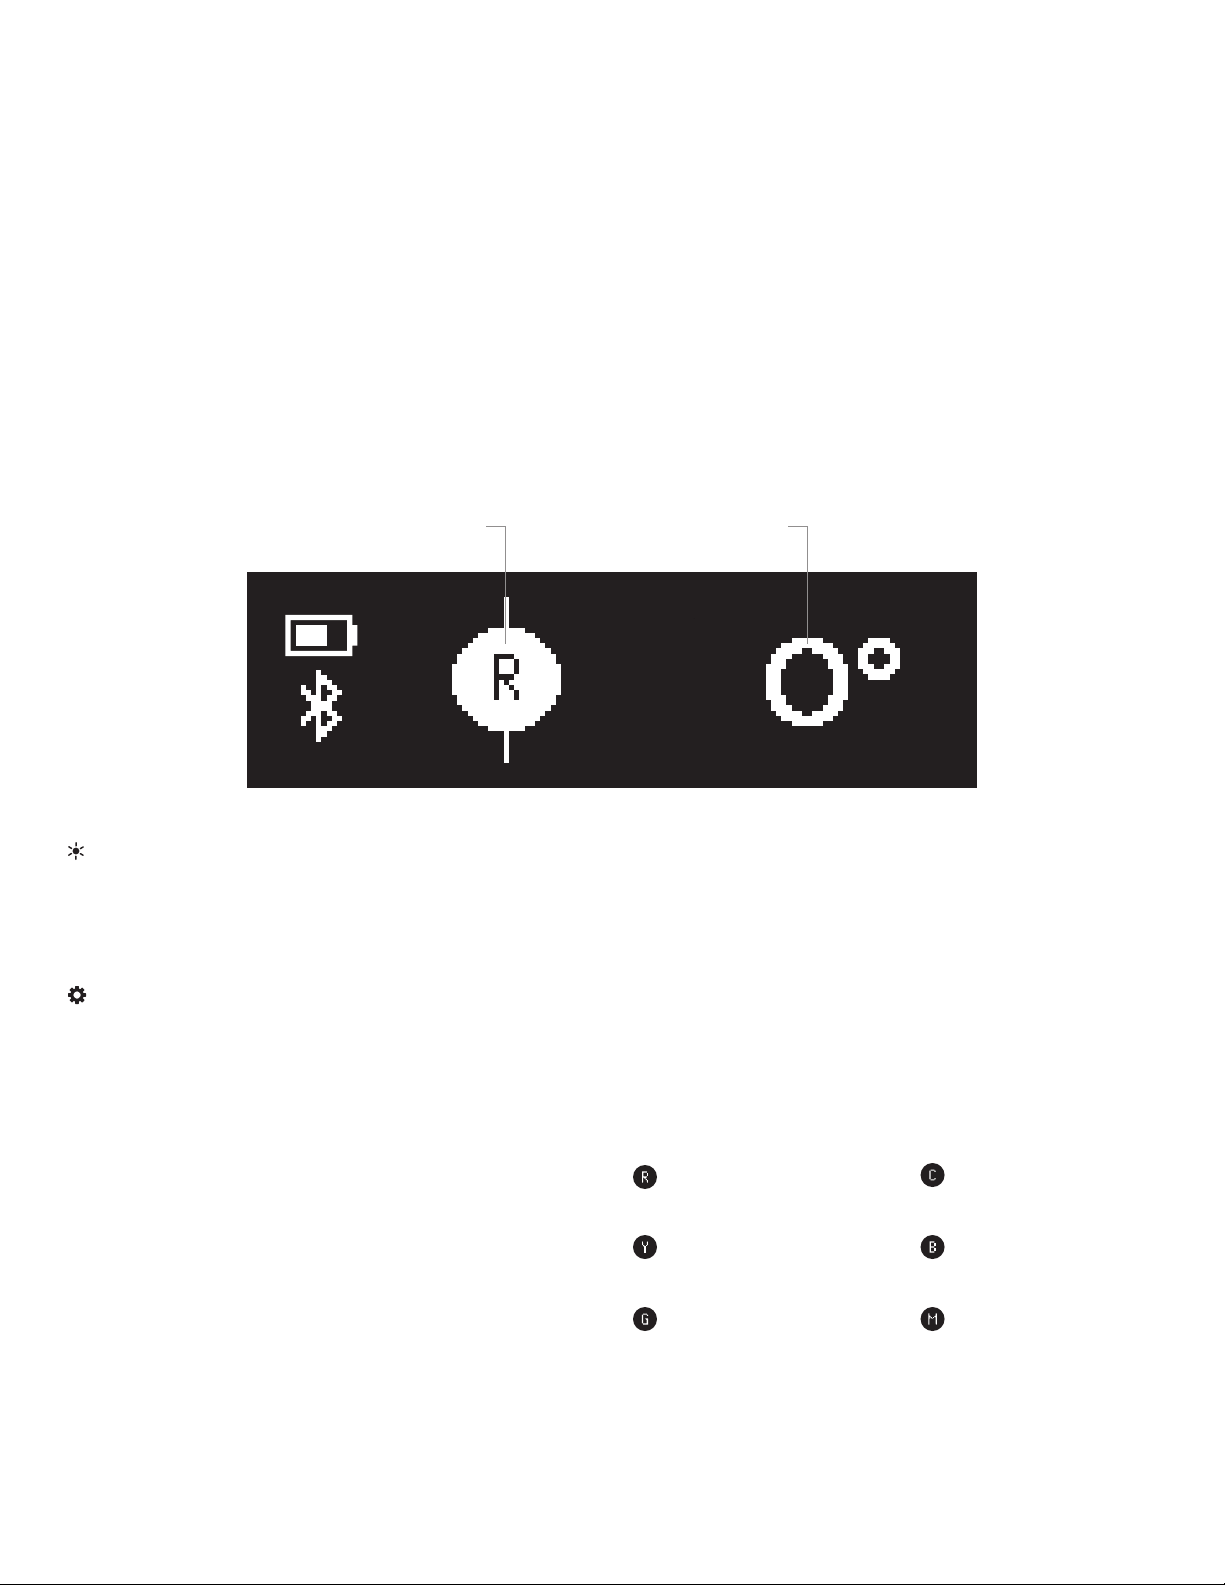
The Viola
2
ve-inch multicolor LED light features a highly accurate and remarkably versatile RGBAW
LED panel.The light is equipped with Bluetooth 4.0 LE that pairs with your tablet or smartphone the
moment you open Luxli’s Conductor mobile app.Whether controlled via the app or the intuitive
interface on the unit itself, the Viola² will illuminate your creative vision with endless possibility.
For the latest version of the Conductor mobile app,rmware updates, and a .pdf of the full user
manual, as well as videos and ideas for creative uses for the Viola², visit luxlilight.com.
• Please read and follow these instructions, and keep this manual in a safe place.
• Keep this product away from water and ammable gases or liquids.
• Use only the correct, recommended voltage.
• Use only batteries supplied with the Viola2or batteries recommended by Luxli. Other batteries
may behave differently and affect the performance of the unit.
• Do not attempt to disassemble or repair this product.
• Clean this product with only a soft, dry cloth.
•
To avoid damage to this product, be careful not to overtighten or improperly thread any of
the threaded ttings.
• All images are for illustrative purposes only.

3
Overview
1. 2.1 mm DC input
2.
Micro-USB port for firmware updates
(visit luxlilight.com for details)
3. Battery slot
4. Battery release
5. 1/4-20 socket
Also Included
• Shoe-mount ball head
• NP-F550 battery
6. LCD panel
7. Power button
8. Mode button
9. Brightness dial
10. Adjustment dial
• Battery charger
3 7 84 5 6
91
102

4
User Interface
Brightness dial
• Scroll: Adjusts the brightness from 100% to 0%.
• Press:Turns off the LED panel without powering down.
Battery indicator
Bluetooth indicator
Brightness percentage

5
CCT Mode
Correlated color temperature (CCT) mode allows you to accurately adjust the color temperature
from 3000 to 10,000K. CCT mode is effective for color matching the Viola2to almost any light source.
The color temperature and brightness can also be adjusted from the Controller app.
Color Temperature Preset Indicators
As you scroll through the color temperature,
the icons that appear on the LCD screen
light up to indicate industry-standard color
temperature settings.
Tungsten bulb (3200K)
Fluorescent bulb (4300K)
Daylight (5600K)
Overcast sky (6400K)
Daytime shade (7200K)
Clear blue sky (10,000K)
Adjustment dial
• Scroll: Adjusts the color temperature in 50K increments
• Press: Switches between tungsten balance (3200K) and daylight balance (5600K).
Brightness dial
• Scroll: Adjusts the brightness from 100% to 0%.
• Press:Turns off the LED panel without powering down.
Color temperature preset
Color temperature

6
Color wheel mode lets you dial up every color of the visible spectrum by scrolling through the
entire color wheel.
In color wheel mode, you can create accent lighting as well as dramatic lighting effects for
photography and video.
Color wheel mode is also available on the Conductor app.
The LCD panel displays the position on the color wheel in degrees.
Color Wheel Mode
Adjustment dial
• Scroll: Scrolls through the color spectrum in 1° increments.
• Press: No function.
Brightness dial
• Scroll: Adjusts the brightness from 100% to 0%.
• Press:Turns off the LED panel without powering down.
Red (0°)
Yellow (60°)
Green (120°)
Cyan (180°)
Blue (240°)
Magenta (300°)
Hue Preset Indicators
As you scroll through the color temperature,
the icons that appear on the LCD screen
light up to indicate industry-standard color
temperature settings.
Hue preset Hue degree

7
Filter mode allows you to apply colored gels to your current CCT setting.
This mode allows you to match the color temperature of your other lights and then add a gel for
a touch of color to the light.The Viola2uses the setting from CCT mode to calculate the precise
color temperature of the gel as it would appear on the actual light.
Applying a lter to a preset white-balance color temperature is available on the Conductor app
in CCT mode.
Each numbered gel has a descriptive title and the exact color temperature.
Filter Mode
Adjustment dial
• Scroll: Scrolls through available gels.
• Press: Switches between 3200, 5600, and 6500K white-balance color temperatures.
Brightness dial
• Scroll: Adjusts the brightness from 100% to 0%.
• Press:Turns off the LED panel without powering down.
10% 6500K
1. Chromakey Blue
Brightness percentage Filter number and name
Color temperature preset

8
Setting the White-Balance Color Temperature
If you need a white-balance color temperature other than the presets,the Viola
2
can be adjusted
to a specic color temperature for lter mode.
A specic white-balance color temperature can also be set with the Conductor app.
To adjust the color temperature setting of lter mode, follow these steps:
1. Press the mode select button repeatedly until CCT mode appears on the LCD display.
2. Use the adjustment dial to scroll to the desired color temperature.
3. Press the mode select button repeatedly to return to lter mode.

9
The Viola2is preset with 10 animated special effects. Each effect can be edited in the Conductor
app so you can control the variable settings of the selected effect.
Effects Mode
Adjustment dial
• Scroll: Scrolls through available effects.
• Press: Runs and stops the effect.
Description of the Special Effects
The settings for each effect listed below are editable only in the Conductor app.
Go to www.luxlilight.com to download the conductor app to your mobile device.
CCT Chase
A continuous loop that changes between two preset color temperatures. Good for simulating
a sunrise, sunset, or a change from cloudy to sunny weather in real time. Since the sequence
loops, you can shoot multiple takes without reprogramming the light.
CCT Start: Selects the color temperature at the beginning of the sequence (3000 to 10,000K).
CCT Stop: Selects the nal color temperature of the sequence (3000 to 10,000K).
Brightness dial
• Scroll: Adjusts the brightness from 100% to 0%.
• Press: No function.
10% Play
1. CCT chase
Effect number and name
Play/stop indicator
Brightness percentage

10
+/- Green: Sets the green/magenta (tint) saturation level in 1% increments from +100% (green)
to -100% (magenta).
Time Unit: Select seconds or minutes for the time loop.
Time/Loop: Select how many seconds or minutes the loop will last (1 to 160).
Color Chase
A continuous loop that moves through the color wheel between two selected colors. Since the
sequence loops, you can shoot multiple takes without reprogramming the light.
Hue Start: Selects the color at the beginning of the sequence (0° to 360°).
Hue Stop: Selects the nal color of the sequence (1° to 360°).
Saturation: Determines the color intensity from 100% (full color) to 0% (white light).
Time Unit: Select seconds or minutes for the time loop.
Time/Loop: Select the duration in seconds or minutes for each loop (1 to 160).
Explosion
Simulates the light from explosions.The Timpani generates random-length pulses and strobes
within a range of the red to amber section of the color wheel.
Explosions/Minute: Sets how many separate explosions occur each minute.
Duration (%): Set the percentage of time the light is illuminated for each pulse or strobe (5% to
95%).
Hue Min/Hue Max: Selects the range of color for each explosion (0° to 360°).

11
Fire
Simulates the light of a candle, camp re, or bonre in various wind conditions.
Fire Type: Select candle, campre, or bonre.
Wind Type: Select no wind, breeze, windy, or storm.
Fireworks
Simulates the light from reworks. Colors and timing of each ash are random.
Explosions/Minute: Sets how many ashes will occur per minute (1 to 50).
Duration (%): Determines the percentage of time the light is illuminated in each cycle. Select
from a range of 5% (shortest duration) to 95% (longest duration).
Lightning
Simulates lightning by creating random short and long bursts.
CCT: Selects the color temperature of the lightning ashes (3000 to 10,000K) in 50K increments.
Interval(s): Sets the interval of seconds between lightning ashes (1 to 60).
Paparazzi
Simulates the random ring of multiple camera ashes.
Intensity: Higher intensity increases the number of random ashes per second (0 to 100).
Bulb Type: Determines the length of each ash.Slow is the longest duration. Modern is the shortest
duration. Choose from Slow, Medium, Fast, and Modern.
CCT: Sets the color temperature of the ashes from 2800 to 10,000K
+/- Green: Sets the green/magenta (tint) saturation level in 1% increments from +100% (green)
to -100% (magenta).

12
Pulse
Offers a steady pulse at a programmable rate. Similar to the Strobe special effect (below), but
the light fades on and off.
Hue: Selects the light color (0° to 360°).
Saturation: Determines the color intensity from 100% (full color) to 0% (white light).
Pulses/Minute: Sets how many times the light will pulse each minute (1 to 200).
Siren
Simulates the ashing lights of a police car or emergency vehicle.
Colors: Select the color combination of ashing lights. Choose red, blue, and white; red and
blue; red and white; blue and white; blue; red; or SAE Amber.
Flash/Cycle: Set the number of times each individual color will ash within the cycle. Choose
from 1 to 4 times per cycle.
Cycles/Minute: Determines how many repetitions of the cycle will occur each minute. Choose
from 10 to 360.
Duration (%): Determines the percentage of time the light is illuminated in each cycle. Select
from a range of 10% (shortest duration) to 90% (longest duration).
Strobe
Offers a steady, ashing light at a programmable rate.
Hue: Selects the light color (0° to 360°).
Saturation: Determines the color intensity from 100% (full color) to 0% (white light).
Frequency: Changes the number of ashes per second (1 to 25).
Duration (%): Determines the percentage of time the light is illuminated in each cycle. Select
from a range of 10% (shortest duration) to 90% (longest duration).

13
Bluetooth Status Indicators
Connecting to the Conductor App
Updating the Firmware
Bluetooth Status Indicators
Disabled Searching Connected
The Viola² starts up in Bluetooth search mode until it is paired with a Bluetooth device. Once the
device is disconnected, the Viola² returns to search mode.
To disable Bluetooth, press and hold the mode select button for 3 seconds until you see the
Bluetooth disabled icon.
Press and hold the mode select button for 3 seconds to enable Bluetooth and start search mode.
1. Enable Bluetooth on your device.Then open the Conductor app on your device.
2. Power on the Viola².
3.
The app will prompt you to connect the Viola² to the app. Once you do,the light is connected
and ready to use with the app.
To disconnect, exit the app.
Visit www.luxlilight.com for the latest rmware for the Viola.
Follow the rmware update instructions that are in the folder with the latest rmware version.

14
Specications
Light Fixture
Connectors
Beam Angle 72°
Color Temperature 3000 to 10,000K
Color Accuracy Standard CRI 97 at 3200K
CRI 96 at 4300K
CRI 96 at 5600K
CRI 96 at 6400K
CRI 95 at 7200K
CRI 94 at 10,000K
Cooling System Passive
Dimming Yes,0% to 100% (continuous)
Display LCD
Light Panel RGBAW LED
Housing Material Plastic
Lumens 840
Photometrics 65 fc
700 lx @ 1 m
Number of LEDs 88
Expected Lamp Life 50,000 hr.
Rectangular Panel Size (W × H) 4.4 × 3.2 in. (11.2 × 8.1 cm)
Fixture Dimensions (W × H × D) 5.2 × 0.96 × 3.7 in. (13.2 × 2.4 × 9.4 cm)
Fixture Weight 0.38 lb. (172 g)
Battery Plate Sony L-series style
Power Connector 2.1 mm × 5.5 mm DC barrel
Service Connector Micro-USB

15
Mounting
Remote Operation
Power
Fixture Mount 1/4-20 socket
DC Input Power 7–15 V, 2 A
Power Source AC adapter, external battery
Max Power Consumption 17 W
Remote Control Type Bluetooth 4.0 LE
Wireless Range 30 ft. (9.1 m)
Troubleshooting
• If you encounter any problems, rst try turning the device off and then on.
• If the problem persists, remove the battery for 5 seconds, and then restart.

16
FCC Compliance Statement
This device complies with part 15 of the FCC rules. Operation is subject to the following two
conditions:
1. This device may not cause harmful interference
2.
This device must accept any interference received, including interference that may cause
undesired operation.
Note: This equipment has been tested and found to comply with the limits for a Class B digital
device, pursuant to part 15 of the FCC Rules.These limits are designed to provide reasonable
protection against harmful interference in a residential installation.This equipment generates,
uses,and can radiate radio frequency energy and,if not installed and used in accordance with
the instructions, may cause harmful interference to radio communications. However, there is no
guarantee that interference will not occur in a particular installation.If this equipment does cause
harmful interference to radio or television reception, which can be determined by turning the
equipment off and on, the user is encouraged to try to correct the interference by one or more
of the following measures:
• Reorient or relocate the receiving antenna.
• Increase the separation between the equipment and receiver.
•
Connect the equipment to an outlet on a circuit different from that to which the receiver
is connected.
• Consult the dealer or an experienced radio/TV technician for help.
Important: Changes or modications to this product not authorized by Gradus Group could void
the electromagnetic compatibility (EMC) and wireless compliance and negate your authority
to operate the product.This product has demonstrated EMC compliance under conditions
that included the use of compliant peripheral devices and shielded cables between system
components. It is important that you use compliant peripheral devices and shielded cables
between system components to reduce the possibility of causing interference to radios,televisions,
and other electronic devices.

17
One-Year Limited Warranty
This Luxli product is warranted to the original purchaser to be free from defects in materials
and workmanship under normal consumer use for a period of one (1) year from the original
purchase date or thirty (30) days after replacement, whichever occurs later.The warranty provider’s
responsibility with respect to this limited warranty shall be limited solely to repair or replacement,
at the provider’s discretion, of any product that fails during normal use of this product in its
intended manner and in its intended environment. Inoperability of the product or part(s) shall
be determined by the warranty provider. If the product has been discontinued, the warranty
provider reserves the right to replace it with a model of equivalent quality and function.
This warranty does not cover damage or defect caused by misuse,neglect,accident, alteration,
abuse, improper installation or maintenance. EXCEPT AS PROVIDED HEREIN, THE WARRANTY
PROVIDER MAKES NEITHER ANY EXPRESS WARRANTIES NOR ANY IMPLIED WARRANTIES, INCLUDING
BUT NOT LIMITED TO ANY IMPLIED WARRANTY OF MERCHANTABILITY OR FITNESS FOR A PARTICULAR
PURPOSE.This warranty provides you with specic legal rights,and you may also have additional
rights that vary from state to state.
To obtain warranty coverage,contact the Luxli Customer Service Department to obtain a return
merchandise authorization (“RMA”) number, and return the defective product to Luxli along with
the RMA number and proof of purchase.Shipment of the defective product is at the purchaser’s
own risk and expense.
For more information or to arrange service, visit www.luxlilight.com or call Customer Service at
212-594-2353.
Product warranty provided by the Gradus Group.
www.gradusgroup.com
LUXLI is a registered trademark of the Gradus Group.
© 2019 Gradus Group LLC.All Rights Reserved.

GG1
www.luxlilight.com
This manual suits for next models
1
Table of contents
Other Luxli Lighting Equipment manuals

Luxli
Luxli TIMPANI2 User manual

Luxli
Luxli ORCHESTRA Series User manual

Luxli
Luxli ORC-CELLO-M2 User manual

Luxli
Luxli Taiko User manual

Luxli
Luxli ORC-TAIKO-2x1 User manual

Luxli
Luxli BICOLOR SFT-10B User manual

Luxli
Luxli ORC-CELLO-10-DK User manual

Luxli
Luxli Timpan-1x1 User manual

Luxli
Luxli SFT-50R User manual

Luxli
Luxli CELLO 2 User manual