M-TI CX FLEX 4A User manual

CX FLEX™ 4A PRODUCT MANUAL
1
MTI P/N 063-00318 rev A ©2019 MTI All Rights Reservedwww.mtigs.com | T:800.426.6844
Product Manual for
CX FLEX™ 4A
DO NOT REMOVE FROM STORE
Contents
1. Materials in Box 2
2. Installation 3
3. Key Enrollment 4
4. Merchandising 4
5. Managing Alarms 5
6. Cable Removal 5
7. Remerchandising 5
8. Adding New User Keys 6
9. Deleting Enrolled Keys 6
10. LED Status Indicators 7
11. Dimensions 9
12. FCC and ISED Statement 10
For additional support, please reach out to our
Contact Center at 800-426-6844
CONTENTS
WORKS WITH

CX FLEX™ 4A PRODUCT MANUAL
2
MTI P/N 063-00318 rev A ©2019 MTI All Rights Reservedwww.mtigs.com | T:800.426.6844
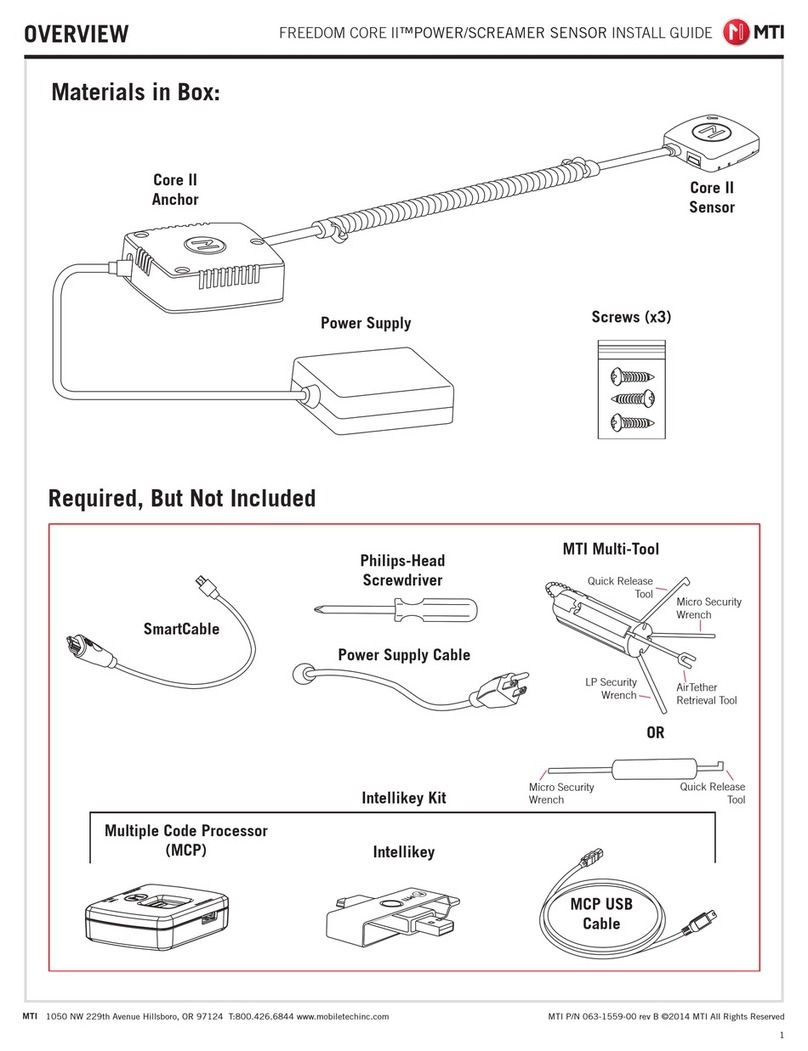
CX Flex™ 4A
Power Supply (400-00143)
Use provided AC/DC adapter model W&T AD1806B050025U manufactured by
W&T Electronics Co., Ltd. with output rating 5V d.c. 0.25A only.
MATERIALS IN BOX

CX FLEX™ 4A PRODUCT MANUAL
3
MTI P/N 063-00318 rev A ©2019 MTI All Rights Reservedwww.mtigs.com | T:800.426.6844
1
3
2
4
Feed power cable up through hole in xture (if needed),
and plug the barrel connector into the receptacle on the
bottom of CX Flex, and plug the provided power supply
into the nearest outlet. Use an outlet installed near the
equipment that is easily accessible.
Route the power cord out of the CX Flex using the
provided channels (marked in blue). The cable may exit
down through a hole in the xture or out from any side.
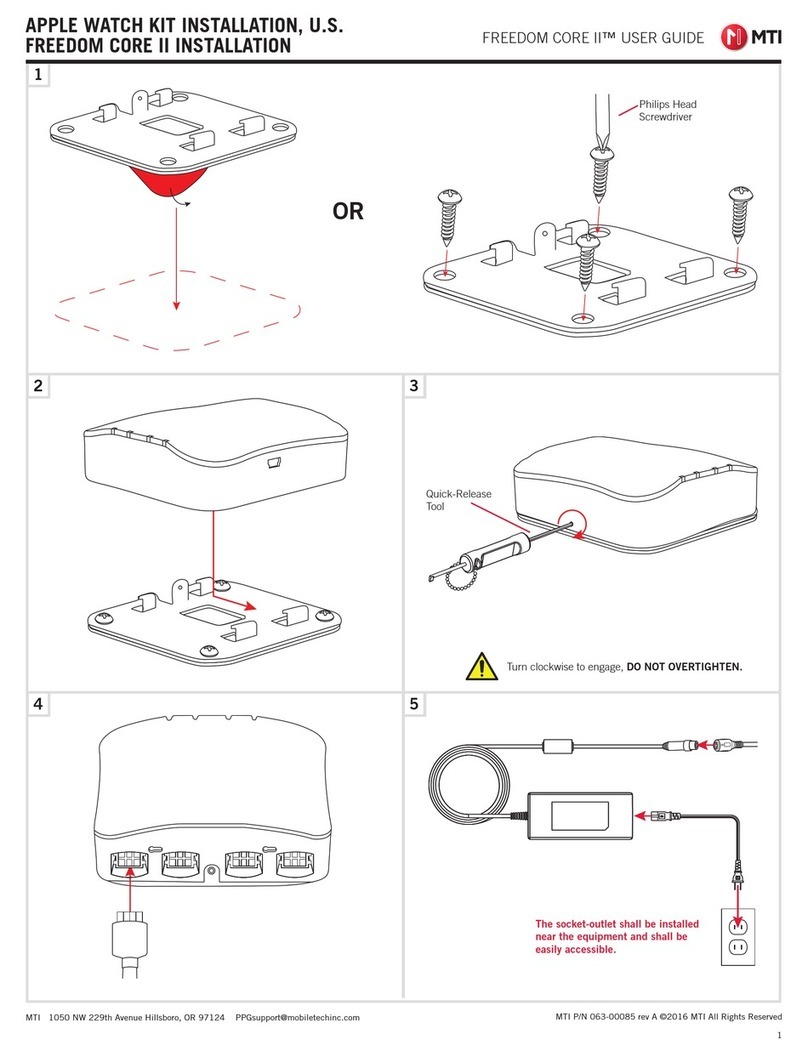
INSTALLATION
Press down on the base plate for 20 seconds for full VHB
contact. Allow 24 hours for full VHB adhesion.
Clean the desired surface with an alcohol pad allow it to
completely dry. Peel the red lm from the VHB adhesive.

CX FLEX™ 4A PRODUCT MANUAL
4
MTI P/N 063-00318 rev A ©2019 MTI All Rights Reservedwww.mtigs.com | T:800.426.6844
MERCHANDISING
KEY ENROLLMENT
Place Authorization Card over the
RFID icon to register to system.
LED will be solid blue.
System must be disarmed
to perform this operation.
Place the User Key you want to
add over the RFID icon.
If successful unit beeps 2 times
Repeat process for all User Keys
until they are successfully added.
To close Enrollment mode, place
the Authorization Card over the
RFID icon. Enrollment mode will
end automatically after 3 minutes
of no use. LED will then be
intermittently ashing white.
NOTE: The Type-C
terminals do not
deliver power or
transfer data to any
device.
1
132
3
USB-C Sensor: Insert the other end of the cable into
the device.
Plug the USB-C system end (marked with the MTI
logo) of the sensor into the CX Flex until it clicks.
Flexi-Disc Sensor: Peel the red lm from the VHB
adhesive and press rmly onto the product for 1
minute if the product surface is curved, or 30 seconds
if it is at.
System will auto-arm after 1 minute, or arm
immediately by holding an enrolled User Card over the
RFID Icon.
click
2b
2a

CX FLEX™ 4A PRODUCT MANUAL
5
MTI P/N 063-00318 rev A ©2019 MTI All Rights Reservedwww.mtigs.com | T:800.426.6844
To silence an alarm, hold the user card over the RFID icon. To disarm after silencing an alarm, hold the user card over the
RFID icon again (2 + 4 beeps). Alarm events on any port will trigger an alarm, and the LEDs for the affected individual port
or ports will ash red/white along with the system (side) LEDs. Other armed ports LEDs remain white.
MANAGING ALARMS
1
2Remove the cable.
Insert a corner of the RFID card into the slot and press
down until the cable detaches.
REMERCHANDISING
CABLE REMOVAL
Re-arm by holding user card over
RFID icon or system will auto-arm
after 1 minute.
Insert new cable until it clicks.From an armed state, place the
User Key over the RFID icon to
disarm the system. LED will be
ashing white. Then remove the
cable.
click
NOTE: If the issue causing the alarm is corrected while the system is
still alarming, holding the card over the RFID icon will immediately
re-arm the system (2 beeps).
If the issue causing the alarm is resolved after silencing the alarm,
the system will automatically re-arm after 1 minute without using the
RFID card or re-arm immediately by holding the User Key over the
RFID icon. (2 beeps).
2 + 4 beeps indicates card was successfully read (2 beeps), but can't
arm the system or all ports that are in use (4 beeps).
1
132
2

CX FLEX™ 4A PRODUCT MANUAL
6
MTI P/N 063-00318 rev A ©2019 MTI All Rights Reservedwww.mtigs.com | T:800.426.6844
1 2 3
DELETING ENROLLED KEYS (This deletes all User Keys from the system.)
ADDING NEW USER KEYS
Hold down the Authorization
Card for 5 seconds, LED will be
solid yellow and a 10 second
countdown timer will start beeping.
Place Authorization Card over the RFID icon. Follow Key
Enrollment process starting on page 4.
2
From an armed state, place the User Key over the RFID
icon to disarm the system. LED will be ashing white.
1
From an Armed state, place the
User Key over the RFID icon to
disarm the system. LED will be
ashing white.
Place the Authorization Card over
the RFID icon AGAIN while LED is
yellow, before the countdown timer
ends.
If successful unit beeps 2 times
and the LED will turn solid green
If unsuccessful unit beeps 4
times (wrong Authorization Card)

CX FLEX™ 4A PRODUCT MANUAL
7
MTI P/N 063-00318 rev A ©2019 MTI All Rights Reservedwww.mtigs.com | T:800.426.6844
SYSTEM LED STATUS INDICATORS
Visual Reference System Status Condition Solution
System LEDs are solid white. Armed
One or more ports of the pystem are
armed. Some ports may be disarmed if
they were not properly merchandised.
System LEDs are ashing
white. Disarmed System is disarmed and is ready to
merchandise or re-arm.
System LEDs are ashing red
and white. Alarming
One or more ports of the system have
triggered an alarm and require immedi-
ate attention, an alarm condition on any
single channel will trigger the alarm.
System LEDs are ashing
green. Default mode
System has no enrolled User Keys or
Authorization Card. Follow key enroll-
ment process.
NOTE: System will arm in this state if
merchandised.
System LEDs are solid green. Ready to Whitelist
System has an Authorization Card, but
does not have any User Keys enrolled.
Follow key enrollment process.

CX FLEX™ 4A PRODUCT MANUAL
8
MTI P/N 063-00318 rev A ©2019 MTI All Rights Reservedwww.mtigs.com | T:800.426.6844
SYSTEM LED STATUS INDICATORS
Visual Reference System Status Condition Solution
System LEDs are ashing
blue. Connect Pairing Mode
In Connect Pairing Mode; LEDs return to
previous color when Pairing is complete;
times-out after ~1.5 minutes.
System LEDs are solid yellow.
1. Armed, paired with Con-
nect,but not communicating to
Connect Network
2. Delete User Keys Mode (If
using Authorization Card)
1. Ensure Connect Network is operating
properly.
2. Hold Authorization Card again to com-
plete the key deletion process, allow
the countdown timer to expire to NOT
delete all enrolled user keys.
System LEDs are ashing
yellow.
Ready to be Armed, paired with
a Connect Network, but not
communicating with the Connect
Network.
Ensure Connect Network is operating
properly.
Armed Alarming
PORT LED STATUS INDICATORS
System and Port LEDs are solid white. System LEDs and Alarming Port(s) are ashing red and white.

CX FLEX™ 4A PRODUCT MANUAL
9
MTI P/N 063-00318 rev A ©2019 MTI All Rights Reservedwww.mtigs.com | T:800.426.6844
DIMENSIONS
4.60" [116.97mm]
2.43" [61.77mm]
1.04"
[26.38mm]

CX FLEX™ 4A PRODUCT MANUAL
10
MTI P/N 063-00318 rev A ©2019 MTI All Rights Reservedwww.mtigs.com | T:800.426.6844
FCC AND ISED STATEMENT
This device complies with Innovation, Science and Economic Development Canada licence-exempt RSS standard(s). Operation is subject to the following
two conditions: (1) this device may not cause interference, and (2) this device must accept any interference, including interference that may cause
undesired operation of the device.
CAN ICES-3(B)/NMB-3(B)
Le présent appareil est conforme aux CNR Innovation, Sciences et Développement économique Canada applicables aux appareils radio exempts de licence.
L’exploitation est autorisée aux deux conditions suivantes:
(1) il ne doit pas produire de brouillage et (2) l’ utilisateur du dispositif doit étre prêt à accepter tout brouillage radioélectrique reçu, même si ce brouillage
est susceptible de compromettre le fomctionnement du dispositif.
CAN ICES-3(B)/NMB-3(B)
The device meets the exemption from the routine evaluation limits in section 2.5 of RSS 102 and compliance with RSS-102 RF exposure, users can obtain
Canadian information on RF exposure and compliance.
Le dispositif rencontre l’exemption des limites courantes d’évaluation dans la section 2.5 de RSS 102 et la conformité à l’exposition de RSS-102 rf,
utilisateurs peut obtenir l’information canadienne sur l’exposition et la conformité de rf.
This transmitter must not be co-located or operating in conjunction with any other antenna or transmitter. This equipment should be installed and operated
with a minimum distance of 20 centimeters between the radiator and your body.
Cet émetteur ne doit pas être Co-placé ou ne fonctionnant en même temps qu’aucune autre antenne ou émetteur. Cet équipement devrait être installé et
actionné avec une distance minimum de 20 centimètres entre le radiateur et votre corps.
This device complies with Part 15 of the FCC Rules.
Caution: If any changes or modications not expressly approved by the party responsible for compliance could void the user’s authority to operate the
equipment.
Operation is subject to the following two conditions: (1) This device may not cause harmful interference, and (2) This device must accept any interference
received, including interference that may cause undesired operation.
The grantee is not responsible for any changes or modications not expressly approved by the party responsible for compliance. Such modications could
void the user’s authority to operate the equipment.
The RF Exposure Compliance distance is 20 Centimeters.
NOTE: This equipment has been tested and found to comply with the limits for a Class B digital device, pursuant to part 15 of the FCC Rules. These
limits are designed to provide reasonable protection against harmful interference in a residential installation. This equipment generates, uses and can
radiate radio frequency energy and, if not installed and used in accordance with the instructions, may cause harmful interference to radio communications.
However, there is no guarantee that interference will not occur in a particular installation. If this equipment does cause harmful interference to radio or
television reception, which can be determined by turning the equipment off and on, the user is encouraged to try to correct the interference by one or more
of the following measures:
—Reorient or relocate the receiving antenna.
—Increase the separation between the equipment and receiver.
—Connect the equipment into an outlet on a circuit different from that to which the receiver is connected.
—Consult the dealer or an experienced radio/TV technician for help.
Technical Data
Operating Frequency: 125kHz
Operating Temperature: 0° C to 40° C
Storage temperature: -20° C to + 60° C
Max Power: 125kHz: <-10dBuA/m at 10m
Operating Frequency: 2.4GHz: 2405-2480MHz
Operating Temperature: 0° C to 40° C
Storage temperature: -20° C to + 60° C
Max Power: 2.4GHz: <0 dBm
Antenna Gain: -1 dBi
FCC ID: 2AA2X-15000252
Model: CX Flex 4A
FCC Statement
ISED Certification Number: 24439-15000252
Model: CX Flex 4A
ISED Statement
This product contains a rechargable battery. Proper storage, use, and disposal of the battery is important. Please refer to the guidelines below:
i. Properly dispose of the battery; Do not dispose of the battery into a furnace/oven or into a fire or mechanically crush or cut the battery, as this
could cause the battery to explode.
ii. Storing the battery in an environment at higher temperatures than stated above can result in explosion or leaking of flammable liquid or gas.
iii. Subjecting a battery to very low air pressure or high altitudes can result in explosion or leaking of flammable liquid or gas.
This product shall not be used under low pressure and high latitude.
Table of contents
Other M-TI Security System manuals