Makita CE002G User manual

CE002G
EN Cordless Power Cutter INSTRUCTION MANUAL 10
ZHCN 充电式切断锯 使用说明书 26
ID Mesin Pemotong Tanpa Kabel PETUNJUK PENGGUNAAN 42
MS Pemotong Kuasa Tanpa Kord MANUAL ARAHAN 59
VI Máy Cắt Bê Tông Cầm Tay
Hoạt Động Bằng Pin TÀI LIỆU HƯỚNG DẪN 76
TH 92

2
1243 65
19
15
18
13
16
14
22
8
11
7
9
10
12
20 21
17
Fig.1

3
11
2
3
Fig.2
1
2
Fig.3
1
Fig.4
1
2
Fig.5
1
2
Fig.6
1
Fig.7
1
2
3
4
Fig.8

4
1
234
2
5
Fig.9
2 3
4
1
2
Fig.10
3
4
1
2
Fig.11
Fig.12
1
2
Fig.13
3
1
2
Fig.14

5
1
Fig.15
11
Fig.16
Fig.17
1
Fig.18
1
Fig.19
1
Fig.20
Fig.21

6
1
Fig.22
1
3
2
4
Fig.23
13 2
Fig.24
1
Fig.25
1
2 1
2
Fig.26
Fig.27

7
1
Fig.28
2 1
Fig.29
1
Fig.30
1
Fig.31
1
2 1
2
Fig.32
1
2
Fig.33

8
1
Fig.34
1
3
2
Fig.35
1
2
Fig.36
1
3
2
Fig.37
1
3
2
Fig.38

9
1
2
Fig.39
1
Fig.40
1
Fig.41
1
3
2
Fig.42

10 ENGLISH
ENGLISH (Original instructions)
SPECIFICATIONS
Model: CE002G
Wheel diameter 350 - 355 mm
Max. wheel thickness 4.0 mm
Max. cutting depth 127 mm
Rated speed 4,200 min-1
Rated voltage D.C. 72 V - 80 V max
Recommended air volume of the
vacuum cleaner
Equal to or more than 1.8 m3/min
Overall length 825 mm
Net weight 13.1 - 15.1 kg
• Duetoourcontinuingprogramofresearchanddevelopment,thespecicationshereinaresubjecttochange
without notice.
• Specicationsmaydierfromcountrytocountry.
• Theweightmaydierdependingontheattachment(s),includingthebatterycartridge.Thelightestandheavi-
estcombinations,accordingtoEPTA-Procedure01/2014,areshowninthetable.
Applicable battery cartridge and charger
Batterycartridge BL4040 / BL4050F* / BL4080F*
*:Recommendedbattery
Charger DC40RA/DC40RB/DC40RC
• Someofthebatterycartridgesandchargerslistedabovemaynotbeavailabledependingonyourregionof
residence.
WARNING: Only use the battery cartridges and chargers listed above.Useofanyotherbatterycartridges
andchargersmaycauseinjuryand/orre.
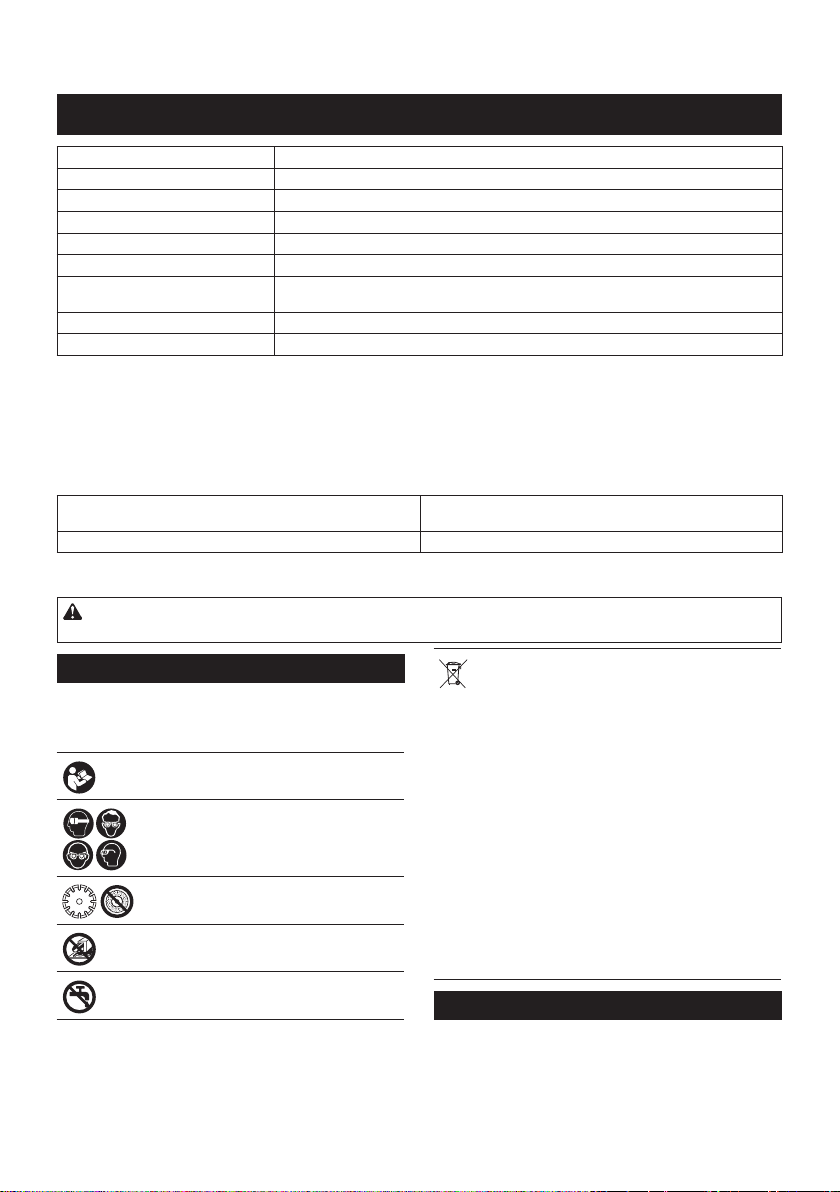
Symbols
Thefollowingsshowthesymbolswhichmaybeused
fortheequipment.Besurethatyouunderstandtheir
meaningbeforeuse.
Read instruction manual.
Wearsafetyglasses.
Donotuseabrasivecut-owheel.
Onlydiamondwheelisapplicable.
Do not cut metal.
Do not feed water.
Ni-MH
Li-ion
OnlyforEUcountries
Due to the presence of hazardous com-
ponents in the equipment, waste electrical
and electronic equipment, accumulators
andbatteriesmayhaveanegativeimpact
on the environment and human health.
Do not dispose of electrical and electronic
appliancesorbatterieswithhousehold
waste!
In accordance with the European Directive
on waste electrical and electronic equip-
mentandonaccumulatorsandbatteries
andwasteaccumulatorsandbatteries,
as well as their adaptation to national law,
wasteelectricalequipment,batteriesand
accumulatorsshouldbestoredseparately
and delivered to a separate collection point
for municipal waste, operating in accor-
dance with the regulations on environmen-
tal protection.
Thisisindicatedbythesymbolofthe
crossed-outwheeledbinplacedonthe
equipment.
Intended use
Thetoolisintendedforcuttinginmasonrymaterials
with a diamond wheel.

11 ENGLISH
SAFETY WARNINGS
General power tool safety warnings
WARNING Read all safety warnings, instruc-
tions, illustrations and specications provided with
this power tool. Failure to follow all instructions listed
belowmayresultinelectricshock,reand/orserious
injury.
Save all warnings and instruc-
tions for future reference.
Theterm“powertool”inthewarningsreferstoyour
mains-operated(corded)powertoolorbattery-operated
(cordless)powertool.
Work area safety
1. Keep work area clean and well lit. Cluttered or
dark areas invite accidents.
2. Do not operate power tools in explosive atmo-
spheres, such as in the presence of ammable
liquids, gases or dust.Powertoolscreatesparks
whichmayignitethedustorfumes.
3. Keep children and bystanders away while
operating a power tool. Distractions can cause
youtolosecontrol.
Electrical safety
1. Power tool plugs must match the outlet. Never
modify the plug in any way. Do not use any
adapter plugs with earthed (grounded) power
tools. Unmodiedplugsandmatchingoutletswill
reduce risk of electric shock.
2. Avoid body contact with earthed or grounded
surfaces, such as pipes, radiators, ranges and
refrigerators.Thereisanincreasedriskofelec-
tricshockifyourbodyisearthedorgrounded.
3. Do not expose power tools to rain or wet con-
ditions. Water entering a power tool will increase
the risk of electric shock.
4. Do not abuse the cord. Never use the cord for
carrying, pulling or unplugging the power tool.
Keep cord away from heat, oil, sharp edges
or moving parts. Damaged or entangled cords
increase the risk of electric shock.
5. When operating a power tool outdoors, use an
extension cord suitable for outdoor use. Use of
acordsuitableforoutdoorusereducestheriskof
electric shock.
6. If operating a power tool in a damp location
is unavoidable, use a residual current device
(RCD) protected supply. Use of an RCD reduces
the risk of electric shock.
7. Power tools can produce electromagnetic
elds (EMF) that are not harmful to the user.
However, users of pacemakers and other similar
medical devices should contact the maker of their
deviceand/ordoctorforadvicebeforeoperating
this power tool.
Personal safety
1. Stay alert, watch what you are doing and use
common sense when operating a power tool.
Do not use a power tool while you are tired or
under the inuence of drugs, alcohol or med-
ication.Amomentofinattentionwhileoperating
powertoolsmayresultinseriouspersonalinjury.
2. Use personal protective equipment. Always
wear eye protection.Protectiveequipmentsuch
asadustmask,non-skidsafetyshoes,hardhator
hearing protection used for appropriate conditions
willreducepersonalinjuries.
3. Prevent unintentional starting. Ensure the
switch is in the o-position before connecting
to power source and/or battery pack, picking
up or carrying the tool.Carryingpowertoolswith
yourngerontheswitchorenergisingpowertools
that have the switch on invites accidents.
4. Remove any adjusting key or wrench before
turning the power tool on.Awrenchorakeyleft
attachedtoarotatingpartofthepowertoolmay
resultinpersonalinjury.
5. Do not overreach. Keep proper footing and
balance at all times.Thisenablesbettercontrol
of the power tool in unexpected situations.
6. Dress properly. Do not wear loose clothing or
jewellery. Keep your hair and clothing away
from moving parts.Looseclothes,jewelleryor
longhaircanbecaughtinmovingparts.
7. If devices are provided for the connection of
dust extraction and collection facilities, ensure
these are connected and properly used. Use of
dust collection can reduce dust-related hazards.
8. Do not let familiarity gained from frequent use
of tools allow you to become complacent and
ignore tool safety principles.Acarelessaction
cancausesevereinjurywithinafractionofa
second.
9. Always wear protective goggles to protect
your eyes from injury when using power tools.
The goggles must comply with ANSI Z87.1 in
the USA, EN 166 in Europe, or AS/NZS 1336
in Australia/New Zealand. In Australia/New
Zealand, it is legally required to wear a face
shield to protect your face, too.
It is an employer's responsibility to enforce
the use of appropriate safety protective equip-
ments by the tool operators and by other per-
sons in the immediate working area.

12 ENGLISH
Power tool use and care
1. Do not force the power tool. Use the correct
power tool for your application.Thecorrect
powertoolwilldothejobbetterandsaferatthe
rate for which it was designed.
2. Do not use the power tool if the switch does
not turn it on and o.Anypowertoolthatcannot
becontrolledwiththeswitchisdangerousand
mustberepaired.
3. Disconnect the plug from the power source
and/or remove the battery pack, if detachable,
from the power tool before making any adjust-
ments, changing accessories, or storing power
tools.Suchpreventivesafetymeasuresreduce
theriskofstartingthepowertoolaccidentally.
4. Store idle power tools out of the reach of chil-
dren and do not allow persons unfamiliar with
the power tool or these instructions to operate
the power tool.Powertoolsaredangerousinthe
hands of untrained users.
5. Maintain power tools and accessories. Check
for misalignment or binding of moving parts,
breakage of parts and any other condition that
may aect the power tool’s operation. If dam-
aged, have the power tool repaired before use.
Manyaccidentsarecausedbypoorlymaintained
power tools.
6. Keep cutting tools sharp and clean.Properly
maintained cutting tools with sharp cutting edges
arelesslikelytobindandareeasiertocontrol.
7. Use the power tool, accessories and tool bits
etc. in accordance with these instructions, tak-
ing into account the working conditions and
the work to be performed. Use of the power tool
foroperationsdierentfromthoseintendedcould
result in a hazardous situation.
8. Keep handles and grasping surfaces dry,
clean and free from oil and grease.Slippery
handles and grasping surfaces do not allow for
safe handling and control of the tool in unexpected
situations.
9. When using the tool, do not wear cloth work
gloves which may be entangled.Theentangle-
mentofclothworkglovesinthemovingpartsmay
resultinpersonalinjury.
Battery tool use and care
1. Recharge only with the charger specied by
the manufacturer.Achargerthatissuitablefor
onetypeofbatterypackmaycreateariskofre
whenusedwithanotherbatterypack.
2. Use power tools only with specically desig-
nated battery packs.Useofanyotherbattery
packsmaycreateariskofinjuryandre.
3. When battery pack is not in use, keep it away
from other metal objects, like paper clips,
coins, keys, nails, screws or other small metal
objects, that can make a connection from one
terminal to another.Shortingthebatterytermi-
nalstogethermaycauseburnsorare.
4. Under abusive conditions, liquid may be
ejected from the battery; avoid contact. If con-
tact accidentally occurs, ush with water. If
liquid contacts eyes, additionally seek medical
help.Liquidejectedfromthebatterymaycause
irritationorburns.
5. Do not use a battery pack or tool that is dam-
aged or modied.Damagedormodiedbatteries
mayexhibitunpredictablebehaviourresultingin
re,explosionorriskofinjury.
6. Do not expose a battery pack or tool to re or
excessive temperature.Exposuretoreortem-
peratureabove130°Cmaycauseexplosion.
7. Follow all charging instructions and do not
charge the battery pack or tool outside the
temperature range specied in the instruc-
tions.Chargingimproperlyorattemperatures
outsidethespeciedrangemaydamagethe
batteryandincreasetheriskofre.
Service
1. Have your power tool serviced by a qualied
repair person using only identical replacement
parts.Thiswillensurethatthesafetyofthepower
tool is maintained.
2. Never service damaged battery packs.Service
ofbatterypacksshouldonlybeperformedbythe
manufacturer or authorized service providers.
3. Follow instruction for lubricating and chang-
ing accessories.
Cordless power cutter safety
warnings
Cut-o machine safety warnings
1. The guard provided with the tool must be
securely attached to the power tool and
positioned for maximum safety, so the least
amount of wheel is exposed towards the oper-
ator. Position yourself and bystanders away
from the plane of the rotating wheel. Theguard
helpstoprotectoperatorfrombrokenwheelfrag-
ments and accidental contact with wheel.
2. Use only diamond cut-o wheels for your
power tool.Justbecauseanaccessorycanbe
attachedtoyourpowertool,itdoesnotassure
safe operation.
3. The rated speed of the accessory must be at
least equal to the maximum speed marked on
the power tool. Accessoriesrunningfasterthan
theirratedspeedcanbreakandyapart.
4. Wheels must be used only for recommended
applications. For example: do not grind with
the side of cut-o wheel.Cut-owheelsare
intended for peripheral grinding, side forces
appliedtothesewheelsmaycausethemto
shatter.
5. Always use undamaged wheel anges that are
of correct diameter for your selected wheel.
Properwheelangessupportthewheelthus
reducingthepossibilityofwheelbreakage.
6. The outside diameter and the thickness of your
accessory must be within the capacity rating
of your power tool.Incorrectlysizedaccessories
cannotbeadequatelyguardedorcontrolled.
7. The arbour size of wheels and anges must
properly t the spindle of the power tool.
Wheelsandangeswitharbourholesthatdonot
match the mounting hardware of the power tool
willrunoutofbalance,vibrateexcessivelyand
maycauselossofcontrol.

13 ENGLISH
8. Do not use damaged wheels. Before each
use, inspect the wheels for chips and cracks.
If power tool or wheel is dropped, inspect for
damage or install an undamaged wheel. After
inspecting and installing the wheel, position
yourself and bystanders away from the plane
of the rotating wheel and run the power tool
at maximum no load speed for one minute.
Damagedwheelswillnormallybreakapartduring
this test time.
9. Wear personal protective equipment.
Depending on application, use face shield,
safety goggles or safety glasses. As appro-
priate, wear dust mask, hearing protectors,
gloves and shop apron capable of stopping
small abrasive or workpiece fragments. The
eyeprotectionmustbecapableofstoppingying
debrisgeneratedbyvariousoperations.Thedust
maskorrespiratormustbecapableofltrating
particlesgeneratedbyyouroperation.Prolonged
exposuretohighintensitynoisemaycausehear-
ing loss.
10. Keep bystanders a safe distance away from
work area. Anyone entering the work area
must wear personal protective equipment.
Fragmentsofworkpieceorofabrokenwheelmay
yawayandcauseinjurybeyondimmediatearea
of operation.
11. Hold the power tool by insulated gripping
surfaces only, when performing an operation
where the cutting accessory may contact hid-
den wiring.Cuttingaccessorycontactinga“live”
wiremaymakeexposedmetalpartsofthepower
tool“live”andcouldgivetheoperatoranelectric
shock.
12. Never lay the power tool down until the acces-
sory has come to a complete stop. Thespinning
wheelmaygrabthesurfaceandpullthepower
tooloutofyourcontrol.
13. Do not run the power tool while carrying it at
your side.Accidentalcontactwiththespinning
accessorycouldsnagyourclothing,pullingthe
accessoryintoyourbody.
14. Regularly clean the power tool’s air vents.The
motor’s fan will draw the dust inside the housing
and excessive accumulation of powdered metal
maycauseelectricalhazards.
15. Do not operate the power tool near ammable
materials.Sparkscouldignitethesematerials.
16. Do not use accessories that require liquid
coolants. Using water or other liquid coolants
mayresultinelectrocutionorshock.
Kickback and related warnings
Kickbackisasuddenreactiontoapinchedorsnagged
rotatingwheel.Pinchingorsnaggingcausesrapid
stalling of the rotating wheel which in turn causes the
uncontrolledpowertooltobeforcedinthedirection
opposite of the wheel’s rotation at the point of the
binding.
Forexample,ifawheelissnaggedorpinchedbythe
workpiece, the edge of the wheel that is entering into
the pinch point can dig into the surface of the material
causingthewheeltoclimboutorkickout.Thewheel
mayeitherjumptowardorawayfromtheoperator,
depending on direction of the wheel’s movement at the
pointofpinching.Wheelsmayalsobreakunderthese
conditions.
Kickbackistheresultofpowertoolmisuseand/or
incorrectoperatingproceduresorconditionsandcanbe
avoidedbytakingproperprecautionsasgivenbelow.
1. Maintain a rm grip on the power tool and
position your body and arm to allow you to
resist kickback forces. Always use auxiliary
handle, if provided, for maximum control over
kickback or torque reaction during start-up.
Theoperatorcancontroltorquereactionsorkick-
backforces,ifproperprecautionsaretaken.
2. Never place your hand near the rotating acces-
sory.Accessorymaykickbackoveryourhand.
3. Do not position your body in line with the
rotating wheel.Kickbackwillpropelthetoolin
direction opposite to the wheel’s movement at the
point of snagging.
4. Use special care when working corners, sharp
edges etc. Avoid bouncing and snagging the
accessory.Corners,sharpedgesorbouncing
haveatendencytosnagtherotatingaccessory
andcauselossofcontrolorkickback.
5. Do not attach a saw chain, woodcarving blade,
segmented diamond wheel with a peripheral
gap greater than 10 mm (3/8") or toothed saw
blade.Suchbladescreatefrequentkickbackand
loss of control.
6. Do not “jam” the wheel or apply excessive
pressure. Do not attempt to make an excessive
depth of cut. Overstressing the wheel increases
theloadingandsusceptibilitytotwistingorbinding
ofthewheelinthecutandthepossibilityofkick-
backorwheelbreakage.
7. When wheel is binding or when interrupting
a cut for any reason, switch o the power
tool and hold the power tool motionless until
the wheel comes to a complete stop. Never
attempt to remove the wheel from the cut while
the wheel is in motion otherwise kickback may
occur. Investigate and take corrective action to
eliminatethecauseofwheelbinding.
8. Do not restart the cutting operation in the
workpiece. Let the wheel reach full speed and
carefully re-enter the cut.Thewheelmaybind,
walkuporkickbackifthepowertoolisrestartedin
the workpiece.
9. Support panels or any oversized workpiece to
minimize the risk of wheel pinching and kick-
back. Large workpieces tend to sag under their
ownweight.Supportsmustbeplacedunderthe
workpiece near the line of cut and near the edge
oftheworkpieceonbothsidesofthewheel.
10. Use extra caution when making a “pocket cut”
into existing walls or other blind areas.The
protrudingwheelmaycutgasorwaterpipes,elec-
tricalwiringorobjectsthatcancausekickback.

14 ENGLISH
Additional Safety Warnings:
1. Do not use abrasive cut-o wheel. Otherwise
reand/orexcessiveheatingmaycauseburn
injury.
2. Do not cut metal object.Otherwisereand/or
excessiveheatingmaycauseburninjury.
3. Before using a segmented diamond wheel,
make sure that the diamond wheel has the
peripheral gap between segments of 10 mm
(3/8") or less, only with a negative rake angle.
4. Never attempt to cut with the tool held upside
down in a vise. This can lead to serious acci-
dents, because it is extremely dangerous.
5. Some material contains chemicals which may
be toxic. Take caution to prevent dust inhala-
tion and skin contact. Follow material supplier
safety data.
6. Store wheels as per manufacturer recommen-
dations. Improper storage may damage the
wheels.
7. Always use the wheel suitable for your work
and the material to be cut.
8. Examine the material to be cut before cutting.
Ifthematerialcontainsexplosiveorammable
substances,itmaycauseanexplosionorre.
9. Do not switch on the tool if a foreign object
is jammed between the wheel cover and the
wheel.Inthiscase,uninstallthebatterycartridge
andremovetheforeignobject.
10. Use clamps or similar to support the work-
piece whenever possible.
11. Always wear hearing protection during
operation.
12. Do not cut wood materials with this tool.
13. The outside diameter and the thickness of the
wheel must be within the capacity rating of
your power tool.Incorrectlysizedwheelscannot
beadequatelyguardedorcontrolled.
14. When operating the power tool, maintain a rm
grip with both hands on the power tool and
position your body and arm to allow you to
resist kickback forces.
15. Keep your hands or face away from the rotat-
ing wheel.
16. Adjust the wheel cover to a position suitable
for your work.
17. Do not wet the tool with water, rain, mud, and
puddle.
18. Do not leave the tool unattended outdoors.
19. When storing the tool, avoid direct sunlight
and rain, and store it in a place where it does
not get hot or humid.
20. Clean the lter of vacuum cleaner regularly.
SAVE THESE INSTRUCTIONS.
WARNING: DO NOT let comfort or familiarity
with product (gained from repeated use) replace
strict adherence to safety rules for the subject
product. MISUSE or failure to follow the safety
rules stated in this instruction manual may cause
serious personal injury.
Important safety instructions for
battery cartridge
1. Before using battery cartridge, read all instruc-
tions and cautionary markings on (1) battery
charger, (2) battery, and (3) product using
battery.
2. Do not disassemble or tamper with the battery
cartridge.Itmayresultinare,excessiveheat,
or explosion.
3. If operating time has become excessively
shorter, stop operating immediately. It may
result in a risk of overheating, possible burns
and even an explosion.
4. If electrolyte gets into your eyes, rinse them
out with clear water and seek medical atten-
tion right away. It may result in loss of your
eyesight.
5. Do not short the battery cartridge:
(1) Do not touch the terminals with any con-
ductive material.
(2) Avoid storing battery cartridge in a con-
tainer with other metal objects such as
nails, coins, etc.
(3) Do not expose battery cartridge to water
or rain.
A battery short can cause a large current
ow, overheating, possible burns and even a
breakdown.
6. Do not store and use the tool and battery car-
tridge in locations where the temperature may
reach or exceed 50 °C (122 °F).
7. Do not incinerate the battery cartridge even if
it is severely damaged or is completely worn
out. The battery cartridge can explode in a re.
8. Do not nail, cut, crush, throw, drop the battery
cartridge, or hit against a hard object to the
battery cartridge.Suchconductmayresultina
re,excessiveheat,orexplosion.
9. Do not use a damaged battery.
10. The contained lithium-ion batteries are subject
to the Dangerous Goods Legislation require-
ments.
Forcommercialtransportse.g.bythirdparties,
forwarding agents, special requirement on pack-
agingandlabelingmustbeobserved.
Forpreparationoftheitembeingshipped,consult-
ing an expert for hazardous material is required.
Pleasealsoobservepossiblymoredetailed
national regulations.
Tapeormaskoopencontactsandpackupthe
batteryinsuchamannerthatitcannotmove
around in the packaging.
11. When disposing the battery cartridge, remove
it from the tool and dispose of it in a safe
place. Follow your local regulations relating to
disposal of battery.
12. Use the batteries only with the products
specied by Makita.Installingthebatteriesto
non-compliantproductsmayresultinare,exces-
siveheat,explosion,orleakofelectrolyte.
13. If the tool is not used for a long period of time,
the battery must be removed from the tool.

15 ENGLISH
14. During and after use, the battery cartridge may
take on heat which can cause burns or low
temperature burns. Pay attention to the han-
dling of hot battery cartridges.
15. Do not touch the terminal of the tool imme-
diately after use as it may get hot enough to
cause burns.
16. Do not allow chips, dust, or soil stuck into the
terminals, holes, and grooves of the battery
cartridge.Itmaycauseheating,catchingre,
burstandmalfunctionofthetoolorbatterycar-
tridge,resultinginburnsorpersonalinjury.
17. Unless the tool supports the use near
high-voltage electrical power lines, do not use
the battery cartridge near high-voltage electri-
cal power lines.Itmayresultinamalfunctionor
breakdownofthetoolorbatterycartridge.
18. Keep the battery away from children.
SAVE THESE INSTRUCTIONS.
CAUTION: Only use genuine Makita batteries.
Useofnon-genuineMakitabatteries,orbatteriesthat
havebeenaltered,mayresultinthebatterybursting
causingres,personalinjuryanddamage.Itwill
alsovoidtheMakitawarrantyfortheMakitatooland
charger.
Tips for maintaining maximum
battery life
1. Charge the battery cartridge before completely
discharged. Always stop tool operation and
charge the battery cartridge when you notice
less tool power.
2. Never recharge a fully charged battery car-
tridge. Overcharging shortens the battery
service life.
3. Charge the battery cartridge with room tem-
perature at 10 °C - 40 °C (50 °F - 104 °F). Let
a hot battery cartridge cool down before
charging it.
4. When not using the battery cartridge, remove
it from the tool or the charger.
5. Charge the battery cartridge if you do not use
it for a long period (more than six months).
Important safety instructions for
wireless unit
1. Do not disassemble or tamper with the wire-
less unit.
2. Keep the wireless unit away from young chil-
dren. If accidentally swallowed, seek medical
attention immediately.
3. Use the wireless unit only with Makita tools.
4. Do not expose the wireless unit to rain or wet
conditions.
5. Do not use the wireless unit in places where
the temperature exceeds 50 °C (122 °F).
6. Do not operate the wireless unit in places
where medical instruments, such as heart
pace makers are nearby.
7. Do not operate the wireless unit in places
where automated devices are nearby. If oper-
ated,automateddevicesmaydevelopmalfunction
or error.
8. Do not operate the wireless unit in places
under high temperature or places where
static electricity or electrical noise could be
generated.
9. The wireless unit can produce electromagnetic
elds (EMF) but they are not harmful to the
user.
10. The wireless unit is an accurate instrument. Be
careful not to drop or strike the wireless unit.
11. Avoid touching the terminal of the wireless
unit with bare hands or metallic materials.
12. Always remove the battery on the product
when installing the wireless unit into it.
13. When opening the lid of the slot, avoid the
place where dust and water may come into the
slot. Always keep the inlet of the slot clean.
14. Always insert the wireless unit in the correct
direction.
15. Do not press the wireless activation button
on the wireless unit too hard and/or press the
button with an object with a sharp edge.
16. Always close the lid of the slot when
operating.
17. Do not remove the wireless unit from the slot
while the power is being supplied to the tool.
Doingsomaycauseamalfunctionofthewireless
unit.
18. Do not remove the sticker on the wireless unit.
19. Do not put any sticker on the wireless unit.
20. Do not leave the wireless unit in a place where
static electricity or electrical noise could be
generated.
21. Do not leave the wireless unit in a place sub-
ject to high heat, such as a car sitting in the
sun.
22. Do not leave the wireless unit in a dusty or
powdery place or in a place corrosive gas
could be generated.
23. Sudden change of the temperature may bedew
the wireless unit. Do not use the wireless unit
until the dew is completely dried.
24. When cleaning the wireless unit, gently wipe
with a dry soft cloth. Do not use benzine, thin-
ner, conductive grease or the like.
25. When storing the wireless unit, keep it in the
supplied case or a static-free container.
26. Do not insert any devices other than Makita
wireless unit into the slot on the tool.
27. Do not use the tool with the lid of the slot dam-
aged.Water,dust,anddirtcomeintotheslotmay
cause malfunction.
28. Do not pull and/or twist the lid of the slot more
than necessary.Restorethelidifitcomeso
from the tool.
29. Replace the lid of the slot if it is lost or
damaged.
SAVE THESE INSTRUCTIONS.

16 ENGLISH
PARTS DESCRIPTION
►Fig.1
1Diamond wheel 2Wheel cover 3Wheel cover grip 4Dust nozzle
5Front grip 6Lamp 7Batterycartridge 8Lock-obutton
9Wireless activation lamp 10 Wireless activation
button
11 Lower guard 12 Caster
13 Shaftlockbutton 14 Cover 15 Clamp holder 16 Handle
17 Switchtrigger 18 Lampbutton 19 Overload indicator 20 HoseclampA
21 Hose clamp B 22 Box wrench ----
FUNCTIONAL
DESCRIPTION
CAUTION: Always be sure that the tool is
switched o and the battery cartridge is removed
before adjusting or checking function on the tool.
Installing or removing battery
cartridge
CAUTION: Always switch o the tool before
installing or removing of the battery cartridge.
CAUTION: Hold the tool and the battery car-
tridge rmly when installing or removing battery
cartridge.Failuretoholdthetoolandthebattery
cartridgermlymaycausethemtoslipoyourhands
andresultindamagetothetoolandbatterycartridge
andapersonalinjury.
Toinstallthebatterycartridge,alignthetongueonthe
batterycartridgewiththegrooveinthehousingandslip
itintoplace.Insertitallthewayuntilitlocksinplace
withalittleclick.Ifyoucanseetheredindicatoras
showninthegure,itisnotlockedcompletely.
Toremovethebatterycartridges,liftthebatterycar-
tridgewhilepushingthebuttononthefrontofthe
cartridge.
►Fig.2: 1. Red indicator 2. Button 3.Batterycartridge
CAUTION: Always install the battery cartridge
fully until the red indicator cannot be seen. If not,
itmayaccidentallyfalloutofthetool,causinginjuryto
youorsomeonearoundyou.
CAUTION: Do not install the battery cartridge
forcibly.Ifthecartridgedoesnotslideineasily,itis
notbeinginsertedcorrectly.
NOTE:Thetooldoesnotworkwithonlyonebattery
cartridge.
Indicating the remaining battery
capacity
Pressthecheckbuttononthebatterycartridgetoindi-
catetheremainingbatterycapacity.Theindicatorlamps
light up for a few seconds.
►Fig.3: 1. Indicator lamps 2.Checkbutton
Indicator lamps Remaining
capacity
Lighted O Blinking
75% to 100%
50% to 75%
25% to 50%
0% to 25%
Charge the
battery.
Thebattery
mayhave
malfunctioned.
NOTE: Depending on the conditions of use and the
ambienttemperature,theindicationmaydierslightly
fromtheactualcapacity.
NOTE:Therst(farleft)indicatorlampwillblinkwhen
thebatteryprotectionsystemworks.
Tool / battery protection system
Thetoolisequippedwithatool/batteryprotectionsys-
tem.Thissystemautomaticallycutsopowertothe
motortoextendtoolandbatterylife.Thetoolwillauto-
maticallystopduringoperationifthetoolorbatteryis
placed under one of the following conditions.

17 ENGLISH
Overload protection
Whenthetool/batteryisoperatedinamannerthat
causesittodrawanabnormallyhighcurrent,thetool
automaticallystops.Inthissituation,turnthetoolo
andstoptheapplicationthatcausedthetooltobecome
overloaded.Thenturnthetoolontorestart.
Overheat protection
Whenthetool/batteryisoverheated,thetoolstops
automatically,andthelampblinks.Inthissituation,let
thetoolcooldownbeforeturningthetoolonagain.
Overdischarge protection
Whenthebatterycapacitybecomeslow,thetoolstops
automatically,andtheindicatorlampofbatterycar-
tridgeblinks.Ifthetooldoesnotoperateevenwhenthe
switchesareoperated,removethebatteriesfromthe
toolandchargethebatteries.
Protections against other causes
Protectionsystemisalsodesignedforothercauses
that could damage the tool and allows the tool to stop
automatically.Takeallthefollowingstepstoclearthe
causes,whenthetoolhasbeenbroughttoatemporary
halt or stop in operation.
1. Turnthetoolo,andthenturnitonagainto
restart.
2. Chargethebattery(ies)orreplaceit/themwith
rechargedbattery(ies).
3. Letthetoolandbattery(ies)cooldown.
Ifnoimprovementcanbefoundbyrestoringprotection
system,thencontactyourlocalMakitaServiceCenter.
NOTICE: If the tool stops due to a cause
not described above, refer to the section for
troubleshooting.
Overload alert
If the tool is operated with excessive load, the overload
indicatorwillblinkinred.Inthissituation,reducethe
loadonthetool.Then,theindicatorstopsblinking.
►Fig.4: 1. Overload indicator
Switch action
WARNING: Before installing the battery car-
tridge into the tool, always check to see that the
switch trigger actuates properly and returns to
the “OFF” position when released.
WARNING: NEVER defeat the lock-o button
by taping down or some other means.Aswitchwith
anegatedlock-obuttonmayresultinunintentional
operationandseriouspersonalinjury.
WARNING: NEVER use the tool if it runs when
you simply pull the switch trigger without press-
ing the lock-o button.Aswitchinneedofrepair
mayresultinunintentionaloperationandserious
personalinjury.ReturntooltoaMakitaservicecenter
for proper repairs BEFORE further usage.
Topreventtheswitchtriggerfrombeingaccidentally
pulled,alock-obuttonisprovided.Tostartthetool,
depressthelock-obuttonandpulltheswitchtrigger.
Release the switch trigger to stop.
►Fig.5: 1.Switchtrigger2.Lock-obutton
NOTICE: Do not pull the switch trigger hard
without pressing in the lock-o button.Thiscan
causeswitchbreakage.
Lighting the lamp
CAUTION: Do not look in the light or see the
source of light directly.
Toturnonthelamp,pressthelampbutton.Toturno,
pressthelampbuttonagain.
►Fig.6: 1.Lampbutton2. Lamp
NOTE:Thelampwillautomaticallybeturnedoif
there is no operation with the tool for one minute.
Adjusting the wheel cover
Holdthewheelcovergripandadjustthepositionofthe
wheelcoversuitableforyourwork.
►Fig.7: 1. Wheel cover grip
Active feedback sensing technology
Thetoolelectronicallydetectssituationswherethe
wheelmaybeatrisktobebound.Inthesituation,the
toolisautomaticallyshutotopreventfurtherrotation
ofthespindle(itdoesnotpreventkickback).
Torestartthetool,switchothetoolrst,removethe
cause of sudden drop in the rotation speed, and then
turn the tool on.
Electric brake
Electricbrakeisactivatedafterthetoolisswitchedo.
Thebrakedoesnotworkwhenthepowersupplyisshut
down,suchasthebatteryisremovedaccidentally,with
the switch still on.
ASSEMBLY
CAUTION: Always be sure that the tool is
switched o and the battery cartridge is removed
before carrying out any work on the tool.
Installing or removing diamond
wheel
CAUTION: Use only the Makita wrench to
install or remove the wheel.
CAUTION: When installing the wheel, be sure
to tighten the bolt securely.
CAUTION: Do not press the shaft lock button
when the wheel is rotating.

18 ENGLISH
Toremovethewheel,presstheshaftlockbuttonand
rotate the wheel until the wheel cannot revolve. While
theshaftlockisfullylocked,turnthehexboltcounter-
clockwiseusingtheboxwrench.Thenremovethehex
bolt,ange,wheel,ring,andangeinorder.
►Fig.8: 1.Shaftlockbutton2. Box wrench 3.Tighten
4. Loosen
►Fig.9: 1.Hexbolt2. Flange 3. Ring 4. Diamond
wheel 5.Arrow(rotationdirectionofthe
wheel)
Toinstallthewheel,followtheremovalprocedurein
reverse.
BESURETOTIGHTENTHEHEXBOLTSECURELY.
CAUTION: Always install the wheel so that
the arrow on it points in the same direction as
the arrow on the wheel cover. Otherwise the wheel
rotatesinreverse,itmaycausepersonalinjury.
CAUTION: Only use the wheel that are
marked with a speed equal or higher than the
speed marked on the tool.
NOTE:Wheninstallingthewheel,besuretoattach
theangessothattheatsideofangefacesthe
wheel, and attach the ring that matches the inner
diameter of the wheel.
►Fig.10: 1.Hexbolt2. Flange 3. Ring 4. Diamond
wheel
Connecting a vacuum cleaner
NOTICE: Always close the cap when not con-
necting a vacuum cleaner.
Whenyouwishtoperformcleancuttingoperation,
connectaMakitavacuumcleanertoyourtool.
Open the cap and connect a hose of the vacuum
cleaner.
►Fig.11: 1. Cap 2. Dust nozzle 3. Hose 4. Vacuum
cleaner
Youcanchangetheangleofthedustnozzleasshown
inthegure.
►Fig.12
Hose clamp
NOTICE: Always remove the hose clamp from
the tool when not in use.
NOTICE: Do not open or close the hose clamp
excessively.Otherwisethehoseclampmaybe
broken.
Foreasyhandlingofthehoseofvacuumcleaner,hose
clampcanbeattached
1. AttachthehoseclampAorhoseclampBonthe
hose.
Type Applicableouterdiameter
of hose
HoseclampA ø 40 mm - ø 46 mm
(ø1-9/16"-ø1-13/16")
Hose clamp B ø 35 mm - ø 40 mm
(ø1-3/8"-ø1-9/16")
►Fig.13: 1.HoseclampA/HoseclampB2. Hose
2. Insert the pins of hose clamp into the holes of
clamp holder.
Makesurethetwopinsaretintheholes.
►Fig.14: 1.Pin2. Hole 3. Clamp holder
3. Toremovethehoseclamp,followtheinstallation
procedure in reverse.
Box wrench storage
Whennotinuse,storetheboxwrenchasshowninthe
guretokeepitfrombeinglost.
►Fig.15: 1. Box wrench
OPERATION
Checking the lower guard function
Removethebatterycartridge.
Retractthelowerguardmanuallytotheendand
releaseit.Thelowerguardisproperlyfunctioningif;
— itisretractedwithoutanyhindranceand;
— itautomaticallyreturnstotheoriginalposition.
►Fig.16: 1. Lower guard
Ifthelowerguardisnotfunctioningproperly,checkif
dust is accumulated inside of the wheel cover.
Somedustmayberemovedbyretractingandreturning
the lower guard several times.
Ifthelowerguardisnotfunctioningproperlyevenafter
removingdust,haveyourmachineservicedataMakita
service center.

19 ENGLISH
Notication about the abnormal
noise
NOTICE: Do not use distorted or old diamond
wheel.Otherwisemalfunction,abnormalnoise,or
breakagemayoccur.
Even if the diamond wheel is new and without distortion,
thediamondwheelmaymakeabnormalnoisesuchas
metalfrictionwhenthetoolisrunningatlowspeed.This
is not malfunction of the tool.
Somekindofdiamondwheelmaymakeabnormalnoise
whenthetoolrunningatlowspeed.Itisbecausethe
diamondwheelandthewheelcoverarepositionedvery
closeforecientdustcollection.
Run the tool at full speed and operate proper cut-
ting.Theabnormalnoisewillberelieved.
Cutting operation
CAUTION: Be sure to hold the workpiece
rmly down on a stable bench or table during
operation.
CAUTION: Do not twist or force the tool in the
cut, or the motor may be overloaded or the work-
piece may break.
CAUTION: During operation, do not bring the
tool higher than your shoulder height.
►Fig.17
1. Holdthetoolrmly.Graspthehandlewithyour
righthandandthefrontgripwithyourlefthand.To
preventelectricshockbyaccidentalcuttingofanelec-
triccable,alwaysholdthefrontgripbythedesignated
portionasshowninthegure.
►Fig.18: 1.Parttohold
2. Switchonthetoolwithoutthediamondwheel
makinganycontactandwaituntilthediamondwheel
attains full speed.
3. Gentlyinsertthediamondwheelstraightintothe
workpiece,andslidethetoolbackwardsmoothlyuntil
the cutting is completed.
• Keepcuttinglinestraightandslidingspeed
uniform.
• Slidethetoolinthedirectionofthearrowonthe
lower guard.
Ifyoumovethetoolforward(Ifyouslidethetoolinthe
oppositedirectionofthearrow),thedustcollection
eciencywillsignicantlydecrease.
►Fig.19: 1.Arrow
• Keepapplyingthelowerguardtotheworkpiece.
Ifthereisaclearancegapbetweenthelowerguard
and the workpiece, dust will leak and the dust collection
eciencywilldecrease.
►Fig.20: 1. Lower guard
NOTE:Whenthebatterycartridgetemperatureis
low,thetoolmaynotworktoitsfullcapacity.Atthis
time,forexample,usethetoolforalight-dutycutfor
awhileuntilthebatterycartridgewarmsupashigh
asroomtemperature.Then,thetoolcanworktoits
fullcapacity.
NOTE: If the cutting action of the diamond wheel
beginstodiminish,dressthecuttingedgeofthe
wheelusinganolddiscardedcoarsegritbench
grinderwheelorconcreteblock.Dressbypressing
lightlyontheouteredgeofthediamondwheel.
WIRELESS ACTIVATION
FUNCTION
Optional accessory
NOTICE: Install the optional dust cover and
accessories before using this function.
What you can do with the wireless
activation function
Thewirelessactivationfunctionenablescleanandcom-
fortableoperation.Byconnectingasupportedvacuum
cleanertothetool,youcanrunthevacuumcleaner
automaticallyalongwiththeswitchoperationofthetool.
►Fig.21
Tousethewirelessactivationfunction,preparefollow-
ing items:
• Awirelessunit(optionalaccessory)
• Avacuumcleanerwhichsupportsthewireless
activation function
Theoverviewofthewirelessactivationfunction
setting is as follows. Refer to each section for detail
procedures.
1. Installing the wireless unit
2. Toolregistrationforthevacuumcleaner
3. Startingthewirelessactivationfunction
Installing the wireless unit
Optional accessory
CAUTION: Place the tool on a at and stable
surface when installing the wireless unit.
NOTICE: Clean the dust and dirt on the tool
before installing the wireless unit. Dust or dirt
maycausemalfunctionifitcomesintotheslotofthe
wireless unit.
NOTICE: To prevent the malfunction caused by
static, touch a static discharging material, such
as a metal part of the tool, before picking up the
wireless unit.
NOTICE: When installing the wireless unit,
always be sure that the wireless unit is inserted
in the correct direction and the lid is completely
closed.

20 ENGLISH
1. Openthelidonthetoolasshowninthegure.
►Fig.22: 1. Lid
2. Insert the wireless unit to the slot and then close
the lid.
Wheninsertingthewirelessunit,aligntheprojections
with the recessed portions on the slot.
►Fig.23: 1. Wireless unit 2.Projection3. Lid
4. Recessed portion
Whenremovingthewirelessunit,openthelidslowly.
Thehooksonthebackofthelidwillliftthewirelessunit
asyoupullupthelid.
►Fig.24: 1. Wireless unit 2. Hook 3. Lid
Afterremovingthewirelessunit,keepitinthesupplied
case or a static-free container.
NOTICE: Always use the hooks on the back of
the lid when removing the wireless unit. If the
hooks do not catch the wireless unit, close the lid
completelyandopenitslowlyagain.
Tool registration for the vacuum
cleaner
NOTE:AMakitavacuumcleanersupportingthe
wireless activation function is required for the tool
registration.
NOTE: Finish installing the wireless unit to the tool
beforestartingthetoolregistration.
NOTE: During the tool registration, do not pull the
switch trigger or turn on the power switch on the
vacuum cleaner.
NOTE: Refer to the instruction manual of the vacuum
cleaner, too.
Ifyouwishtoactivatethevacuumcleaneralongwith
theswitchoperationofthetool,nishthetoolregistra-
tionbeforehand.
1. Installthebatteriestothevacuumcleanerandthe
tool.
2. Setthestand-byswitchonthevacuumcleanerto
“AUTO”.
►Fig.25: 1.Stand-byswitch
3. Pressthewirelessactivationbuttononthevac-
uum cleaner for 3 seconds until the wireless activation
lampblinksingreen.Andthenpressthewirelessacti-
vationbuttononthetoolinthesameway.
►Fig.26: 1.Wirelessactivationbutton2. Wireless
activation lamp
If the vacuum cleaner and the tool are linked success-
fully,thewirelessactivationlampswilllightupingreen
for2secondsandstartblinkinginblue.
NOTE:Thewirelessactivationlampsnishblinking
ingreenafter20secondselapsed.Pressthewireless
activationbuttononthetoolwhilethewirelessacti-
vationlamponthecleanerisblinking.Ifthewireless
activationlampdoesnotblinkingreen,pushthewire-
lessactivationbuttonbrieyandholditdownagain.
NOTE: When performing two or more tool registra-
tionsforonevacuumcleaner,nishthetoolregistra-
tiononebyone.
Starting the wireless activation
function
NOTE: Finish the tool registration for the vacuum
cleaner prior to the wireless activation.
NOTE: Refer to the instruction manual of the vacuum
cleaner, too.
Afterregisteringatooltothevacuumcleaner,the
vacuumcleanerwillautomaticallyrunsalongwiththe
switch operation of the tool.
1. Install the wireless unit to the tool.
2. Connect the hose of the vacuum cleaner with the
tool.
►Fig.27
3. Setthestand-byswitchonthevacuumcleanerto
“AUTO”.
►Fig.28: 1.Stand-byswitch
4. Pushthewirelessactivationbuttononthetool
briey.Thewirelessactivationlampwillblinkinblue.
►Fig.29: 1.Wirelessactivationbutton2. Wireless
activation lamp
5. Turnonthetool.Checkifthevacuumcleanerruns
while the tool is operating.
Tostopthewirelessactivationofthevacuumcleaner,
pushthewirelessactivationbuttononthetool.
NOTE:Thewirelessactivationlamponthetoolwill
stopblinkinginbluewhenthereisnooperationfor
2hours.Inthiscase,setthestand-byswitchonthe
vacuumcleanerto“AUTO”andpushthewireless
activationbuttononthetoolagain.
NOTE:Thevacuumcleanerstarts/stopswithadelay.
Thereisatimelagwhenthevacuumcleanerdetects
a switch operation of the tool.
NOTE:Thetransmissiondistanceofthewirelessunit
mayvarydependingonthelocationandsurrounding
circumstances.
NOTE: When two or more tools are registered to
onevacuumcleaner,thevacuumcleanermaystart
runningevenifyoudonotturnonyourtoolbecause
another user is using the wireless activation function.
Other manuals for CE002G
5
Table of contents
Languages:
Other Makita Cutter manuals

Makita
Makita 4131 User manual

Makita
Makita CE001GT202X User manual

Makita
Makita BCS550 User manual

Makita
Makita SC103D User manual

Makita
Makita 180 mm 4157KB User manual

Makita
Makita 180 mm 4157KB User manual

Makita
Makita SC103D User manual

Makita
Makita EK7300 Instruction Manual

Makita
Makita CC301D User manual

Makita
Makita 4105KB User manual

Makita
Makita DCE090 User manual

Makita
Makita JS1000 User manual

Makita
Makita DCE090ZX2 User manual

Makita
Makita 4112HS User manual

Makita
Makita CP100DWA User manual

Makita
Makita 4190D User manual

Makita
Makita 4101RH User manual

Makita
Makita 4131 User manual

Makita
Makita CA5000 User manual

Makita
Makita DPC6410 (UK) Quick start guide