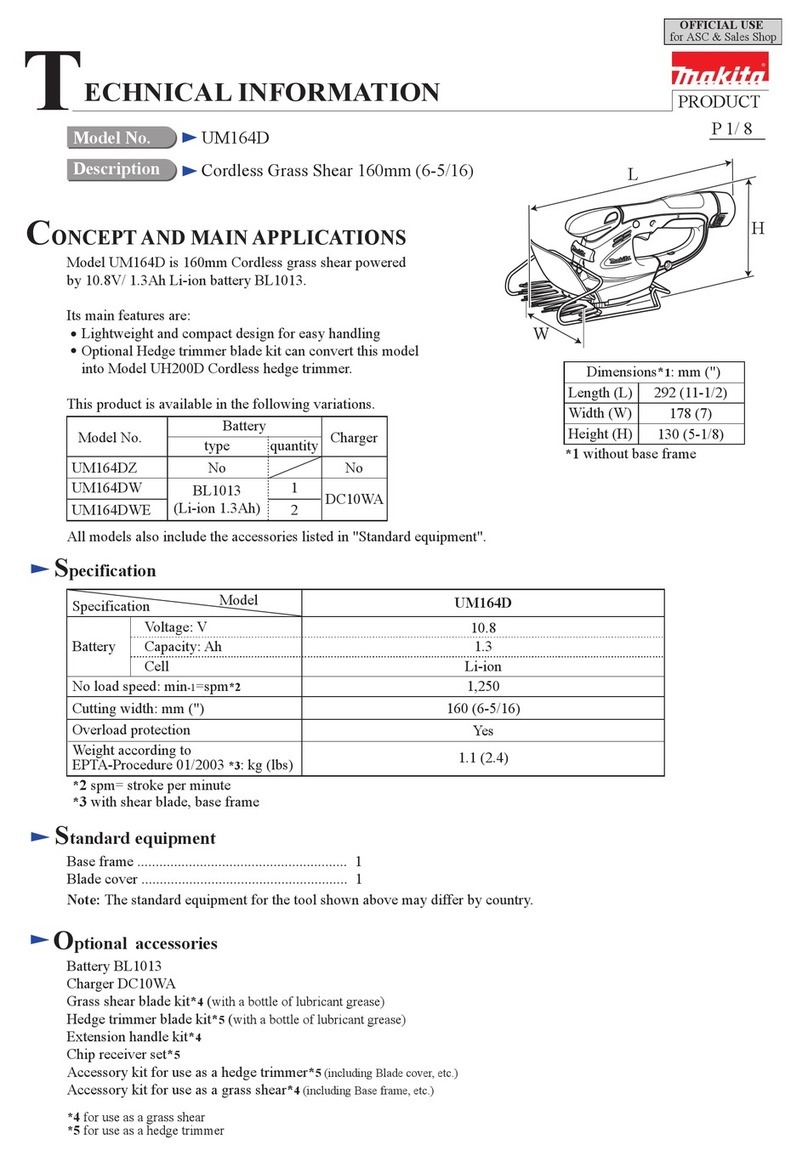
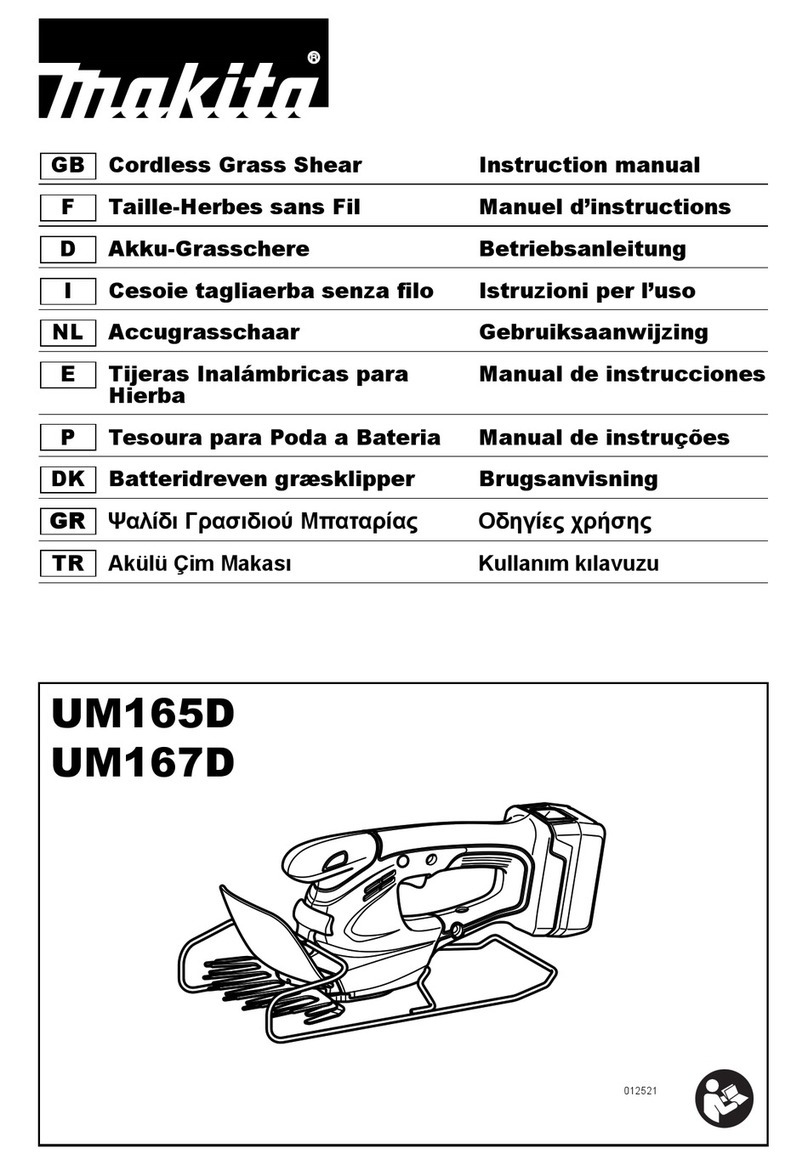
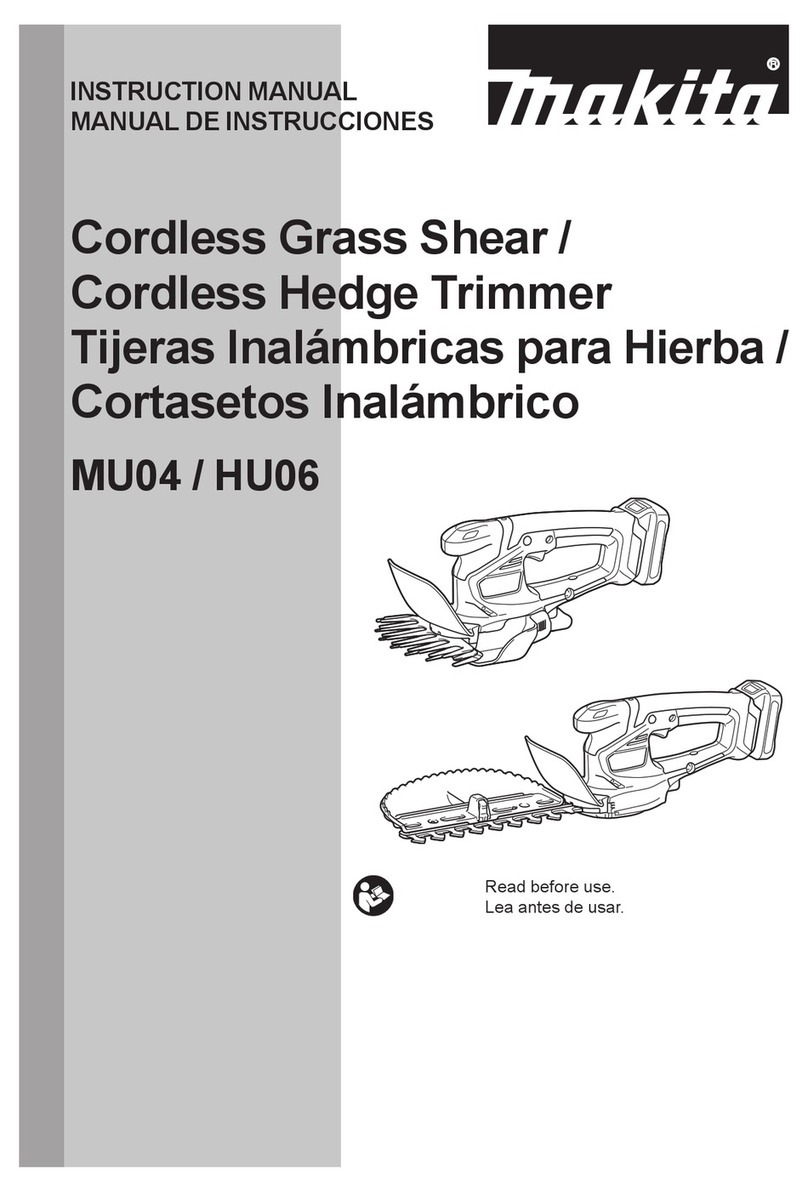
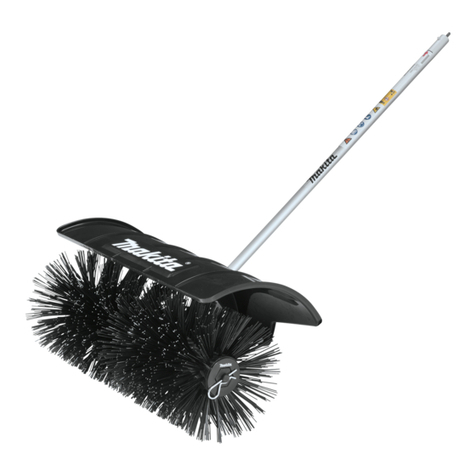
Makita SW400MP User guide

BR400MP
SW400MP
EN Power Brush Attachment /
Power Sweep Attachment
ORIGINAL INSTRUCTION
MANUAL 2
FR
Outil Balai Brosse/Outil Balai Racleur
INSTRUCTIONS D’EMPLOI 14
DE Kehrbürstenaufsatz /
Kehrwalzenaufsatz
ORIGINAL-
BETRIEBSANLEITUNG 26
IT
Accessorio spazzolone
rotativo a motore/
Accessorio rullo-spazzola a motore
MANUALE DI ISTRUZIONI
ORIGINALE 39
NL
Borstelhulpstuk / Vegerhulpstuk
ORIGINELE GEBRUIKSAANWIJZING
51
ES
Accesorio de Cepillado Motorizado /
Accesorio Barredor Motorizado
MANUAL DE
INSTRUCCIONES ORIGINAL 63
PT
Implemento Escova para Varrer /
Implemento de Borracha para Varrer
MANUAL DE INSTRUÇÕES
ORIGINAL 75
DA Tilbehør til motorbørste /
Tilbehør til motorfejemaskine
OPRINDELIG
BRUGSANVISNING 87
EL
99
TR
KILAVUZU 112
ZHTW 毛刷清掃器/地面掃除器 原始操作手冊 124

2ENGLISH
ENGLISH (Original instructions)
SPECIFICATIONS
Model: BR400MP
Dimensions: length x width x height (with brushes) 1,145 mm x 600 mm x 362 mm
Net weight 6.3 kg
Brush width 600 mm
Outer diameter of the brush 250 mm
Model: SW400MP
Dimensions: length x width x height (with sweep drums) 1,159 mm x 600 mm x 362 mm
Net weight 7.2 kg
Sweep drum width 590 mm
Outer diameter of the sweep drum 265 mm
without notice.
Approved power unit
-
ing power unit(s):
• DUX60, DUX18, UX01G Cordless Multi Function
Power Head
• EX2650LH Multi Function Power Head
WARNING: Never use the attachment with
non-approved power unit. Non-approved combi-
nation may cause serious injury.
Symbols
Take Particular care and attention!
Read instruction manual.
protection!
The brushes or sweep drums rotate in the
direction of the arrow.
When attaching the brushes or sweep
drums, make sure that the gear case is
facing upward.
Intended use
BR400MP
approved power unit. Never use the attachment for other
SW400MP
clearing wet materials, such as leaves, dirt, and removing
power unit. Never use the attachment for other purposes.
attachment is intended for commercial use.
Declarations of Conformity
For European countries only
We as the manufacturers: Makita Europe N.V.,
Business address: Jan-Baptist Vinkstraat 2 3070
Kortenberg BELGIUM. Authorize Kazuhisa Makino
Designation: Power Brush Attachment / Power
Sweep AttachmentBR400MP
/ SW400MP.
2006/42/EC and
are manufactured in accordance with the following
Harmonised Standards: EN 60335-1:2012+A11:2014
+A13:2017+A1:2019+A14:2019+A2:2019+A15:2021,
EN 60335-2-72:2012.
Place and date of declaration: Kortenberg, Belgium.
1. 8. 2023
Responsible person: Kazuhisa Makino, Director -
Makita Europe N.V.

3ENGLISH
Declaration of Conformity (For UK)
For UK only
We as the manufacturers: Makita Europe N.V.,
Business address: Jan-Baptist Vinkstraat 2 3070
Kortenberg BELGIUM. Authorize Kazuhisa Makino
Designation: Power Brush Attachment / Power
Sweep AttachmentBR400MP
/ SW400MP.
S.I. 2008/1597
(as amended) and are manufactured in accor-
dance with the following Designated Standards: EN
60335-1:2012+A11:2014+A13:2017+A1:2019+A14:20
19+A2:2019+A15:2021, EN 60335-2-72:2012.
Place and date of declaration: Kortenberg, Belgium.
1. 8. 2023
Responsible person: Kazuhisa Makino, Director -
Makita Europe N.V.
Importer: Makita (UK) Limited, Michigan Drive,
8JD, UK
SAFETY WARNINGS
Power brush / power sweep safety
warnings
WARNING: Read all safety warnings,
-
vided with this machine as well as the instruction
manual of the power unit before using. Failure
Save all warnings and instruc-
tions for future reference.
in the warnings and precautions refer to the combina-
tion of the attachment and the power unit.
to the engine or electric motor of the power unit.
General safety
1.
First-time or inexperienced operator should
ask the dealer for training in all operation of the
machine. Never allow children, persons with
reduced physical, sensory or mental capabil-
ities or lack of experience and knowledge or
people unfamiliar with the instructions to use
the machine. Children should be supervised to
ensure that they do not play with the machine.
2. It is recommended only to lend the machine
to people who have proven to be experienced.
Always hand over the instruction manual.
3. Stay alert, watch what you are doing and use
common sense when operating the machine.
Do not use the machine while you are tired,
medication. A moment of inattention while oper-
4. Avoid using the machine in bad weather
conditions especially when there is a risk of
lightning.
5. Follow your national and local regulation for
use of outdoor power machines.
6. Never attempt to modify the machine.
7. Keep in mind that the operator or user is
responsible for accidents or hazards occurring
to other people or their property.
Work area safety
WARNING: Keep the power brush / power
sweep away from electric lines and communica-
tion cables. Touching or approaching high-voltage
-
trical fences around the work area before starting
operation.
1. Operate the machine under good visibility and
daylight conditions only. Do not operate the
machine in darkness or fog.
2. Start and operate the engine only outdoors in
a well ventilated area.
3. Before operation, examine the work area for
wire fences, stones, or other solid objects.
4. During operation, never stand on an unstable
or slippery surface or a steep slope. During
the cold season, beware of ice and snow and
always ensure secure footing.
5. Avoid working close to fences, stumps or root
of trees.
drums.
6. Avoid working close to buildings, cars and
other properties.
7.
static electricity, and there is a risk of electric
shock or accidents.
Personal protective equipment
1. Always wear heavy, long pants, sturdy boots,
gloves, and a long-sleeve shirt. Do not wear
loose clothing, jewelry, short pants, sandals,
or go barefoot. Secure hair so it is above
shoulder level.
2. Always wear protective goggles to protect
your eyes from injury when using the machine.
The goggles must comply with ANSI Z87.1 in
the USA, EN 166 in Europe, or AS/NZS 1336
in Australia/New Zealand. In Australia/New
Zealand, it is legally required to wear a face
shield to protect your face, too.

4ENGLISH
It is an employer's responsibility to enforce
the use of appropriate safety protective equip-
ments by the tool operators and by other per-
sons in the immediate working area.
3.
Exposure to noise can cause hearing loss.
4. Always wear sturdy shoes with a non-slip
sole.
ensures a good footing.
5. Wear a dust mask as necessary.
Refueling
1. Stop the engine before refueling. Keep away
during refueling.
2. Refuel outdoors. Refueling in a closed room can
cause explosion of fuel vapor.
3. Avoid contact with fuel or engine oil. Do not
of the machine and/or ground immediately. If
fuel spills on your clothes, change it immedi-
4. After refueling, carefully tighten the fuel tank
cap and check for fuel leak. Move at least 3 m
(10 feet) away from the fueling source and site
before starting engine.
5. Only transport and store fuel in approved con-
tainers. Keep children away from the stored
fuel.
Starting up the power brush / power
sweep
1. Before assembling or adjusting the machine,
plug cap or the battery cartridge.
2. Before handling the brushes or sweep drums,
wear protective gloves.
3. Wear the personal protective equipments
before starting the motor.
4. Before starting the motor, inspect the machine
for damages, loose screws/nuts or improper
assembly. Check all control levers and
switches for easy action. Clean and dry the
handles.
5. Never attempt to start the motor if the machine
is damaged or not fully assembled with proper
guards, plates, or other safety protective
devices.
6. Before starting the motor, carefully check that
the brushes or sweep drums are not touching
your body and other objects. Starting the motor
with the brushes or sweep drums contacting with
7. Before starting the motor, make sure that there
is no person or animal in the work area.
8. Adjust the shoulder harness and hand grip to
suit the operator's body size.
9. Replace the brushes or sweep drums if they
are cracked, bent, or damaged. Damaged
-
10. Start and operate the machine only outdoors
in a well ventilated area.
11. When starting the engine, place the machine
-
ance and secure footing.
12. When pulling the starter knob of the engine,
by your left hand. Never step on the drive shaft
of the power unit.
13. If the brushes or sweep drums rotate at idle,
stop the engine and adjust the idle speed
down. Otherwise unintentional contact with mov-
14. Stop the motor immediately if you notice any
trouble.
15. Follow the instruction manual of the power
unit for starting the motor.
Transportation
1. Stop the motor during transportation.
2. Ensure safe position of the machine during car
transportation to avoid fuel leakage.
3. Lift the entire machine from the ground when
carrying the machine. Dragging the machine
causes fuel tank damage and fuel leakage, result-
4. When transporting the equipment, carry it in a
horizontal position by holding the shaft. Keep
Operation
1. During operation, keep bystanders or animals
at least 5 m (17 ft) away from the power brush
/ power sweep. Stop the motor as soon as
someone approaches.
2.
motor immediately.
3. If you feel any unusual condition (e.g. noise,
motor. Do not use the machine until the cause
is recognized and solved.
4. With the engine running only at idle, attach the
shoulder harness.
5. During operation, use the shoulder harness.

5ENGLISH
6. Hold the front handle with the left hand and the
rear grip with the right hand, no matter you are
and thumbs around the handles.
7.
Never attempt to operate the machine with one hand.
Loss of control may result in serious or fatal injury.
To reduce the risk of injuries, keep your hands and
feet away from the brushes or sweep drums.
8. When operating, do not raise the brushes or
sweep drums above waist height.
9. The brushes or sweep drums continue to move
for a short period after releasing the throttle
to contact the brushes or sweep drums.
10.
Do not overreach. Keep proper footing and balance
at all times. Watch for hidden obstacles such as
tree stumps, roots and ditches to avoid stumbling.
11. Use extreme caution when reversing the brush
or sweep drum rotation or pulling the machine
toward you. If the power unit has reverse
rotation function, do not use it more than
necessary. When operated in reverse rotation,
brushes or sweep drums are on the ground.
12.
Do not overload the machine capacity by
attempting to push too hard at too fast a rate. The
machine will do better work when used with proper
13. Do not accelerate the motor with the brushes
or sweep drums blocked. It increases the load
and will damage the machine.
14.
If the machine gets heavy impact or fall, check
the condition before continuing work. Check
the fuel system for fuel leakage and the con-
trols and safety devices for malfunction. If there
is any damage or doubt, ask our authorized
service center for the inspection and repair.
15. Do not touch the gear case. The gear case
becomes hot during operation.
16.
Take a rest to prevent loss of control caused by fatigue.
17. When you leave the machine, even if it is a
remove the battery cartridge. The machine unat-
unauthorized person and cause serious accident.
18.
Follow the instruction manual of the power unit
for proper use of the control lever and switch.
19. During or after operation, do not put the
hot machine onto dry grass or combustible
materials.
20. If the brushes or sweep drums catch foreign
spark plug cap or battery cartridge, and then
remove the obstructions.
21. Keep your hands and feet clear of the brushes
or sweep drums. Contacting the brushes or
sweep drums can result in serious injury.
When handling the brushes or sweep drums,
stop the motor and remove the spark plug cap
or battery cartridge.
22. Check the brushes or sweep drums frequently
during operation for cracks or damages.
23.
-
tery cartridge when removing debris or foreign
objects from the brushes or sweep drums.
24. Refer to the instruction manual of the power
unit for how to start and control the machine.
Vibration
Exposing to excessive vibration injures blood vessels
or nervous system of the operator and causes the
“Falling asleep” (numbness), tingling, pain, stabbing
sensation, alteration of skin color or of the skin. If any
of these symptoms occur, see a physician.
your hands warm during operation and well main-
tain the machine and accessories.
Maintenance
1.
Before doing any maintenance or repair work or
and remove the spark plug cap or the battery car-
tridge. Wait until the motor gets cold.
2.
3. Always wear protective gloves when handling
the brushes or sweep drums.
4.
use gasoline, benzine, thinner, alcohol or the like for
the purpose. Discoloration, deformation or cracks of
5. After each use, tighten all screws and nuts,
except for the carburetor adjustment screws.
6. Replace the brushes or sweep drums if they
are damaged.
7. Do not attempt any maintenance or repair not
described in this booklet or the instruction
manual of the power unit. Ask our authorized
service center for such work.
8. Follow instructions for lubricating and chang-
ing accessories.
9. Always use the genuine spare parts and acces-
sories only. Using parts or accessories supplied
-
10.
Request our authorized service center to inspect
and maintain the machine at regular interval.
6ENGLISH
Storage
1. Before storing the machine, perform full clean-
ing and maintenance. Remove the spark plug
cap or the battery cartridge. Drain the fuel after
the engine gets cold.
2. Store the equipment in a dry and high or
locked location out of reach of children.
3. Do not prop the equipment against something,
such as a wall.
First Aid
1.
box is available in the vicinity of the opera-
tions. Immediately replace any item taken from
2. When asking for help, give the following
information:
— Place of accident
— What happened
— Number of injured persons
— Kind of injuries
— Your name
SAVE THESE INSTRUCTIONS.
WARNING: Use of this product can create
dust containing chemicals which may cause
respiratory or other illnesses. Some examples of
these chemicals are compounds found in pes-
ticides, insecticides, fertilizers and herbicides.
Your risk from these exposures varies, depend-
ing on how often you do this type of work. To
reduce your exposure to these chemicals: work
in a well ventilated area, and work with approved
safety equipment, such as those dust masks that
particles.
PARTS DESCRIPTION
Power brush attachment
2
1
7
6
5
3 4
1. Cap 2. Pipe 3. Protector 4. Clip 5. Brush 6. Gear
case 7. Hexalobular wrench
Power sweep attachment
2
6
5
34
1
7
1. Cap 2. Pipe 3. Protector 4. Clip 5. Sweep drum
6. Gear case 7. Hexalobular wrench

7ENGLISH
ASSEMBLY
WARNING:
Before assembling or adjusting the
spark plug cap or battery cartridge. Otherwise the brushes,
WARNING:
When assembling or adjusting the
equipment, always put it down.
WARNING: Follow the warnings and precau-
tions in the chapter “SAFETY WARNINGS” and
the instruction manual of the power unit.
Assembling the attachment
1. Remove the clip from the brush or sweep drum on
the left side of the brush unit or sweep drum unit, and
then remove the brush or sweep drum.
1
2
1. Brush 2. Clip
2. Loosen 3 screws on the gear case.
1
2
1. Screw 2. Gear case
3. Remove 2 caps from both ends of the pipe.
1
2
1. Pipe 2. Cap
NOTICE: Do not dispose of the caps since the
cap is necessary for storing the attachment.
4. Attach the protector and the sleeve to the pipe.
2
3
4
1
1. Pin 2. Pipe 3. Protector 4. Sleeve
NOTICE: Be sure to insert the end of the pipe
without the pin into the protector and the sleeve.

8ENGLISH
5. Make sure that the gear case and the pin on the
pipe are facing up, and then insert the pipe into the gear
case.
12
3
1. Gear case 2. Pipe 3. Pin
NOTICE: Make sure that the gear case and the
pin on the pipe are facing up, and the protector is
12 3
1. Gear case 2. Protector 3. Pin
6. Align the screw hole on the pipe with the hole on
1
2
1. Hole 2. Pipe
7. Tighten 3 screws on the gear case.
1
2
1. Screw 2. Gear case
8. Tighten 2 screws on the protector.
1
2
3
4
1. Screw 2. Protector 3. Sleeve 4. Gear case
NOTICE: Make sure that there is no gap
between the gear case and the sleeve, and the
sleeve and the protector.

9ENGLISH
9. Attach the brush or sweep drum to the brush unit
or sweep drum unit, and then attach the clip to the
brush or sweep drum.
NOTICE: When attaching the brushes, be
sure to attach them with the Makita logo facing
outside.
NOTICE: When attaching the sweep drums, be
sure to attach them in the direction shown in the
mesh with each other.
12
1. Sweep drum 2. Gear case
Mounting the attachment pipe
CAUTION: Always check that the attach-
ment pipe is secured after installation. Improper
Mount the attachment pipe to the power unit.
1. Turn the lever toward the attachment.
1
1. Lever
2. Align the pin with the arrow mark. Insert the
attachment pipe until the release button pops up. Make
sure that the position line is on the tip of the arrow mark.
1
2
3
4
1. Release button 2. Arrow mark 3. Pin 4. Position
line
3. Turn the lever toward the power unit.
1
1. Lever
Make sure that the surface of the lever is parallel to the
pipe.
NOTICE: Do not tighten the lever without the
attachment pipe inserted.
tighten the entrance of the drive shaft too much and
damage it.
To remove the pipe, turn the lever toward the attach-
ment and pull the pipe out while pressing down the
release button.
Fig.12
3
1
2
1. Release button 2. Lever 3. Pipe

10 ENGLISH
OPERATION
WARNING: Follow the warnings and precau-
tions in the chapter “SAFETY WARNINGS” and
the instruction manual of the power unit.
WARNING: Adjust the hanger position and
shoulder harness to your comfortable position
before operating.
WARNING: Wear dust mask and well venti-
late the work area. Some material contains chem-
icals which may be toxic. Take caution to prevent
dust inhalation and skin contact.
CAUTION: Before operation, remove hard
and/or long objects such as stones, cans, and
ropes from the working area.
the brushes or sweep drums or hinder the rotation of
the brushes or sweep drums.
sweep at walking speed.
CAUTION: The steeper the angle becomes,
power sweep, and the more likely you are pushed
back by the power brush / power sweep.
MAINTENANCE
WARNING: Before inspecting or maintaining
the spark plug cap or battery cartridge. Otherwise
WARNING: When inspecting or maintaining
the equipment, always put it down. Assembling or
WARNING: Follow the warnings and precau-
tions in the chapter “SAFETY WARNINGS” and
the instruction manual of the power unit.
NOTICE: Never use gasoline, benzine, thinner,
alcohol or the like. Discoloration, deformation or
cracks may result.
To maintain product SAFETY and RELIABILITY,
Cleaning the attachment
3
2
1
1. Power unit 2. Pipe end 3. Gear case
NOTICE: Do not pour water over the power
unit and pipe end.
attachment.
sweep drum from the brush unit or sweep drum unit.
Refer to the instructions for replacing the brushes or
sweep drums in this manual.

11 ENGLISH
Overall inspection
• Tighten loose bolts, nuts and screws.
• Check for damaged parts, brushes, or sweep
drums. Ask our authorized service center to
Inspecting the brushes, sweep
drums, and protector
Check and clean the brushes, sweep drums, and pro-
them.
Replacing the brushes or sweep
drums
1. Remove the clips from the brushes or sweep
drums, and then remove the brushes or sweep drums.
1
2
1. Brush 2. Clip
2. Attach the brushes or sweep drums to the brush
unit or sweep drum unit, and then attach the clips.
NOTICE: When attaching the brushes, be
sure to attach them with the Makita logo facing
outside.
NOTICE: When attaching the sweep drums, be
sure to attach them in the direction shown in the
mesh with each other.
12
1. Sweep drum 2. Gear case
Lubricating moving parts
NOTICE: Follow the instruction of the fre-
quency and amount of grease supplied. Otherwise
Gear case:
CAUTION: Do not apply grease when the
gear case is hot. Hot gear case can cause burn
Fill approx. 30 ml of grease (Makita grease SG No.0)
operation.
With the supplied hexalobular wrench, remove the bolt
near the lubrication marking on the gear case. Loosen
the bolt on the other side so that the air in the gear case

12 ENGLISH
1
2
1. Bolt 2. Gear case
Drive axle:
of operation.
NOTE:
Storage
WARNING: Follow the warnings and precau-
tions in the chapter “SAFETY WARNINGS” and
the instruction manual of the power unit.
When storing the attachment separated from the power
unit, put the cap onto the end of the shaft.
Interval of inspection and maintenance
Operating hour Before
Operation
Daily (10h) 25h
Whole unit - -
Tighten - -
Brushes, sweep drums, and
protector
-
aged parts
--
Gear case - -
Drive axle - -
Power unit Refer to the instruction manual of the power unit

13
TROUBLESHOOTING
-
replacement parts for repairs.
State of abnormality Probable cause (malfunction) Remedy
Motor or engine does not start. -Refer to the instruction manual of the power unit.
Motor or engine stops soon. -Refer to the instruction manual of the power unit.
Motor or engine speed does not
increase.
-Refer to the instruction manual of the power unit.
Brushes or sweep drums do not
rotate.
Stop the motor or engine
The pipes of the power unit and the
Brushes or sweep drums caught a
foreign matter.
Remove the foreign matter.
Contact an authorized service center for repairs.
Stop the motor or engine
Brushes or sweep drums are bent or
broken.
Replace the brushes or sweep drums.
Loose attachment of the brushes or
sweep drums
Attach the clips for the brushes or sweep drums
Irregular attachment of the brushes or
sweep drums
Install the brushes or sweep drums in the correct
Contact an authorized service center for repairs.
Brushes or sweep drums continue to
is released.
Stop the motor or engine
-
erated. Contact an authorized service center for
repairs.
ENGLISH

14 FRANÇAIS
FRANÇAIS (Instructions originales)
SPÉCIFICATIONS
Modèle : BR400MP
Dimensions : longueur x largeur x hauteur (brosses incluses) 1 145 mm x 600 mm x 362 mm
Poids net 6,3 kg
Largeur de la brosse 600 mm
Diamètre externe de la brosse 250 mm
Modèle : SW400MP
Dimensions : longueur x largeur x hauteur (rouleaux racleurs inclus)
1 159 mm x 600 mm x 362 mm
Poids net 7,2 kg
Largeur du rouleau racleur 590 mm
Diamètre externe du rouleau racleur 265 mm
Unité motorisée approuvée
Cet accessoire est approuvé pour être utilisé avec le ou
les unités motorisées suivantes :
• Moteur Multi-Fonctions Sans Fil DUX60, DUX18,
UX01G
• Moteur multi-fonctions EX2650LH
AVERTISSEMENT : Ne jamais utiliser
l’accessoire avec une unité motorisée non
approuvée. Une combinaison non approuvée peut
provoquer de graves blessures.
Symboles
être comprises.
Redoubler de précaution et d’attention !
Lire le mode d’emploi.
de protection et un serre-tête antibruit !
-
dérapantes. Il est conseillé de porter des
chaussures avec embout de sécurité.
Éloignez les badauds d’au moins 5 m.
Les brosses ou les rouleaux racleurs
-
d’engrenage est tourné vers le haut.
Utilisations
BR400MP
sol et les chemins en association avec un outil moto-
conçu pour un usage commercial.
SW400MP
les matières humides comme les feuilles, la saleté et
retirer l’eau de surfaces solides en association avec un
-
-
soire est conçu pour un usage commercial.
Déclarations de conformité
Pour les pays européens uniquement
Nous, fabricants : Makita Europe N.V., adresse com-
merciale : Jan-Baptist Vinkstraat 2 3070 Kortenberg
BELGIQUE. Autorisons Kazuhisa Makino pour la
Désignation : Outil Balai Brosse/Outil Balai Racleur.
BR400MP /SW400MP.
Satisfait toutes les dispositions pertinentes de 2006/42/
CE-
disées suivantes : EN 60335-1:2012+A11:2014+A13
:2017+A1:2019+A14:2019+A2:2019+A15:2021, EN
60335-2-72:2012.
Lieu et date de déclaration : Kortenberg, Belgique. 1. 8. 2023
Personne responsable : Kazuhisa Makino, Directeur -
Makita Europe N.V.

15 FRANÇAIS
CONSIGNES DE
SÉCURITÉ
Consignes de sécurité pour balai
brosse/balai racleur
AVERTISSEMENT : Lisez toutes les
consignes de sécurité, instructions, illustrations
ainsi que le mode d’emploi de l’outil motorisé
avant utilisation. Le non-respect de toutes les
Garder tous les avertissements
et instructions pour consultation
ultérieure.
-
motorisé.
-
de l’unité motorisée.
Consignes générales de sécurité
1. Les utilisateurs novices ou inexpérimentés
doivent solliciter au revendeur une formation
sur toutes les utilisations de cette machine. Ne
laissez jamais les enfants, les personnes aux
capacités physiques, sensorielles ou mentales
réduites, qui manquent d’expérience ou de
connaissances, ou les personnes qui ne sont
pas familiarisées avec ces instructions utiliser
la machine. Les enfants doivent être sous
qu’ils ne jouent pas avec la machine.
2. Il est conseillé de ne prêter la machine qu’aux
personnes ayant déjà une certaine expérience.
Remettez toujours le manuel d’instructions.
3. Restez vigilant, surveillez vos gestes et faites
preuve de bon sens lorsque vous utilisez la
machine. N’utilisez pas la machine lorsque
vous êtes fatigué, malade ou sous l’emprise
de drogues, d’alcool ou de médicaments.
Un moment d’inattention durant l’utilisation de
corporelles.
4. Évitez d’utiliser la machine dans de mauvaises
conditions climatiques, notamment en cas de
risque de foudre.
5. Suivez votre réglementation nationale et locale
relative à l’utilisation des machines motori-
sées pour usage extérieur.
6.
7. Gardez à l’esprit que l’opérateur ou l’utilisa-
teur est responsable des accidents ou risques
encourus par les personnes ou leur propriété.
Sécurité de l’aire de travail
AVERTISSEMENT : Tenez le balai brosse/
balai racleur à l’écart des lignes électriques et
des câbles de communication. Le contact du balai
voire mortelles. Surveillez les lignes haute tension
avant de mettre en marche l’outil.
1. Utilisez uniquement la machine si vous avez
une bonne visibilité et à la lumière du jour.
N’utilisez pas la machine dans l’obscurité ou le
brouillard.
2. Ne démarrez et ne faites tourner le moteur
qu’à l’extérieur dans un endroit bien aéré.
3. Avant toute utilisation, examinez l’aire de
travail pour vous assurer qu’elle ne présente
durs. Ils peuvent endommager les brosses ou les
rouleaux racleurs.
4. Pendant le fonctionnement, ne vous tenez
jamais sur une surface instable ou glissante
ou sur une pente abrupte. En hiver, faites
attention au verglas et à la neige et assu-
rez-vous toujours d’avoir une bonne assise.
5. Évitez de travailler près de clôtures, souches
ou racines d’arbre. Elles peuvent endommager
les brosses ou les rouleaux racleurs.
6. Évitez de travailler près de bâtiments, voitures
et autres propriétés. Les pierres et les débris
les endommager.
7. Le nettoyage de sols synthétiques peut géné-
rer de l’électricité statique, ce qui présente un
risque d’électrocution ou d’accidents.
Équipement de protection
individuelle
1. Portez toujours un pantalon robuste et long,
des chaussures solides, des gants et une
chemise à manches longues. Ne portez pas
de vêtements amples, de bijoux, de shorts, de
sandales et ne marchez pas pieds nus. Veillez
à ce que vos cheveux ne descendent pas
au-dessous des épaules.
2. Pour protéger vos yeux des blessures lorsque
vous utilisez la machine, portez toujours des
lunettes de protection. Les lunettes de protec-
tion doivent être conformes à ANSI Z87.1 aux
États-Unis, EN 166 en Europe ou AS/NZS 1336
en Australie/Nouvelle-Zélande. En Australie/
Nouvelle-Zélande, il est également obligatoire
de porter un écran facial pour protéger votre
visage.

16 FRANÇAIS
Il est de la responsabilité de l’employeur d’imposer
l’utilisation d’équipements de sécurité adaptés aux
opérateurs d’outils et aux autres personnes situées
à proximité immédiate de la zone de travail.
3. Portez une protection auditive, comme un
serre-tête antibruit. L’exposition au bruit peut
4. Portez toujours des chaussures robustes à
semelles antidérapantes. Elles protégeront vos
pieds des blessures et garantiront un bon appui.
5. Portez un masque anti-poussière au besoin.
Plein de carburant
1.
Coupez le moteur avant de faire le plein. Tenez-vous à
jamais pendant que vous faites le plein.-
2. Faites le plein à l’air libre. Faire le plein dans
vapeurs de carburant.
3. Évitez tout contact avec le carburant ou l’huile
pour moteur. N’inhalez pas les vapeurs de car-
burant. En cas de déversement de carburant
ou d’huile, essuyez immédiatement la machine
et/ou le sol. Changez-vous immédiatement
en cas de déversement de carburant sur vos
4.
Après avoir fait le plein, serrez soigneusement le
fuit pas. Avant de démarrer le moteur, écartez-vous
d’au moins 3 m de la source d’approvisionnement en
carburant et du site d’approvisionnement.
5. Ne transportez et ne stockez le carburant que
dans des conteneurs homologués. Maintenez
les enfants à l’écart du carburant stocké.
Démarrage du balai brosse/balai racleur
1. Avant d’assembler ou de régler la machine,
coupez le moteur et retirez le capuchon de la
bougie d’allumage ou la batterie.
2. Avant de manipuler les brosses ou les rou-
leaux racleurs, mettez des gants de protection.
3. Mettez l’équipement de protection individuelle
avant de démarrer le moteur.
4.
Avant de démarrer le moteur, inspectez la machine
pour vous assurer qu’elle n’est pas endommagée,
mal assemblée ou que les vis/écrous sont des-
et les interrupteurs fonctionnent sans problème.
Nettoyez et séchez les poignées.
5. N’essayez jamais de démarrer le moteur si la
machine est endommagée ou pas entièrement
assemblée avec les carters de protection,
plaques ou autres dispositifs de sécurité
adéquats. Sinon, vous pourriez gravement vous
blesser.
6. -
gneusement que les brosses ou les rouleaux
racleurs ne touchent pas votre corps ou
d’autres objets. Démarrer le moteur avec les
brosses ou les rouleaux racleurs en contact avec
grave.
7. Avant de démarrer le moteur, assurez-vous
qu’il n’y a pas de personne ou d’animal dans
l’aire de travail.
8. Réglez la bandoulière et la poignée selon la
corpulence de l’opérateur.
9. Remplacez les brosses ou les rouleaux
pourraient se briser en éclats pendant le fonction-
10. Démarrez et utilisez la machine uniquement
à l’extérieur dans un endroit bien aéré. Faire
11. Lorsque vous démarrez le moteur, placez la
machine sur un sol dur, puis maintenez un bon
équilibre et une bonne assise.
12. Lorsque vous enclenchez la poignée de
démarrage du moteur, tenez l’outil motorisé
de la main gauche fermement contre le sol. Ne
l’outil motorisé.
13. Si les brosses ou les rouleaux racleurs
tournent au ralenti, coupez le moteur et bais-
sez la vitesse de ralenti. Sinon, un contact
accidentel avec les brosses ou les rouleaux
blessures.
14. Coupez immédiatement le moteur si vous
remarquez une défaillance.
15. Respectez le mode d’emploi de l’outil motorisé
pour le démarrage du moteur.
Transport
1. Coupez le moteur pendant le transport. Sinon,
blessures.
2. Lorsque vous transportez la machine en voi-
ture, assurez-vous qu’elle est positionnée de
3. Pour transporter la machine, soulevez-la com-
plètement.
endommagement du réservoir de carburant et une
4. Transportez l’appareil à l’horizontale en le
tenant par la tige. Éloignez le silencieux chaud
de votre corps.

17 FRANÇAIS
Fonctionnement
1. Pendant le fonctionnement, éloignez les
badauds ou les animaux d’au moins 5 m du
balai brosse/balai racleur. Coupez le moteur
aussitôt que quelqu’un s’approche.
2.
En cas d’urgence, coupez immédiatement le moteur.
3.
Si vous détectez une anomalie (par exemple,
bruit ou vibration) en cours de fonctionnement,
coupez le moteur. N’utilisez pas la machine tant
que la cause n’est pas connue et résolue.
4.
tournant au ralenti.
5. Pendant le fonctionnement, utilisez la bandou-
lière. Maintenez fermement la machine contre
vous du côté droit.
6. Tenez la poignée avant de la main gauche et
la poignée arrière de la main droite que vous
soyez droitier ou gaucher. Enveloppez les
poignées avec vos doigts et vos pouces.
7. N’essayez jamais de faire fonctionner la
-
sures, tenez vos mains et vos pieds à l’écart
des brosses ou des rouleaux racleurs.
8. Pendant le fonctionnement, ne soulevez pas
les brosses ou les rouleaux racleurs plus haut
que votre taille.
9.
Les brosses ou les rouleaux racleurs continuent
de bouger pendant un bref instant après avoir
relâché la gâchette de commande d’accélération
ou coupé le moteur. Ne vous précipitez pas pour
toucher les brosses ou les rouleaux racleurs.
10.
Ne vous penchez pas trop loin. Maintenez constam-
ment une bonne assise et un bon équilibre. Soyez
attentif aux obstacles cachés comme les souches
d’arbre, racines ou fossés pour éviter de trébucher.
11. Soyez très prudent lorsque vous inversez la
rotation de la brosse ou du rouleau racleur ou
tirez la machine vers vous. Si l’outil motorisé
est pourvu d’une fonction de rotation inverse,
ne l’utilisez pas plus que nécessaire.
balai racleur vous poussera si les brosses ou les
rouleaux racleurs sont sur le sol.
12.
Ne surchargez pas la machine en essayant de pousser
trop fort à un rythme trop rapide. La machine réalisera
blessures si vous l’utilisez avec la charge appropriée.
13. N’accélérez pas le moteur si les brosses ou les
rouleaux racleurs sont bloqués. La charge en
est augmentée et cela endommagera la machine.
14.
Si la machine subit un choc violent ou tombe,
pas et que les commandes et les dispositifs de
sécurité fonctionnent correctement. En cas de
réparation à notre service après-vente agréé.
15. -
16.
Reposez-vous régulièrement pour empêcher la perte
du contrôle due à la fatigue. Nous recommandons de
17.
Lorsque vous abandonnez la machine, même pen-
dant un court instant, coupez toujours le moteur ou
retirez la batterie. Une machine sans surveillance dont
le moteur tourne peut être utilisée par une personne
18. Respectez le mode d’emploi de l’outil motorisé
pour une utilisation correcte du levier de com-
mande et de l’interrupteur.
19. En cours de fonctionnement et après, ne posez
pas la machine encore chaude sur de l’herbe
sèche ou un matériau combustible.
20. Si les brosses ou les rouleaux racleurs
attrapent des corps étrangers, coupez le
moteur et retirez le capuchon de la bougie d’al-
lumage ou la batterie, puis retirez l’obstacle.
21. Éloignez vos mains et pieds des brosses ou
des rouleaux racleurs. Un contact avec les
brosses ou les rouleaux racleurs peut provo-
quer de graves blessures. Lorsque vous mani-
pulez les brosses ou les rouleaux racleurs,
coupez le moteur et retirez le capuchon de la
bougie d’allumage ou la batterie.
22. -
ment que les brosses ou les rouleaux racleurs
23.
Coupez toujours le moteur ou retirez la batterie
lorsque vous retirez des débris ou des corps
étrangers des brosses ou des rouleaux racleurs.
24. Reportez-vous au mode d’emploi de l’outil
motorisé pour savoir comment démarrer et
contrôler la machine.
Vibration
Une exposition à des vibrations excessives altère
les vaisseaux sanguins ou le système nerveux de
l’utilisateur et provoque les symptômes suivants
dans les doigts, les mains ou les poignets : engour-
dissement, picotement, douleur, douleur lancinante,
changement de couleur de la peau ou de la peau
elle-même. Si un ou plusieurs de ces symptômes
apparaissent, consultez un médecin.
Pour réduire le risque du syndrome de Raynaud,
gardez vos mains au chaud pendant l’utilisa-
tion et maintenez en bon état la machine et les
accessoires.

18 FRANÇAIS
Entretien
1.
Avant de réaliser une tâche d’entretien ou de
réparation ou le nettoyage de la machine, cou-
pez toujours le moteur et retirez le capuchon de
la bougie d’allumage ou la batterie. Patientez
jusqu’à ce que le moteur devienne froid.
2. Pour réduire le risque d’incendie, ne dépannez
pas l’appareil près d’un feu.
3.
Portez toujours des gants de protection pour
manipuler les brosses ou les rouleaux racleurs.
4.
Retirez toujours la poussière et la saleté de l’appa-
reil. N’utilisez jamais d’essence, benzine, diluant,
Ils
5. Après chaque utilisation, serrez toutes les vis
et tous les écrous, sauf les vis de réglage du
carburateur.
6. Remplacez les brosses ou les rouleaux
7. N’essayez pas de réaliser des procédures
d’entretien ou de réparation non décrites dans
ce livret ou le mode d’emploi de l’outil moto-
notre service après-vente agréé.
8.
le remplacement des accessoires.
9. Utilisez toujours des pièces de rechange et
accessoires d’origine uniquement. L’utilisation
de pièces ou accessoires fournis par un tiers peut
10. -
tien de la machine à notre service après-vente
agréé.
Rangement
1.
Avant de ranger la machine, procédez à un net-
toyage et un entretien complets. Retirez le capu-
chon de la bougie d’allumage ou la batterie. Videz
le carburant une fois que le moteur a refroidi.
2. Rangez l’appareil dans un endroit sec en
hauteur ou verrouillé hors de la portée des
enfants.
3. N’appuyez pas l’appareil contre un mur, par
exemple.
Premiers secours
1. En cas d’accident, assurez-vous qu’une
trousse de premiers secours est disponible à
proximité des opérations. Remplacez immé-
diatement tout article pris dans la trousse de
premiers secours.
2. Lorsque vous appelez les secours, fournissez
les informations suivantes :
— Le lieu de l’accident
— Les circonstances de l’accident
— Le nombre de personnes blessées
— Le type de blessures
— Votre nom
CONSERVEZ CES INSTRUCTIONS.
AVERTISSEMENT : L’utilisation de ce
produit peut créer de la poussière contenant des
produits chimiques susceptibles de provoquer
des maladies respiratoires ou autres. Parmi ces
produits chimiques, on trouve des composés
présents dans les pesticides, insecticides, fer-
tilisants et herbicides. Le risque présenté par
l’exposition à ces produits varie en fonction de la
fréquence de ce type de travail. Pour réduire votre
degré d’exposition à ces produits chimiques :
travaillez dans une aire de travail bien aérée et en
utilisant des dispositifs de sécurité approuvés,
comme des masques anti-poussière spécialement
DESCRIPTION DES PIÈCES
Outil Balai Brosse
2
1
7
6
5
3 4
1. Capuchon 2.3. Protecteur 4. Attache
5. Brosse 6.7. Clé hexalobulaire
Outil Balai Racleur
2
6
5
34
1
7
1. Capuchon 2.3. Protecteur 4. Attache
5. Rouleau racleur 6.7. Clé
hexalobulaire

19 FRANÇAIS
ASSEMBLAGE
AVERTISSEMENT : Avant de monter
ou de régler l’équipement, coupez le moteur et
retirez le capuchon de la bougie d’allumage ou la
batterie. Sinon, les brosses, les rouleaux ou d’autres
blessures.
AVERTISSEMENT : Lorsque vous montez
ou réglez l’équipement, posez-le toujours. Le
AVERTISSEMENT : Suivez les aver-
tissements et les précautions du chapitre «
CONSIGNES DE SÉCURITÉ » et le manuel d’ins-
tructions de l’unité motorisée.
Assemblage de l’accessoire
1. Retirez l’attache de la brosse ou du rouleau
racleur sur le côté gauche de l’ensemble de la brosse
ou du rouleau racleur, puis retirez la brosse ou le rou-
leau racleur.
1
2
1. Brosse 2. Attache
2.
1
2
1. Vis 2.
3. Retirez 2 capuchons des deux extrémités du
1
2
1.2. Capuchon
REMARQUE : Ne jetez pas les capuchons, car
ils sont nécessaires pour ranger l’accessoire.
4.
2
3
4
1
1. Goupille 2.3. Protecteur 4. Manchon

20 FRANÇAIS
REMARQUE : Veillez à insérer l’extrémité du
tuyau sans la goupille dans le protecteur et le
manchon.
5. -
12
3
1.2.3. Goupille
REMARQUE :
d’engrenage et la goupille sur le tuyau sont tour-
12 3
1.2. Protecteur 3. Goupille
6.
1
2
1. Trou 2.
7.
1
2
1. Vis 2.
8. Serrez 2 vis sur le protecteur.
1
2
3
4
1. Vis 2. Protecteur 3. Manchon 4.
d’engrenage
REMARQUE : Assurez-vous qu’il n’y a pas
-
chon, et entre le manchon et le protecteur.
This manual suits for next models
1
Table of contents
Languages:
Other Makita Lawn And Garden Equipment manuals

Makita
Makita UM104D User manual

Makita
Makita DUM168RF User manual

Makita
Makita DG002G User manual

Makita
Makita DUM168 User manual

Makita
Makita DUM604 User manual

Makita
Makita UH201D User manual

Makita
Makita EN420MP User manual

Makita
Makita DDG461PT2 User manual

Makita
Makita UM600D User manual

Makita
Makita UM104D User manual

Makita
Makita DCU180Z User manual

Makita
Makita DUM166 User manual

Makita
Makita BUM166 User manual

Makita
Makita DUM168Z User manual

Makita
Makita EY403MP User manual

Makita
Makita DUM604 User manual

Makita
Makita DUH481 User manual

Makita
Makita UV3200 User guide

Makita
Makita UM110D User manual

Makita
Makita DUP361 User manual