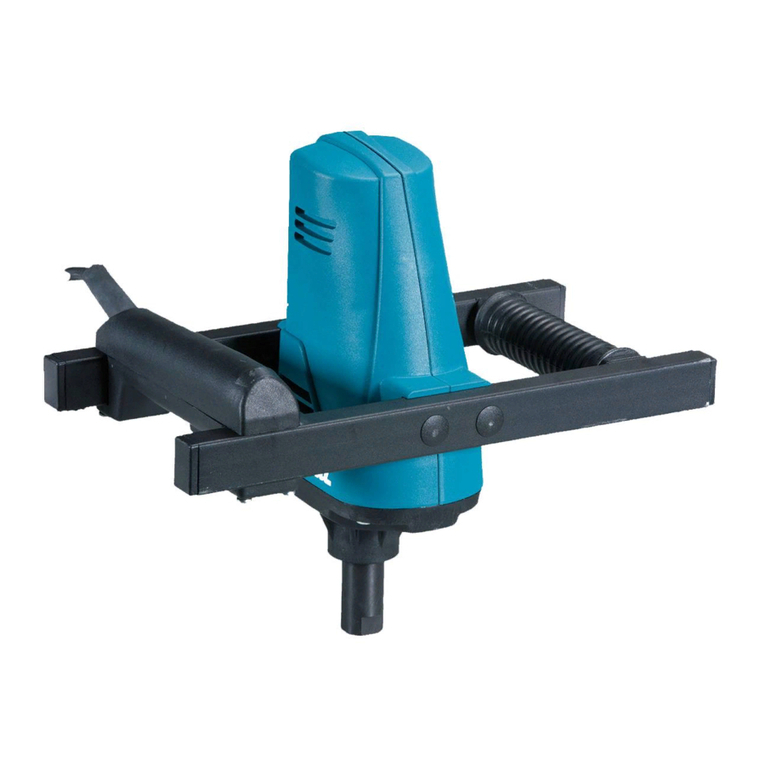
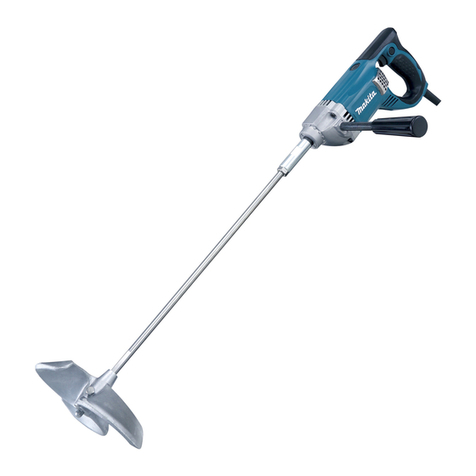
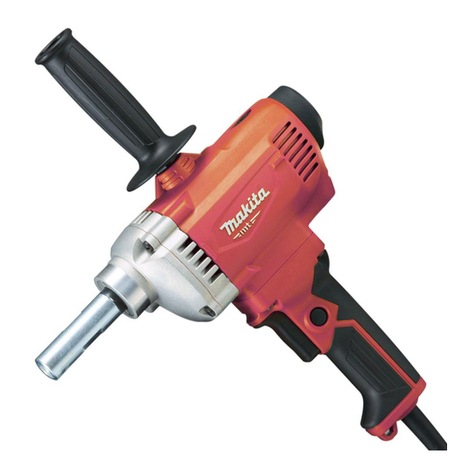
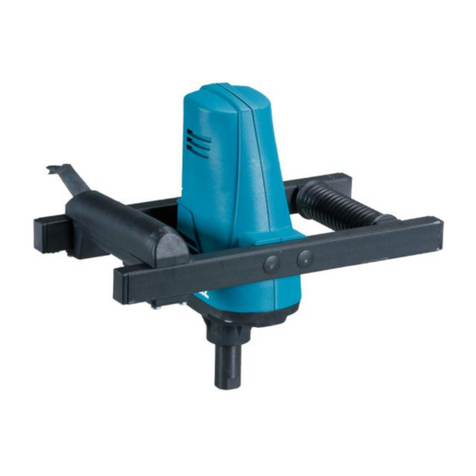
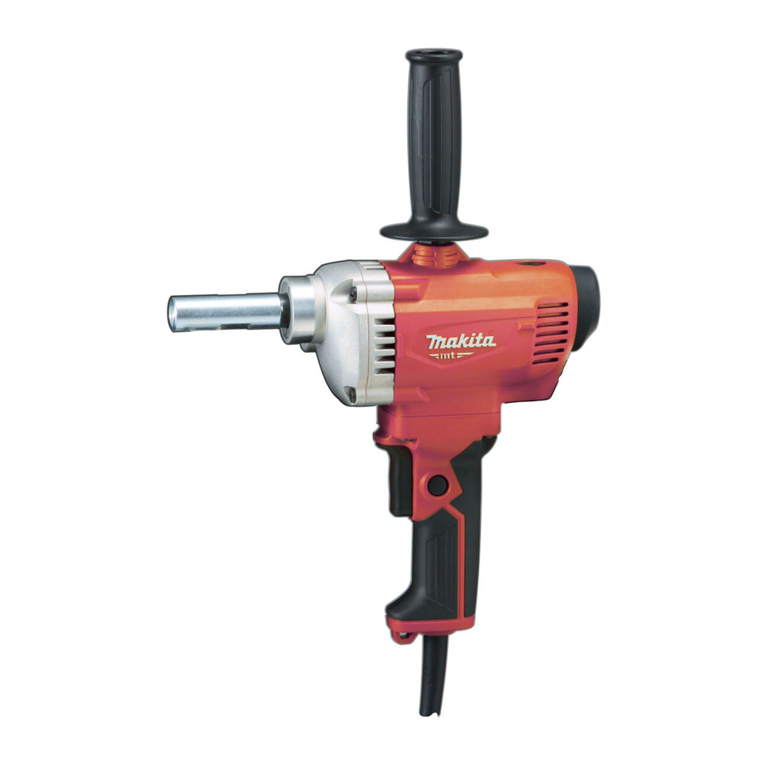
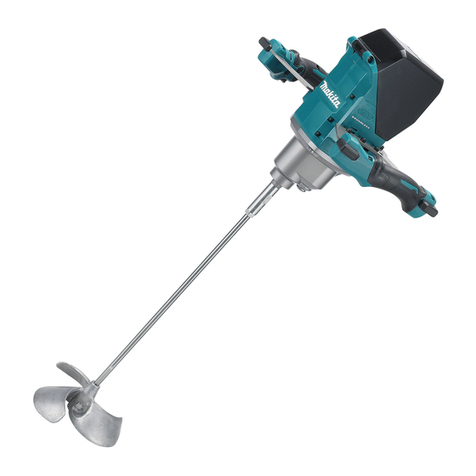
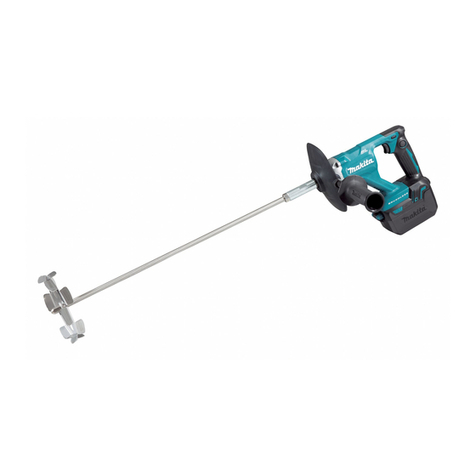
Makita DUT130 User manual

DUT130
DUT131
EN Cordless Mixer INSTRUCTION MANUAL 5
FR Malaxeur sans l MANUEL D’INSTRUCTIONS 11
DE Akku-Rührwerk BETRIEBSANLEITUNG 17
IT Miscelatore a batteria ISTRUZIONI PER L’USO 23
NL Accumenger GEBRUIKSAANWIJZING 29
ES Mezclador Inalámbrico MANUAL DE
INSTRUCCIONES 35
PT Misturador a Bateria MANUAL DE INSTRUÇÕES 41
DA Akku blandemaskine BRUGSANVISNING 47
EL Φορητός αναδευτήρας ΕΓΧΕΙΡΙΔΙΟ ΟΔΗΓΙΩΝ 53
TR Akülü Mikser KULLANMA KILAVUZU 59

1
2
Fig.1
1
2
3
Fig.2
1
2
Fig.3
1
A B
Fig.4
12
3
Fig.5
1
2
Fig.6
1
2
Fig.7
2

12
Fig.8
1
2
Fig.9
12
Fig.10
1
2
Fig.11
1
2
3
Fig.12
1
Fig.13
1
2
3
1
2
3
Fig.14
1
2
3
Fig.15
3

2
1
2
Fig.16
4

5ENGLISH
ENGLISH (Original instructions)
SPECIFICATIONS
Model: DUT130 DUT131
No load speed High speed 0 - 1,300 min-1
Low speed 0 - 350 min-1
Maximum mixing blade diameter 165 mm
Overall length (without shaft and mixing blade) 320 mm 307 mm
Rated voltage D.C. 18 V
Net weight 2.5 - 2.8 kg 2.7 - 3.0 kg
• Duetoourcontinuingprogramofresearchanddevelopment,thespecicationshereinaresubjecttochange
without notice.
• Specicationsandbatterycartridgemaydifferfromcountrytocountry.
• Theweightmaydifferdependingontheattachment(s),includingthebatterycartridge.Thelightestandheavi-
est combination, according to EPTA-Procedure 01/2014, are shown in the table.
Applicable battery cartridge and charger
Batterycartridge BL1815N / BL1820 / BL1820B / BL1830 / BL1830B / BL1840 /
BL1840B / BL1850 / BL1850B / BL1860B
Charger DC18RC / DC18RD / DC18RE / DC18SD / DC18SE / DC18SF
• Someofthebatterycartridgesandchargerslistedabovemaynotbeavailabledependingonyourregionof
residence.
WARNING: Only use the battery cartridges and chargers listed above.Useofanyotherbatterycartridges
andchargersmaycauseinjuryand/orre.
Symbols
Thefollowingsshowthesymbolsusedfortheequip-
ment.Besurethatyouunderstandtheirmeaningbefore
use.
Read instruction manual.
Do not use the tool in the rain.
Do not clean the tool with water.
Ni-MH
Li-ion
OnlyforEUcountries
Donotdisposeofelectricequipmentor
batterypacktogetherwithhouseholdwaste
material!
In observance of the European Directives,
on Waste Electric and Electronic
EquipmentandBatteriesandAccumulators
and Waste Batteries and Accumulators
and their implementation in accordance
withnationallaws,electricequipmentand
batteriesandbatterypack(s)thathave
reached the end of their life must be col-
lectedseparatelyandreturnedtoanenvi-
ronmentallycompatiblerecyclingfacility.
Intended use
The tool is intended for mixing wall materials, etc.
(exceptammablematerials).
Noise
ThetypicalA-weightednoiseleveldeterminedaccord-
ing to EN60745-2-1:
Model DUT130
Sound pressure level (LpA) : 74 dB(A)
Uncertainty(K):3dB(A)
Model DUT131
Sound pressure level (LpA) : 74 dB(A)
Uncertainty(K):3dB(A)
Thenoiselevelunderworkingmayexceed80dB(A).
NOTE:
The declared noise emission value(s) has been
measured in accordance with a standard test method
andmaybeusedforcomparingonetoolwithanother.
NOTE:
Thedeclarednoiseemissionvalue(s)may
alsobeusedinapreliminaryassessmentofexposure.
WARNING: Wear ear protection.
WARNING:
The noise emission during actual
use of the power tool can differ from the declared val-
ue(s) depending on the ways in which the tool is used
especially what kind of workpiece is processed.
WARNING:
Be sure to identify safety measures
to protect the operator that are based on an estima-
tion of exposure in the actual conditions of use (tak-
ing account of all parts of the operating cycle such
as the times when the tool is switched off and when
it is running idle in addition to the trigger time).

6ENGLISH
Vibration
The vibration total value (tri-axial vector sum) deter-
mined according to EN60745-2-1:
Model DUT130
Work mode: operation without load
Vibration emission (ah) : 2.5 m/s2or less
Uncertainty(K):1.5m/s2
Model DUT131
Work mode: operation without load
Vibration emission (ah) : 2.5 m/s2or less
Uncertainty(K):1.5m/s2
NOTE: The declared vibration total value(s) has been
measured in accordance with a standard test method
andmaybeusedforcomparingonetoolwithanother.
NOTE:Thedeclaredvibrationtotalvalue(s)mayalso
beusedinapreliminaryassessmentofexposure.
WARNING:
The vibration emission during actual
use of the power tool can differ from the declared val-
ue(s) depending on the ways in which the tool is used
especially what kind of workpiece is processed.
WARNING:
Be sure to identify safety measures
to protect the operator that are based on an estima-
tion of exposure in the actual conditions of use (tak-
ing account of all parts of the operating cycle such
as the times when the tool is switched off and when
it is running idle in addition to the trigger time).
EC Declaration of Conformity
For European countries only
TheECdeclarationofconformityisincludedasAnnexA
to this instruction manual.
SAFETY WARNINGS
General power tool safety warnings
WARNING:
Read all safety warnings, instruc-
tions, illustrations and specications provided with this
power tool. Failure to follow all instructions listed below
mayresultinelectricshock,reand/orseriousinjury.
Save all warnings and instruc-
tions for future reference.
Theterm"powertool"inthewarningsreferstoyour
mains-operated(corded)powertoolorbattery-operated
(cordless) power tool.
Cordless mixer safety warnings
1.
Hold the tool with both hands at the intended
handles.Lossofcontrolcancausepersonalinjury.
2. Ensure sufcient ventilation when mixing am-
mable materials to avoid a hazardous atmo-
sphere.Developingvapourmaybeinhaledorbe
ignitedbythesparksthepowertoolproduces.
3. Do not mix food. Power tools and their accesso-
ries are not designed for processing food.
4. Ensure that the mixing container is placed in a
rm and secure position. A container that is not
properlysecuredmaymoveunexpectedly.
5. Follow the instructions and warnings for the
material to be mixed.Materialtobemixedmay
be harmful.
6. Do not reach into the mixing container with
your hands or insert any other objects into it
while mixing.Contactwiththemixerblademay
leadtoseriouspersonalinjury.
7. Start up and run down the tool in the mixing
container only.Themixerblademaybendorspin
in an uncontrolled manner.
8.
Ensure that no liquid splashes against the hous-
ing of the power tool.Liquidthathaspenetrated
the power tool can cause damage to the tool.
9. Use auxiliary handles, if supplied with the tool.
Lossofcontrolmaycausepersonalinjury.
10.
Hold power tool by insulated gripping sur-
faces, when performing an operation where the
cutting accessory may contact hidden wiring.
Cuttingaccessorycontactinga"live"wiremay
make exposed metal parts of the power tool "live"
and could give the operator an electric shock.
11. Always be sure you have a rm footing. Be
sure no one is below when using the tool in
high locations.
12. Hold the tool rmly.
13. Keep hands away from rotating parts.
14. Do not leave the tool running. Operate the tool
only when you are holding it.
15. Some materials contain chemicals which may
be toxic. Take caution to prevent dust inhala-
tion and skin contact. Follow safety warnings
by supplier of the material.
16. When performing the mixing operation, place
the mixing container on a at and stable
surface.
SAVE THESE INSTRUCTIONS.
WARNING: DO NOT let comfort or familiarity
with product (gained from repeated use) replace
strict adherence to safety rules for the subject
product. MISUSE or failure to follow the safety
rules stated in this instruction manual may cause
serious personal injury.
Important safety instructions for
battery cartridge
1. Before using battery cartridge, read all instruc-
tions and cautionary markings on (1) battery
charger, (2) battery, and (3) product using
battery.
2. Do not disassemble battery cartridge.
3. If operating time has become excessively
shorter, stop operating immediately. It may
result in a risk of overheating, possible burns
and even an explosion.
4. If electrolyte gets into your eyes, rinse them
out with clear water and seek medical atten-
tion right away. It may result in loss of your
eyesight.

7ENGLISH
5. Do not short the battery cartridge:
(1) Do not touch the terminals with any con-
ductive material.
(2) Avoid storing battery cartridge in a con-
tainer with other metal objects such as
nails, coins, etc.
(3) Do not expose battery cartridge to water
or rain.
A battery short can cause a large current
ow, overheating, possible burns and even a
breakdown.
6. Do not store the tool and battery cartridge in
locations where the temperature may reach or
exceed 50 °C (122 °F).
7. Do not incinerate the battery cartridge even if
it is severely damaged or is completely worn
out. The battery cartridge can explode in a re.
8. Be careful not to drop or strike battery.
9. Do not use a damaged battery.
10. The contained lithium-ion batteries are subject
to the Dangerous Goods Legislation require-
ments.
Forcommercialtransportse.g.bythirdparties,
forwardingagents,specialrequirementonpack-
aging and labeling must be observed.
For preparation of the item being shipped, consult-
inganexpertforhazardousmaterialisrequired.
Pleasealsoobservepossiblymoredetailed
national regulations.
Tape or mask off open contacts and pack up the
batteryinsuchamannerthatitcannotmove
around in the packaging.
11. Follow your local regulations relating to dis-
posal of battery.
12. Use the batteries only with the products
specied by Makita. Installing the batteries to
non-compliantproductsmayresultinare,exces-
siveheat,explosion,orleakofelectrolyte.
SAVE THESE INSTRUCTIONS.
CAUTION: Only use genuine Makita batteries.
Use of non-genuine Makita batteries, or batteries that
havebeenaltered,mayresultinthebatterybursting
causingres,personalinjuryanddamage.Itwill
alsovoidtheMakitawarrantyfortheMakitatooland
charger.
Tips for maintaining maximum
battery life
1. Charge the battery cartridge before completely
discharged. Always stop tool operation and
charge the battery cartridge when you notice
less tool power.
2. Never recharge a fully charged battery car-
tridge. Overcharging shortens the battery
service life.
3. Charge the battery cartridge with room tem-
perature at 10 °C - 40 °C (50 °F - 104 °F). Let
a hot battery cartridge cool down before
charging it.
4. Charge the battery cartridge if you do not use
it for a long period (more than six months).
FUNCTIONAL
DESCRIPTION
CAUTION: Always be sure that the tool is
switched off and the battery cartridge is removed
before adjusting or checking function on the tool.
Installing or removing battery
cartridge
CAUTION: Always switch off the tool before
installing or removing of the battery cartridge.
CAUTION: Hold the tool and the battery car-
tridge rmly when installing or removing battery
cartridge.Failuretoholdthetoolandthebattery
cartridgermlymaycausethemtoslipoffyourhands
andresultindamagetothetoolandbatterycartridge
andapersonalinjury.
CAUTION: Do not use this tool with the
battery adapter.Ifyouconnectthebatteryadapter
tothetool,thebatterycovercannotbeclosed,and
usingthetoolwithbatterycoveropenedmaycause
aninjury.
Openthebatterycoverwhilepressingthebuttononthe
batterycover.
►Fig.1: 1. Button 2.Batterycover
Toremovethebatterycartridge,slideitfromthetool
while sliding the button on the front of the cartridge.
►Fig.2: 1. Red indicator 2. Button 3.Batterycartridge
Toinstallthebatterycartridge,alignthetongueonthe
batterycartridgewiththegrooveinthehousingandslip
itintoplace.Insertitallthewayuntilitlocksinplace
withalittleclick.Ifyoucanseetheredindicatoronthe
uppersideofthebutton,itisnotlockedcompletely.
Afterinstallingthebatterycartridge,closethebattery
coversecurely.
CAUTION: Always install the battery cartridge
fully until the red indicator cannot be seen. If not,
itmayaccidentallyfalloutofthetool,causinginjuryto
youorsomeonearoundyou.
CAUTION: Do not install the battery cartridge
forcibly.Ifthecartridgedoesnotslideineasily,itis
notbeinginsertedcorrectly.

8ENGLISH
Indicating the remaining battery
capacity
Only for battery cartridges with the indicator
►Fig.3: 1. Indicator lamps 2. Check button
Pressthecheckbuttononthebatterycartridgetoindi-
catetheremainingbatterycapacity.Theindicatorlamps
light up for a few seconds.
Indicator lamps Remaining
capacity
Lighted Off Blinking
75% to 100%
50% to 75%
25% to 50%
0% to 25%
Charge the
battery.
Thebattery
mayhave
malfunctioned.
NOTE: Depending on the conditions of use and the
ambienttemperature,theindicationmaydifferslightly
fromtheactualcapacity.
Tool / battery protection system
Thetoolisequippedwithatool/batteryprotectionsys-
tem.Thissystemautomaticallycutsoffpowertothe
motortoextendtoolandbatterylife.Thetoolwillauto-
maticallystopduringoperationifthetoolorbatteryis
placed under one of the following conditions:
Overload protection
Whenthetoolorbatteryisoperatedinamannerthat
causesittodrawanabnormallyhighcurrent,thetool
automaticallystopswithoutanyindication.Inthissit-
uation, turn the tool off and stop the application that
caused the tool to become overloaded. Then turn the
tool on to restart.
Overheat protection
Whenthetoolorbatteryisoverheated,thetoolstops
automatically.Inthiscase,letthetoolandbatterycool
before turning the tool on again.
Overdischarge protection
Whenthebatterycapacityisnotenough,thetoolstops
automatically.Inthiscase,removethebatteryfromthe
toolandchargethebattery.
Switch action
CAUTION: Before installing the battery car-
tridge into the tool, always check to see that the
switch trigger actuates properly and returns to
the "OFF" position when released.
CAUTION: Switch can be locked in "ON" posi-
tion for ease of operator comfort during extended
use. Apply caution when locking tool in "ON"
position and maintain rm grasp on tool.
CAUTION: Do not install the battery cartridge
with the lock button engaged.
CAUTION: When not operating the tool,
depress the trigger-lock button from side to
lock the switch trigger in the OFF position.
►Fig.4: 1. Trigger-lock button
►Fig.5: 1. Switch trigger 2. Lock button 3. Trigger-
lock button
Topreventtheswitchtriggerfromaccidentallypulled,
the trigger-lock button is provided. To start the tool,
depress the trigger-lock button from A ( ) side and pull
theswitchtrigger.Toolspeedisincreasedbyincreas-
ing pressure on the switch trigger. Release the switch
trigger to stop. After use, depress the trigger-lock button
from B ( ) side.
For continuous operation, depress the lock button while
pulling the switch trigger, and then release the switch
trigger.Tostopthetool,pulltheswitchtriggerfully,then
release it.
Speed change
NOTICE: Use the speed change knob only after
the tool comes to a complete stop. Changing the
toolspeedbeforethetoolstopsmaydamagethetool.
NOTICE: Always set the speed change knob
carefully into the correct position.Ifyouoperate
the tool with the speed change knob positioned half-
waybetweentheposition1andtheposition2,the
toolmaybedamaged.
NOTICE: If the rotation speed signicantly
decreases during operation in the high speed
mode, stop the tool and change the mode to the
low speed mode.Otherwise,themotormayget
overloadedandcauseamalfunctionorre.
Two speed ranges can be preselected with the speed
change knob.
To change the speed, turn the speed change knob so
that the pointer points to the position 1 for low speed or
the position 2 for high speed.
►Fig.6: 1. Pointer 2. Speed change knob
Accidental restart preventive
function
Ifyouinstallthebatterycartridgewhilepullingthe
switch trigger or locking the switch trigger, the tool does
not start. To start the tool, release the switch trigger, and
then pull the switch trigger.

9ENGLISH
Electronic function
Thetoolisequippedwiththeelectronicfunctionsfor
easyoperation.
• Soft start
The soft-start function minimizes start-up shock,
andmakesthetoolstartsmoothly.
ASSEMBLY
CAUTION: Always be sure that the tool is
switched off and the battery cartridge is removed
before carrying out any work on the tool.
Installing the front cover and side
grip
CAUTION: Tighten the side grip rmly.
Otherwise,thefrontcovermayfallandcausean
injury.
►Fig.7: 1. Front cover 2. Side grip
Attach the front cover to the tool and screw the side grip
onthetoolsecurely.
The side grip can be installed on either side of the tool.
Installing the shaft
Optional accessory
For DUT130
1. Tighten the shaft into the shaft holder.
►Fig.8: 1. Shaft 2. Shaft holder
2. Tighten the shaft with wrench while holding the
shaft holder with another wrench.
►Fig.9: 1. Shaft 2. Shaft holder
For DUT131
1. Insert the shaft into the chuck as far as it will go.
►Fig.10: 1. Shaft 2. Chuck
2. Tightenthechuckbyhand,andthenplacethe
chuckkeyineachofthreeholesandtightenitclock-
wise.Besuretotightenthechuckkeyatallthreeholes
evenly.
►Fig.11: 1.Chuckkey2. Chuck
Toremovetheshaft,turnthechuckkeycounterclock-
wiseatoneoftheholes,andthenloosenthechuckby
hand.
Installing the mixing blade
Optional accessory
Attach the mixing blade on the top of the shaft, and then
secure it with the hex bolt.
►Fig.12: 1. Mixing blade 2. Shaft 3. Hex bolt
NOTICE: Be sure to attach the mixing blade with
"UP" mark facing the tool.
►Fig.13: 1. Mark
Hook
Optional accessory
CAUTION: Always remove the battery when
hanging the tool with the hook.
CAUTION: Never hook the tool at high loca-
tion or on potentially unstable surface.
►Fig.14: 1. Groove 2. Hook 3. Screw
Thehookisconvenientfortemporarilyhangingthetool.
This can be installed on either side of the tool.
To install the hook, insert it into a groove in the tool
housing on either side and then secure it with a screw.
To remove, loosen the screw and then take it out.
Installing or removing the shaft
holder
Optional accessory
For DUT131
1. Insert the hex wrench into the chuck, and then
loosen the chuck with the hex wrench while holding the
spindle with the wrench.
►Fig.15: 1. Hex wrench 2. Chuck 3. Wrench
2. Tighten the shaft holder with a wrench while hold-
ing the spindle with another wrench.
►Fig.16: 1. Shaft holder 2. Wrench
To remove the shaft holder, perform the installation
procedure in reverse.
OPERATION
CAUTION: Do not mix ammable materials or
operate the tool around ammable materials such
as paint with thinner used as solvent. Failure to do
somaycauseaninjury.
CAUTION: Do not mix high viscosity material,
such as mortar or adhesive, in the high speed
mode.Youmaylosethecontrolofthetoolandcause
aninjury.
NOTICE: When you mix the material while the
mixing blade oating out of the material, be care-
ful not to splash the material.
1. Select high speed or low speed according to the
material to be mixed.
2. Hold the rear handle of the tool with one hand
andthegripwiththeotherhandrmly,placethemixing
bladeundermaterialfullyandturnonthetoolafter
makingsureworksitesafety.
3. Move the mixing blade up and down during the
mixing operation so that whole part of material can be
mixed.
4. Whennishingmixing,turnoffthetool,makesure
that the mixing blade has come to a complete stop, and
then pull it out of the mixing container.

10 ENGLISH
MAINTENANCE
CAUTION: Always be sure that the tool is
switched off and the battery cartridge is removed
before attempting to perform inspection or
maintenance.
NOTICE: Never use gasoline, benzine, thinner,
alcohol or the like. Discoloration, deformation or
cracks may result.
To maintain product SAFETY and RELIABILITY,
repairs,anyothermaintenanceoradjustmentshould
beperformedbyMakitaAuthorizedorFactoryService
Centers,alwaysusingMakitareplacementparts.
OPTIONAL
ACCESSORIES
CAUTION: These accessories or attachments
are recommended for use with your Makita tool
specied in this manual.Theuseofanyother
accessories or attachments might present a risk of
injurytopersons.Onlyuseaccessoryorattachment
for its stated purpose.
Ifyouneedanyassistanceformoredetailsregard-
ingtheseaccessories,askyourlocalMakitaService
Center.
• Mixing blade
• Shaft
• Shaft holder
• Hook
• Makitagenuinebatteryandcharger
NOTE:Someitemsinthelistmaybeincludedinthe
toolpackageasstandardaccessories.Theymay
differfromcountrytocountry.

11 FRANÇAIS
FRANÇAIS (Instructions originales)
SPÉCIFICATIONS
Modèle : DUT130 DUT131
Vitesse à vide Grande vitesse 0 - 1 300 min-1
Basse vitesse 0 - 350 min-1
Diamètre maximum de la lame de malaxage 165 mm
Longueur totale (sans axe et lame de malaxage) 320 mm 307 mm
Tension nominale 18 VCC
Poids net 2,5 - 2,8 kg 2,7 - 3,0 kg
• Étantdonnél’évolutionconstantedenotreprogrammederechercheetdedéveloppement,lesspécications
contenuesdanscemanuelsontsujettesàmodicationsanspréavis.
• Lesspécicationsetlabatteriepeuventêtredifférentessuivantlespays.
• Lepoidspeutêtredifférentselonlesaccessoires,notammentlabatterie.Lesassociationslapluslégèreetla
pluslourde,conformémentàlaprocédureEPTA01/2014,sontindiquéesdansletableau.
Batterie et chargeur applicables
Batterie BL1815N / BL1820 / BL1820B / BL1830 / BL1830B / BL1840 /
BL1840B / BL1850 / BL1850B / BL1860B
Chargeur DC18RC / DC18RD / DC18RE / DC18SD / DC18SE / DC18SF
• Certainschargeursetbatteriesrépertoriésci-dessuspeuventnepasêtredisponiblesselonlarégionoùvous
résidez.
AVERTISSEMENT : N’utilisez que les batteries et les chargeurs répertoriés ci-dessus. L’utilisation
d’autresbatteriesetchargeurspeutprovoquerdesblessureset/ouunincendie.
Symboles
Voustrouverezci-dessouslessymbolesutiliséspour
l’appareil.Veillezàcomprendreleursignicationavant
toute utilisation.
Lire le mode d’emploi.
N’utilisez pas l’outil sous la pluie.
Nenettoyezpasl’outilavecdel’eau.
Ni-MH
Li-ion
Pourlespaysdel’Unioneuropéenne
uniquement
Nejetezpaslesappareilsélectriquesou
les batteries avec vos ordures ménagères !
Conformément aux directives européennes
relativesauxdéchetsd’équipements
électriquesetélectroniquesetauxpiles
etaccumulateursainsiqu’auxdéchetsde
piles et d’accumulateurs et leur mise en
œuvre conformément aux lois nationales,
leséquipementsélectriques,lespilesetles
batteriesenndeviedoiventfairel’objet
d’unecollectesélectiveetêtreconésà
uneusinederecyclagerespectueusede
l’environnement.
Utilisations
L’outil est conçu pour mélanger des matériaux pour
mur,etc.(sauflesmatériauxinammables).
Bruit
NiveaudebruitpondéréAtypique,déterminéselon
EN60745-2-1 :
Modèle DUT130
Niveau de pression sonore (LpA) : 74 dB (A)
Incertitude(K):3dB(A)
Modèle DUT131
Niveau de pression sonore (LpA) : 74 dB (A)
Incertitude(K):3dB(A)
Le niveau de bruit en fonctionnement peut dépasser 80 dB (A).
NOTE : La ou les valeurs d’émission de bruit décla-
rées ont été mesurées conformément à la méthode
deteststandardetpeuventêtreutiliséespourcom-
parer les outils entre eux.
NOTE : La ou les valeurs d’émission de bruit décla-
réespeuventaussiêtreutiliséespourl’évaluation
préliminaire de l’exposition.

12 FRANÇAIS
AVERTISSEMENT : Portez un serre-tête
antibruit.
AVERTISSEMENT : L’émission de bruit
lors de l’usage réel de l’outil électrique peut être
différente de la ou des valeurs déclarées, suivant
la façon dont l’outil est utilisé, particulièrement
selon le type de pièce usinée.
AVERTISSEMENT : Les mesures de sécurité
à prendre pour protéger l’utilisateur doivent être
basées sur une estimation de l’exposition dans
des conditions réelles d’utilisation (en tenant
compte de toutes les composantes du cycle
d’utilisation, comme par exemple le moment de
sa mise hors tension, lorsqu’il tourne à vide et le
moment de son déclenchement).
Vibrations
Valeur totale de vibrations (somme de vecteur triaxial)
déterminée selon EN60745-2-1 :
Modèle DUT130
Mode de travail : fonctionnement à vide
Émission de vibrations (ah) : 2,5 m/s2ou moins
Incertitude(K):1,5m/s2
Modèle DUT131
Mode de travail : fonctionnement à vide
Émission de vibrations (ah) : 2,5 m/s2ou moins
Incertitude(K):1,5m/s2
NOTE : La ou les valeurs de vibration totales décla-
rées ont été mesurées conformément à la méthode
deteststandardetpeuventêtreutiliséespourcom-
parer les outils entre eux.
NOTE : La ou les valeurs de vibration totales décla-
réespeuventaussiêtreutiliséespourl’évaluation
préliminaire de l’exposition.
AVERTISSEMENT : L’émission de vibrations
lors de l’usage réel de l’outil électrique peut être
différente de la ou des valeurs déclarées, suivant
la façon dont l’outil est utilisé, particulièrement
selon le type de pièce usinée.
AVERTISSEMENT : Les mesures de sécurité
à prendre pour protéger l’utilisateur doivent être
basées sur une estimation de l’exposition dans
des conditions réelles d’utilisation (en tenant
compte de toutes les composantes du cycle
d’utilisation, comme par exemple le moment de
sa mise hors tension, lorsqu’il tourne à vide et le
moment de son déclenchement).
Déclaration de conformité CE
Pour les pays européens uniquement
La déclaration de conformité CE est fournie en Annexe
A à ce mode d’emploi.
CONSIGNES DE SÉCURITÉ
Consignes de sécurité générales
pour outils électriques
AVERTISSEMENT : Veuillez lire les
consignes de sécurité, instructions, illustrations
et spécications qui accompagnent cet outil
électrique. Le non-respect de toutes les instructions
indiquéesci-dessouspeutentraîneruneélectrocu-
tion, un incendie et/ou de graves blessures.
Conservez toutes les mises en
garde et instructions pour réfé-
rence ultérieure.
Leterme«outilélectrique»danslesavertissements
faitréférenceàl’outilélectriquealimentéparlesecteur
(aveccordond’alimentation)ouàl’outilélectriquefonc-
tionnant sur batterie (sans cordon d’alimentation).
Consignes de sécurité pour
malaxeur sans l
1. Tenez l’outil des deux mains par les poignées
prévues.Toutepertedemaîtrisedel’outilcom-
porteunrisquedeblessure.
2.
Prévoyez une aération sufsante lorsque vous
mélangez des matériaux inammables an d’éviter
de créer une atmosphère dangereuse. Les vapeurs
émisespeuventêtreinhaléesous’enammerau
contactdesétincellesproduitesparl’outilélectrique.
3. Ne mélangez pas de nourriture. Les outils élec-
triquesetleursaccessoiresnesontpasconçus
pour préparer les aliments.
4. Assurez-vous que la cuve de mélange est pla-
cée dans une position stable et sûre. Une cuve
malsécuriséepeutbougerbrusquement.
5. Suivez les instructions et les avertissements
du matériau à mélanger. Le matériau à mélanger
peutêtredangereux.
6.
Ne mettez pas les mains dans la cuve de mélange,
ni n’insérez tout autre objet dedans pendant le
malaxage. Le contact avec la lame du malaxeur peut
entraînerdegravesblessurescorporelles.
7. Démarrez et arrêtez l’outil dans la cuve de
mélange uniquement. La lame du malaxeur peut
se tordre ou tourner de manière imprévisible.
8.
Assurez-vous qu’aucun liquide n’éclabousse le
logement de l’outil électrique. La pénétration de
liquidedansl’outilélectriquepeutl’endommager.
9. Utilisez les poignées auxiliaires, si l’outil en
possède.Toutepertedemaîtrisedel’outilpeut
présenterunrisquedeblessure.
10. Tenez l’outil électrique par des surfaces de
prise isolées lorsque vous effectuez une tâche
au cours de laquelle l’accessoire de coupe
peut entrer en contact avec des ls cachés.
Lecontactdel’accessoiredecoupeavecunl
sous tension peut transmettre du courant dans les
piècesmétalliquesexposéesdel’outilélectrique
et électrocuter l’utilisateur.

13 FRANÇAIS
11.
Assurez-vous toujours d’avoir une bonne
assise. Veillez à ce que personne ne se trouve
dessous lorsque vous utilisez l’outil en hauteur.
12. Tenez l’outil fermement.
13. Gardez vos mains à l’écart des pièces en
rotation.
14. N’abandonnez pas l’outil alors qu’il tourne.
Faites fonctionner l’outil uniquement lorsque
vous le tenez.
15. Certains matériaux contiennent des produits
chimiques susceptibles d’être toxiques.
Prenez les précautions nécessaires pour éviter
que la poussière dégagée lors du travail ne
soit inhalée et n’entre en contact avec la peau.
Suivez les consignes de sécurité du fabricant
du matériau.
16. Lors du malaxage, placez la cuve de mélange
sur une surface plane et stable.
CONSERVEZ CES
INSTRUCTIONS.
AVERTISSEMENT : NE vous laissez PAS
tromper (au l d’une utilisation répétée) par un
sentiment d’aisance et de familiarité avec le
produit, en négligeant le respect rigoureux des
consignes de sécurité qui accompagnent le pro-
duit en question. La MAUVAISE UTILISATION de
l’outil ou l’ignorance des consignes de sécurité
indiquées dans ce mode d’emploi peut entraîner
de graves blessures.
Consignes de sécurité importantes
pour la batterie
1. Avant d’utiliser la batterie, lisez toutes les
instructions et précautions relatives (1) au
chargeur de batterie, (2) à la batterie, et (3) au
produit utilisant la batterie.
2. Ne démontez pas la batterie.
3. Cessez immédiatement l’utilisation si le temps
de fonctionnement devient excessivement
court. Il y a risque de surchauffe, de brûlures,
voire d’explosion.
4. Si l’électrolyte pénètre dans vos yeux, rin-
cez-les à l’eau claire et consultez immédiate-
ment un médecin. Il y a risque de perte de la
vue.
5. Ne court-circuitez pas la batterie :
(1) Ne touchez les bornes avec aucun maté-
riau conducteur.
(2) Évitez de ranger la batterie dans un
conteneur avec d’autres objets métal-
liques, par exemple des clous, des pièces
de monnaie, etc.
(3) N’exposez pas la batterie à l’eau ou à la
pluie.
Un court-circuit de la batterie peut provoquer
une intensité de courant élevée, une sur-
chauffe, parfois des brûlures et même une
panne.
6. Ne rangez pas l’outil et la batterie dans un
endroit où la température risque d’atteindre ou
de dépasser 50 °C.
7. Ne jetez pas la batterie au feu même si elle est
sérieusement endommagée ou complètement
épuisée. La batterie peut exploser au contact
du feu.
8. Évitez de laisser tomber ou de cogner la
batterie.
9. N’utilisez pas la batterie si elle est
endommagée.
10. Les batteries au lithium-ion contenues sont
soumises aux exigences de la législation sur
les marchandises dangereuses.
Lors du transport commercial par des tierces
parties ou des transitaires par exemple, des exi-
gencesspéciquesenmatièred’étiquetageet
d’emballagedoiventêtrerespectées.
Pour la préparation de l’article expédié, il est
nécessaire de consulter un expert en matériau
dangereux. Veuillez également respecter les
réglementationsnationalessusceptiblesd’être
plus détaillées.
Recouvrez les contacts exposés avec du ruban
adhésifoudurubandemasquageetemballezla
batteriedetellesortequ’ellenepuissepasbouger
dans l’emballage.
11. Suivez les réglementations locales en matière
de mise au rebut des batteries.
12. Utilisez les batteries uniquement avec les
produits spéciés par Makita. L’insertion de
batteries dans des produits non conformes peut
provoquerunincendie,unechaleurexcessive,
uneexplosionouunefuitedel’électrolyte.
CONSERVEZ CES
INSTRUCTIONS.
ATTENTION : N’utilisez que des batteries
Makita d’origine.L’utilisationdebatteriesdemarque
autrequeMakitaoudebatteriesmodiéespeutpro-
voquerl’explosiondesbatteries,cequiprésenteun
risqued’incendie,dedommagesmatérielsetcorpo-
rels. Cela annulera également la garantie Makita pour
l’outil et le chargeur Makita.
Conseils pour assurer la durée
de vie optimale de la batterie
1. Chargez la batterie avant qu’elle ne soit com-
plètement déchargée. Arrêtez toujours l’outil
et rechargez la batterie quand vous remarquez
que la puissance de l’outil diminue.
2. Ne rechargez jamais une batterie complète-
ment chargée. La surcharge réduit la durée de
service de la batterie.
3. Chargez la batterie à une température
ambiante comprise entre 10 °C et 40 °C. Avant
de charger une batterie chaude, laissez-la
refroidir.
4. Rechargez la batterie si elle est restée inutili-
sée pendant une période prolongée (plus de
six mois).

14 FRANÇAIS
DESCRIPTION DU
FONCTIONNEMENT
ATTENTION : Assurez-vous toujours que
l’outil est hors tension et que sa batterie est
retirée avant de l’ajuster ou de vérier son
fonctionnement.
Insertion ou retrait de la batterie
ATTENTION : Éteignez toujours l’outil avant
de mettre en place ou de retirer la batterie.
ATTENTION : Tenez fermement l’outil et la
batterie lors de la mise en place ou du retrait de
la batterie. Si vous ne tenez pas fermement l’outil
et la batterie, ils peuvent vous glisser des mains, et
s’abîmerouvousblesser.
ATTENTION : N’utilisez pas cet outil avec
l’adaptateur de batterie. Si vous connectez l’adapta-
teur de batterie à l’outil, le couvercle de la batterie ne
pourra pas fermer. Utiliser l’outil avec le couvercle de
labatterieouvertprésenteunrisquedeblessure.
Ouvrezlecouvercledelabatterieenappuyantsurle
bouton dessus.
►Fig.1: 1. Bouton 2. Couvercle de la batterie
Pour retirer la batterie, faites-la glisser hors de l’outil
tout en faisant glisser le bouton à l’avant de la batterie.
►Fig.2: 1.Voyantrouge2. Bouton 3. Batterie
Pour mettre en place la batterie, alignez la languette sur
la batterie avec la rainure sur le compartiment et insé-
rez-la.Insérez-laàfondjusqu’àcequ’unlégerdéclic
sefasseentendre.Silevoyantrougesurledessusdu
boutonestvisible,celasigniequ’ellen’estpasbien
verrouillée.
Après avoir installé la batterie, refermez bien le cou-
vercle de la batterie.
ATTENTION : Insérez toujours complètement
la batterie jusqu’à ce que le voyant rouge ne soit
plus visible. Sinon, elle pourrait tomber acciden-
tellementdel’outil,aurisquedevousblesseroude
blesserquelqu’unsetrouvantprèsdevous.
ATTENTION : N’insérez pas la batterie de
force.Sielleneglissepasfacilement,c’estquevous
ne l’insérez pas correctement.
Indication de la charge restante de
la batterie
Uniquement pour les batteries avec voyant lumineux
►Fig.3: 1. Témoins 2.Boutondevérication
Appuyezsurleboutondevéricationsurlabatterie
pourindiquerlachargerestantedelabatterie.Les
témoinss’allumentpendantquelquessecondes.
Témoins Charge
restante
Allumé Éteint Clignotant
75 % à 100 %
50 % à 75 %
25 % à 50 %
0 % à 25 %
Chargez la
batterie.
Anomalie
possible
de la batterie.
NOTE : Selon les conditions d’utilisation et la tem-
pératureambiante,l’indicationpeutêtrelégèrement
différente de la capacité réelle.
Système de protection de l’outil/la
batterie
L’outilestéquipéd’unsystèmedeprotectiondel’outil/la
batterie.Cesystèmecoupeautomatiquementl’alimen-
tation vers le moteur pour prolonger la durée de vie de
l’outil et de la batterie. Si l’outil ou la batterie se trouve
dans l’une des situations suivantes, l’outil cessera
automatiquementdefonctionner.
Protection contre la surcharge
Lorsquel’outiloulabatterieestutiliséd’unemanière
provoquantunappeldecourantanormalementélevé,
l’outils’arrêteautomatiquementsansindication.Dans
cecas,éteignezl’outiletarrêtezlatâcheayantpro-
voquélasurchargedel’outil.Puisrallumezl’outilpour
reprendrelatâche.
Protection contre la surchauffe
En cas de surchauffe de l’outil ou de la batterie, l’outil
s’arrêteautomatiquement.Danscecas,laissezl’outilet
la batterie refroidir avant de rallumer l’outil.
Protection contre la décharge totale
de la batterie
Lorsquelachargedelabatterieestinsufsante,l’outil
s’arrêteautomatiquement.Danscecas,retirezlabatte-
rie de l’outil et chargez-la.

15 FRANÇAIS
Fonctionnement de la gâchette
ATTENTION : Avant d’insérer la batterie dans
l’outil, vériez toujours que la gâchette fonc-
tionne bien et revient en position d’arrêt lorsque
vous la relâchez.
ATTENTION : Vous pouvez verrouiller l’in-
terrupteur sur la position « Marche » pour plus
de confort en cas d’utilisation prolongée. Soyez
prudent lorsque vous verrouillez l’outil sur la
position « Marche », et gardez une prise ferme
sur l’outil.
ATTENTION : N’installez pas la batterie alors
que le bouton de verrouillage est enclenché.
ATTENTION : Lorsque vous n’utilisez pas
l’outil, appuyez sur le côté du bouton de
verrouillage de la gâchette pour verrouiller la
gâchette en position d’arrêt.
►Fig.4: 1.Boutondeverrouillagedelagâchette
►Fig.5: 1.Gâchette2. Bouton de verrouillage
3.Boutondeverrouillagedelagâchette
Pour éviter tout déclenchement accidentel de la
gâchette,l’outilestmunid’unboutondeverrouillage
delagâchette.Pourdémarrerl’outil,appuyezsurle
côté A ( )duboutondeverrouillagedelagâchette
etenclenchezlagâchette.Lavitessedel’outilaug-
menteàmesurequevousaugmentezlapressionsur
lagâchette.Pourl’arrêter,relâchezlagâchette.Après
utilisation,appuyezsurlecôtéB( ) du bouton de
verrouillagedelagâchette.
Pour un fonctionnement en continu, enfoncez le bouton
deverrouillagetoutenenclenchantlagâchette,puis
relâchez-la.Pourarrêterl’outil,enclenchezcomplète-
mentlagâchette,puisrelâchez-la.
Changement de vitesse
REMARQUE : N’utilisez le bouton de change-
ment de vitesse qu’une fois l’outil complètement
arrêté. Si vous changez la vitesse de l’outil avant
l’arrêtdel’outil,vousrisquezdel’endommager.
REMARQUE : Mettez toujours le bouton de
changement de vitesse soigneusement sur la
bonne position. En utilisant l’outil avec le bouton de
changement de vitesse placé à mi-chemin entre la
position1etlaposition2,vousrisquezd’endomma-
ger l’outil.
REMARQUE : Si la vitesse de rotation diminue
considérablement pendant le fonctionnement en
mode grande vitesse, arrêtez l’outil et réglez le
mode sur le mode basse vitesse. Autrement, cela
pourraitprovoquerlasurchargedumoteuretentraî-
nerundysfonctionnementouunincendie.
Deuxplagesdevitessepeuventêtreprésélectionnées
avec le bouton de changement de vitesse.
Pour changer la vitesse, tournez le bouton de change-
mentdevitessedesortequel’indexsoittournéversla
position 1 pour la basse vitesse ou la position 2 pour la
grande vitesse.
►Fig.6: 1. Index 2. Bouton de changement de vitesse
Fonction de prévention de
redémarrage accidentel
Si vous installez la batterie tout en enclenchant ou
enverrouillantlagâchette,l’outilnedémarrerapas.
Pourdémarrerl’outil,relâchezlagâchette,puis
enclenchez-la.
Fonction électronique
L’outilestdotédefonctionsélectroniquespourenfacili-
ter le fonctionnement.
• Démarrage progressif
La fonction de démarrage progressif réduit le
choc du démarrage et permet à l’outil de démarrer
doucement.
ASSEMBLAGE
ATTENTION : Assurez-vous toujours que
l’outil est hors tension et que sa batterie est reti-
rée avant d’effectuer toute tâche dessus.
Installation du couvercle avant et de
la poignée latérale
ATTENTION : Serrez fermement la poignée
latérale. Autrement, le couvercle avant pourrait tom-
beretprovoquerdesblessures.
►Fig.7: 1. Couvercle avant 2. Poignée latérale
Fixez le couvercle avant sur l’outil et vissez solidement
la poignée latérale sur l’outil.
Lapoignéelatéralepeutêtreinstalléedesdeuxcôtés
de l’outil.
Installation de l’axe
Accessoire en option
Pour le DUT130
1. Serrez l’axe dans le porte-axe.
►Fig.8: 1. Axe 2. Porte-axe
2. Serrez l’axe avec une clé de tout en tenant le
porte-axe avec une autre clé de.
►Fig.9: 1. Axe 2. Porte-axe
Pour le DUT131
1. Insérez l’axe dans le mandrin en l’insérant à fond.
►Fig.10: 1. Axe 2. Mandrin
2. Serrez le mandrin manuellement, puis placez la
clédemandrindanschacundestroisoricesetser-
rez-la dans le sens des aiguilles d’une montre. Assurez-
vousdeserrerlaclédemandrinsurlestroisoricesde
manière uniforme.
►Fig.11: 1. Clé de mandrin 2. Mandrin
Pour retirer l’axe, tournez la clé de mandrin dans le
sens inverse des aiguilles d’une montre sur un des
orices,puisdesserrezmanuellementlemandrin.

16 FRANÇAIS
Pose de la lame de malaxage
Accessoire en option
Fixez la lame de malaxage sur le haut de l’axe, puis
maintenez-la en place avec le boulon hexagonal.
►Fig.12: 1. Lame de malaxage 2. Axe 3. Boulon
hexagonal
REMARQUE : Veillez à xer la lame de malaxage
avec le repère « UP » tourné vers l’outil.
►Fig.13: 1. Repère
Crochet
Accessoire en option
ATTENTION : Retirez toujours la batterie
lorsque l’outil est suspendu par son crochet.
ATTENTION : N’accrochez jamais l’outil dans
un emplacement élevé ou sur une surface poten-
tiellement instable.
►Fig.14: 1. Rainure 2. Crochet 3. Vis
Lecrochetestpratiquepoursuspendreprovisoirement
l’outil. Il s’installe d’un côté comme de l’autre de l’outil.
Pour installer le crochet, insérez-le dans une rai-
nure du carter de l’outil sur l’un des deux côtés, puis
xez-leavecunevis.Pourleretirer,desserrezlaviset
enlevez-le.
Installation ou retrait du porte-axe
Accessoire en option
Pour le DUT131
1. Insérez la clé hexagonale dans le mandrin, puis
desserrez le mandrin à l’aide de la clé hexagonale tout
en tenant la tige avec la clé.
►Fig.15: 1. Clé hexagonale 2. Mandrin 3. Clé
2. Serrez le porte-axe avec une clé de tout en tenant
la tige avec une autre clé de.
►Fig.16: 1. Porte-axe 2. Clé
Pour retirer le porte-axe, effectuez la procédure de pose
en sens inverse.
UTILISATION
ATTENTION : Ne mélangez pas de matériaux
inammables, ni n’utilisez l’outil à proximité de
matériaux inammables comme de la peinture
avec du diluant utilisé comme solvant. Vous ris-
queriezautrementdevousblesser.
ATTENTION : Ne mélangez pas de matériau à
viscosité élevée comme du mortier ou de la colle
dans le mode grande vitesse.Vousrisqueriezde
perdrelamaîtrisedel’outiletdevousblesser.
REMARQUE : Lorsque vous mélangez le maté-
riau alors que la lame de malaxage otte hors du
matériau, prenez garde de ne pas asperger de
matériau autour de vous.
1. Sélectionnez la grande ou basse vitesse en fonc-
tion du matériau à mélanger.
2. Tenez fermement la poignée arrière de l’outil
d’une main et la poignée de l’autre main, placez la lame
de malaxage complètement sous le matériau et mettez
l’outilsoustensionaprèsvousêtreassurédelasécurité
du chantier.
3. Déplacez la lame de malaxage de haut en bas
pendantlemalaxagedesortequel’ensembledumaté-
riaupuisseêtremélangé.
4. Lorsquelemalaxageestterminé,mettezl’outil
horstension,assurez-vousdel’arrêtcompletdelalame
de malaxage, puis sortez-la de la cuve de mélange.
ENTRETIEN
ATTENTION : Assurez-vous toujours que
l’outil est hors tension et que la batterie est reti-
rée avant d’y effectuer tout travail d’inspection ou
d’entretien.
REMARQUE : N’utilisez jamais d’essence, ben-
zine, diluant, alcool ou autre produit similaire.
Cela risquerait de provoquer la décoloration, la
déformation ou la ssuration de l’outil.
Pour assurer la SÉCURITÉ et la FIABILITÉ du produit,
toute réparation, tout travail d’entretien ou de réglage
doiventêtreeffectuésparuncentred’entretienMakita
agréé, avec des pièces de rechange Makita.
ACCESSOIRES EN
OPTION
ATTENTION : Ces accessoires ou pièces
complémentaires sont recommandés pour l’utili-
sation avec l’outil Makita spécié dans ce mode
d’emploi. L’utilisation de tout autre accessoire ou
piècecomplémentairepeutcomporterunrisquede
blessure. N’utilisez les accessoires ou pièces complé-
mentairesqu’auxnsauxquellesilsontétéconçus.
Pour obtenir plus de détails sur ces accessoires,
contactez votre centre d’entretien local Makita.
• Lame de malaxage
• Axe
• Porte-axe
• Crochet
• Batterie et chargeur Makita d’origine
NOTE :Ilsepeutquecertainsélémentsdelaliste
soient compris dans l’emballage de l’outil en tant
qu’accessoiresstandard.Ilspeuventvarierd’unpays
à l’autre.

17 DEUTSCH
DEUTSCH (Original-Anleitung)
TECHNISCHE DATEN
Modell: DUT130 DUT131
Leerlaufdrehzahl Hohe Drehzahl 0 - 1.300 min-1
Niedrige Drehzahl 0 - 350 min-1
Maximaler Rührblattdurchmesser 165 mm
Gesamtlänge (ohne Welle und Rührblatt) 320 mm 307 mm
Nennspannung 18 V Gleichstrom
Nettogewicht 2,5 - 2,8 kg 2,7 - 3,0 kg
• Wir behalten uns vor, Änderungen der technischen Daten im Zuge der Entwicklung und des technischen
Fortschritts ohne vorherige Ankündigung vorzunehmen.
• Die technischen Daten und der Akku können von Land zu Land unterschiedlich sein.
• Das Gewicht kann abhängig von dem Aufsatz (den Aufsätzen), einschließlich des Akkus, unterschiedlich
sein.DieleichtesteunddieschwersteKombination,gemäßdemEPTA-Verfahren01/2014,sindinderTabelle
angegeben.
Zutreffende Akkus und Ladegeräte
Akku BL1815N / BL1820 / BL1820B / BL1830 / BL1830B / BL1840 /
BL1840B / BL1850 / BL1850B / BL1860B
Ladegerät DC18RC / DC18RD / DC18RE / DC18SD / DC18SE / DC18SF
• EinigederobenaufgelistetenAkkusundLadegerätesindjenachIhremWohngebieteventuellnichterhältlich.
WARNUNG: Verwenden Sie nur die oben aufgeführten Akkus und Ladegeräte. Bei Verwendung irgend-
welcher anderer Akkus und Ladegeräte besteht Verletzungs- und/oder Brandgefahr.
Symbole
Nachfolgend werden die für das Gerät verwende-
tenSymbolebeschrieben.MachenSiesichvorder
Benutzung mit ihrer Bedeutung vertraut.
Betriebsanleitung lesen.
Benutzen Sie das Werkzeug nicht bei
Regen.
Reinigen Sie das Werkzeug nicht mit
Wasser.
Ni-MH
Li-ion
Nur für EU-Länder
Werfen Sie Elektrogeräte oder Akkus nicht
in den Hausmüll!
Unter Einhaltung der Europäischen
Richtlinie über Elektro- und Elektronik-
Altgeräte, Batterien, Akkus sowie ver-
brauchte Batterien und Akkus und ihre
Umsetzung gemäß den Landesgesetzen
müssen Elektrogeräte und Batterien bzw.
Akkus, die das Ende ihrer Lebensdauer
erreicht haben, getrennt gesammelt
undeinerumweltgerechtenRecycling-
Einrichtung zugeführt werden.
Vorgesehene Verwendung
Das Werkzeug ist zum Mischen von Wandmaterial usw.
(außer brennbaren Materialien) vorgesehen.
Geräusch
TypischerA-bewerteterGeräuschpegelermitteltgemäß
EN60745-2-1:
Modell DUT130
Schalldruckpegel (LpA): 74 dB (A)
Messunsicherheit(K):3dB(A)
Modell DUT131
Schalldruckpegel (LpA): 74 dB (A)
Messunsicherheit(K):3dB(A)
Der Geräuschpegel kann während des Betriebs 80 dB (A)
überschreiten.
HINWEIS: Der (Die) angegebene(n)
Schallemissionswert(e) wurde(n) im Einklang mit der
Standardprüfmethode gemessen und kann (können)
für den Vergleich zwischen Werkzeugen herangezo-
gen werden.
HINWEIS: Der (Die) angegebene(n)
Schallemissionswert(e) kann (können) auch für eine
Vorbewertung des Gefährdungsgrads verwendet
werden.

18 DEUTSCH
WARNUNG: Einen Gehörschutz tragen.
WARNUNG: Die Schallemission während der
tatsächlichen Benutzung des Elektrowerkzeugs
kann je nach der Benutzungsweise des
Werkzeugs, und speziell je nach der Art des bear-
beiteten Werkstücks, von dem (den) angegebenen
Wert(en) abweichen.
WARNUNG: Identizieren Sie
Sicherheitsmaßnahmen zum Schutz des
Benutzers anhand einer Schätzung des
Gefährdungsgrads unter den tatsäch-
lichen Benutzungsbedingungen (unter
Berücksichtigung aller Phasen des Arbeitszyklus,
wie z. B. Ausschalt- und Leerlaufzeiten des
Werkzeugs zusätzlich zur Betriebszeit).
Schwingungen
Schwingungsgesamtwert (Drei-Achsen-Vektorsumme)
ermittelt gemäß EN60745-2-1:
Modell DUT130
Arbeitsmodus: Leerlaufbetrieb
Schwingungsemission (ah): 2,5 m/s2oder weniger
Messunsicherheit(K):1,5m/s2
Modell DUT131
Arbeitsmodus: Leerlaufbetrieb
Schwingungsemission (ah): 2,5 m/s2oder weniger
Messunsicherheit(K):1,5m/s2
HINWEIS: Der (Die) angegebene(n)
Vibrationsgesamtwert(e) wurde(n) im Einklang mit der
Standardprüfmethode gemessen und kann (können)
für den Vergleich zwischen Werkzeugen herangezo-
gen werden.
HINWEIS: Der (Die) angegebene(n)
Vibrationsgesamtwert(e) kann (können) auch für eine
Vorbewertung des Gefährdungsgrads verwendet
werden.
WARNUNG: Die Vibrationsemission
während der tatsächlichen Benutzung
des Elektrowerkzeugs kann je nach der
Benutzungsweise des Werkzeugs, und speziell
je nach der Art des bearbeiteten Werkstücks,
von dem (den) angegebenen Emissionswert(en)
abweichen.
WARNUNG: Identizieren Sie
Sicherheitsmaßnahmen zum Schutz des
Benutzers anhand einer Schätzung des
Gefährdungsgrads unter den tatsäch-
lichen Benutzungsbedingungen (unter
Berücksichtigung aller Phasen des Arbeitszyklus,
wie z. B. Ausschalt- und Leerlaufzeiten des
Werkzeugs zusätzlich zur Betriebszeit).
EG-Konformitätserklärung
Nur für europäische Länder
DieEG-KonformitätserklärungistalsAnhangAindieser
Bedienungsanleitung enthalten.
SICHERHEITSWARNUNGEN
Allgemeine Sicherheitswarnungen
für Elektrowerkzeuge
WARNUNG: Lesen Sie alle mit die-
sem Elektrowerkzeug gelieferten
Sicherheitswarnungen, Anweisungen,
Abbildungen und technischen Daten durch. Eine
Missachtung der unten aufgeführten Anweisungen
kann zu einem elektrischen Schlag, Brand und/oder
schweren Verletzungen führen.
Bewahren Sie alle Warnungen
und Anweisungen für spätere
Bezugnahme auf.
Der Ausdruck „Elektrowerkzeug“ in den Warnhinweisen
beziehtsichaufIhrmitNetzstrom(mitKabel)oderAkku
(ohneKabel)betriebenesElektrowerkzeug.
Sicherheitswarnungen für
Akku-Rührwerk
1. Halten Sie das Werkzeug mit beiden Händen
an den vorgesehenen Handgriffen fest.
VerlustderKontrollekannPersonenschäden
verursachen.
2. Sorgen Sie beim Mischen von brennbaren
Materialien für ausreichende Belüftung, um die
Entstehung einer gefährlichen Atmosphäre zu
vermeiden. Anderenfalls können die entstehen-
den Dämpfe eingeatmet oder von den Funken, die
das Elektrowerkzeug erzeugt, entzündet werden.
3. Verrühren Sie keine Lebensmittel.
Elektrowerkzeuge und ihre Zubehörteile sind nicht
für die Verarbeitung von Lebensmitteln ausgelegt.
4. Gewährleisten Sie, dass der Mischbehälter
sich an einer festen und sicheren Position
bendet. Ein Behälter, der nicht ordnungsgemäß
gesichert ist, kann sich unerwartet bewegen.
5. Befolgen Sie die Anweisungen und Warnungen
für das zu mischende Material. Das zu
mischende Material kann gesundheitsschädlich
sein.
6. Greifen Sie während des Mischens nicht mit
Ihren Händen in den Mischbehälter hinein, und
stecken Sie auch keine anderen Gegenstände
hinein.KontaktmitdemRührblattkannzuschwe-
ren Personenschäden führen.
7. Starten und stoppen Sie das Werkzeug nur im
Mischbehälter. Das Rührblatt könnte sonst ver-
bogen werden oder sich in unkontrollierter Weise
drehen.
8. Stellen Sie sicher, dass keine Flüssigkeit
gegen das Gehäuse des Elektrowerkzeugs
spritzt. In das Elektrowerkzeug eingedrun-
gene Flüssigkeit kann eine Beschädigung des
Werkzeugs verursachen.
9. Benutzen Sie Zusatzgriffe, sofern sie mit dem
Werkzeug geliefert wurden.VerlustderKontrolle
kann Personenschäden verursachen.

19 DEUTSCH
10.
Halten Sie das Elektrowerkzeug an den iso-
lierten Griffächen, wenn Sie Arbeiten ausfüh-
ren, bei denen die Gefahr besteht, dass das
Schneidzubehör verborgene Kabel kontaktiert. Bei
KontaktmiteinemStromführendenKabelkönnendie
freiliegenden Metallteile des Elektrowerkzeugs eben-
falls Strom führend werden, so dass der Benutzer
einen elektrischen Schlag erleiden kann.
11. Achten Sie stets auf sicheren Stand.
Vergewissern Sie sich bei Einsatz des
Werkzeugs an hochgelegenen Arbeitsplätzen,
dass sich keine Personen darunter aufhalten.
12. Halten Sie das Werkzeug mit festem Griff.
13.
Halten Sie Ihre Hände von rotierenden Teilen fern.
14. Lassen Sie das Werkzeug nicht unbeaufsich-
tigt laufen. Betreiben Sie das Werkzeug nur im
handgehaltenen Zustand.
15. Manche Materialien können giftige
Chemikalien enthalten. Treffen Sie
Vorsichtsmaßnahmen, um das Einatmen von
Arbeitsstaub und Hautkontakt zu verhüten.
Befolgen Sie die Sicherheitswarnungen des
Materiallieferanten.
16. Stellen Sie den Mischbehälter bei der
Durchführung der Rührarbeit auf eine ebene
und stabile Oberäche.
DIESE ANWEISUNGEN
AUFBEWAHREN.
WARNUNG:
Lassen Sie sich NICHT durch
Bequemlichkeit oder Vertrautheit mit dem Produkt
(durch wiederholten Gebrauch erworben) von der strik-
ten Einhaltung der Sicherheitsregeln für das vorliegende
Produkt abhalten. MISSBRAUCH oder Missachtung
der Sicherheitsvorschriften in dieser Anleitung können
schwere Personenschäden verursachen.
Wichtige Sicherheitsanweisungen
für Akku
1. Lesen Sie vor der Benutzung des Akkus alle
Anweisungen und Warnhinweise, die an (1)
Ladegerät, (2) Akku und (3) Akkuwerkzeug
angebracht sind.
2. Unterlassen Sie ein Zerlegen des Akkus.
3. Falls die Betriebszeit beträchtlich kürzer
geworden ist, stellen Sie den Betrieb sofort
ein. Anderenfalls besteht die Gefahr von
Überhitzung, möglichen Verbrennungen und
sogar einer Explosion.
4. Falls Elektrolyt in Ihre Augen gelangt, waschen
Sie sie mit sauberem Wasser aus, und
begeben Sie sich unverzüglich in ärztliche
Behandlung. Anderenfalls können Sie Ihre
Sehkraft verlieren.
5. Der Akku darf nicht kurzgeschlossen werden:
(1) Die Kontakte dürfen nicht mit leitfähigem
Material berührt werden.
(2)
Lagern Sie den Akku nicht in einem Behälter
zusammen mit anderen Metallgegenständen,
wie z. B. Nägel, Münzen usw.
(3) Setzen Sie den Akku weder Wasser noch
Regen aus.
Ein Kurzschluss des Akkus verursacht star-
ken Stromuss, der Überhitzung, mögliche
Verbrennungen und einen Defekt zur Folge
haben kann.
6. Lagern Sie das Werkzeug und den Akku nicht
an Orten, an denen die Temperatur 50 °C errei-
chen oder überschreiten kann.
7. Versuchen Sie niemals, den Akku zu verbren-
nen, selbst wenn er stark beschädigt oder
vollkommen verbraucht ist. Der Akku kann im
Feuer explodieren.
8. Achten Sie darauf, dass der Akku nicht fallen
gelassen oder Stößen ausgesetzt wird.
9. Benutzen Sie keine beschädigten Akkus.
10. Die enthaltenen Lithium-Ionen-Akkus unter-
liegen den Anforderungen der Gefahrengut-
Gesetzgebung.
Für kommerzielle Transporte, z. B. durch
Dritte oder Spediteure, müssen besondere
Anforderungen zu Verpackung und Etikettierung
beachtet werden.
Zur Vorbereitung des zu transportierenden
Artikels ist eine Beratung durch einen Experten für
Gefahrengut erforderlich. Bitte beachten Sie mög-
licherweise ausführlichere nationale Vorschriften.
ÜberklebenoderverdeckenSieoffeneKontakte,
und verpacken Sie den Akku so, dass er sich in
der Verpackung nicht umher bewegen kann.
11. Befolgen Sie die örtlichen Bestimmungen
bezüglich der Entsorgung von Akkus.
12. Verwenden Sie die Akkus nur mit den von
Makita angegebenen Produkten. Das Einsetzen
der Akkus in nicht konforme Produkte kann zu
einem Brand, übermäßiger Hitzebildung, einer
ExplosionoderAuslaufenvonElektrolytführen.
DIESE ANWEISUNGEN
AUFBEWAHREN.
VORSICHT: Verwenden Sie nur Original-
Makita-Akkus. Die Verwendung von Nicht-Original-
Makita-Akkus oder von Akkus, die abgeändert
worden sind, kann zum Bersten des Akkus und
daraus resultierenden Bränden, Personenschäden
und Beschädigung führen. Außerdem wird dadurch
die Makita-Garantie für das Makita-Werkzeug und
-Ladegerät ungültig.
Hinweise zur Aufrechterhaltung
der maximalen
Akku-Nutzungsdauer
1. Laden Sie den Akku, bevor er vollkommen
erschöpft ist. Schalten Sie das Werkzeug stets
aus, und laden Sie den Akku, wenn Sie ein
Nachlassen der Werkzeugleistung feststellen.
2. Unterlassen Sie erneutes Laden eines voll
aufgeladenen Akkus. Überladen führt zu einer
Verkürzung der Nutzungsdauer des Akkus.
3. Laden Sie den Akku bei Raumtemperatur
zwischen 10 – 40 °C. Lassen Sie einen heißen
Akku abkühlen, bevor Sie ihn laden.
4. Der Akku muss geladen werden, wenn er lange
Zeit (länger als sechs Monate) nicht benutzt
wird.

20 DEUTSCH
FUNKTIONSBESCHREIBUNG
VORSICHT: Vergewissern Sie sich vor
der Durchführung von Einstellungen oder
Funktionsprüfungen des Werkzeugs stets, dass
das Werkzeug ausgeschaltet und der Akku abge-
nommen ist.
Anbringen und Abnehmen des
Akkus
VORSICHT: Schalten Sie das Werkzeug
stets aus, bevor Sie den Akku anbringen oder
abnehmen.
VORSICHT: Halten Sie das Werkzeug und
den Akku beim Anbringen oder Abnehmen
des Akkus sicher fest. Wenn Sie das Werkzeug
und den Akku nicht sicher festhalten, können
sie Ihnen aus der Hand rutschen, was zu einer
Beschädigung des Werkzeugs und des Akkus und zu
Körperverletzungenführenkann.
VORSICHT: Benutzen Sie dieses Werkzeug
nicht mit dem Akku-Adapter. Wenn Sie den
Akku-Adapter an das Werkzeug anschließen, kann
die Akkuabdeckung nicht geschlossen werden,
und die Benutzung des Werkzeugs bei offener
Akkuabdeckung kann eine Verletzung verursachen.
ÖffnenSiedieAkkuabdeckung,währendSiedenKnopf
an der Akkuabdeckung drücken.
►Abb.1: 1.Knopf2. Akkuabdeckung
Ziehen Sie den Akku zum Abnehmen vom Werkzeug
ab,währendSiedenKnopfanderVorderseitedes
Akkus verschieben.
►Abb.2: 1. Rote Anzeige 2.Knopf3. Akku
Richten Sie zum Anbringen des Akkus dessen
Führungsfeder auf die Nut im Gehäuse aus, und schie-
ben Sie den Akku hinein. Schieben Sie ihn vollständig
ein,bisermiteinemhörbarenKlickeneinrastet.Falls
dieroteAnzeigeanderOberseitedesKnopfessichtbar
ist, ist der Akku nicht vollständig verriegelt.
Schließen Sie die Akkuabdeckung sicher, nachdem Sie
den Akku eingesetzt haben.
VORSICHT: Schieben Sie den Akku stets bis
zum Anschlag ein, bis die rote Anzeige nicht mehr
sichtbar ist. Anderenfalls kann er aus dem Werkzeug
herausfallen und Sie oder umstehende Personen
verletzen.
VORSICHT: Unterlassen Sie
Gewaltanwendung beim Anbringen des Akkus.
Falls der Akku nicht reibungslos hineingleitet, ist er
nicht richtig ausgerichtet.
Anzeigen der Akku-Restkapazität
Nur für Akkus mit Anzeige
►Abb.3: 1. Anzeigelampen 2. Prüftaste
Drücken Sie die Prüftaste am Akku, um die Akku-
Restkapazität anzuzeigen. Die Anzeigelampen leuchten
wenige Sekunden lang auf.
Anzeigelampen Restkapazität
Erleuchtet Aus Blinkend
75% bis
100%
50% bis 75%
25% bis 50%
0% bis 25%
Den Akku
auaden.
Möglicherweise
liegt eine
Funktionsstörung
im Akku vor.
HINWEIS: Abhängig von den
Benutzungsbedingungen und der
Umgebungstemperatur kann die Anzeige geringfügig
vondertatsächlichenKapazitätabweichen.
Werkzeug/Akku-Schutzsystem
Das Werkzeug ist mit einem Werkzeug/Akku-
Schutzsystemausgestattet.DiesesSystemschaltetdie
Stromversorgung des Motors automatisch ab, um die
Lebensdauer von Werkzeug und Akku zu verlängern.
Das Werkzeug bleibt während des Betriebs automa-
tisch stehen, wenn das Werkzeug oder der Akku einer
der folgenden Bedingungen unterliegt:
Überlastschutz
Wird das Werkzeug oder der Akku auf eine Weise
benutzt, die eine ungewöhnlich hohe Stromaufnahme
bewirkt,bleibtdasWerkzeugohnejeglicheAnzeige
automatisch stehen. Schalten Sie in dieser Situation
das Werkzeug aus, und brechen Sie die Arbeit ab,
die eine Überlastung des Werkzeugs verursacht hat.
Schalten Sie dann das Werkzeug wieder ein, um es neu
zu starten.
Überhitzungsschutz
Wenn das Werkzeug oder der Akku überhitzt wird,
bleibt das Werkzeug automatisch stehen. Lassen Sie
das Werkzeug und den Akku in diesem Fall abkühlen,
bevor Sie das Werkzeug wieder einschalten.
Überentladungsschutz
Wenn die Akkukapazität unzureichend wird, bleibt das
Werkzeug automatisch stehen. Nehmen Sie in diesem
Fall den Akku vom Werkzeug ab, und laden Sie ihn auf.
Other manuals for DUT130
5
This manual suits for next models
3
Table of contents
Languages:
Other Makita Mixer manuals

Makita
Makita UT2204 User manual

Makita
Makita UT001G User manual

Makita
Makita UT 1200 User manual

Makita
Makita UT1305 Manual

Makita
Makita M6600 User manual

Makita
Makita UT 1401 User manual

Makita
Makita M6600 User manual

Makita
Makita UT1305 User manual

Makita
Makita UT2204 User manual

Makita
Makita UT 1200 User manual

Makita
Makita XTU02 User manual

Makita
Makita UT2204 User manual

Makita
Makita UT1301 User manual

Makita
Makita UT1305 User manual

Makita
Makita UT1305 User manual

Makita
Makita UT2204 User manual

Makita
Makita UT001G User manual

Makita
Makita UT001G User manual

Makita
Makita DUT130 User manual

Makita
Makita DUT130 User manual