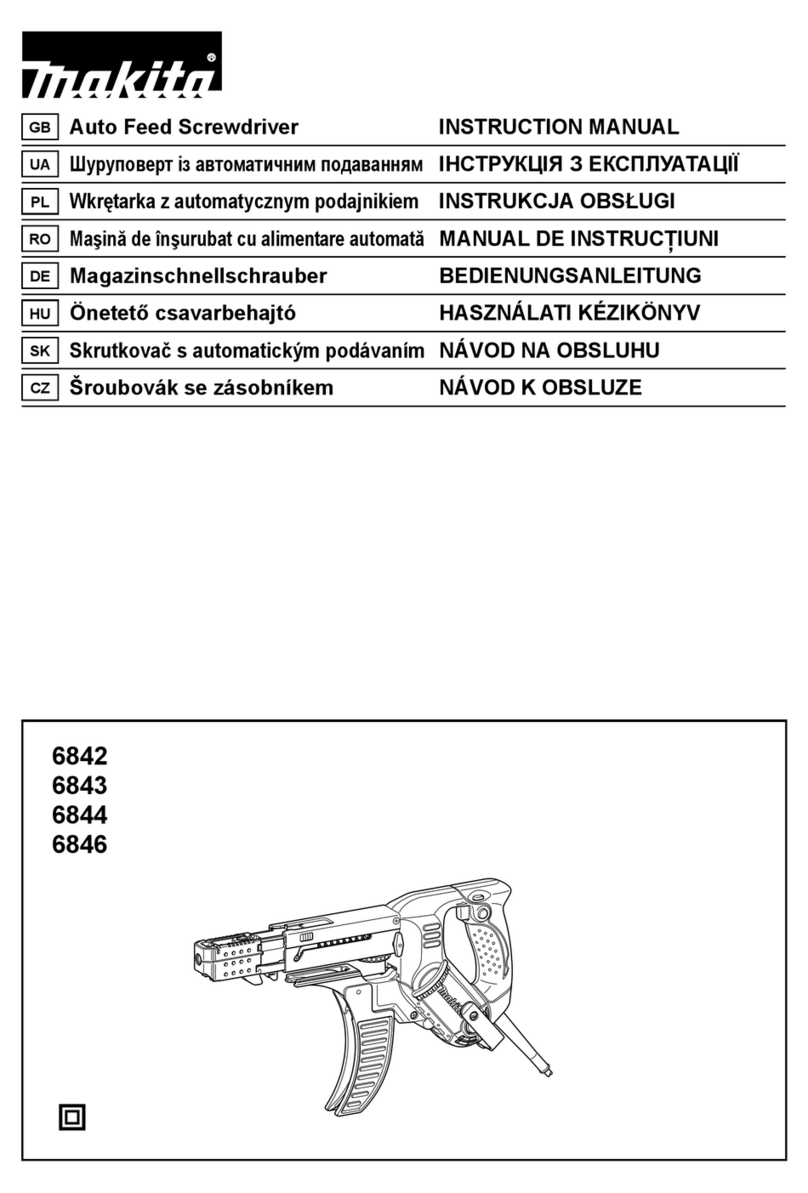
Makita DFR551 User manual

DFR452
DFR551
EN Cordless Auto Feed
Screwdriver INSTRUCTION MANUAL 6
SL Brezžični izvijač s
samodejnim podajanjem NAVODILA ZA UPORABO 13
SQ Kaçavidë vetëmbushëse me
bateri MANUALI I PËRDORIMIT 20
BG Акумулаторна отвертка с
автоматично подаване РЪКОВОДСТВО ЗА
ЕКСПЛОАТАЦИЯ 27
HR Bežični odvijač s
automatskim punjenjem PRIRUČNIK S UPUTAMA 35
МК Безжичен шрафцигер со
автоматско напојување УПАТСТВО ЗА УПОТРЕБА 42
SR Бежични одвијач за
аутоматско пуњење УПУТСТВО ЗА УПОТРЕБУ 50
RO
Mașină de înșurubat cu acumulator,
cu alimentare automată
MANUAL DE INSTRUCŢIUNI 57
UK Бездротовий шуруповерт з
автоматичною подачею ІНСТРУКЦІЯ З
ЕКСПЛУАТАЦІЇ 64
RU Аккумуляторный
магазинный шуруповерт РУКОВОДСТВО ПО
ЭКСПЛУАТАЦИИ 72

2
1
2
3
Fig.1
1
Fig.2
1
2
Fig.3
1
23
4
Fig.4
1
23
4
Fig.5
1
2
34
5A
B
Fig.6
12
Fig.7
1
A
B
1
Fig.8

3
1
2
Fig.9
1
2
Fig.10
1
2
3
Fig.11
1
3
5
2
4
Fig.12
1
2
Fig.13
Fig.14

4
1
2
Fig.15
1
1
2
3
2
3
Fig.16
1
Fig.17
Fig.18
1
2
Fig.19
1
2
Fig.20
Fig.21
1 2
3
Fig.22

5
B
1
Fig.23
1
2
Fig.24
213
Fig.25

6ENGLISH
ENGLISH (Original instructions)
SPECIFICATIONS
Model: DFR452 DFR551
Screw strip
ø3.5 mm x 20 mm - ø4.2 mm x 41 mm ø3.5 mm x 25 mm - ø4.2 mm x 55 mm
No load speed (RPM) 0 - 6,000 min-1
Overall length 360 mm 396 mm
Rated voltage D.C. 18 V
Net weight 1.9 - 2.2 kg
• Duetoourcontinuingprogramofresearchanddevelopment,thespecicationshereinaresubjecttochange
without notice.
• Specicationsmaydierfromcountrytocountry.
• Theweightmaydierdependingontheattachment(s),includingthebatterycartridge.Thelightestandheavi-
estcombination,accordingtoEPTA-Procedure01/2014,areshowninthetable.
Applicable battery cartridge and charger
Batterycartridge BL1815N/BL1820B/BL1830B/BL1840B/BL1850B/BL1860B
Charger DC18RC/DC18RD/DC18RE/DC18SD/DC18SE/DC18SF/
DC18SH
• Someofthebatterycartridgesandchargerslistedabovemaynotbeavailabledependingonyourregionof
residence.
WARNING: Only use the battery cartridges and chargers listed above.Useofanyotherbatterycartridges
andchargersmaycauseinjuryand/orre.
Intended use
The tool is intended for screw driving in wood, metal
and plastic.
Noise
ThetypicalA-weightednoiseleveldeterminedaccord-
ingtoEN62841-2-2:
Model DFR452
Sound pressure level (LpA):75dB(A)
Uncertainty(K):3dB(A)
Model DFR551
Sound pressure level (LpA):74dB(A)
Uncertainty(K):3dB(A)
Thenoiselevelunderworkingmayexceed80dB(A).
NOTE: The declared noise emission value(s) has
beenmeasuredinaccordancewithastandardtest
methodandmaybeusedforcomparingonetoolwith
another.
NOTE: The declared noise emission value(s)
mayalsobeusedinapreliminaryassessmentof
exposure.
WARNING: Wear ear protection.
WARNING: The noise emission during actual
use of the power tool can dier from the declared
value(s) depending on the ways in which the
tool is used especially what kind of workpiece is
processed.
WARNING: Be sure to identify safety mea-
sures to protect the operator that are based on an
estimation of exposure in the actual conditions of
use (taking account of all parts of the operating
cycle such as the times when the tool is switched
o and when it is running idle in addition to the
trigger time).
Vibration
Thevibrationtotalvalue(tri-axialvectorsum)deter-
minedaccordingtoEN62841-2-2:
Model DFR452
Workmode:screwdrivingwithoutimpact
Vibrationemission(ah):2.5m/s2or less
Uncertainty(K):1.5m/s2
Model DFR551
Workmode:screwdrivingwithoutimpact
Vibrationemission(ah):2.5m/s2or less
Uncertainty(K):1.5m/s2
NOTE:Thedeclaredvibrationtotalvalue(s)hasbeen
measured in accordance with a standard test method
andmaybeusedforcomparingonetoolwithanother.
NOTE:Thedeclaredvibrationtotalvalue(s)mayalso
beusedinapreliminaryassessmentofexposure.

7ENGLISH
WARNING: The vibration emission during
actual use of the power tool can dier from the
declared value(s) depending on the ways in which
the tool is used especially what kind of workpiece
is processed.
WARNING: Be sure to identify safety mea-
sures to protect the operator that are based on an
estimation of exposure in the actual conditions of
use (taking account of all parts of the operating
cycle such as the times when the tool is switched
o and when it is running idle in addition to the
trigger time).
EC Declaration of Conformity
For European countries only
TheECdeclarationofconformityisincludedasAnnexA
to this instruction manual.
SAFETY WARNINGS
General power tool safety warnings
WARNING: Read all safety warnings, instruc-
tions, illustrations and specications provided
with this power tool.Failuretofollowallinstructions
listedbelowmayresultinelectricshock,reand/or
seriousinjury.
Save all warnings and instruc-
tions for future reference.
Theterm"powertool"inthewarningsreferstoyour
mains-operated(corded)powertoolorbattery-operated
(cordless) power tool.
Cordless screwdriver safety
warnings
1. Hold the power tool by insulated gripping
surfaces, when performing an operation
where the fastener may contact hidden wiring.
Fastenerscontactinga"live"wiremaymake
exposed metal parts of the power tool "live" and
could give the operator an electric shock.
2. Always be sure you have a rm footing.
Be sure no one is below when using the tool in
high locations.
3. Hold the tool rmly.
4. Keep hands away from rotating parts.
5. Do not touch the bit or the workpiece immedi-
ately after operation; they may be extremely
hot and could burn your skin.
6. Always secure workpiece in a vise or similar
hold-down device.
7. Make sure there are no electrical cables, water
pipes, gas pipes etc. that could cause a hazard
if damaged by use of the tool.
SAVE THESE INSTRUCTIONS.
WARNING: DO NOT let comfort or familiarity
with product (gained from repeated use) replace
strict adherence to safety rules for the subject
product.
MISUSE or failure to follow the safety rules stated
in this instruction manual may cause serious
personal injury.
Important safety instructions for
battery cartridge
1. Before using battery cartridge, read all instruc-
tions and cautionary markings on (1) battery
charger, (2) battery, and (3) product using
battery.
2. Do not disassemble or tamper with the battery
cartridge.Itmayresultinare,excessiveheat,
or explosion.
3. If operating time has become excessively
shorter, stop operating immediately. It may
result in a risk of overheating, possible burns
and even an explosion.
4. If electrolyte gets into your eyes, rinse them
out with clear water and seek medical atten-
tion right away. It may result in loss of your
eyesight.
5. Do not short the battery cartridge:
(1) Do not touch the terminals with any con-
ductive material.
(2) Avoid storing battery cartridge in a con-
tainer with other metal objects such as
nails, coins, etc.
(3) Do not expose battery cartridge to water
or rain.
A battery short can cause a large current
ow, overheating, possible burns and even a
breakdown.
6. Do not store and use the tool and battery car-
tridge in locations where the temperature may
reach or exceed 50 °C (122 °F).
7. Do not incinerate the battery cartridge even if
it is severely damaged or is completely worn
out. The battery cartridge can explode in a re.
8. Do not nail, cut, crush, throw, drop the battery
cartridge, or hit against a hard object to the
battery cartridge.Suchconductmayresultina
re,excessiveheat,orexplosion.
9. Do not use a damaged battery.
10. The contained lithium-ion batteries are subject
to the Dangerous Goods Legislation require-
ments.
Forcommercialtransportse.g.bythirdparties,
forwarding agents, special requirement on pack-
agingandlabelingmustbeobserved.
Forpreparationoftheitembeingshipped,consult-
ing an expert for hazardous material is required.
Pleasealsoobservepossiblymoredetailed
national regulations.
Tapeormaskoopencontactsandpackupthe
batteryinsuchamannerthatitcannotmove
around in the packaging.

8ENGLISH
11. When disposing the battery cartridge, remove
it from the tool and dispose of it in a safe
place. Follow your local regulations relating to
disposal of battery.
12. Use the batteries only with the products
specied by Makita.Installingthebatteriesto
non-compliantproductsmayresultinare,exces-
siveheat,explosion,orleakofelectrolyte.
13. If the tool is not used for a long period of time,
the battery must be removed from the tool.
14. During and after use, the battery cartridge may
take on heat which can cause burns or low
temperature burns. Pay attention to the han-
dling of hot battery cartridges.
15. Do not touch the terminal of the tool imme-
diately after use as it may get hot enough to
cause burns.
16. Do not allow chips, dust, or soil stuck into the
terminals, holes, and grooves of the battery
cartridge.Itmaycauseheating,catchingre,
burstandmalfunctionofthetoolorbatterycar-
tridge,resultinginburnsorpersonalinjury.
17. Unless the tool supports the use near
high-voltage electrical power lines, do not use
the battery cartridge near high-voltage electri-
cal power lines.Itmayresultinamalfunctionor
breakdownofthetoolorbatterycartridge.
18. Keep the battery away from children.
SAVE THESE INSTRUCTIONS.
CAUTION: Only use genuine Makita batteries.
Useofnon-genuineMakitabatteries,orbatteriesthat
havebeenaltered,mayresultinthebatterybursting
causingres,personalinjuryanddamage.Itwill
alsovoidtheMakitawarrantyfortheMakitatooland
charger.
Tips for maintaining maximum
battery life
1. Charge the battery cartridge before completely
discharged. Always stop tool operation and
charge the battery cartridge when you notice
less tool power.
2. Never recharge a fully charged battery car-
tridge. Overcharging shortens the battery
service life.
3. Charge the battery cartridge with room tem-
perature at 10 °C - 40 °C (50 °F - 104 °F). Let
a hot battery cartridge cool down before
charging it.
4. When not using the battery cartridge, remove
it from the tool or the charger.
5. Charge the battery cartridge if you do not use
it for a long period (more than six months).
FUNCTIONAL
DESCRIPTION
CAUTION: Always be sure that the tool is
switched o and the battery cartridge is removed
before adjusting or checking function on the tool.
Installing or removing battery
cartridge
CAUTION: Always switch o the tool before
installing or removing of the battery cartridge.
CAUTION: Hold the tool and the battery car-
tridge rmly when installing or removing battery
cartridge.Failuretoholdthetoolandthebattery
cartridgermlymaycausethemtoslipoyourhands
andresultindamagetothetoolandbatterycartridge
andapersonalinjury.
►Fig.1: 1. Red indicator 2. Button 3.Batterycartridge
Toremovethebatterycartridge,slideitfromthetool
whileslidingthebuttononthefrontofthecartridge.
Toinstallthebatterycartridge,alignthetongueonthe
batterycartridgewiththegrooveinthehousingandslip
itintoplace.Insertitallthewayuntilitlocksinplace
withalittleclick.Ifyoucanseetheredindicatoras
showninthegure,itisnotlockedcompletely.
CAUTION: Always install the battery cartridge
fully until the red indicator cannot be seen. If not,
itmayaccidentallyfalloutofthetool,causinginjuryto
youorsomeonearoundyou.
CAUTION: Do not install the battery cartridge
forcibly.Ifthecartridgedoesnotslideineasily,itis
notbeinginsertedcorrectly.
Tool / battery protection system
Thetoolisequippedwithatool/batteryprotectionsys-
tem.Thissystemautomaticallycutsopowertothe
motortoextendtoolandbatterylife.Thetoolwillauto-
maticallystopduringoperationifthetoolorbatteryis
placedunderoneofthefollowingconditions:
Overload protection
Whenthetool/batteryisoperatedinamannerthat
causesittodrawanabnormallyhighcurrent,thetool
stopsautomatically.Inthissituation,turnthetoolo
andstoptheapplicationthatcausedthetooltobecome
overloaded. Then turn the tool on to restart.
Overheat protection
Whenthetool/batteryisoverheated,thetoolstops
automatically.Inthissituation,letthetool/batterycool
beforeturningthetoolonagain.
Overdischarge protection
Whenthebatterycapacityisnotenough,thetoolstops
automatically.Inthiscase,removethebatteryfromthe
toolandchargethebattery.
9ENGLISH
Alert indicator
The indicator lamp on the push drive mode selector
raisesanalertwithashingredlightswhenthetool
works in the following operating conditions.
►Fig.2: 1. Indicator lamp
Lamp status Causes Remedies
Fastashing(approx.
one-third second
intervals)
Battery
getting low
Chargethebattery
atyourearliest
opportunity.
Delayedashing
(approx. a second
intervals)
Overheated
Let the tool cool
downbeforeturning
it on again.
NOTE:Anover-dischargealertmayappeardepend-
ingonthebatterystatusandoperationalconditions.
Indicating the remaining battery capacity
Only for battery cartridges with the indicator
►Fig.3: 1. Indicator lamps 2.Checkbutton
Pressthecheckbuttononthebatterycartridgetoindi-
catetheremainingbatterycapacity.Theindicatorlamps
light up for a few seconds.
Indicator lamps Remaining
capacity
Lighted O Blinking
75%to100%
50%to75%
25%to50%
0%to25%
Charge the
battery.
Thebattery
mayhave
malfunctioned.
NOTE: Depending on the conditions of use and the
ambienttemperature,theindicationmaydierslightly
fromtheactualcapacity.
NOTE:Therst(farleft)indicatorlampwillblinkwhen
thebatteryprotectionsystemworks.
Setting for desired screw lengths
For model DFR452
The tool provides 4 positive-lock screw length settings.
Slidethestopperbaseoutandinwhiledepressingthe
leversonthetopsurfaceofthestopperbasesothe
numberfordesiredscrewlength(indicatedonthelabel)
appearsinthereadingwindow.Seethefollowingtable
fordetailsonthenumbersallocatedtoyourdesired
screw lengths.
►Fig.4: 1.Stopperbase2. Levers 3.Label
4. Reading window
Numbers indicated on
the label Screw length ranges
20 20mm(3/4″)
25 25mm-28mm(1″-1-1/8″)
32 28mm-35mm(1-1/8″-1-3/8″)
41 35mm-41mm(1-3/8″-1-5/8″)
For model DFR551
Thetoolprovides7positive-lockscrewlengthsettings.
Slidethestopperbaseoutandinwhiledepressingthe
leversonthetopsurfaceofthestopperbasesothe
numberfordesiredscrewlength(indicatedonthelabel)
appearsinthereadingwindow.Seethefollowingtable
fordetailsonthenumbersallocatedtoyourdesired
screw lengths.
►Fig.5: 1.Stopperbase2. Levers 3.Label
4. Reading window
Numbers indicated on
the label Screw length ranges
25 25mm(1″)
30 25mm-30mm(1″-1-3/16″)
35 30mm-35mm(1-3/16″-1-3/8″)
40 35mm-40mm(1-3/8″-1-9/16″)
45 40mm-45mm(1-9/16″-1-3/4″)
50 45mm-50mm(1-3/4″-2″)
55 50mm-55mm(2″-2-3/16″)
Adjusting driving depths
Pressthefrontfaceofthestopperbaseandholdthe
feederboxdownintothecasingasfarasitwillgo.
Whilekeepingitinthatposition,turntheadjustingdial
sothatthedriverbittipcomesoutapproximately6mm
fromthefrontfaceofthestopperbase.
Driveatrialscrew.Ifthescrewheadstandsabovethe
workpiecesurface,turntheadjustingdialintheAdirec-
tion;ifthescrewheadsitsbelowthesurface,turnthe
adjustingdialintheBdirection.
►Fig.6: 1.Approx.6mm2.Stopperbase3.Feeder
box4. Casing 5.Adjustingdial
Switch action
WARNING: Before installing the battery car-
tridge into the tool, always check to see that the
switch trigger actuates properly and returns to
the "OFF" position when released.
To start the tool, pull the switch trigger. Tool speed is
increasedbyincreasingpressureontheswitchtrigger.
Release the switch trigger to stop.
Forcontinuousoperation,pulltheswitchtrigger,pushin
thelockbuttonandthenreleasethetrigger.Tostopthe
toolfromthelockedposition,pulltheswitchtriggerfully,
and then release it.
►Fig.7: 1. Switch trigger 2.Lockbutton

10 ENGLISH
Reversing switch action
CAUTION: Always check the direction of
rotation before operation.
CAUTION: Use the reversing switch only after
the tool comes to a complete stop. Changing the
directionofrotationbeforethetoolstopsmaydam-
age the tool.
CAUTION: When not operating the tool,
always set the reversing switch lever to the neu-
tral position.
This tool has a reversing switch to change the direction
of rotation. Depress the reversing switch lever from the
AsideforclockwiserotationorfromtheBsideforcoun-
terclockwise rotation.
When the reversing switch lever is in the neutral posi-
tion,theswitchtriggercannotbepulled.
►Fig.8: 1. Reversing switch lever
Push drive mode
Inpushdrivemode,thedriverbitonlyrotatesbyapply-
ing pressure onto the driving surface with the stopper
base,allowingthetooltocutopowertothemotorto
savebatterypoweratidle.
To select push drive mode, pull the switch trigger
slightly,thenreleaseitandquicklypressthemode
selectbutton.Theindicatorlamponthepushdrive
mode selector will then light up.
►Fig.9: 1.Modeselectbutton2. Indicator lamp
NOTE:Pushdrivemodewillautomaticallybedeacti-
vated after eight hours with the switch trigger locked
on and no further switch operation. To restart the tool,
pulltheswitchtriggerfullytoreleasethelockbutton,
and pull the trigger again.
ASSEMBLY
CAUTION: Always be sure that the tool is
switched o and the battery cartridge is removed
before carrying out any work on the tool.
Removing and installing driver bit
CAUTION: Be careful not to touch the sharp
edges of screws while reassembling the compo-
nents and attachments.
CAUTION: Handle accessories and attach-
ments with care. Always be sure to hold acces-
sories and attachments body rmly when instal-
lation and uninstallation to avoid them falling or
slipping o from your hands.
1. Pressandholdthereleasebuttonsoneachside
of the casing, and then pull the casing apart.
►Fig.10: 1.Releasebuttons2. Casing
2. Toremovethedriverbit,pullitowhilepushing
and holding the spindle into the gear housing.
►Fig.11: 1.Driverbit2. Spindle 3. Gear housing
3. Toinstalladriverbit,placeitintothespindlehole
as far as it will go while pushing and holding the spin-
dle into the gear housing. Then release the spindle to
securethedriverbit.
4. Resetthecasingbackontothegearhousingwhile
holdingitsbodyrmlyuntilthereleasebuttonsoneach
side of the casing lock in place.
Installing screw strip
Insert a screw strip through the screw strip guide on
the casing, and then insert it through the screw loading
guideinthefeederbox.
►Fig.12: 1. Screw strip 2. Screw strip guide 3. Casing
4. Screw loading guide 5.Feederbox
NOTICE:Makesuretosettherstscrewinthe
second row next to the driving position.
►Fig.13: 1.Firstscrew2. Driving position
Removing screw strip
To remove the screw strip, pull it upwards out of the
feederbox.
►Fig.14
Thescrewstripcanbepulleddownwardsoutofthe
feederboxwhilepressingthereversebuttononthe
feederbox.
►Fig.15: 1.Reversebutton2.Feederbox
Installing hook
WARNING: Use the hanging/mounting parts
for their intended purposes only, e.g., hanging the
tool on a tool belt between jobs or work intervals.
WARNING: Be careful not to overload the
hook as too much force or irregular overburden
may cause damages to the tool resulting in per-
sonal injury.
CAUTION: When installing the hook, always
secure it with the screw rmly. If not, the hook
maycomeofromthetoolandresultinthepersonal
injury.
CAUTION: Make sure to hang the tool
securely before releasing your hold.Insucient
orunbalancedhookingmaycausefallingoandyou
maybeinjured.
►Fig.16: 1. Groove 2. Hook 3. Screw
Thehookisconvenientfortemporarilyhangingthetool.
Thiscanbeinstalledoneithersideofthetool.Toinstall
the hook, insert it into a groove in the tool housing on
either side and then secure it with a screw. To remove,
loosen the screw and then take it out.

11 ENGLISH
Using hole
WARNING: Never use the hanging hole for
unintended purpose, for instance, tethering the
tool at high location.Bearingstressinaheavily
loadedholemaycausedamagestothehole,result-
ingininjuriestoyouorpeoplearoundorbelowyou.
►Fig.17: 1. Hanging hole
Usethehangingholeatthebottomrearofthetoolto
hang the tool on a wall using a hanging cord or similar
strings.
OPERATION
Driving operation
NOTICE: Always check the driver bit carefully
for wear before driving operations. Replace a worn
driverbitorpoorfasteningmayresult.
NOTICE: Always hold the tool squarely against
the driving surface.Holdingitatananglemaydam-
age the screw heads and cause wear on the driver
bit.Thismayalsoleadtopoorfastening.
NOTICE: Always keep the tool rmly against the
driving surface until the driving is over.Failureto
dosomaycauseinsucientfasteningofscrews.
NOTICE: Be careful not to drive a screw onto
another screw already fastened.
NOTICE: Do not operate the tool without screws.
It will damage the driving surface.
NOTICE: Do not apply oil or grease on the slid-
ing surface of the feeder box.
Switchonthetoolbypullingtheswitchtrigger.Holdthe
toolsquarelyandrmlyupagainstthedrivingsurface.A
screwwillbeautomaticallycarriedtothedrivingposi-
tion and fastened.
►Fig.18
Driving operation in push drive mode
1. Pulltheswitchtriggerslightlyandreleaseit.Then
quicklypressthemodeselectbutton.
The indicator lamp on the push drive mode selector
lightsup,andpushdrivemodebecomesactivated.
►Fig.19: 1.Modeselectbutton2. Indicator lamp
2. Depressthelockbuttonwhilepullingtheswitch
trigger, and then release the switch trigger.
►Fig.20: 1.Lockbutton2. Switch trigger
NOTE: While selecting push drive mode and locking
the trigger on, the motor does not rotate under no
load to minimize power consumption.
3. Holdthetoolsquarelyagainstthedrivingsurface
andapplyforwardpressuretothetool.
Thescrewwillbeautomaticallycarriedtothedriving
position and driven at full speed.
►Fig.21
Driving in corner
CAUTION: Driving at a position closer than
15 mm to the wall or driving with the stopper base
in contact with the wall may damage the screw
heads and cause wear on the driver bit.Thismay
also lead to poor fastening of screws and malfunction
of the tool.
Thistoolcanbeusedtodriveataposition15mmaway
fromthewallasshowninthegure.
►Fig.22: 1. Wall 2.Stopperbase3. 15 mm
Unfastening operation
CAUTION: Always check the direction of
rotation before operation.
CAUTION: Use the reversing switch only after
the tool comes to a complete stop. Changing the
directionofrotationbeforethetoolstopsmaydam-
age the tool.
Thetoolallowsyoutochangethedirectionofdriverbit
rotation with ease, either towards the right (clockwise)
to tighten a screw or towards the left (counterclockwise)
to loosen a screw.
1. Depress the reversing switch lever from the B side
for counterclockwise rotation.
►Fig.23: 1. Reversing switch lever
2. Pressandholdthereleasebuttonsoneachside
of the casing, and then pull the casing apart.
►Fig.24: 1.Releasebuttons2. Casing
3. Placethetipofthedriverbitintotheheadofthe
screwtobeloosened.
4. Holdthetoolrmlyagainstthescrewandsqueeze
the switch trigger to start.
►Fig.25: 1.Driverbit2. Screw head 3. Switch trigger
5. Resetthecasingbackontothegearhousinguntil
itlocksinplaceafternishingoperation.
MAINTENANCE
CAUTION: Always be sure that the tool is
switched o and the battery cartridge is removed
before attempting to perform inspection or
maintenance.
NOTICE: Never use gasoline, benzine, thinner,
alcohol or the like. Discoloration, deformation or
cracks may result.
TomaintainproductSAFETYandRELIABILITY,
repairs,anyothermaintenanceoradjustmentshould
beperformedbyMakitaAuthorizedorFactoryService
Centers,alwaysusingMakitareplacementparts.

12 ENGLISH
After use
Wipeothetoolusingadryclothorclothslightlymoist-
enedwithsoapywateratregularintervals.
OPTIONAL
ACCESSORIES
CAUTION: These accessories or attachments
are recommended for use with your Makita tool
specied in this manual.Theuseofanyother
accessories or attachments might present a risk of
injurytopersons.Onlyuseaccessoryorattachment
for its stated purpose.
Ifyouneedanyassistanceformoredetailsregard-
ingtheseaccessories,askyourlocalMakitaService
Center.
• Drywallscrewstrip
• Phillipsbit
• Squarebit
• Pozidrivbit
• Feederbox
• Casing
• Makitagenuinebatteryandcharger
NOTE:Someitemsinthelistmaybeincludedinthe
toolpackageasstandardaccessories.Theymay
dierfromcountrytocountry.

13 SLOVENŠČINA
SLOVENŠČINA (Originalna navodila)
TEHNIČNI PODATKI
Model: DFR452 DFR551
Trakzvijaki
ø3,5 mm x 20 mm - ø4,2 mm x 41 mm ø3,5 mm x 25 mm - ø4,2 mm x 55 mm
Hitrostbrezobremenitve(vrt/min) 0 - 6.000 min-1
Celotnadolžina 360 mm 396 mm
Nazivna napetost D.C. 18 V
Netoteža 1,9 - 2,2 kg
• Kernenehnoopravljamoraziskaveinrazvijamosvojeizdelke,selahkotehničnipodatkivtemdokumentu
spremenijobrezobvestila.
• Tehničnipodatkiselahkorazlikujejooddržavedodržave.
• Težaselahkorazlikujegledenapriključke,vključnozakumulatorskobaterijo.Najlažjainnajtežjakombinacijav
skladuspostopkomEPTA01/2014staprikazanivpreglednici.
Uporabna akumulatorska baterija in polnilnik
Baterijskivložek BL1815N/BL1820B/BL1830B/BL1840B/BL1850B/BL1860B
Polnilnik DC18RC/DC18RD/DC18RE/DC18SD/DC18SE/DC18SF/
DC18SH
• Nekaterezgorajnavedeneakumulatorskebaterijeinpolnilnikimordavvašidržaviprebivališčanisonavoljo.
OPOZORILO: Uporabljajte le zgoraj navedene akumulatorske baterije in polnilnike.Uporabadrugih
akumulatorskihbaterijinpolnilnikovlahkopovzročitelesnepoškodbein/alipožar.
Predvidena uporaba
Orodjejenamenjenozavijačenjevles,kovinoin
plastiko.
Hrup
ObičajnaA-ovrednotenaravenhrupavskladuz
EN62841-2-2:
Model DFR452
Ravenzvočnegatlaka(LpA):75dB(A)
Odstopanje(K):3dB(A)
Model DFR551
Ravenzvočnegatlaka(LpA):74dB(A)
Odstopanje(K):3dB(A)
Nivohrupameddelomlahkopreseže80dB(A).
OPOMBA:Navedenevrednostioddajanjahrupaso
bileizmerjenevskladusstandardnimimetodami
testiranjainselahkouporabljajozaprimerjavoorodij.
OPOMBA:Navedenevrednostioddajanjahrupa
selahkouporabljajotudipripredhodnioceni
izpostavljenosti.
OPOZORILO: Uporabljajte zaščito za sluh.
OPOZORILO: Oddajanje hrupa med dejansko
uporabo električnega orodja se lahko razlikuje od
navedenih vrednosti, odvisno od načina uporabe
orodja in predvsem vrste obdelovanca.
OPOZORILO: Upravljavec mora za lastno
zaščito poznati varnostne ukrepe, ki temeljijo
na oceni izpostavljenosti v dejanskih pogojih
uporabe (poleg časa proženja je treba upoštevati
celoten delovni cikel, vključno s časom, ko je
orodje izklopljeno, in časom, ko deluje v prostem
teku).
Vibracije
Skupnevrednostivibracij(vektorskavsotatrehosi)v
skladuzEN62841-2-2:
Model DFR452
Delovninačin:vijačenjebrezudarjanja
Emisijevibracij(ah):2,5m/s2alimanj
Odstopanje(K):1,5m/s2
Model DFR551
Delovninačin:vijačenjebrezudarjanja
Emisijevibracij(ah):2,5m/s2alimanj
Odstopanje(K):1,5m/s2
OPOMBA:Navedeneskupnevrednostioddajanja
vibracijsobileizmerjenevskladusstandardnimi
metodamitestiranjainselahkouporabljajozaprimer-
javoorodij.
OPOMBA:Navedeneskupnevrednostioddajanja
vibracijselahkouporabljajotudipripredhodnioceni
izpostavljenosti.

14 SLOVENŠČINA
OPOZORILO:
Oddajanje vibracij med
dejansko uporabo električnega orodja se lahko raz-
likuje od navedenih vrednosti, odvisno od načina
uporabe orodja in predvsem vrste obdelovanca.
OPOZORILO:
Upravljavec mora za lastno
zaščito poznati varnostne ukrepe, ki temeljijo na
oceni izpostavljenosti v dejanskih pogojih upo-
rabe (poleg časa proženja je treba upoštevati celo-
ten delovni cikel, vključno s časom, ko je orodje
izklopljeno, in časom, ko deluje v prostem teku).
Izjava o skladnosti ES
Samo za evropske države
IzjavaESoskladnostijevključenavdodatkuA,kije
priložentemnavodilomzauporabo.
VARNOSTNA OPOZORILA
Splošna varnostna opozorila za
električno orodje
OPOZORILO: Preberite vsa varnostna opo-
zorila in navodila s slikami in tehničnimi podatki,
ki so dobavljeni skupaj z električnim orodjem.
Obneupoštevanjuspodajnavedenihnavodilobstaja
nevarnostelektričnegaudara,požarain/alihudih
telesnihpoškodb.
Shranite vsa opozorila in navo-
dila za poznejšo uporabo.
Izraz„električnoorodje“vopozorilihsenanašanavaše
električnoorodje(skablom)alibaterijskoelektrično
orodje(brezkabla).
Varnostna opozorila za brezžični vijačnik
1. Če obstaja nevarnost, da bi s pritrjevalnikom
prerezali skrito električno napeljavo, držite ele-
ktrično orodje na izoliranih držalnih površinah.
Obstikuzvodnikipodnapetostjodobijonapetost
vsineizoliranikovinskidelielektričnegaorodja,
zaradičesarlahkopridedoelektričnegaudara.
2. Vedno zagotovite, da imate trden oprijem na
podlagi, kjer stojite.
Kadar uporabljate orodje na višini, se prepri-
čajte, da spodaj ni nikogar.
3. Trdno držite orodje.
4. Ne približujte rok vrtečim se delom.
5. Takoj po končani obdelavi se ne dotikajte
nastavka ali obdelovanca; lahko sta zelo vroča
in povzročita opekline kože.
6. Obdelovanec vedno vpnite v primež ali
podobno napravo za držanje.
7. Prepričajte se, da v bližini ni električnih kablov,
vodovodnih cevi, plinskih cevi in drugih ele-
mentov, ki bi predstavljali nevarnost, če bi jih
poškodovali z orodjem.
SHRANITE TA NAVODILA.
OPOZORILO: NE dovolite, da bi zaradi udob-
nejšega dela ali znanja o uporabi izdelka (prido-
bljenega z večkratno uporabo) opustili strogo
upoštevanje varnostnih zahtev v okviru pravilne
uporabe orodja.
ZLORABA ali neupoštevanje varnostnih zahtev
v teh navodilih za uporabo lahko povzroči resne
telesne poškodbe.
Pomembna varnostna navodila za
akumulatorsko baterijo
1. Pred uporabo baterijskega vložka preberite
vsa navodila in opozorilne oznake na (1) pol-
nilniku akumulatorja, (2) akumulatorju in (3)
izdelku, ki uporablja akumulator.
2. Ne razstavljajte ali spreminjajte akumulatorske
baterije.Stemlahkopovzročitepožar,preko-
mernovročinoalieksplozijo.
3. Če se je čas delovanja občutno skrajšal, takoj
prenehajte uporabljati orodje. V nasprotnem
primeru lahko pride do pregretja, morebitnih
opeklin in celo eksplozije.
4. Če pride elektrolit v stik z očmi, jih sperite s
čisto vodo in takoj poiščite zdravniško pomoč.
Posledica je lahko izguba vida.
5. Ne povzročite kratkega stika baterijskega
vložka:
(1) Ne dotikajte se priključkov s kakršnim
koli prevodnim materialom.
(2) Izogibajte se shranjevanju baterijskega
vložka v vsebniku z drugimi kovinskimi
predmeti kot so žeblji, kovanci itn.
(3) Ne izpostavljajte baterijskega vložka vodi
ali dežju.
Kratek stik akumulatorja lahko povzroči velik
električni tok, pregrevanje, morebitne opekline
in celo okvaro.
6. Ne shranjujte in uporabljajte orodja in akumu-
latorske baterije na mestih, kjer lahko tempera-
tura doseže ali preseže 50 °C (122 °F).
7. Ne sežigajte baterijskega vložka, tudi če je
hudo poškodovan ali v celoti izpraznjen.
Baterijski vložek lahko v ognju eksplodira.
8. Ne pribijajte, režite, drobite, mečite, spuščajte
akumulatorske baterije oziroma ne udarjajte
z akumulatorsko baterijo po trdem predmetu.
Takšnoravnanjelahkopovzročipožar,preko-
mernovročinoalieksplozijo.
9. Ne uporabljajte poškodovanih akumulatorjev.
10. Priložene litij-ionske baterije ustrezajo zahte-
vam zakonodaje v zvezi z nevarnim blagom.
Zakomercialneprevoze,npr.tiste,kijihopravljajo
tretjestrankeincarinskiposredniki,jetrebaupo-
števatiposebnezahtevevzvezizembalažoin
označevanjem.
Med postopkom priprave na odpremo izdelka se
jetrebaposvetovatisstrokovnjakomzanevarne
snovi.Pritemupoštevajtetudipodrobnejšenacio-
nalne predpise.
Odprtestikeoblepitezlepilnimtrakomalijihdru-
gačezaščitite,baterijopazapakirajtetako,dasev
embalažinemorepremikati.

15 SLOVENŠČINA
11. Ko odstranjujete akumulatorsko baterijo, jo
vzemite iz orodja in varno zavrzite. Upoštevajte
lokalne uredbe glede odlaganja baterije.
12. Baterije uporabljajte le z izdelki, ki jih določi
Makita.Čenamestitebaterijevneskladneizdelke,
lahkopridedopožara,pregrevanja,eksplozijeali
puščanjaelektrolita.
13. Če orodja dlje časa ne uporabljate, morate iz
njega odstraniti baterijo.
14. Med uporabo in po uporabi lahko akumu-
latorska baterija postane vroča in povzroči
opekline. Z vročimi akumulatorskimi baterijami
ravnajte pazljivo.
15. Ne dotikajte se priključka orodja takoj po upo-
rabi, ker se lahko dovolj segreje, da povzroči
opekline.
16. Ne dovolite, da bi se v priključke, odprtine in
utore akumulatorske baterije zlepili ostružki,
prah ali zemlja.Tolahkopovzročipregrevanje,
požar,razpočenjeinokvaroorodjaaliakumula-
torskebaterijeterprivededoopeklinalidrugih
telesnihpoškodb.
17. Razen če orodje podpira uporabo v bližini
visokonapetostnih električnih vodov, akumula-
torske baterije ne uporabljajte v bližini visoko-
napetostnih električnih vodov.Takšnauporaba
lahkopovzročimotnjevdelovanjualiokvaro
orodjaoziromaakumulatorskebaterije.
18. Baterijo hranite izven dosega otrok.
SHRANITE TA NAVODILA.
POZOR: Uporabljajte le originalne baterije
Makita.ČeuporabljateneoriginalnebaterijeMakita
alibaterije,kisobilespremenjene,lahkopridedo
eksplozijebaterijeinposledičnodopožara,telesnih
poškodbalimaterialneškode.Stakšnouporabo
bostetudirazveljaviligarancijoMakitazaorodjein
polnilnik Makita.
Nasveti za ohranjanje največje
zmogljivosti akumulatorja
1. Napolnite baterijski vložek, preden se v celoti
izprazni. Ko opazite, da ima orodje manjšo
moč, vedno ustavite delovanje orodja in napol-
nite baterijski vložek.
2. Nikoli znova ne polnite popolnoma napol-
njenega baterijskega vložka. Prenapolnjenje
skrajša življenjsko dobo akumulatorja.
3. Baterijski vložek s sobno temperaturo pol-
nite pri temperaturi okolja od 10 °C do 40 °C.
Počakajte, da se vroč baterijski vložek pred
polnjenjem ohladi.
4. Ko akumulatorske baterije ne uporabljate, jo
odstranite iz orodja ali polnilnika.
5. Če baterijskega vložka ne uporabljate dalj časa
(več kot 6 mesecev), ga napolnite.
OPIS DELOVANJA
POZOR: Pred nastavljanjem ali preizkusom
delovanja orodja se prepričajte, ali je orodje
izključeno in ali je akumulatorska baterija
odstranjena.
Nameščanje ali odstranjevanje
akumulatorske baterije
POZOR: Vedno izklopite orodje, preden name-
stite ali odstranite akumulatorsko baterijo.
POZOR: Kadar nameščate ali odstranjujete
akumulatorsko baterijo, trdno držite orodje in
akumulatorsko baterijo.Čeorodjainakumulatorske
baterijenedržitetrdno,selahkozgodi,davamzdr-
snetaizrok,posledicapajelahkopoškodbaorodjain
akumulatorskebaterijetertelesnapoškodba.
►Sl.1: 1.Rdečiindikator2.Gumb3.Baterijskivložek
Čeželiteodstranitiakumulatorskobaterijo,jopotisniteiz
orodja,pritempapomikajtegumbnasprednjistranivložka.
Akumulatorskobaterijovstavitetako,daporavnate
jezičeknabaterijizutoromnaohišjuinjopotisnetev
ležišče.Potisnitejodokonca,dasezaskoči.Čevidite
rdečiindikator,kotjeprikazanonasliki,seakumulator-
skabaterijaniustreznozaskočila.
POZOR: Vedno namestite akumulatorsko
baterijo tako, da rdeči indikator ni več viden.Če
teganeupoštevate,lahkobaterijanepričakovano
padeizorodjainpoškodujevasaliosebevneposre-
dnibližini.
POZOR: Ne nameščajte akumulatorske bate-
rije s silo.Česeakumulatorskabaterijanezaskoči
zlahka,nipravilnovstavljena.
Zaščitni sistem orodja/akumulatorja
Orodjejeopremljenozzaščitnimsistemomzaorodje/
akumulator.Sistemsamodejnoprekinenapajanjeorodja,
dapodaljšaživljenjskodoboorodjainakumulatorja.
Orodjesesamodejnozaustavimeddelovanjem,če
orodjealiakumulatordelujetapodnaslednjimipogoji:
Zaščita pred preobremenitvijo
Kadarorodje/akumulatoruporabljatenanačin,ki
povzročauporaboneobičajnovisokegatoka,seorodje
samodejnoustavi.Vtemprimeruizklopiteorodjein
prekinitedelo,kijepovzročilopreobremenitevorodja.
Natovklopiteorodje,dagaznovazaženete.
Zaščita pred pregrevanjem
Česeorodje/akumulatorpregreje,seorodjesamodejno
ustavi.Vtemprimerupustite,daseorodje/akumulator
ohladi,predenorodjeznovavklopite.
Zaščita pred izpraznjenjem
Kojezmogljivostakumulatorjaprenizka,seorodje
samodejnoustavi.Vtemprimeruodstraniteakumulator
izorodjainganapolnite.

16 SLOVENŠČINA
Opozorilni indikator
Indikatorskalučkanaizbirnikupotisneganačina
pogonasprožiopozorilozutripajočimirdečimilučmi,ko
jeorodjevnaslednjihpogojihdelovanja.
►Sl.2: 1.Indikatorskalučka
Status lučke Vzroki Ukrepi
Hitroutripanje(pribl.
v intervalih po eno
tretjinosekunde)
Akumulator
sebokmalu
izpraznil
Napolnite akumu-
latortako,kobo
možno.
Zakasnjenoutripanje
(pribl.vintervalihpo
eno sekundo)
Pregrevanje
Počakajte,da
seorodjeohladi,
preden ga znova
vklopite.
OPOMBA:Odvisnoodstanjaakumulatorjainpogo-
jevdelovanjaselahkopojaviopozorilooprekomerni
izpraznitvi.
Prikazuje preostalo raven
napolnjenosti akumulatorja
Samo za akumulatorske baterije z indikatorjem
►Sl.3: 1.Indikatorskelučke2.Gumbzapreverjanje
Pritisnitegumbzapreverjanjenabaterijskemvložku,
dapreveriteravennapolnjenostiakumulatorja.
Indikatorskelučkenakratkozasvetijo.
Indikatorske lučke Prikaz pre-
ostale ravni
napolnjenosti
Sveti Ne sveti Utripa
od75%do
100%
od50%do
75%
od25%do
50%
od0%do
25%
Napolnite
akumulator.
Akumulator
jemorda
okvarjen.
OPOMBA:Odvisnoodpogojevuporabeinokoljske
temperatureseoznačbalahkonekolikorazlikujeod
dejanskenapolnjenosti.
OPOMBA:Prvaopozorilnalučka(skrajnolevo)bo
utripala,kosistemzazaščitoakumulatorjadeluje.
Nastavitev za želene dolžine vijakov
Za model DFR452
Orodjezagotavlja4nastavitvedolžinevijakovspozitivnim
zaklepom.Potisniteomejilniknoterinven,medtemkopoti-
skatenaročicenazgornjipovršiniomejilnika,takodasena
okencuzaodčitavanjeprikažeštevilkaželenedolžinevijaka
(označenananalepki).Podrobnostioštevilkah,dodeljenih
vašimželenimdolžinamvijakov,sioglejtevnaslednjitabeli.
►Sl.4: 1.Omejilnik2.Ročica3.Plošča4.Ohišje
Številke, navedene na
nalepki Obsegi dolžin vijakov
20 20mm(3/4″)
25 25mm-28mm(1″-1-1/8″)
32 28mm-35mm(1-1/8″-1-3/8″)
41 35mm-41mm(1-3/8″-1-5/8″)
Za model DFR551
Orodjezagotavlja7nastavitvedolžinevijakovspozitivnim
zaklepom.Potisniteomejilniknoterinven,medtemkopoti-
skatenaročicenazgornjipovršiniomejilnika,takodasena
okencuzaodčitavanjeprikažeštevilkaželenedolžinevijaka
(označenananalepki).Podrobnostioštevilkah,dodeljenih
vašimželenimdolžinamvijakov,sioglejtevnaslednjitabeli.
►Sl.5: 1.Omejilnik2.Ročica3.Plošča4.Ohišje
Številke, navedene na nalepki
Obsegi dolžin vijakov
25 25mm(1″)
30 25mm-30mm(1″-1-3/16″)
35 30mm-35mm(1-3/16″-1-3/8″)
40 35mm-40mm(1-3/8″-1-9/16″)
45 40mm-45mm(1-9/16″-1-3/4″)
50 45mm-50mm(1-3/4″-2″)
55 50mm-55mm(2″-2-3/16″)
Prilagajanje globin vijačenja
Pritisnitenasprednjostranomejilnikainpotiskajtezabojpoda-
jalnikadolvohišje,kolikordalečgre.Medtemkojevtempolo-
žaju,obrnitenastavitvenoštevilčnicotako,dakonicavijačnega
nastavkaizstopizapribližno6mmodsprednjestraniomejilnika.
Poskusnopotisnitevijak.Čejeglavavijakanadpovršinoobde-
lovanca,obrnitenastavitvenoštevilčnicovsmerA;čejeglava
vijakapodpovršino,obrnitenastavitvenoštevilčnicovsmerB.
►Sl.6: 1.Pribl.6mm2.Omejilnik3.Zabojpodajal-
nika 4.Ohišje5.Nastavitvenaštevilčnica
Delovanje stikala
OPOZORILO:
Preden vstavite akumulatorsko bate-
rijo v orodje, se vedno prepričajte, da stikalo deluje brez-
hibno in se vrača v položaj za izklop (OFF), ko ga spustite.
Zazagonorodjapritisnitesprožilec.Zmočnejšimpri-
tiskomnasprožilecsepovečahitrostorodja.Čeželite
zaustavitiorodje,spustitesprožilec.
Zaneprekinjenodelovanjepovlecitesprožilnostikalo,
pritisnitegumbzazaporovklopainnatospustitestikalo.
Zaizklopneprekinjenegadelovanjaorodjapopolnoma
povlecitesprožilnostikaloinganatospustite.
►Sl.7: 1.Sprožilnostikalo2.Gumbzazaklep

17 SLOVENŠČINA
Stikalo za preklop smeri vrtenja
POZOR: Pred obratovanjem vedno preverite
smer vrtenja.
POZOR: Stikalo za spreminjanje smeri vrtenja
uporabite šele, ko se stroj popolnoma ustavi.Če
smervrtenjaspremenite,predensestrojustavi,seta
lahkopoškoduje.
POZOR: Ko orodja ne uporabljate, vedno poti-
snite preklopno stikalo v nevtralen položaj.
Toorodjejeopremljenospreklopnikomzaspremembo
smerivrtenja.Ročicopreklopnikasmerivrtenjapritisnite
vsmeriAzavrtenjevsmeriurnegakazalcainvsmeriB
zavrtenjevobratnismeriurnegakazalca.
Kojepreklopnostikalovnevtralnempoložaju,seglav-
nega stikala ne da premakniti.
►Sl.8: 1.Preklopnaročicazaobratnosmer
Potisni način pogona
Vpotisnemnačinupogonasevijačninastaveksuče
samospritiskanjemnapovršinovijačenjasomejilnika,
karorodjuomogoča,daizklopinapajanjemotorja,s
čimerprihranienergijoakumulatorjavprostemteku.
Zaizbiropotisneganačinapogonarahlopovlecite
sprožilec,natogaspustiteinhitropritisnitegumbza
izbironačina.Natoseboprižgalaindikatorskalučkana
izbirnikupotisneganačinapogona.
►Sl.9: 1.Gumbzaizbironačina2.Indikatorskalučka
OPOMBA:Potisninačinpogonasebosamodejno
deaktiviralpoosmihurah,čejesprožilecvzaklenje-
nempoložajuzavklopinsestikalaneuporabljaveč.
Zaponovnizagonorodjapopolnomapotegnitespro-
žilec,dasprostitegumbzazaklep,inznovapotegnite
sprožilec.
MONTAŽA
POZOR: Pred vsako izvedbo dela na orodju se
prepričajte, da je le to izključeno in da je akumula-
torska baterija odstranjena.
Odstranjevanje in nameščanje
vijačnega nastavka
POZOR: Pazite, da se ne dotaknete ostrih
robov vijakov, medtem ko ponovno sestavljate
komponente in priključke.
POZOR: Z dodatno opremi in priključki
rokujte previdno. Vedno zagotovite, da dodatno
opremo in priključke med nameščanjem in odstra-
njevanjem trdno držite, da ne padejo ali zdrsnejo
iz vaših rok.
1. Pritisniteindržitesprostitvenegumbenavsaki
straniohišjainnatoohišjepovlecitenarazen.
►Sl.10: 1.Sprostitvenigumbi2.Ohišje
2. Čeželiteodstranitivijačninastavek,gaizvlecite,
medtemkovohišjeorodjapotiskateindržitevreteno.
►Sl.11: 1.Vijačninastavek2. Vreteno 3.Ohišje
orodja
3. Čeželitenamestitvijačninastavek,gačimbolj
globokovstavitevluknjovretena,medtempapotiskajte
indržitevretenovohišjuogrodja.Natosprostitevreteno
intakoksirajtevijačninastavek.
4. Ponastaviteohišjenazajnaohišjeorodja,medtem
konjegovglavnideltrdnodržite,doklersesprostitveni
gumbinaobehstranehohišjanevpnejonamestu.
Nameščanje traku z vijaki
Vstavitetrakzvijakiskozivodilotrakuzvijakinaohišju
inganatovstaviteskozivodilozanalaganjevijakovv
zabojupodajalnika.
►Sl.12: 1.Trakzvijaki2.Vodilotrakuzvijaki
3.Ohišje4.Vodilozanalaganjevijakov
5.Zabojpodajalnika
OBVESTILO:Prvivijakvstavitevdrugovrstico
zravenvijačnegapoložaja.
►Sl.13: 1.Prvivijak2.Vijačnipoložaj
Odstranjevanje traku z vijaki
Čeželiteodstranititrakzvijaki,gapotegnitenavzgoriz
zabojapodajalnika.
►Sl.14
Trakzvijakilahkopotegnetenavzdolizzabojapoda-
jalnika,medtemkopritiskatenagumbzaspremembo
smerinazabojupodajalnika.
►Sl.15: 1.Gumbzaspremembosmeri2.Zaboj
podajalnika
Nameščanje kavlja
OPOZORILO: Dele za obešanje/pritrjevanje
uporabljajte samo v skladu z njihovim predvide-
nim namenom, npr. tako, da orodje med opravili
ali delovnimi postopki obesite na pas za orodje.
OPOZORILO: Pazite, da kavlja ne obremenite
preveč, saj se lahko zaradi prevelike ali neenako-
merne obremenitve poškoduje orodje in posle-
dično pride do telesnih poškodb.
POZOR: Kavelj pri nameščanju vedno močno
zategnite z vijakom.Čeganezategnete,selahko
kaveljsnamezorodjainpovzročitelesnepoškodbe.
POZOR: Preden orodje izpustite, se pre-
pričajte, da je pravilno obešeno.Čejeobešeno
površnoalineuravnoteženo,lahkopadenatlainvas
poškoduje.
►Sl.16: 1.Vdolbina2.Kavelj3.Vijak
Kaveljjepriročenpripomočekzazačasnoobešanje
stroja.Namestitegalahkonakaterokolistranstroja.
Kaveljvstavitevutornalevialidesnistraniohišjastroja
ingaprivijtezvijakom.Odstranitegatako,daodvijete
vijakingaizvlečete.

18 SLOVENŠČINA
Odprtina za uporabo
OPOZORILO:
Odprtine za obešanje nikoli ne
uporabljajte za druge namene, na primer za pritrjevanje
orodja na visoko mesto.Velikaobremenitevodprtineza
obešanjelahkoprivededopoškodbodprtine,zaradičesar
selahkovialidrugiokolialipodvamipoškodujejo.
►Sl.17: 1.Odprtinazaobešanje
Odprtinazaobešanjejenaspodnjemzadnjemdelu
orodjainjenamenjenazaobešanjeorodjanastenoz
vrvicozaobešanjealipodobniminitmi.
DELOVANJE
Vijačenje
OBVESTILO: Pred vijačenjem vedno skrbno
preverite, ali je vijačni nastavek obrabljen.
Obrabljenvijačninastavekzamenjajte,sajbomorda
vnasprotnemprimerumordaslabopritrjen.
OBVESTILO: Orodje vedno držite pravokotno na
površino vijačenja.Čegadržitepodkotom,lahko
poškodujeteglavevijakovaliobrabitevijačninasta-
vek.Takolahkopovzročitetudislabopritrjevanje.
OBVESTILO:
Orodje vedno držite trdno na
površini vijačenja, dokler vijačenja ne zaključite. V
nasprotnemprimeruvijakimordanebododovoljpritrjeni.
OBVESTILO: Pazite, da vijaka ne privijete v
drug, že pritrjen vijak.
OBVESTILO: Orodja ne uporabljajte brez vija-
kov.Stemlahkopoškodujetepovršinovijačenja.
OBVESTILO: Na drsne površine zaboja podajal-
nika ne nanašajte olja ali masti.
Orodjevklopitetako,dapritisnetesprožilec.Orodje
držitepravokotnointrdnonapovršinivijačenja.Vijakbo
samodejnopremaknjenvvijačnipoložajinpritrjen.
►Sl.18
Vijačenje v potisnem načinu pogona
1. Rahlopovlecitesprožilecingasprostite.Nato
hitropritisnitegumbzaizbironačina.
Indikatorskalučkanaizbirnikupotisneganačinapogona
seprižgeinpotisninačinpogonaseaktivira.
►Sl.19:
1.Gumbzaizbironačina2.Indikatorskalučka
2. Pritisnitegumbzazaklepinhkratisprožilecter
natosprožilecspustite.
►Sl.20: 1.Gumbzazaklep2.Sprožilec
OPOMBA:Medizbiranjempotisneganačinapogona
inzaklepanjemsprožilcasemotorbrezobremenitve
nevrtiintakoznižaporaboenergije.
3. Držiteorodjepravokotnonapovršinovijačenjain
potisnitenaprejnaorodje.
Vijakbosamodejnopremaknjenvvijačnipoložajin
vijačenpripolnihitrosti.
►Sl.21
Vijačenje v kotih
POZOR: Če vijačenje izvajate na položaju, ki
je manj kot 15 mm oddaljen do zidu, ali vijačite z
omejilnikom v stiku z zidom, lahko poškodujete
glave vijakov in povzročite obrabo vijačnega
nastavka.Takolahkopovzročitetudislabopritrjeva-
njevijakovinokvaroorodja.
Toorodjejemogočeuporabitizavijačenjenapoložaju,
kijeoddaljen15mmodzidu,kotjeprikazanonasliki.
►Sl.22: 1. Zid 2.Omejilnik3. 15 mm
Odvijanje
POZOR: Pred obratovanjem vedno preverite
smer vrtenja.
POZOR: Stikalo za spreminjanje smeri vrtenja
uporabite šele, ko se stroj popolnoma ustavi.Če
smervrtenjaspremenite,predensestrojustavi,seta
lahkopoškoduje.
Orodjeomogoča,dazlahkotospremenitesmervrte-
njavijačneganastavka,bodisiprotivdesno(vsmeri
urnegakazalca)zapritrjevanjevijakabodisivlevo(v
smerinasprotiurnegakazalca)zaodvijanjevijaka.
1. RočicozapreklopsmerivrtenjapritisnitesstraniB
zavrtenjevsmerinasprotiurnegakazalca.
►Sl.23: 1.Ročicazapreklopsmerivrtenja
2. Pritisniteindržitesprostitvenegumbenavsaki
straniohišjainnatoohišjepovlecitenarazen.
►Sl.24: 1.Sprostitvenigumbi2.Ohišje
3. Vstavitekonicovijačneganastavkavglavovijaka,
kigaželiteodviti.
4. Čvrstodržiteorodjenavijakuinzazagonpritisnite
sprožilec.
►Sl.25: 1.Vijačninastavek2.Glavavijaka
3.Sprožilec
5. Pokoncuuporabeponastaviteohišjenazajna
ohišjeorodja,doklersenevpnenamestu.
VZDRŽEVANJE
POZOR: Preden se lotite pregledovanja ali
vzdrževanja orodja, se vedno prepričajte, da
je orodje izklopljeno in akumulatorska baterija
odstranjena.
OBVESTILO: Nikoli ne uporabljajte bencina,
razredčila, alkohola ali podobnega sredstva. V
tem primeru se lahko orodje razbarva ali defor-
mira oziroma lahko nastanejo razpoke.
VARNOinZANESLJIVOdelovanjetegaizdelkabo
zagotovljenole,čebostepopravila,vzdrževanjein
nastavitveprepustilipooblaščenemuservisuzaorodja
Makitaalitovarniškemuosebju,kivgrajujeizključno
originalne nadomestne dele.

19 SLOVENŠČINA
Po uporabi
Rednoobrišiteorodjessuhokrpoalikrpo,kijerahlo
navlaženazmilnico.
DODATNA OPREMA
POZOR: Ta dodatni pribor ali pripomočki so
predvideni za uporabo z orodjem Makita, ki je
opisano v teh navodilih za uporabo.Priuporabi
drugegapriboraalipripomočkovobstajanevarnost
telesnihpoškodb.Dodatnipriboralipripomočke
uporabljajtesamozanavedeninamen.
Zavečinformacijododatniopremiseobrnitenanaj-
bližjipooblaščeniserviszaorodjaMakita.
• Vijačnitrakzasuhomontažo
• Nastavki Phillips
• Kvadratninastavek
• Nastavek Pozidriv
• Zabojpodajalnika
• Ohišje
• Originalna akumulator in polnilnik Makita
OPOMBA: Nekateri predmeti na seznamu so lahko
priloženiorodjukotstandardnadodatnaoprema.
Lahkoserazlikujejooddržavedodržave.

20 SHQIP
SHQIP (Udhëzimet origjinale)
SPECIFIKIMET
Modeli: DFR452 DFR551
Majaekaçavidës
ø3,5 mm x 20 mm - ø4,2 mm x 41 mm ø3,5 mm x 25 mm - ø4,2 mm x 55 mm
Shpejtësiapangarkesë(RPM) 0 - 6 000 min-1
Gjatësiatotale 360 mm 396 mm
Tensioni nominal D.C. 18 V
Pesha neto 1,9 - 2,2 kg
• Përshkaktëprogramittonëtëvazhdueshëmtëkërkim-zhvillimit,specikimetqëjepenkëtumundtë
ndryshojnëpadhënënjoftim.
• Specikimetmundtëndryshojnënganjërishtetnëtjetrin.
• Peshamundtëndryshojënëvarësitëaksesorit(ëve),përfshirëkutinëebaterisë.Kombinimimëilehtëdhemë
irëndë,sipasProcedurësEPTA01/2014,tregohetnëtabelë.
Kutia e aplikueshme e baterisë dhe karikuesi
Kutiaebaterisë BL1815N/BL1820B/BL1830B/BL1840B/BL1850B/BL1860B
Karikuesi DC18RC/DC18RD/DC18RE/DC18SD/DC18SE/DC18SF/
DC18SH
• Disaprejkutivetëbaterivedhekarikuesvetërendituramëlartmundtëmosjenëtëdisponueshmenëvarësitë
zonëskujubanoni.
PARALAJMËRIM: Përdorni vetëm kutitë e baterisë dhe karikuesit e listuar më lart.Përdorimii
karikuesvedhekutivetëtjeratëbaterisëmundtëshkaktojëlëndimdhe/osezjarr.
Përdorimi i synuar
Pajisjaështësynuarpërvendosjenevidavenëdru,
metaldheplastikë.
Zhurma
NivelitipikizhurmësA,imatursipasEN62841-2-2:
Modeli DFR452
Niveliipresionittëzhurmës(LpA):75dB(A)
Pasiguria(K):3dB(A)
Modeli DFR551
Niveliipresionittëzhurmës(LpA):74dB(A)
Pasiguria(K):3dB(A)
Niveliizhurmësmundtëtejkalojë80dB(A).
SHËNIM:Vleratedeklaruartotaletëemetimeve
tëzhurmësjanëmatursipasnjëmetodestandarde
testimidhemundtëpërdorenpërtëkrahasuarnjë
vegëlmenjëtjetër.
SHËNIM:Vleratedeklaruaratëemetimevetë
zhurmësmundtëpërdorenpërnjëvlerësimparaprak
tëekspozimit.
PARALAJMËRIM:
Mbani mbrojtëse për veshët.
PARALAJMËRIM: Emetimet e zhurmës gjatë
përdorimit aktual të veglës elektrike mund të
ndryshojnë nga vlerat e deklaruara në varësi të
mënyrave sesi përdoret vegla, veçanërisht nga
lloji i materialit të punës që përdoret.
PARALAJMËRIM:
Vërtetoni që masat e
sigurisë për mbrojtjen e përdoruesit bazohen në
vlerësimin e ekspozimit ndaj kushteve aktuale të
përdorimit (duke marrë parasysh të gjitha pjesët e
ciklit të funksionimit si ato kur pajisja është e kur
dhe punon pa prerë ashtu edhe kohën e përdorimit).
Dridhja
Vleratotaleedridhjeve(shumaevektoritmetreakse)
përcaktohetsipasEN62841-2-2:
Modeli DFR452
Regjimiipunës:vidhosjapagoditje
Emetimiidridhjeve(ah):2,5m/s2osemëpak
Pasiguria(K):1,5m/s2
Modeli DFR551
Regjimiipunës:vidhosjapagoditje
Emetimiidridhjeve(ah):2,5m/s2osemëpak
Pasiguria(K):1,5m/s2
SHËNIM:Vleratedeklaruaratotaletëdridhjevejanë
matursipasnjëmetodestandardetestimidhemund
tëpërdorenpërtëkrahasuarnjëvegëlmenjëtjetër.
SHËNIM:Vleratedeklaruaratotaletëdridhjevemund
tëpërdorenpërnjëvlerësimparapraktëekspozimit.
This manual suits for next models
2
Table of contents
Languages:
Other Makita Power Screwdriver manuals

Makita
Makita DFS250 User manual

Makita
Makita 6821 User manual

Makita
Makita DFL651F User manual

Makita
Makita DDA450RTE User manual

Makita
Makita DFT023F User manual

Makita
Makita DFL020F User manual

Makita
Makita XRF03 User manual

Makita
Makita DFT086F User manual

Makita
Makita 6821 User manual

Makita
Makita 6842 Manual

Makita
Makita LXT DFS452Z User manual

Makita
Makita DFL083F User manual

Makita
Makita 6827 User manual

Makita
Makita BFT022F Manual

Makita
Makita BFR750 User manual

Makita
Makita DFS452 User manual

Makita
Makita DFT024F User manual

Makita
Makita DFS452 User manual

Makita
Makita FS4000 User manual

Makita
Makita 6822 User manual