2
ENGLISH (Original instructions)
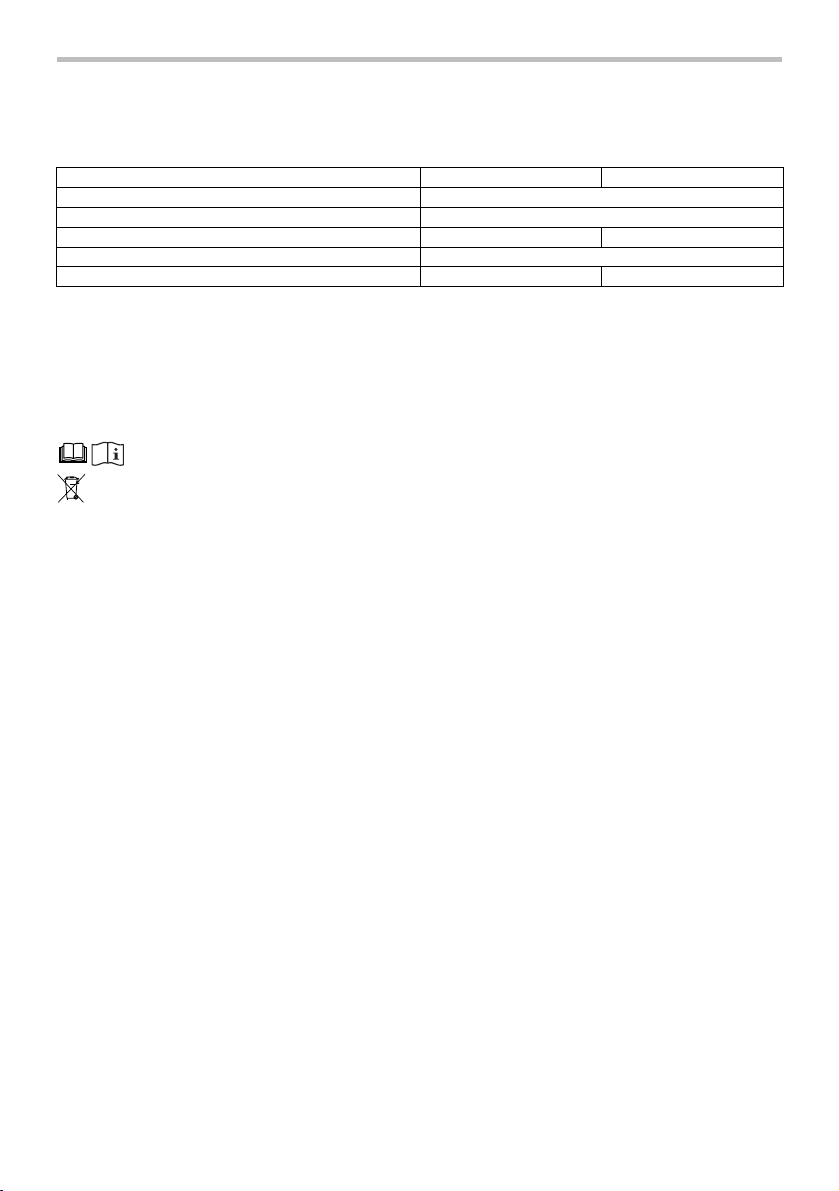
SPECIFICATIONS
Model DCL140 DCL180
Capacity 650 mL
Continuous use Approx. 20 min
Overall length 981 mm 999 mm
Net weight 1.2 kg
Rated voltage D.C. 14.4 V D.C. 18 V
• Due to our continuing program of research and development, the specifications herein are subject to change without notice.
• Specifications and battery cartridge may differ from country to country.
• Weight, with battery cartridge, according to EPTA-Procedure 01/2003
END315-1
Symbols
The following show the symbols used for the equipment.
Be sure that you understand their meaning before use.
・Read instruction manual.
・Only for EU countries
Do not dispose of electric equipment or
battery pack together with household
waste material!
In observance of the European Directives,
on Waste Electric and Electronic
Equipment and Batteries and
Accumulators and Waste Batteries and
Accumulators and their implementation in
accordance with national laws, electric
equipment and batteries and battery
pack(s) that have reached the end of their
life must be collected separately and
returned to an environmentally compatible
recycling facility.
ENE017-1
Intended use
The tool is intended for collecting dry dust.
ENA005-3
IMPORTANT
SAFETY INSTRUCTIONS
When using an electrical appliance, basic precautions
should always be followed, including the following:
READ ALL INSTRUCTIONS
BEFORE USING THIS
APPLIANCE.
WARNING - To reduce the risk of fire, electric shock
or injury:
1. Do not expose to rain. Store indoors.
2.
Do not allow to be used as a toy. Close attention
is necessary when used by or near children.
3.
Use only as described in this manual. Use only
manufacturer's recommended attachments.
4. Do not use with damaged battery. If appliance
is not working as it should, has been dropped,
damaged, left outdoors, or dropped into water,
return it to a service center.
5. Do not handle appliance with wet hands.
6. Do not put any object into openings. Do not
use with any opening blocked; keep free of
dust, lint, hair, and anything that may reduce
air flow.
7.
Keep hair, loose clothing, fingers, and all parts
of body away from openings and moving parts.
8. Turn off all controls before removing the
battery.
9. Use extra care when cleaning on stairs.
10. Do not use to pick up flammable or
combustible liquids, such as gasoline, or use
in areas where they may be present.
11. Use only the charger supplied by the
manufacturer to recharge.
12. Do not pick up anything that is burning or
smoking, such as cigarettes, matches, or hot
ashes.
13. Do not use without filters in place.
14. Do not charge the battery outdoors.
15. This appliance is not intended for use by
persons (including children) with reduced
physical, sensory or mental capabilities, or
lack of experience and knowledge, unless they
have been given supervision or instruction
concerning use of the appliance by a person
responsible for their safety.
16. Children should be supervised to ensure that
they do not play with the appliance.
SAVE THESE INSTRUCTIONS.
This appliance is intended for household use.
Cd
Ni-MH
Li-ion


