manuals.online logo
Brands
  1. Home
  2. •
  3. Brands
  4. •
  5. MARTINDALE
  6. •
  7. Measuring Instrument
  8. •
  9. MARTINDALE CO90 User manual

MARTINDALE CO90 User manual

MARTINDALE
ELECTRIC
Trusted by professionals
INSTRUCTIONS
CARBON MONOXIDE METER
CO90
INTRODUCTION
• The carbon monoxide meter is designed to measure low levels of carbon
monoxide (CO) in parts per million(PPM).
• It is intended to measure levels of CO in still ambient air.
• It uses a catalytic chemical sensor that consumes no chemicals.
• Sensor life is primarily determined by the type of exposure.
• The most practical application is to determine if the indoor CO levels are
higher than outdoor levels and to determine the source.
• This instrument detects changes in CO levels very quickly. The faster the
beeper sounds, the higher the concentration of CO.
• Above 200PPM, the beeper sounds continuously, and the frequency of the
tone increases with the concentration of CO.
• This instrument is a portable easy use 3½ digit, compact-sized digital
carbon monoxide meter designed for simple one hand operation, complete
with back light LCD display.
WARNING
Do not take measurements directly at a tailpipe, in a boiler flue, or at a
register. See precautions. Do not rely solely on a carbon monoxide measure-
ment to determine if a heat exchanger is bad. See heat exchangers.
3
WARNING
Due to the highly dangerous nature of CO, it is essential that regular testing
is carried out to confirm the continuing correct functioning of your meter. See
next page for precautions.
4
PRECAUTIONS
1. Do not measure petrol engine exhaust or other high CO or highly
contaminated gases. High levels of CO and other contaminants can ruin the
sensor.
2. Do not take readings directly in the stream of air at register or in a flue.
3. Allow enough time for the accessory head to reach ambient temperature and
RH%. Air being measured must be stable and between 0°C and 40°C(32°F
and 105°F) and 15%RH and 90%RH. Temperature and humidity changes can
cause transient readings. For best results, use a Hand pump to sample the
air, cool it to near room temperature, and raise the relative humidity.
4. Regularly check your CO90 to ensure it is reading correctly. Martindale
recommends an annual recalibration and regular checks, with either test gas
or the simple “coffee cup test.”
Coffee cup test
To demonstrate that your CO90 works, turn a ceramic coffee cup upside down
and slide it over the edge of a counter (or desk) to expose about a third of the
mouth of the cup. Burn a cigarette lighter inside the exposed mouth of the cup
- don't burn the counter. When the flame starts to flicker, you've burned up most
of the oxygen in the cup creating carbon dioxide and now you're starting to
produce CO (carbon monoxide). Bring the flame in and out of the mouth of the
coffee cup to just keep the flame alive. The longer you keep the flame flickering,
the more CO you produce. After 10 seconds of flickering, extinguish the flame
and put the CO90 head in the mouth of the cup.You should see readings in the
100s. Take it out if it approaches 1000PPM.
5
How to use
1. Slide the switch to “Average” or “Normal” to measure the concentration of CO.
2. Let stabilise for at least 45 seconds.
3. Take the instrument outside and adjust it to zero. Then bring inside to take
measurements.
4. Expose sensor to a still, stable air sample.(see precautions). The display
reacts to the presence of CO in seconds. Take the final reading when the
display stabilises.
5. For initial test, walk around the building, watching for the readings to go up to
determine where maximum concentrations of CO are. To measure air from a
register, use a pump or measure out of the air stream. Hot blowing air can
adversely affect the reading. The temperature of the sample must be near
ambient.
6. Push “MAX” to read the maximum reading
Push “HOLD” to hold the maximum reading
Push " " to turn on the back light
Push " " to turn off the back light
7. Average mode gives a stable reading. The unit takes a measurement every
second and displays an average reading on the screen.
Zeroing the Sensor
Turn on the power and allow the displayed reading to stabilise before
proceeding after approximately 30 seconds. Then with the instrument sampling
fresh air (air that is free of CO), remove cap marked "CAL" and use attached
screwdriver to adjust VR which is in the hole for a reading of 000±2ppm.
If you’re not sure about the quality of the surrounding air, you can apply a blend
of Oxygen/Nitrogen gas to the sensor. If rapid temperature changes are
encountered (such as from freezing to room temperatures) during the operation
of the analyser, the operator must allow the analyser to stabilise at the ambient
temperature for at least 2 minutes before taking a measurement.
SPECIFICATIONS
GENERAL
Display: 3 1/2 digit liquid crystal display (LCD) with maximum reading of 1999
Low battery indication: the " " is displayed when the battery voltage
drops below the operating level
Operating Environment: 32°F to 105°F (0°C to 40°C) at 15% to 90% relative
humidity
Storage Temperature: -4°F to 140°F (-20°C to 60°C) , 0 to 80% R.H. with
battery removed from meter
Battery: Standard 9V battery (NEDA 1604, IEC 6F22 006P)
Battery Life: 200 hours typical. No measurable current draw when in " off "
position
Dimensions: 189mm(H) x 67mm(W) x 35mm(D)
Weight: approx.193g including battery
SAFETY INFORMATION
Read the safety and operating instructions before use. Pay particular attention
to the precautions on page 4.
CO level Health effect
0-1 ppm Normal background level.
9 ppm Maximum indoor air quality level.
50 ppm Maximum concentration for continuous exposure in
any 8 hour average level.
200 ppm Mild headache, fatigue, nausea and dizziness.
400 ppm Frontal headache, life threatening after 3 hours.
800 ppm Death within 2 hours.
1600 ppm Nausea within 20 minutes, death within 1 hour.
12800 ppm Death within 1 to 3 minutes.
67
OPERATING INSTRUCTIONS
BACK-LIGHT Button
Press " " button to turn the Back-Light on.
Press " " button to turn the Back-Light off.
DATA HOLD Button
Press the " HOLD " key to enter the Data Hold mode, the " " indicator
appears on the display. When DATA HOLD mode is selected, the meter holds
the present reading and stops all further measurements. Pressing the " HOLD "
key again cancels DATA HOLD mode, causing the meter to resume taking
measurements.
MAX HOLD Button
Pressing the " MAX " key to enter the MAX HOLD mode. The meter then
records and updates the maximum absolute values and the " " indicator
appears on the display. Press the " MAX " key again to exit the MAX HOLD
recording mode. In the MAX HOLD mode, press " HOLD " key to stop the
recording, press " HOLD " key again to resume recording.
Cross-sensitivity
The sensor has a permanent irreplaceable filter built inside the sensor to filter
out trace concentrations of SO2, NO2 and most hydrocarbons.
If exposed to high concentrations of harmful chemicals or dirt, the filter can
deteriorate and/or impede diffusion of air to the sensor.
MAX
H
8
Gas PPM Cross-sensitivity%
Hydrogen sulfide 207 1.3
Sulphur dioxide 208 -0.7
Nitric oxide 1000 46
Nitrogen dioxide 20 -4.4
Chlorine 15 -3.8
Hydrogen 200 78
Hydrogen cyanide 15 -0.5
Hydrogen chloride 135 -0.7
Storage
Do not store in areas which contain solvent vapours. This includes aerosols
such as air-freshener, wax polish, window cleaner, and all organic solvents.
ELECTRICAL
Range: 0 to 1000PPM (2000PPM with 5 minute max exposure time.)
Sensor Calibration: Factory calibrated on 205ppm.
Sensor Type: Electrochemical (specific to CO)
Initial Accuracy: ±5% of reading ±5PPM
Response time: <70sec to 90% of reading
Operating Temperature: 0 to 40 °C (32 to 105 °F)
Operating relative humidity: 15 to 90%RH, non-condensing
Long term drift: <5%/year (depending on use)
SPECIAL NOTE ABOUT CRACKED HEAT EXCHANGERS
A CO detector cannot tell you if a heat exchanger is good. A CO detector can
indicate a heat exchanger is cracked only if all of the following conditions occur
simultaneously:
9
1. The flame generates enough CO (lack of oxygen, excess fuel, high temp).
2. Enough exhaust gases are emitted from the heat exchanger crack.
3. The exhaust gases from the crack are not diluted too much before coming in
contact with the sensor. A cracked heat exchanger may leak CO in a small
stream. You may measure high concentrations at one point but low
concentrations only an inch away.
4. The heat exchanger is the only possible source from the CO detected.
OPERATOR MAINTENANCE
Battery Replacement
Power is supplied by a 9 volt "transistor" battery. (NEDA 1604, IEC 6F22).
The " " appears on the LCD display when replacement is needed.
To replace the battery, remove the two screws from the back of the meter and
lift off the battery cover. Remove the battery from battery contacts.
Cleaning
Periodically wipe the case with a damp cloth, do not use abrasives or solvents.
10
Martindale Electric will carry out routine calibration (on a chargeable basis) if the
instrument is returned, carriage paid, to the address on the final page of this
document. Alternatively, a chargeable collection and return service is available.
Repair & Service
There are no user serviceable parts in this unit. Return to Martindale Electric if
faulty. Our service department will promptly quote to repair any faults that occur
outside the warranty period.
Storage Conditions
The unit should be kept in warm, dry conditions away from direct sources of
heat or sunlight, with the battery removed and in such a manner as to preserve
the working life of the unit. It is strongly advised that the unit is not kept in a tool
box where other tools may damage it.
Warranty
Faults in manufacture and materials are fully guaranteed for 2 years from date
of invoice and will be rectified by us free of charge, provided the unit has not
been tampered with and is returned to us with its housing unopened. Damage
due to dropping, abuse or misuse is not covered by the guarantee. Nothing in
these instructions reduces your statutory rights.
Martindale Electric Company Ltd. was founded in 1928 and
manufactures a large range of test equipment.
G18th Edition Testers
GAll-In-One Testers
GCalibration Equipment
GContinuity Testers
GElectrician’s kits
GFull Calibration & Repair Service
GFuse Finders
GDigital Clamp Meters
GDigital Multimeters
GMicrowave Leakage Detectors
GMotor Maintenance Equipment
GNon-trip loop testers
GPat testers & Accessories
GPhase rotation
GProving units
GSocket Testers
GThermometers & Probes
GTest Leads
GVoltage Indicators
+
GSpecialist Metrohm testers (4 & 5kV)
GSpecialist Drummond testers
Martindale Electric Company Limited
Metrohm House, Imperial Park, Imperial Way, Watford,
Hertfordshire, WD24 4PP, UK
Tel: +44 (0)1923 441717 Fax: +44 (0)1923 446900
E-mail:[email protected]
Website: www.martindale-electric.co.uk
rev 2 E+OE. © Martindale Electric Co. Ltd. 2016

Other MARTINDALE Measuring Instrument manuals

MARTINDALE CM82 User manual

MARTINDALE

MARTINDALE CM82 User manual

MARTINDALE LM192 User manual

MARTINDALE

MARTINDALE LM192 User manual

MARTINDALE CT60 User manual

MARTINDALE

MARTINDALE CT60 User manual

MARTINDALE VI13800 User manual

MARTINDALE

MARTINDALE VI13800 User manual

MARTINDALE CM69 User manual

MARTINDALE

MARTINDALE CM69 User manual

MARTINDALE CMi210 User manual

MARTINDALE

MARTINDALE CMi210 User manual

MARTINDALE VR2250 Operator's manual

MARTINDALE

MARTINDALE VR2250 Operator's manual

MARTINDALE CM87 User manual

MARTINDALE

MARTINDALE CM87 User manual

MARTINDALE VR2230 Operator's manual

MARTINDALE

MARTINDALE VR2230 Operator's manual

MARTINDALE PM85 User manual

MARTINDALE

MARTINDALE PM85 User manual

MARTINDALE CM76 User manual

MARTINDALE

MARTINDALE CM76 User manual

MARTINDALE RT80 User manual

MARTINDALE

MARTINDALE RT80 User manual

MARTINDALE CB12 User manual

MARTINDALE

MARTINDALE CB12 User manual

MARTINDALE FD650/R User manual

MARTINDALE

MARTINDALE FD650/R User manual

MARTINDALE SP79 User manual

MARTINDALE

MARTINDALE SP79 User manual

MARTINDALE VT7 User manual

MARTINDALE

MARTINDALE VT7 User manual

MARTINDALE DH85 User manual

MARTINDALE

MARTINDALE DH85 User manual

MARTINDALE LM195 User manual

MARTINDALE

MARTINDALE LM195 User manual

MARTINDALE AV90 User manual

MARTINDALE

MARTINDALE AV90 User manual

MARTINDALE LM82 User manual

MARTINDALE

MARTINDALE LM82 User manual

MARTINDALE FD500 User manual

MARTINDALE

MARTINDALE FD500 User manual

MARTINDALE TEK100 User manual

MARTINDALE

MARTINDALE TEK100 User manual

MARTINDALE SP75 User manual

MARTINDALE

MARTINDALE SP75 User manual

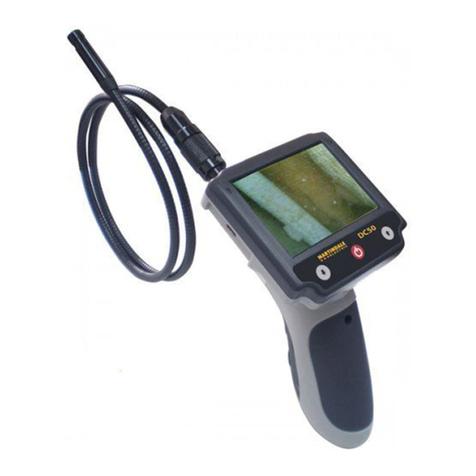
MARTINDALE DC50 User manual

MARTINDALE

MARTINDALE DC50 User manual

Popular Measuring Instrument manuals by other brands

BEHA Unitest Duplex 93486 instruction manual

BEHA

BEHA Unitest Duplex 93486 instruction manual

ENM MT10 Series Technical data

ENM

ENM MT10 Series Technical data

Sekonic Litemaster Pro L-478D operating manual

Sekonic

Sekonic Litemaster Pro L-478D operating manual

LaserLiner VideoScope manual

LaserLiner

LaserLiner VideoScope manual

Epilog Laser Zing 24 quick start guide

Epilog Laser

Epilog Laser Zing 24 quick start guide

BW SENSING BW-IMU300 Technical manual

BW SENSING

BW SENSING BW-IMU300 Technical manual

Sequoia LISST-100X user manual

Sequoia

Sequoia LISST-100X user manual

Kyowa Medex Co., Ltd. HM-JACK Series Operation manual

Kyowa Medex Co., Ltd.

Kyowa Medex Co., Ltd. HM-JACK Series Operation manual

Fluidwell F113-P manual

Fluidwell

Fluidwell F113-P manual

PRONOVA Stelzner pH AGRAR 2000 Technical instructions

PRONOVA

PRONOVA Stelzner pH AGRAR 2000 Technical instructions

Solta Medical CLEAR Plus BRILLIANT Service manual

Solta Medical

Solta Medical CLEAR Plus BRILLIANT Service manual

wtw PurCon operating manual

wtw

wtw PurCon operating manual

Vaisala CL31 user guide

Vaisala

Vaisala CL31 user guide

Qonnex DCE.230 user manual

Qonnex

Qonnex DCE.230 user manual

THORLABS PMD5000 Operation manual

THORLABS

THORLABS PMD5000 Operation manual

DeWalt DCE825G18 manual

DeWalt

DeWalt DCE825G18 manual

Midtronics CELLTRON MAX instruction manual

Midtronics

Midtronics CELLTRON MAX instruction manual

Baltech VP-3470 Operation manual

Baltech

Baltech VP-3470 Operation manual

manuals.online logo
manuals.online logoBrands
  • About & Mission
  • Contact us
  • Privacy Policy
  • Terms and Conditions

Copyright 2025 Manuals.Online. All Rights Reserved.