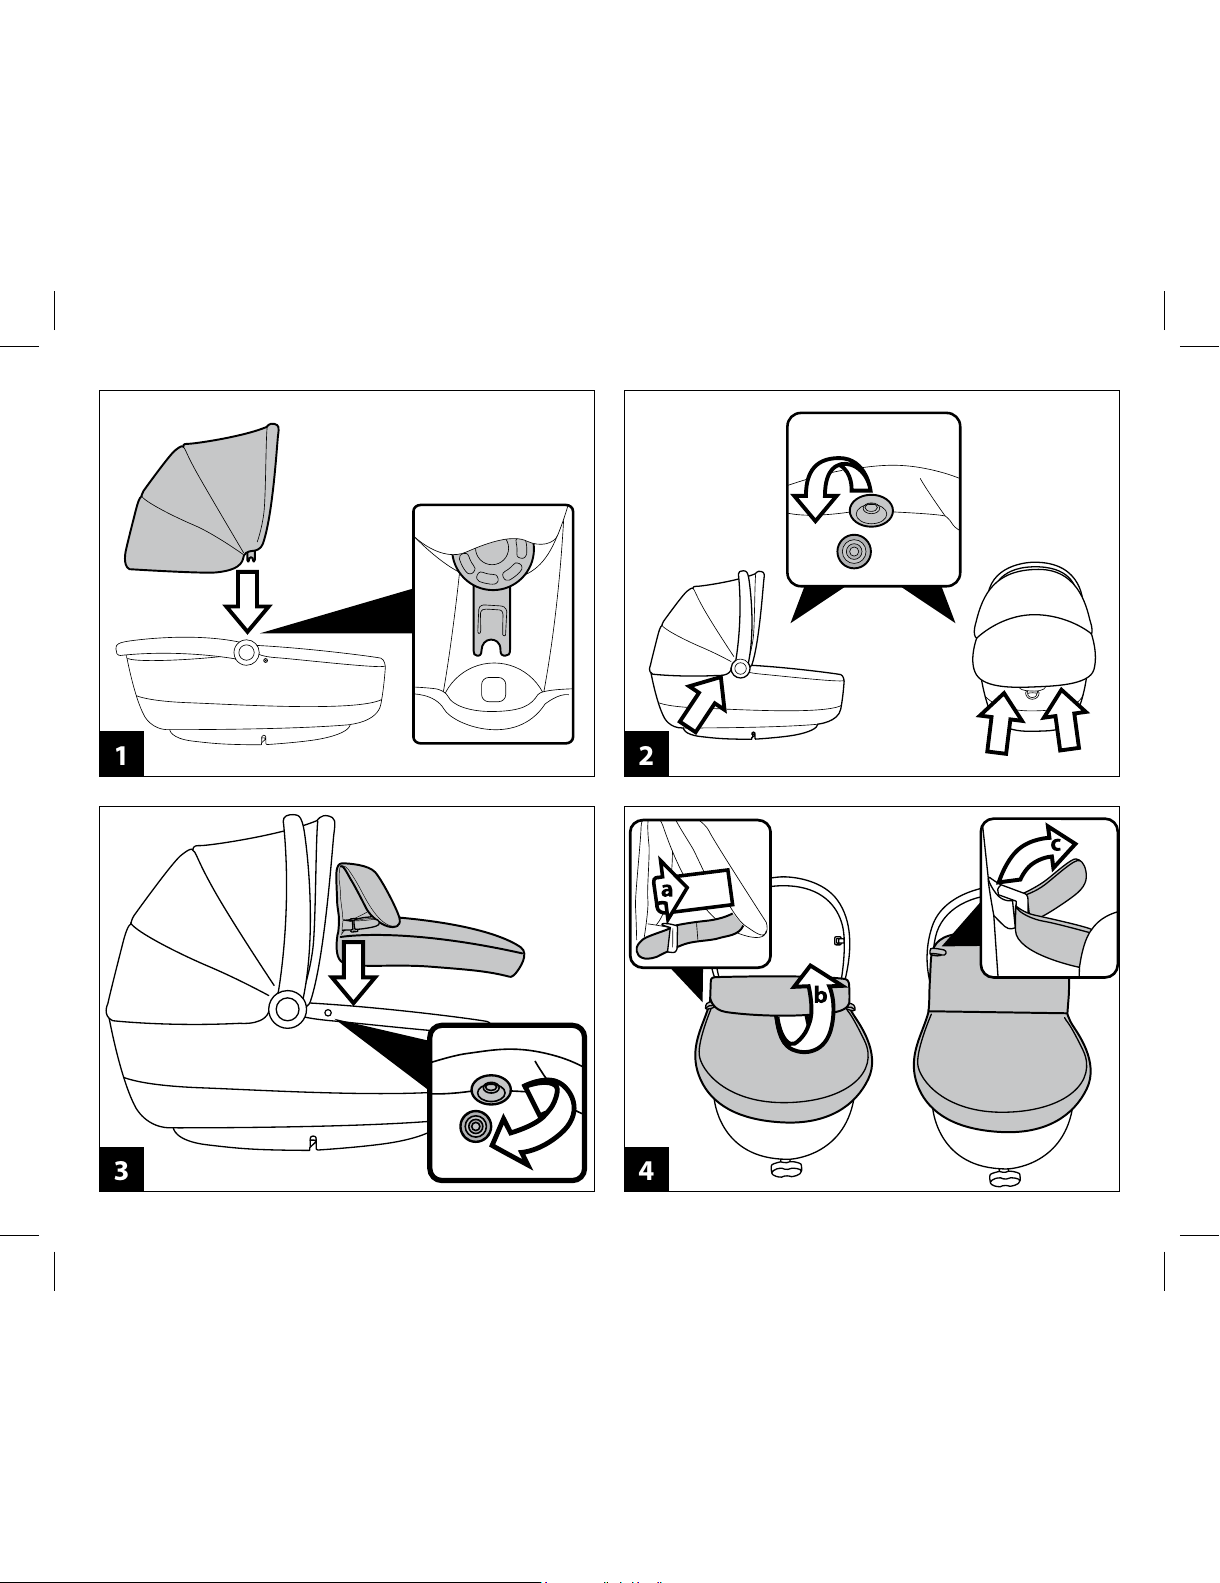
Martinelli Navetta XL User manual
Other Martinelli Stroller manuals

Martinelli
Martinelli CARRELLO BOOK ST User manual

Martinelli
Martinelli PRIMONIDO ELITE User manual

Martinelli
Martinelli Pliko Mini User manual

Martinelli
Martinelli VIAGGIO FF105 User manual

Martinelli
Martinelli CARRELLO BOOK 51 S User manual

Martinelli
Martinelli Navetta Pop-Up Elite User manual

Martinelli
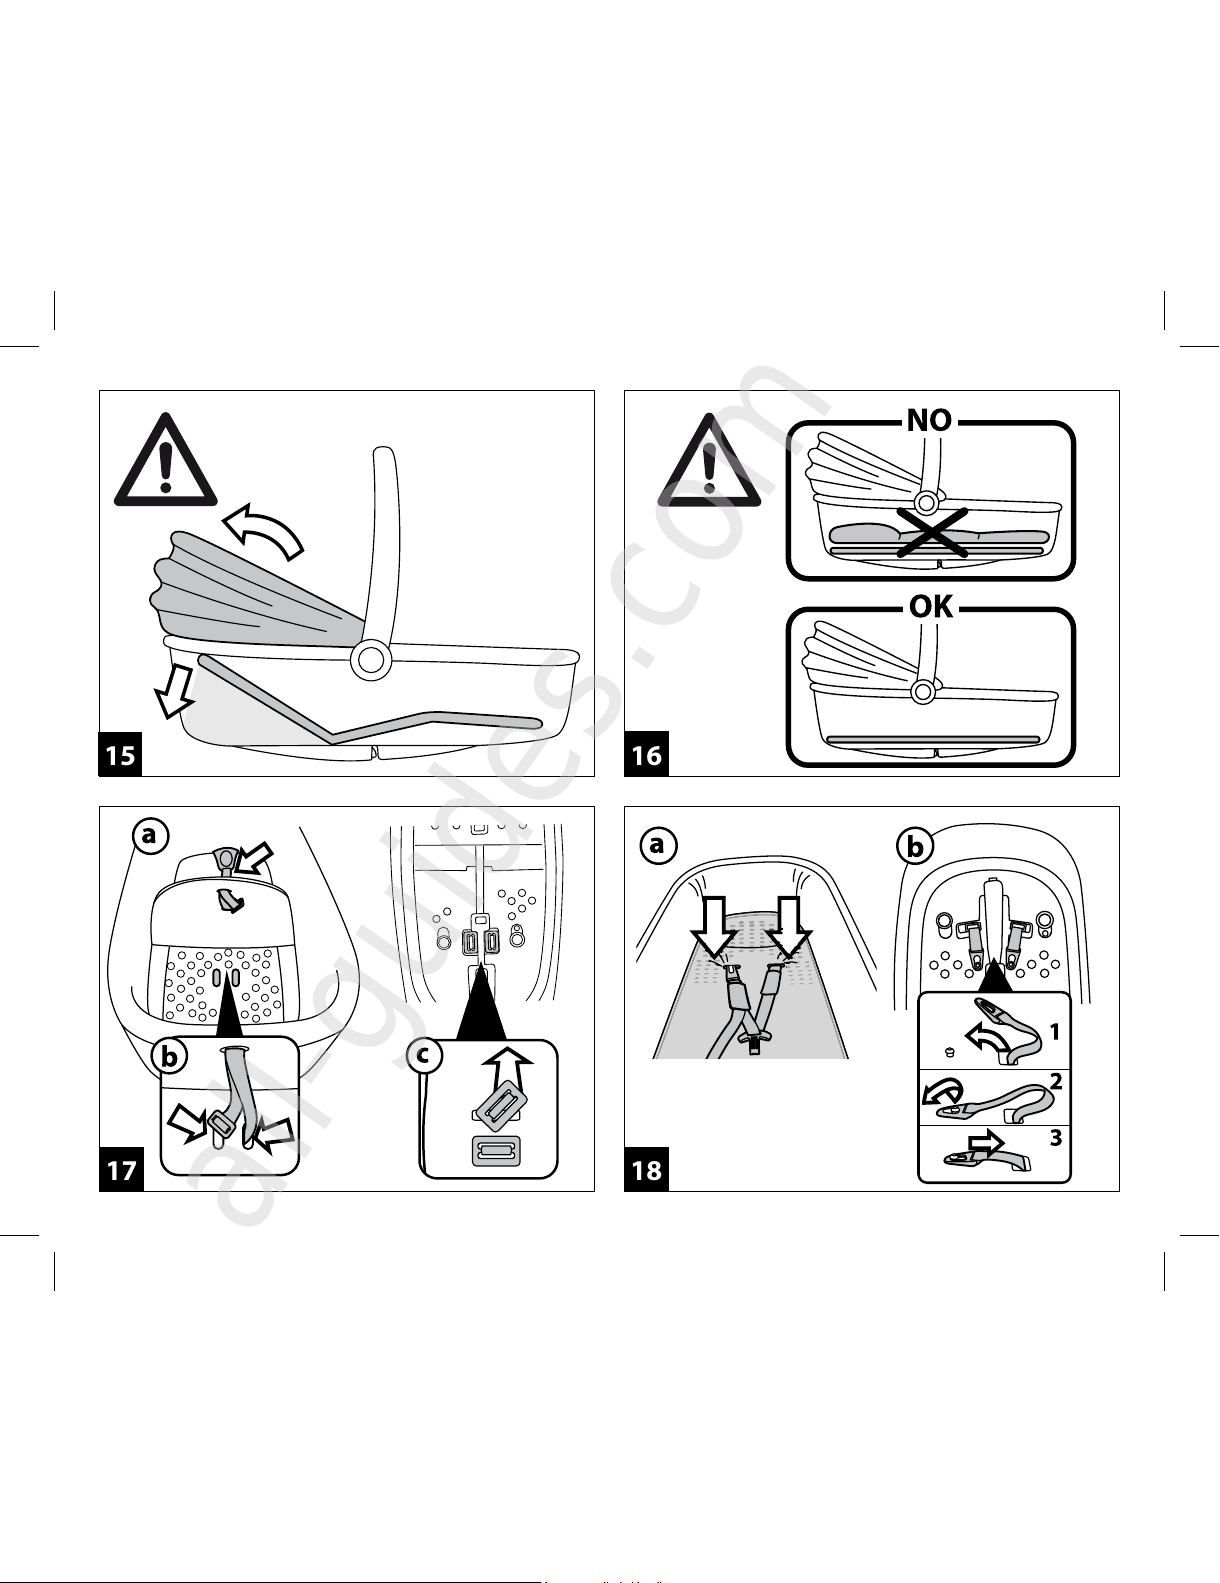
Martinelli CARRELLO CLASSICO User manual

Martinelli
Martinelli CARRELLO BOOK 51 S User manual

Martinelli
Martinelli SEGGIOLINO POP-UP User manual

Martinelli
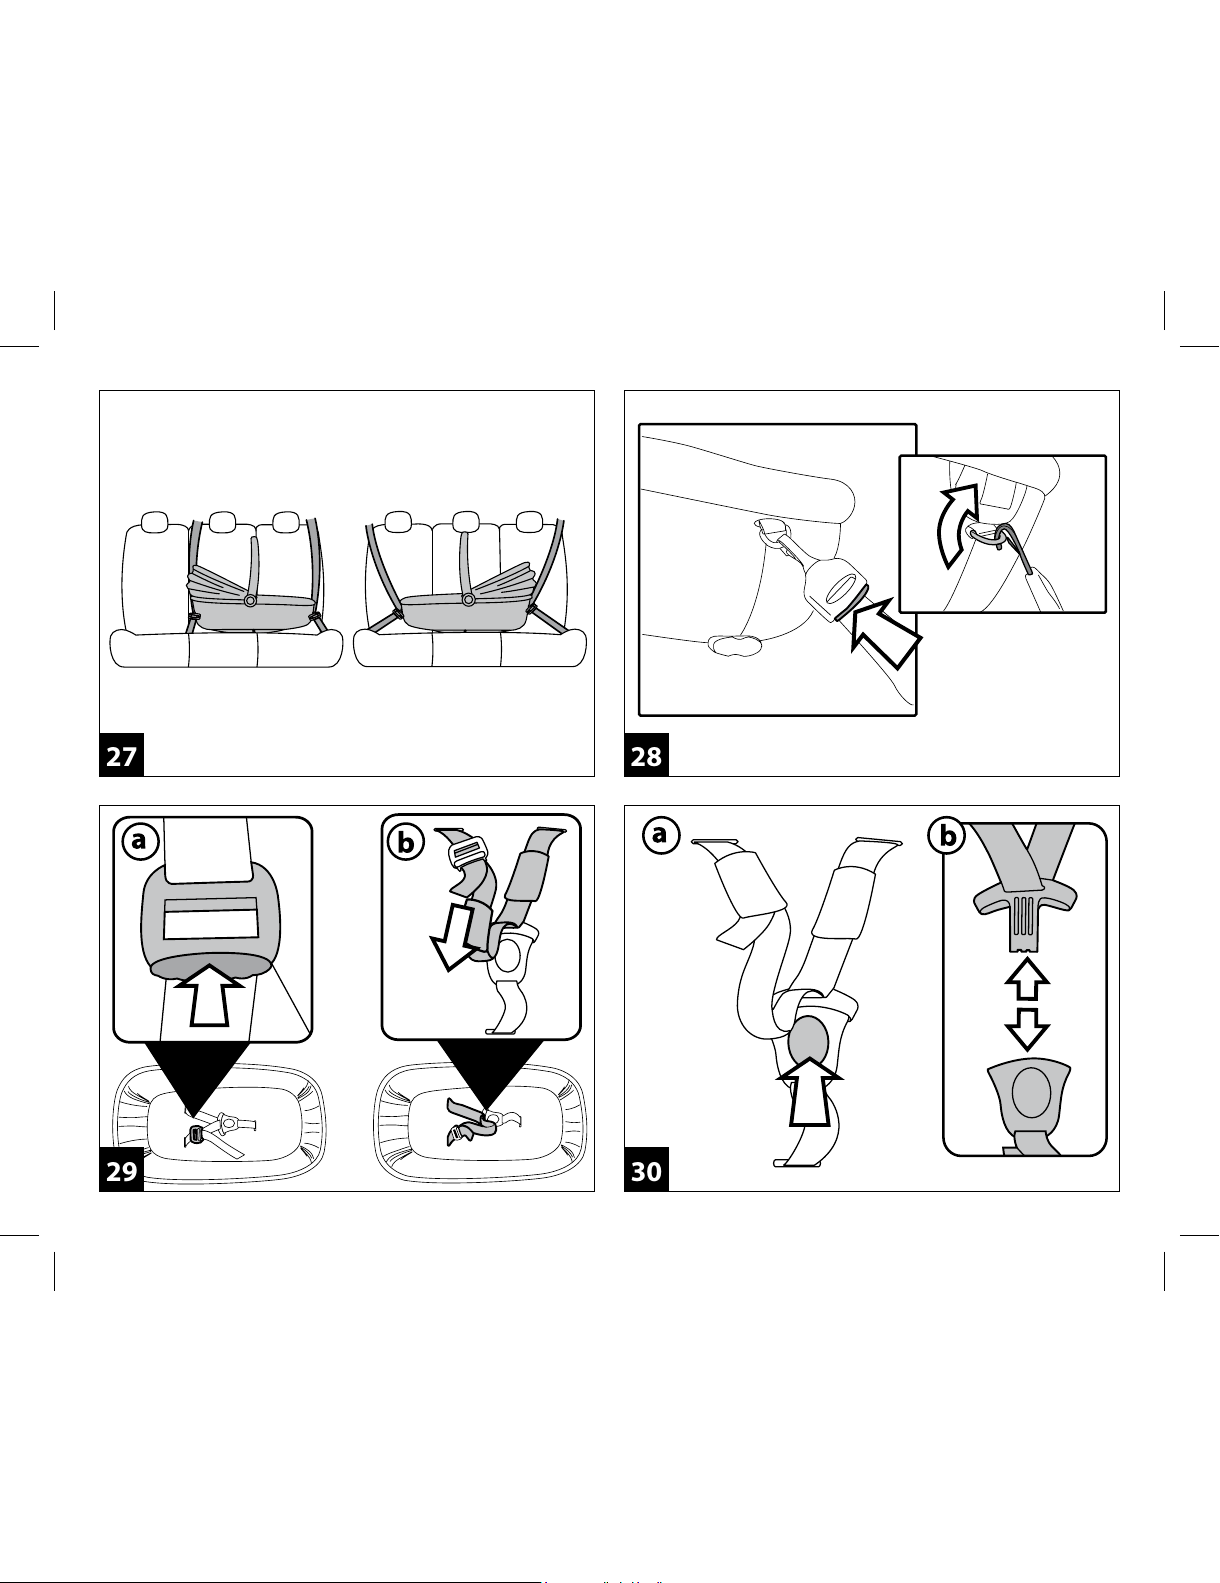
Martinelli Navicella User manual