manuals.online logo
Brands
  1. Home
  2. •
  3. Brands
  4. •
  5. Mastercare
  6. •
  7. Medical Equipment
  8. •
  9. Mastercare Gen II Entree Bath User manual

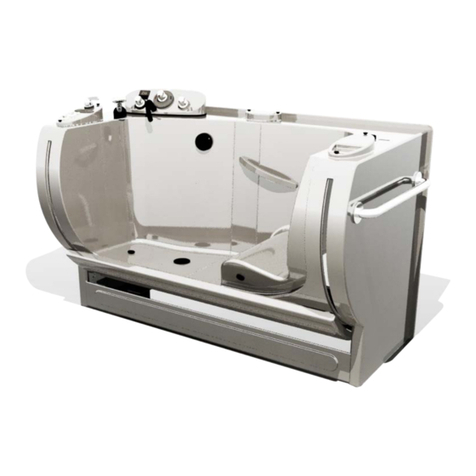
Mastercare Gen II Entree Bath User manual

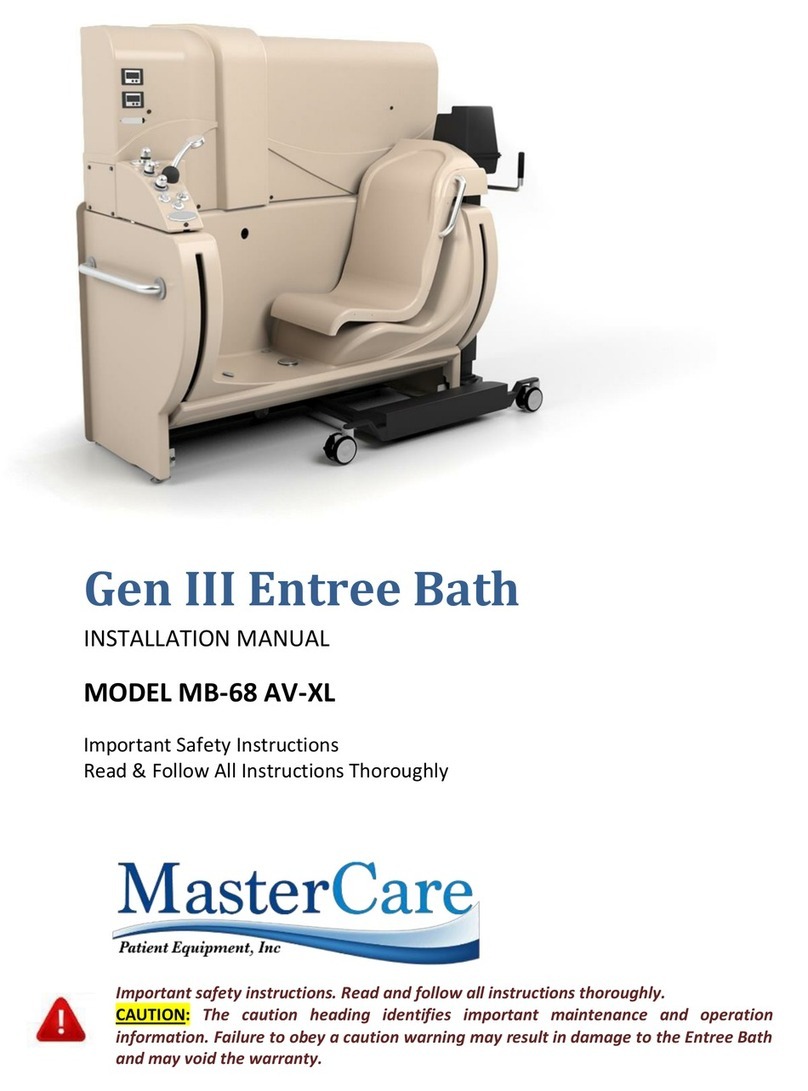
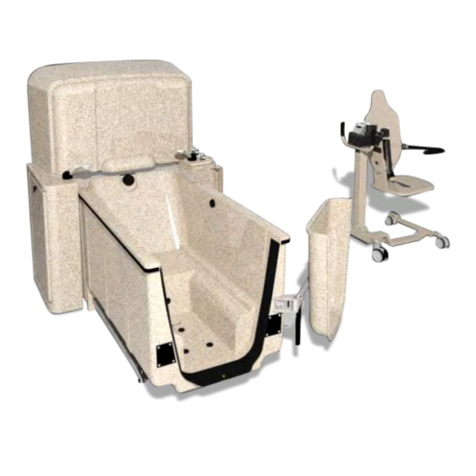
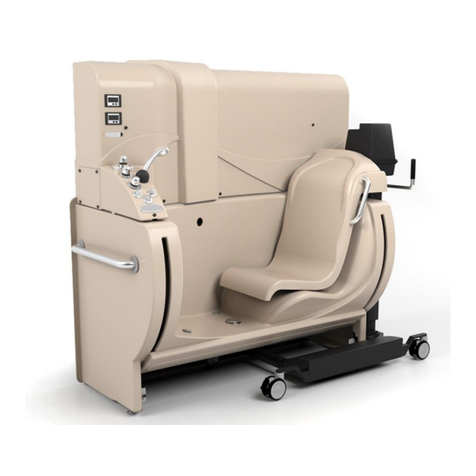
Gen II Entree Bath
All Models
Maintenance Manual
Important Safety Instructions
Read & Follow All Instructions Thoroughly
Note: The serial tag is at the first page of this manual package. The Standards and
certification labels are located in the Architectural Specifications & Rough-In
Information
Generation II Entree Bath –All Models
MAINTENANCE MANUAL
07-01-16
Page 3 of 17
2071 14th Ave – Columbus, NE 68601
800-798-5867 FAX: 402-563-9102
www.mastercarebath.com
MasterCare hygiene products are designed and manufactured to help provide a more operationally efficient and secure
environment for your staff and residents. It is required that a scheduled maintenance program be set up to insure that
the efficiencies and security designed into the bathing system are kept at peak levels. Instructions on how to set up a
scheduled maintenance program are covered in this manual.
Maintenance Instructions:
MasterCare Bathing Systems are purposely designed to minimize the maintenance requirements associated with such
products. They are manufactured using materials suited to their application and the durability requirements of the health
care industry
Daily:
•Check for loose fasteners, worn seat belts and pads, leaks on the floor and mixing valve temperature.
Weekly:
•Test for proper operation of the GFCI.
Monthly:
•Door assembly: Check all components on the entire door assembly to ensure they are properly secured and not
missing. Check the security belt and pads for signs of excessive wear. Correct all deficiencies found during the
inspections before putting unit back into service.
Quarterly:
•Door assembly: Same as monthly.
•Plumbing and drain assembly: Check all fittings and connections to make sure they are secure and no leaks have
developed. Check with a hand held thermometer and observe the solar thermometer of incoming water to
ensure it is accurate.
•BathAire(SM) system: Check all air supply pipes and hoses in the system so they are secure and no air leaks have
developed. Also check to make certain no water leaks have developed.
•Control system: Check all controls to ensure that they function as outlined in the operations manual.
CAUTION:All deficiencies discovered during monthly and quarterly inspections must be corrected and/or repaired
immediately. This will help prevent potential damage to the system that could occur if corrective action is not taken
and ultimately extend the life of the bathing system.
IMPORTANT SAFETY INSTRUCTIONS
READ AND FOLLOW ALL INSTRUCTIONS
THROUGHLY
CAUTION: The caution heading identifies important
maintenance and operation information. Failure to
obey a caution warning may result in damage to the
Entree Bath and may void the warranty.
Failures of materials can occur due to
normal wear associated with use or misuse
over time. It is in the best interests of the
residents
, staff and the provider that
recommended safety inspections are
scheduled on a periodic basis and preventive
maintenance performed as needed.
Before performing any checks that require
inspection inside of the tub shell, trip the
GFCI circuit breaker to OFF. It is located
under the GFCI Access Panel
Generation II Entree Bath –All Models
MAINTENANCE MANUAL
07-01-16
Page 4 of 17
2071 14th Ave – Columbus, NE 68601
800-798-5867 FAX: 402-563-9102
www.mastercarebath.com
PROBLEM SOLVING AND DIAGNOSIS:
The following guide is intended to help solve the majority of problems that may occur due to normal wear and use of the
system over time.
Problem
Potential Causes
Door does not open/close
properly
Procedure: Drain must be fully open for door to open.
Mechanical: Micro switch activated by drain linkage inside tub loose or not aligned
properly.
Other potential causes: air transmitter, air lines, power failure, capacitor on
actuator.
Electrical: Refer to electrical diagram (Page.8)
BathAire (SM) Blower not
functioning properly.
Procedure: Purge cycle automatic.
Mechanical: Membrane switch defective. BathAire(SM) aerator out of adjustment.
Flexible air tubing disconnected from BathAire (SM) aerator.
Electrical: Refer to electrical diagram. (Page.8). Check GFCI on tub and community
GFCI.
Water in air tubing.
Mechanical: Foreign material lodged under rubber rim of aerator. Air injection
rubber valve head old, cracking or worn out. Adjustment nuts at bottom of
aerator assembly are not tight. “O” ring between aeration valve and inside tub
surface not sealing.
Drain not functioning
properly.
Mechanical: Drain linkage out of adjustment. Foreign material lodged under
stopper or inside drain shoe.
Plumbing not functioning
properly.
Mechanical: Mixing valve linkage out of adjustment. Hot/cold incoming water
screens plugged and/or mixing valve cartridge plugged.
Electrical: Refer to electrical diagram. (Page.8)
Generation II Entree Bath –All Models
MAINTENANCE MANUAL
07-01-16
Page 5 of 17
2071 14th Ave – Columbus, NE 68601
800-798-5867 FAX: 402-563-9102
www.mastercarebath.com
ENTREE BATH LEAK GUIDE
Note: Leaks can be cause by one or more of the following.
1. Foreign debris or material between seal and inner stainless steel door skin:This generally occurs right after
installation. To correct: rotate the door to access the seal area. Use a plastic spatula or similar non-metallic tool
with cloth over the end to clean any debris trapped between the seal and stainless steel door skin, or using a
wet-vac with crevasse tool, clean along the entire length of the seal with the tool directed at the area between
the seal and the stainless steel inner door skin.
2. Water overflowing above the level of the seal inside the door:A combination of full BathAire(SM) volume and/or
an active individual you are bathing can cause water to run down along the outside of the seal making it appear
the seal is leaking. To correct: reduce BathAire(SM). Adjust the fill level of the tub down to one to four inches
below the overflow. Calm the bather down.
3. The casual water drain system is not functioning:The casual water drain system is designed to drain off any
residual water or water remaining between the tub and the seal when the door is first opened. If this system is
not functioning correctly, water will run out one side or the other of the lower end of the fiberglass door cover
when the door is rotated to a full up position.
This failure can be caused by two events:
a. Check valve stuck or plugged with debris. To correct: check and clean the valve.
b. The check valve in the 2” PVC drain pipe is located too high above the level of the hose bar in the door
when the door is rotated to a full closed position. To correct: relocate the check valve in the drain pipe
to 2 ½” above the floor. Plug the hose at the previous position of the hose barb.
4. Seal not being compressed enough:The adjustment for proper seal compression is made at the factory and will
not normally require further adjustment in the field. The seal is perfectly round when the door is open. When
the door is in a full closed position, the seal should be compressed into an oval shape about one half its original
size.
If not, two things can cause this:
a. The attendant is not holding the door close switch down until the door rotation stops automatically. To
correct: make sure the attendant(s) are holding the switch down until the door rotation stops
automatically.
b. The door is out of adjustment or the seal is flattened and unable to compress further. To correct: call
MasterCare to order a new seal and replacement instructions.
5. Seal is worn out or damaged:The inner core of the seal is permanently inflated with a material called closed cell
foam and springs back to a round shape after the door opens. Three things can happen to cause the seal to fail:
a. The round shape can be altered through prolonged compression with the door fully closed for an
extended period of time. Check the shape of the seal with the door open. If it is in a very obvious oval
shape, it has been damaged by prolonged compression.
b. The seal has been damaged by a cut or gouge in its outer surface. Check for this type of damage.
c. The seal has lost its elasticity. The seal should spring back to a round shape immediately after
decompression. If not, it is worn out and it will not seal properly.
To correct any of the above situations, replace the seal.
CAUTION:DO NOT compress the seal (close the door all the way) when tub is NOT in use.
Generation II Entree Bath –All Models
MAINTENANCE MANUAL
07-01-16
Page 6 of 17
2071 14th Ave – Columbus, NE 68601
800-798-5867 FAX: 402-563-9102
www.mastercarebath.com
DOOR ADJUSTMENT DIAGRAM
Bottom view of Actuator
Motor l
ooking up from
the floor. All adjustments
are made from this point
of reference.
SCALE 1:1
Door tighten/loosen adjustment screw.
Using a 1/8 x 6” flat head screwdriver,
rotate counter clockwise to tighten more.
Make adjustments in 1/32nd turns.
CAUTION: Do not make adjustments until
all causes for leaks are checked in the
maintenance manual. Do not over-tighten
the door. Failure to follow this precaution
could result in damage to the door or tub.
Door open/close adjustment screw.
Using a 1/8 x 6” flat head screwdriver
rotate clockwise to open more. Make
adjustments in 1/32nd turns.
CAUTION: Do not over-rotate the door
open position. Failure to follow this
precaution could result in damage to the
door or plumbing.
Actuator Motor
OPEN
CLOSE
TIGHTEN
LOOSEN
Generation II Entree Bath –All Models
MAINTENANCE MANUAL
07-01-16
Page 7 of 17
2071 14th Ave – Columbus, NE 68601
800-798-5867 FAX: 402-563-9102
www.mastercarebath.com
ACTUATOR - GEN II NON-ELECTRIC DIAGRAM
Generation II Entree Bath –All Models
MAINTENANCE MANUAL
07-01-16
Page 8 of 17
2071 14th Ave – Columbus, NE 68601
800-798-5867 FAX: 402-563-9102
www.mastercarebath.com
ELECTRICAL ASSEMBLY DIAGRAM - 1
NR QTY DESCRIPTION
01 2
MOMENTARY AIR SWITCH
02 1 PATCH CORD
03 6
LIQ. TIGHT FITTING .270/.470
04 1 GROUNDING BAR
05 4 TERMINAL BLOCK
06 1
TERMINAL BLOCK END SHIED
07 3 TRANSMITTER
08 1
8 X 6 X 4" JUNCTION BOX
09 36"
14/3 15A 300V POWER CORD
10 2 1/4-20 X 3/4 HH BOLT ZINC
11 4
1/4" FLAT WASHER ZINC
12 2
1/4" LOCK WASHER ZINC
13 1 10-32 X 3/4" RHMS ZINC
14 2 10-32 X 1/2" RHMS ZINC
15 3 10-32 FLAT WASHER ZINC
16 3 10-32 LOCK WASHER ZINC
17 96" 1/8" ID AIR TUBING
18 24" 18/2 WIRE
19 1 OPEN DOOR LABEL
21 1
CONTROLLER, MC OVAL NEW STYLE
22 3"
CONNECTING CHANNEL
23 1 GROUND LABEL
24 1
INSTALL/ CAUTION LABEL
25 1 LEFT TERMINAL LABEL
26 1
RIGHT TERMINAL LABEL
27 1
WIRE NUT 16 AWG GRAY
28 1
14/3 SJEOOW 14AWG CORD 3FT.
29 1
OUTLET BOX 4 HOLE 1/2" ALL WEATHER
30 1
GFCI SWITCH DEAD FRONT 20 AMP.
31 1
INSTALL/CAUTION LABEL FRENCH VERSION
32 7 6-
14 AWG GROUNDING LUG
33 8'
SIZE 8 AWG SOLID BONDING WIRE
35 1 GROUNDING LUG
ENTREEBATH SERIES
ELECTRICAL ASSEMBLY
WITH VARIABLE SPEED
BATHAIRE SWITCH
Generation II Entree Bath –All Models
MAINTENANCE MANUAL
07-01-16
Page 9 of 17
2071 14th Ave – Columbus, NE 68601
800-798-5867 FAX: 402-563-9102
www.mastercarebath.com
ELECTRICAL ASSEMBLY DIAGRAM - 2
LABEL INSTALLED ON
ELECTRICAL BOX COVER
LABEL INSTALLED BELOW OPEN
LUG
(ITEM 32) IN THE
BONDING
SYSTEM TO IDENTIFY IT
24
31
Generation II Entree Bath –All Models
MAINTENANCE MANUAL
07-01-16
Page 10 of 17
2071 14th Ave – Columbus, NE 68601
800-798-5867 FAX: 402-563-9102
www.mastercarebath.com
ENTREE DOOR SEAL MAINTENANCE & REPLACEMENT INSTRUCTIONS
(Parts #211081 & 211082):
Note: Read all instructions carefully and thoroughly. Refer to the attached Entree Door Seal drawing to reference details.
6. Push door close button, bringing door up and stop once the Phillips head screw are visible on the side of the
door. (Fig. 1)
7. Remove the casual water drain hose from the hose barb located on the bottom side of the door.
8. Carefully remove the fiberglass door cover by removing the two Phillips head machine screws from each side of
the door (Fig: 1). Set the fiberglass door cover off to the side.
9. Using a 9/16” wrench or 1/4" Allen wrench remove ONLY the top three door retainer bolts (Fig: 2) from each
side of the stainless steel door (Note: Hold the door before removing the third bolt). Gently lower the door down
after the third bolt is removed.
10. If the seal is good condition as shown in (Fig: 4), clean out any accumulated debris between the seal and the
stainless steel door skin with a plastic putty knife. Inspect the door seal for damage or check if the door seal is
permanently compressed as shown in (Fig: 5). If the seal is damaged or permanently compressed, continue on to
step 6. If replacement of the seal is NOT necessary, continue on to steps 11, 13 and 14.
11. Using a Phillips screwdriver, loosen all seal retainer bolts as shown in (Fig: 3). DO NOT remove the bolts.
12. Remove the seal by gently pulling on one end until the entire seal is removed (Note: If the seal is stuck, use a flat
screwdriver to pry up gently on the seal retainer).
13. Clean the underside of the seal retainer and in between each screw with a plastic putty knife.
14. Starting on one end of the seal retainer, slowly push the NEW seal under the retainer (Note: May be necessary
to gently pry up on the seal retainer with a flat screwdriver to get the seal under the retainer). Continue pushing
the seal under the retainer until the entire seal is installed.
15. Push the seal towards the seal retainer and tighten each seal retainer bolt along the seal retainer (Fig: 3).
16. Remove all tools from the stainless steel door. Lift up the stainless steel door and line up the holes in the door
with the holes in the tub (Fig: 2). Insert the three door retainer bolts into each side and tighten accordingly with
a 9/16” wrench or Allen wrench.
17. Close the door all the way and proceed to fill the tub with water. Check for any leaks on the bottom side of the
door. If there are any leaks around the seal, repeat steps 4-10.
18. Push the bottom of the fiberglass door cover in first then push in the top. Line up the holes in the fiberglass door
cover with the holes in the stainless steel door. Continue to insert the door retainer bolts into each side of the
fiberglass door cover. Tighten each bolt it contacts the fiberglass. If adjustment is needed, loosen and tighten
each of the bolts accordingly until the fiberglass cover is in proper alignment.
19. Connect the casual water drain hose to the hose barb on the bottom side of the door.
Generation II Entree Bath –All Models
MAINTENANCE MANUAL
07-01-16
Page 11 of 17
2071 14th Ave – Columbus, NE 68601
800-798-5867 FAX: 402-563-9102
www.mastercarebath.com
ENTREE DOOR SEAL DIAGRAM
Generation II Entree Bath –All Models
MAINTENANCE MANUAL
07-01-16
Page 12 of 17
2071 14th Ave – Columbus, NE 68601
800-798-5867 FAX: 402-563-9102
www.mastercarebath.com
AERATION INJECTOR ASSY DIAGRAM
Generation II Entree Bath –All Models
MAINTENANCE MANUAL
07-01-16
Page 13 of 17
2071 14th Ave – Columbus, NE 68601
800-798-5867 FAX: 402-563-9102
www.mastercarebath.com
DRAIN SHOE-ENTREE REPLACEMENT DIAGRAM
Generation II Entree Bath –All Models
MAINTENANCE MANUAL
07-01-16
Page 14 of 17
2071 14th Ave – Columbus, NE 68601
800-798-5867 FAX: 402-563-9102
www.mastercarebath.com
GEN II MIXING VALVE CARTRIDGE
Adjustment & Replacement Instructions (Item #600578):
Note: Read and follow all instructions thoroughly. Refer to the GEN II Mixing Valve Diagram to reference details.
Supplies needed: Silicone lubricant if replacing the cartridge (readily available at local hardware stores).
Adjustment Instructions:
20. Using a utility knife, gently pry off the cap (6) that is located on top of the thermostatic control valve handle (7).
21. Using a Philips head screwdriver, remove the screw (8) and thermostatic control valve handle (7).
22. Orientation of the setting ring (5). Note: When the two red lines on the side of the cartridge (2) line up the water
temperature is approximately 100oF. Rotate the setting ring (5) counter clockwise a notch or two to increase the
temperature. Doing so will increase the water temperature to approximately 110oF.
23. Replace the thermostatic control valve handle (7). Line up the stop on the handle (7) with the top right corner of
the thermometer (refer to drawing).
24. Replace the screw (8) into the thermostatic control valve handle (7) and tighten. Place the cap (6) into the
thermostatic control valve handle (7).
Replacement Instructions:
25. Turn off the hot and cold water supply before the replacing the cartridge.
26. Using a utility knife, gently pry off the cap (6) that is located on top of the thermostatic control valve handle (7).
27. Using a Philips screwdriver, remove the screw (8) and thermostatic control valve handle (7).
28. Remove the escutcheon (9). Gently remove the hub (4) by carefully pulling off.
29. Remove the setting ring (5).
30. Using an adjustable wrench, loosen and remove the cartridge (2) from the thermostatic valve (1).
31. Apply a small amount of silicone lubricant to the three “O” rings (3) on the NEW cartridge (2).
32. Place the NEW cartridge (2) into the thermostatic valve (1) and hand tighten. Using an adjustable wrench,
tighten the cartridge (2) accordingly (Note: DO NOT over tighten).
33. Install the setting ring (5) so it is horizontally positioned (3 and 9 o’clock position). Note: When the two red lines
on the side of the cartridge (2) line up the water temperature is approximately 100oF. To increase the
temperature, rotate the setting ring (5) counter clockwise a notch or two. The water temperature will be
increased to approximately 110oF.
34. Replace the escutcheon (9) and hub (4) by gently pushing both into place.
35. Replace the thermostatic control valve handle (7). Line up the stop on the handle (7) with the top right corner of
the thermometer (refer to drawing).
36. Turn on the water supply. Check the water temperature. If adjustment is needed, refer to step 9 accordingly.
37. Replace the screw (8) into the thermostatic control valve handle (7) and tighten. Place the cap (6) into the
thermostatic control valve handle (7).
Generation II Entree Bath –All Models
MAINTENANCE MANUAL
07-01-16
Page 15 of 17
2071 14th Ave – Columbus, NE 68601
800-798-5867 FAX: 402-563-9102
www.mastercarebath.com
GEN II MIXING VALVE DIAGRAM
Generation II Entree Bath –All Models
MAINTENANCE MANUAL
07-01-16
Page 16 of 17
2071 14th Ave – Columbus, NE 68601
800-798-5867 FAX: 402-563-9102
www.mastercarebath.com
DOOR OPEN/CLOSE BUTTONS INSTRUCTIONS
(Part #706127):
Note: Read and follow all instructions thoroughly. Refer to the drawing bellow to reference.
1. Loosen and remove both thumb screws from the foot end control. Gently tilt the foot end control to the side.
2. Loosen the strain relief. Remove the 1/8” tubing from the chrome raised transmitter to be replaced.
3. Using large pliers loosen and remove the plastic nut from the bottom of the chrome raised transmitter to be
replaced. The chrome raised transmitter may now be removed.
4. Insert the NEW chrome raised transmitter into the foot end control. Replace the plastic nut and tighten
accordingly.
5. Push the 1/8” tubing onto the chrome raised transmitter.
6. Replace the strain relief and hand tighten.
7. Gently tilt the foot end control back into place. Place the two thumb screws into the holes and tighten
accordingly.
Generation II Entree Bath –All Models
Contact
07-01-16
Page 17 of 17
2071 14th Ave – Columbus, NE 68601
800-798-5867 FAX: 402-563-9102
www.mastercarebath.com
Contact
FOR ADDITIONAL MAINTENANCE HELP OR PLACE AN ORDER:
Online: www.mastercarebath.com,
Email: mastercareweb@mastercarebath.com
Call: 1-800-798-5867 (M-F/8a.m .- 5p.m. CST)

Other manuals for Gen II Entree Bath

2

Other Mastercare Medical Equipment manuals

Mastercare Vario Cover S ST User manual

Mastercare

Mastercare Vario Cover S ST User manual

Mastercare MB-68 AV-XL User manual

Mastercare

Mastercare MB-68 AV-XL User manual

Mastercare Master Turner Combi User manual

Mastercare

Mastercare Master Turner Combi User manual

Mastercare Master Turner OP User manual

Mastercare

Mastercare Master Turner OP User manual

Mastercare Slide Master MC 002-1240 User manual

Mastercare

Mastercare Slide Master MC 002-1240 User manual

Mastercare CN-AH6 User manual

Mastercare

Mastercare CN-AH6 User manual

Mastercare Gen II Entree Bath User manual

Mastercare

Mastercare Gen II Entree Bath User manual

Mastercare Master Turner MC 001-1722 User manual

Mastercare

Mastercare Master Turner MC 001-1722 User manual

Mastercare Integrity MB-80R User manual

Mastercare

Mastercare Integrity MB-80R User manual

Mastercare MC 002-1240 User manual

Mastercare

Mastercare MC 002-1240 User manual

Mastercare Silk Master MC 001-1839 User manual

Mastercare

Mastercare Silk Master MC 001-1839 User manual

Mastercare Master Turner Pro User manual

Mastercare

Mastercare Master Turner Pro User manual

Mastercare Gen III Entree Bath User manual

Mastercare

Mastercare Gen III Entree Bath User manual

Mastercare BASIC Inco Small User manual

Mastercare

Mastercare BASIC Inco Small User manual

Mastercare Master Turner Medium User manual

Mastercare

Mastercare Master Turner Medium User manual

Mastercare Master Turner Pro Soft User manual

Mastercare

Mastercare Master Turner Pro Soft User manual

Mastercare MC 001-8070 User manual

Mastercare

Mastercare MC 001-8070 User manual

Mastercare Master Belt Junior User manual

Mastercare

Mastercare Master Belt Junior User manual

Popular Medical Equipment manuals by other brands

B.Well PRO-118 user manual

B.Well

B.Well PRO-118 user manual

Fresenius Medical Care Liberty manual

Fresenius Medical Care

Fresenius Medical Care Liberty manual

Hoffrichter Point Brief instructions

Hoffrichter

Hoffrichter Point Brief instructions

GCE Zen-O lite Quick user guide

GCE

GCE Zen-O lite Quick user guide

Invacare HomeFill HF2POST6 Operator's manual

Invacare

Invacare HomeFill HF2POST6 Operator's manual

Otto Bock 17B97 Series Instructions for use

Otto Bock

Otto Bock 17B97 Series Instructions for use

Schiller FRED easyport Short operating instructions

Schiller

Schiller FRED easyport Short operating instructions

biomag Lumina user manual

biomag

biomag Lumina user manual

Schrack Seconet VISOCALL IP Staff Terminal ST-TOUCH user manual

Schrack Seconet

Schrack Seconet VISOCALL IP Staff Terminal ST-TOUCH user manual

Hillrom O-ABSL Instructions for use

Hillrom

Hillrom O-ABSL Instructions for use

Juzo Thorax Instructions for use

Juzo

Juzo Thorax Instructions for use

DeRoyal Static-Pro Elbow Instructions for use

DeRoyal

DeRoyal Static-Pro Elbow Instructions for use

Lojer Scandia OT340 Maintenance manual

Lojer

Lojer Scandia OT340 Maintenance manual

Glooko Transmitter quick guide

Glooko

Glooko Transmitter quick guide

Johnson & Johnson DePuy Mitek Rigidfix 104144 manual

Johnson & Johnson

Johnson & Johnson DePuy Mitek Rigidfix 104144 manual

Dräger Medical Narkomed 6400 Operator's instruction manual

Dräger Medical

Dräger Medical Narkomed 6400 Operator's instruction manual

Keeler All Pupil II LED instructions

Keeler

Keeler All Pupil II LED instructions

Mopedia MUEVO instruction manual

Mopedia

Mopedia MUEVO instruction manual

manuals.online logo
manuals.online logoBrands
  • About & Mission
  • Contact us
  • Privacy Policy
  • Terms and Conditions

Copyright 2025 Manuals.Online. All Rights Reserved.