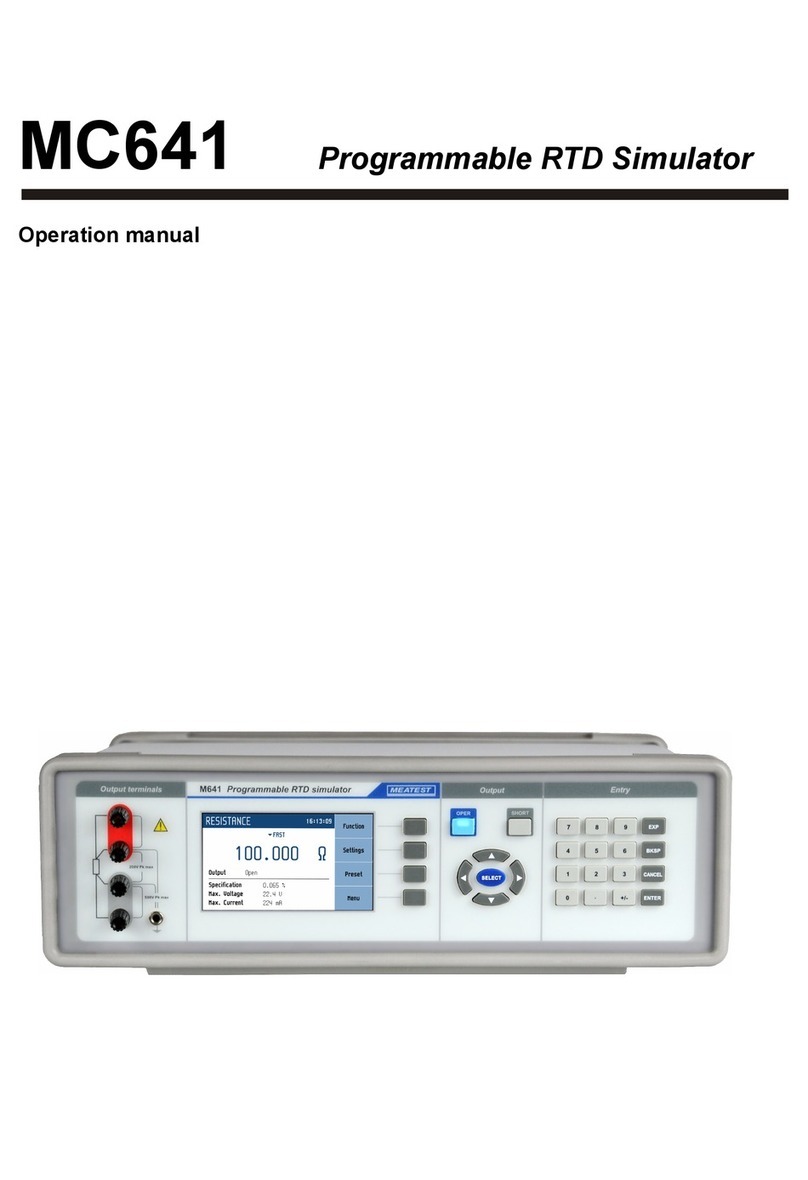
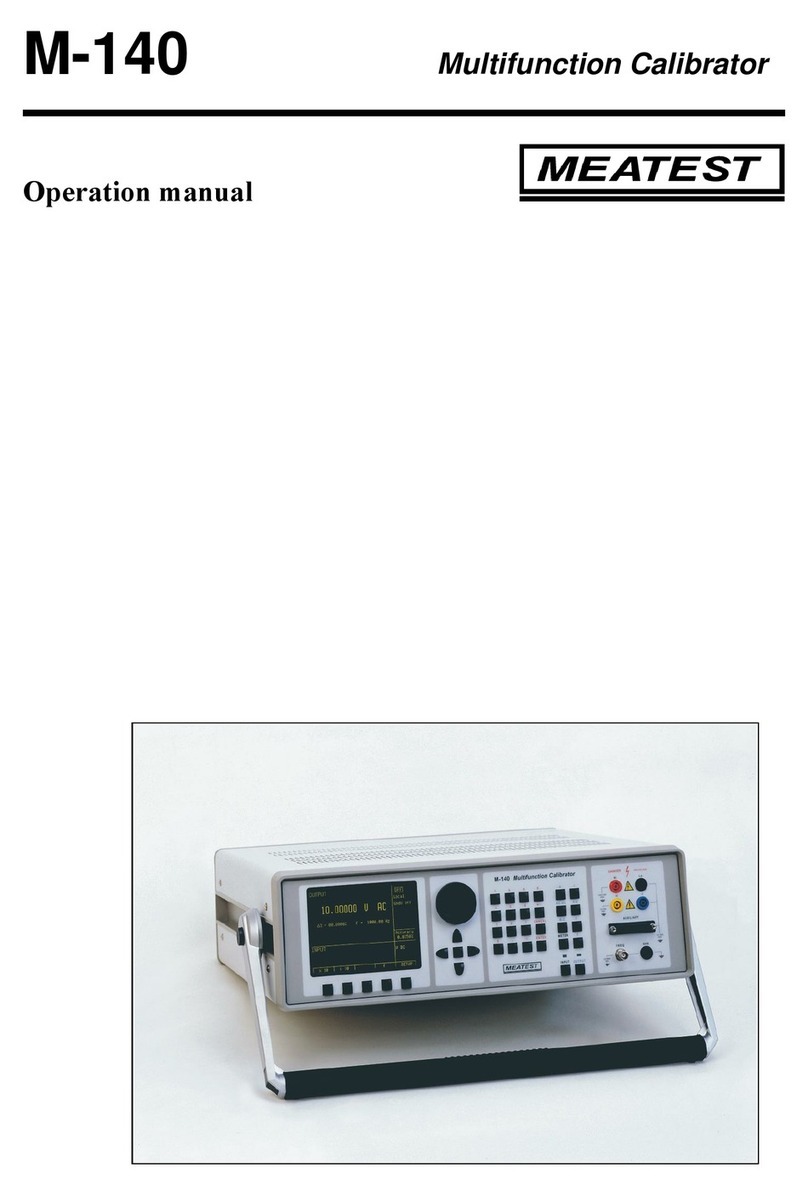
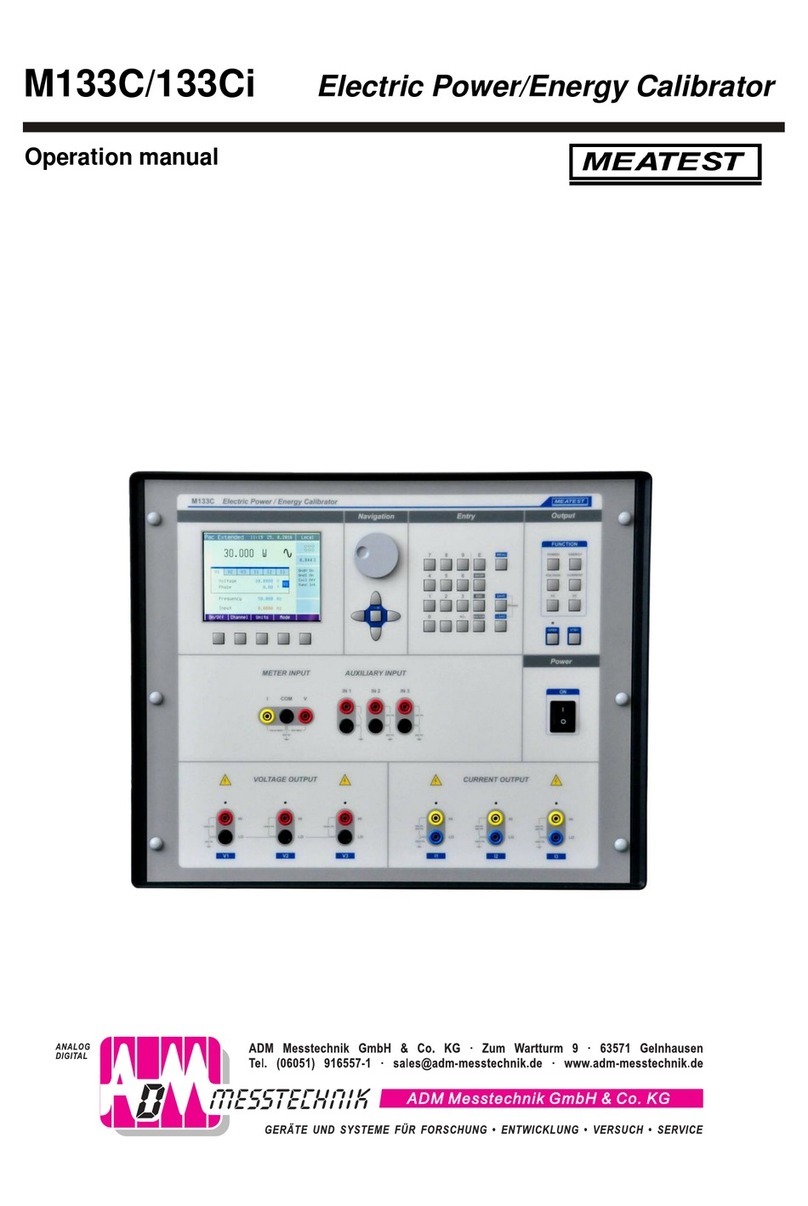
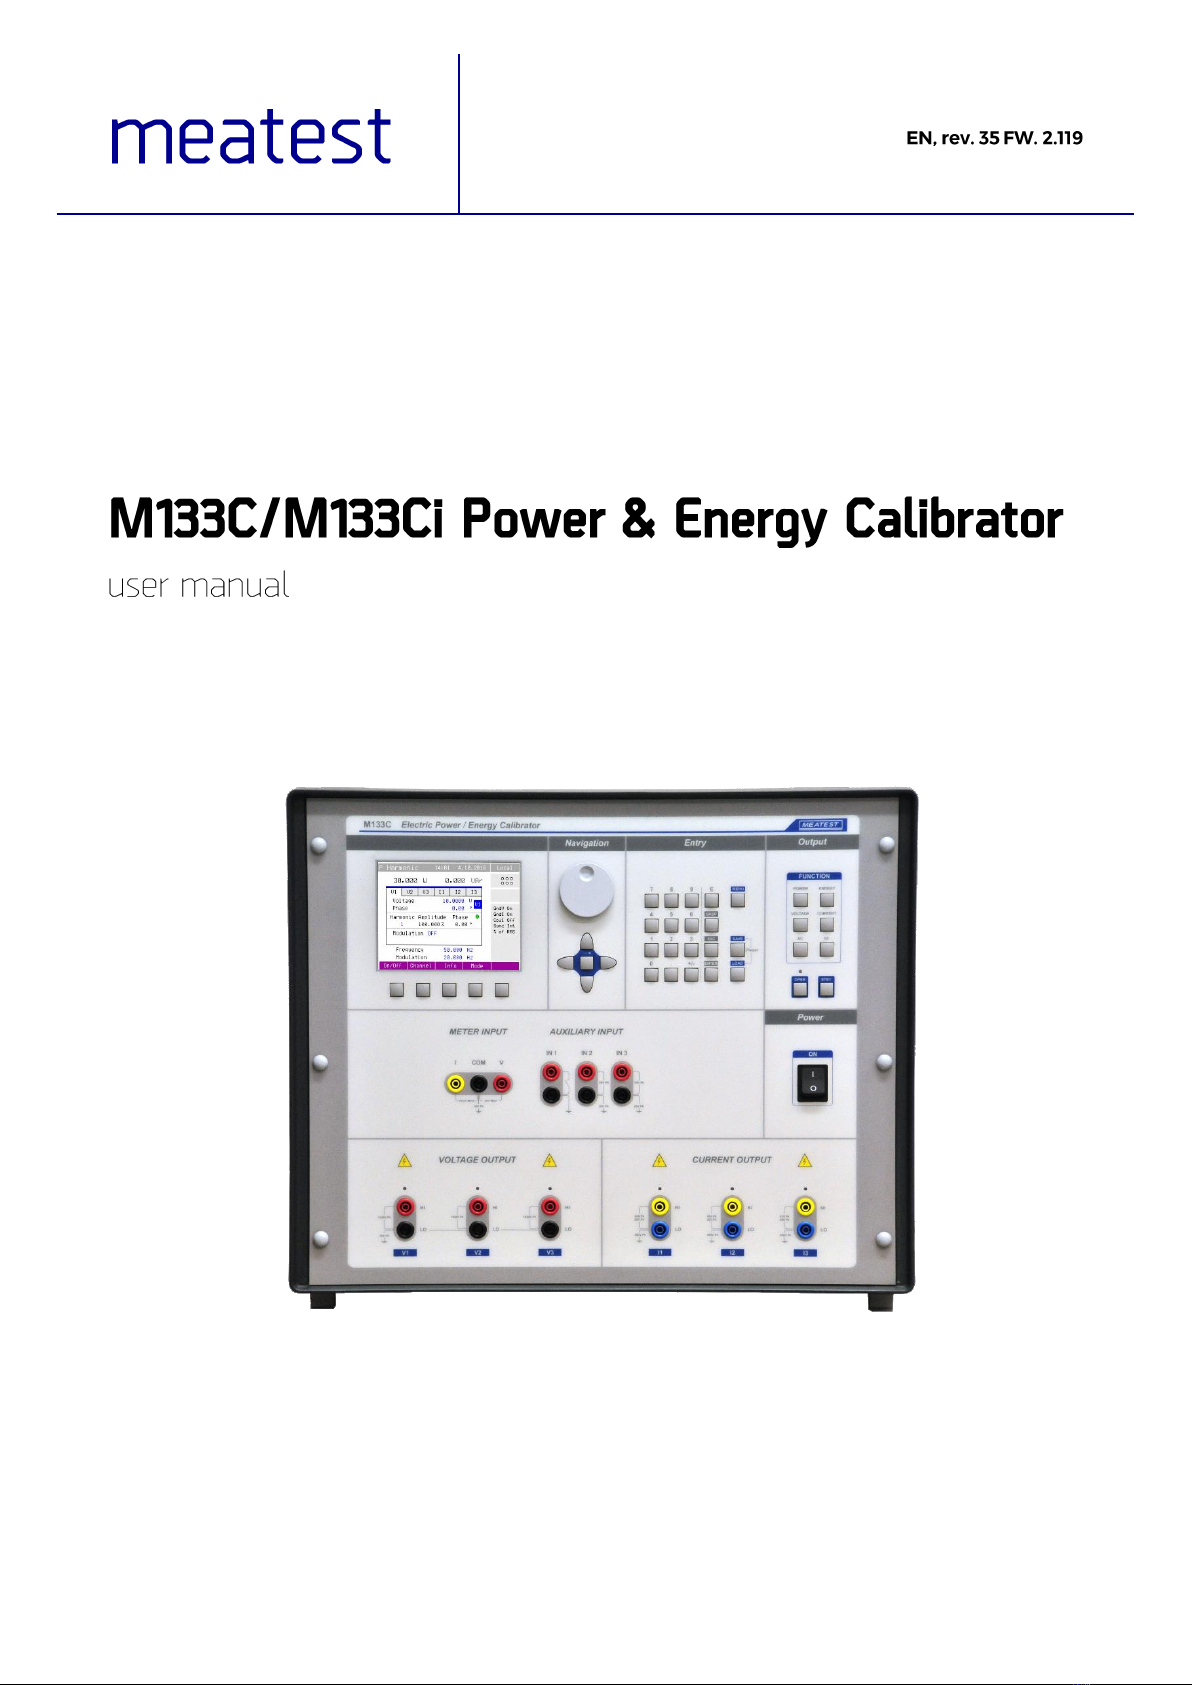
Meatest M133C User manual


M133C Three (single) phase power calibrator is a multifunction calibrator used primarily as a standard
for calibration laboratories. It can be used for calibration of any measuring instrument which measures
voltage, current, power, energy, phase and frequency. The calibrator is equipped with a built-in
multimeter, which can be used simultaneously with output functions. Transducers of various types,
regulators and sensing units can be therefore checked without the need for additional measuring
instruments.
M133C model is equipped with special functions for testing power line voltage analyzers. It can generate
calibrated harmonic and interharmonic distortion, fluctuation harmonics, flickers, ramp signals and
others.
M133Ci model is delivered without the option of harmonic/interharmonic functions.
Basic features of the calibrator include generation of calibrated AC voltage in the range of 1 V to 600 V
and DC voltage in the range of 1 V to 280 V, DC and AC current in the range of 5 mA to 30 A. Phase
shift for all outputs (3x voltage and 3x current) can be set independent for each output. The best accuracy
of the calibrator is 0.025 % for voltage and 0.035 % for current. Internal ranges (voltage 10, 30, 70, 140,
280 V and 600 Vac, current 0.3, 1, 2, 5, 10 and 30 A) are suitable for accurate testing of power
transducers. Maximum frequency range is 15 Hz to 1000 Hz.
Internal multimeter with 20 mA, 10 V and 10 kHz (0.02 % accuracy) can be used to measure normalized
signals coming from transducers.
The calibrator can easily fit within calibration systems featuring Power software support.

The front panel of the calibrator includes a TFT color display, control buttons and output terminals. The
following picture shows the control part of the front panel.
1. Display - The display is divided to three horizontal sections:
A) Information line:
-Selected function (Pac Basic –Power AC basic mode)
-Date and time
-Remote control state (Local –keyboard, Remote –computer)

B) Main area - This section displays the set-up values of generated signals and the data related to
the calibrator status. The section includes the following types of data:
1. Main value - There is displayed main output value with the unit and indication of AC or DC
(picture). There is displayed also actual position of cursor if the parameter is in edit mode.
Position of cursor can be changed using keys , and parameter can be changed using keys
, or using the rotary knob. If output voltage exceeds 50V sign of danger voltage is
displayed before main value.
2. Auxiliary parameters - This section displays auxiliary parameters of actually selected function:
-Voltage (functions power and energy)
-Current (functions power and energy)
-Phase / Power factor (functions power and energy)
-Frequency (AC functions)
-Power (energy)
-Dose of energy (energy)
3. Measured value - Value measured using internal multimeter with unit. Value „over“ is displayed
if measured signal is out of range.
4. Outputs state - Window displays which phase units are connected (one phase to three phase),
which terminals are used for signal generation and also informs about output voltage higher
than 50V.
Symbols displayed in window:
- warning, displayed if output voltage is higher or equal 50V.
- phase unit (channel) is connected, output is off
- phase unit (channel) is connected, output is on
- phase unit (channel) is not connected
5. Specification
6. In the field specification of set-up output signal is shown. Uncertainty is related to the main
parameter. Label BUSY instead of uncertainty is displayed, if calibrator is not within specified
parameters or if internal reconnection is in process. This can occur during changing the
functions, changing set parameters, switching output terminals ON and OFF. Specification is
not available in power functions „P Harmonic“ and „P Interharmonic”.
7. Information section
The information section located in the right part of the display and displays additional
information related to the selected function:
-information about the grounding method of output terminals: GndU, GndI as set up
using the menu „Calibrator“.
-information about voltage terminal configuration (2-wire / 4-wire) as set up using the
menu „Calibrator“.
-information about the use of 25-turn coil or 50-turn coil (COIL x50) as set up using the
menu „Calibrator“.
-information about number of controlled output channels (only functions „Power Pac“
and „Energy Eac“).
8. Meter’s information section
C) Display softkeys - The functions of these keys change during operation (depends on actual
display mode).
2. Rotary knob - The rotary knob integrates several functions. By turning the knob to the left or right,
the user can:
-step through the options
-enter numeric values
The function of the rotary knob can usually be performed by the cursor buttons. The central button
is used to confirm the selection (Select) or change the function of the rotary knob (value change or
position change).
3. Numeric keyboard - The keyboard allows the entry of numeric values on the display. ENTER
button is used to confirm the selection. CANCEL button can be used to cancel the entry.
4. Direct keyboard - MENU button is used to open the Main menu of the instrument (parameters
petting). SAVE (RECALL) buttons can be used to save (recall) the actual setting of the instrument
(all values including parameters). Capacity of the memory is up to 100 different settings. Each
setting contains simple text description.
5. Function buttons - Function buttons can be used to call-up the functions of the calibrator directly.
The following buttons are provided:
After the function mode is changed, the parameters of the respective function are restored. If the
respective function was never used, the calibrator resets to its reference values.
6. Display buttons - There are five buttons below the display, whose meaning changes depending on
the contents of the display. These buttons usually call-up the “local Menu” (units, modes, etc.).
7. Cursor buttons - The keyboard includes two buttons (, ) which allow the cursor to be set to the
required position at the display. These buttons are usually used to step through the options and to
move from one option to another or between the menu levels. Numeric values can be set in some
control modes as well. In these cases, the buttons marked (, ) allow the user to increase or
decrease the number at the cursor button.
The central button is used to select value you want to change (TAB).
8. Meter input - Input terminals for internal multimeter. The COM terminal is common for all
measuring. The V terminal is for DC voltage (10V) and frequency (10kHz) measuring. The mA
terminal is for DC current (20mA) measuring.
9. Auxiliary input - Auxiliary input terminals for energy counting and for AC output signal
synchronization.
10. Power switch - Turns instrument AC power ON and OFF.
11. Voltage output - Voltage outputs HI and LO terminals (three phases L1, L2 and L3).
12. Current output - Current outputs HI and LO terminals (three phases L1, L2 and L3).

Common rules are used for applied color of labels and values.
1. Red color is applied, when displayed value is measured by the calibrator.
2. Blue color is applied for parameters or values, which can be set-up or modified directly from
front panel keyboard or via Main menu.
3. Black color is used for fix values, labels, notes, parameters which cannot be modified and for
other fix text with general information purpose.
4. Meaning of display buttons is always shown the lowest line. If there is no description above
display button, the button is not active in selected function.
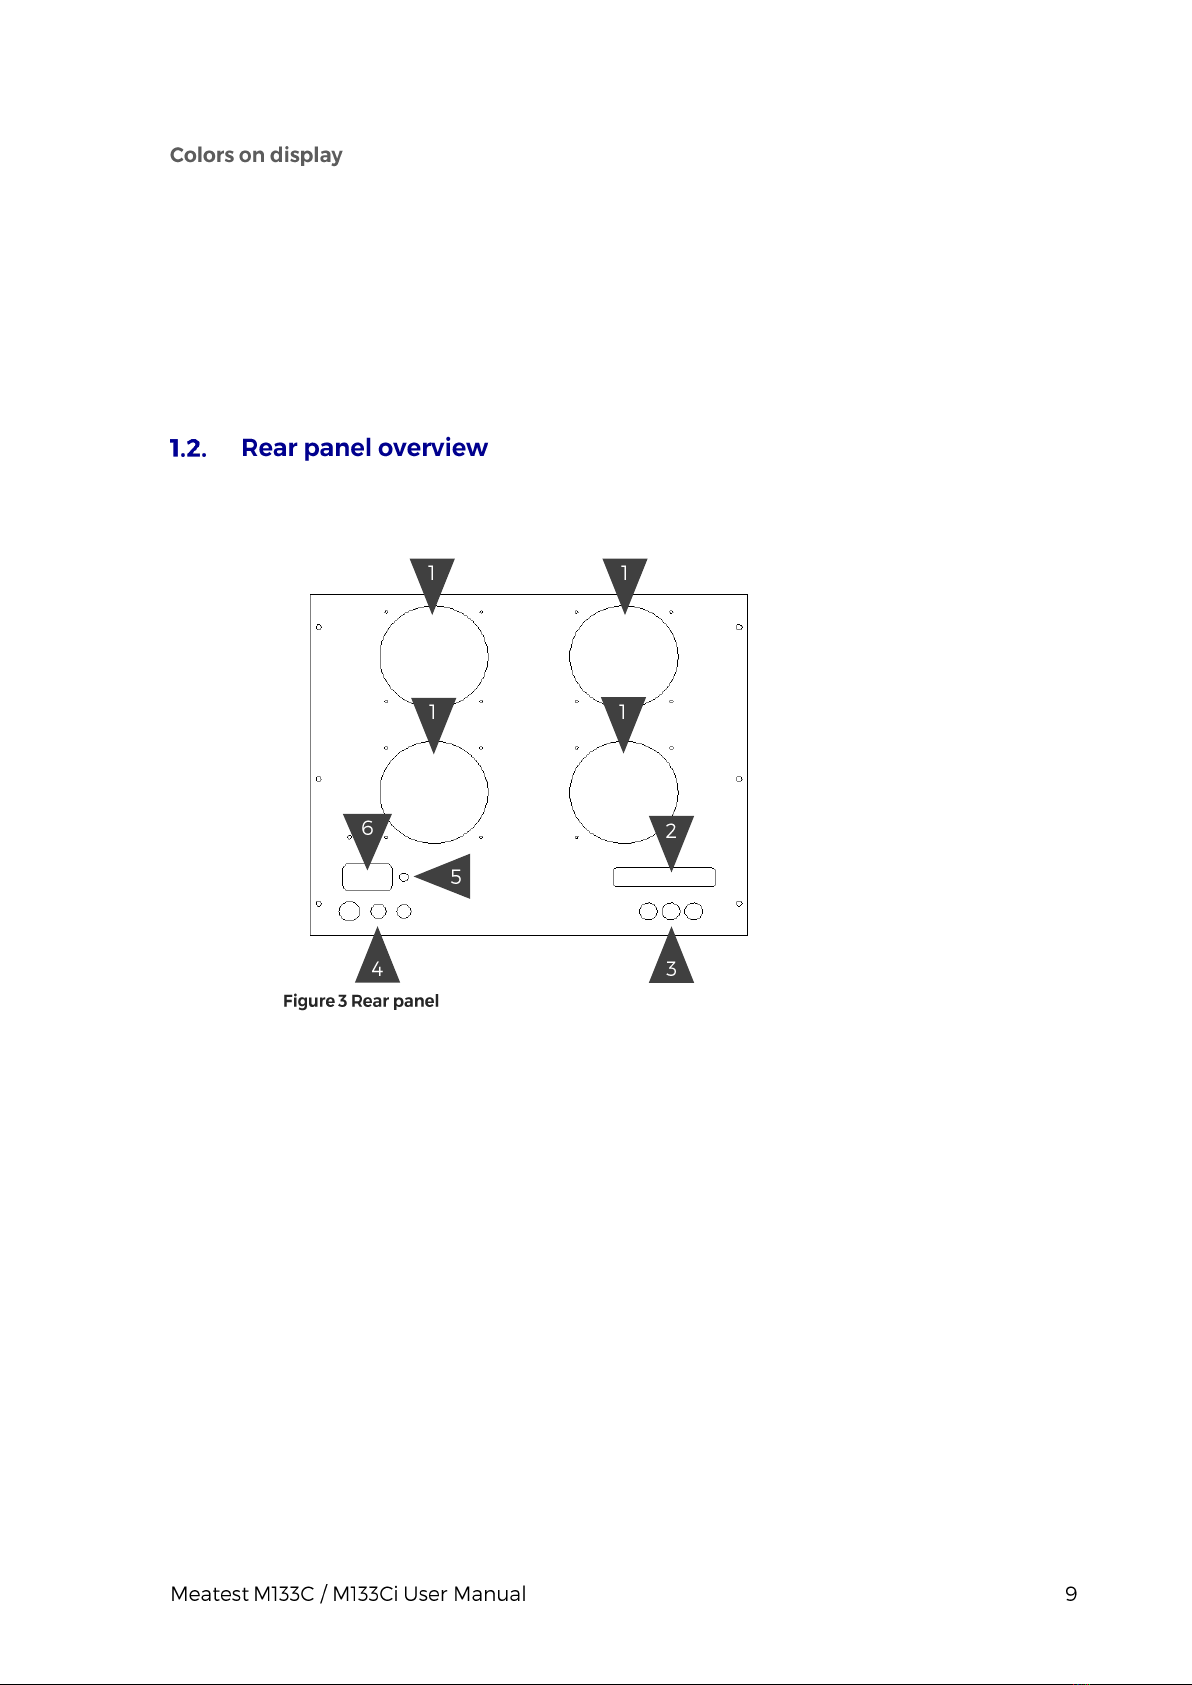
Rear panel includes ventilation holes, power cord socket, power line fuse, power line voltage selector
115/230V, fuse for internal multimeter, interface connectors GPIB, RS232 and RJ45, BNC outputs
connectors and metal central ground terminal.
1. Forced ventilation holes
2. GPIB, RS-232 and RJ45 connectors
3. From right to left:
1) Energy pulse output - reference output (see Energy pulse output in Chapter 4.2)
2) Sample reference output - manufacturing and service only
3) Phase reference output - internal reference signal for 0 ° phase (all output channels are
synchronized with this signal)
4. From right to left:
1) power line switch
2) fuse for internal multimeter (T100mA / 250V)
3) power line fuse
5. Central ground terminal
6. Power line entry

Basic accessories (included in delivery)
-Power line cord 1 pc
-User´s manual 1 pc
-Test report 1 pc
-Spare fuse 1 pc
-Test cable banana-banana 1000V - 32 A, black 3 (1) pcs
-Test cable banana-banana 1000V - 32 A, red 3 (1) pcs
-Test cable banana-banana 1000V - 32 A, blue 3 (1) pcs
-Test cable banana-banana 1000V - 32 A, yellow 3 (1) pcs
-133-01 High Current Adapter 1 (0) pc
-RS232 cable 1 pc
(Test cable 1000V/32A –12 pcs with Three phase version and 4 pcs Single phase version)
Values in brackets are for single phase version. Delivered with EU plug, other plug types available upon
request.
Following accessory is not part of standard delivery and can be extra ordered:
-140-50 Current coil 25 and 50 turns up to 1000A
-151-25 Current coil 25 turns up to 2250A
-Option 10 Test lead 32A/1000V (black)
-Option 11 Test lead 32A/1000V (red)
-Option 12 Test lead 32A/1000V (blue)
-Option 13 Test lead 32A/1000V (yellow)
-IEEE488/IEEE488 GPIB cable, 2m
-Caliber Universal application SW for automated calibration.
Calibrator is available in Three or Single phase version. Both versions look the same. The only
difference is that the Single phase version doesn’t contain channels 2 and 3. Single phase version can
be upgraded to Three phase version by the manufacturer.
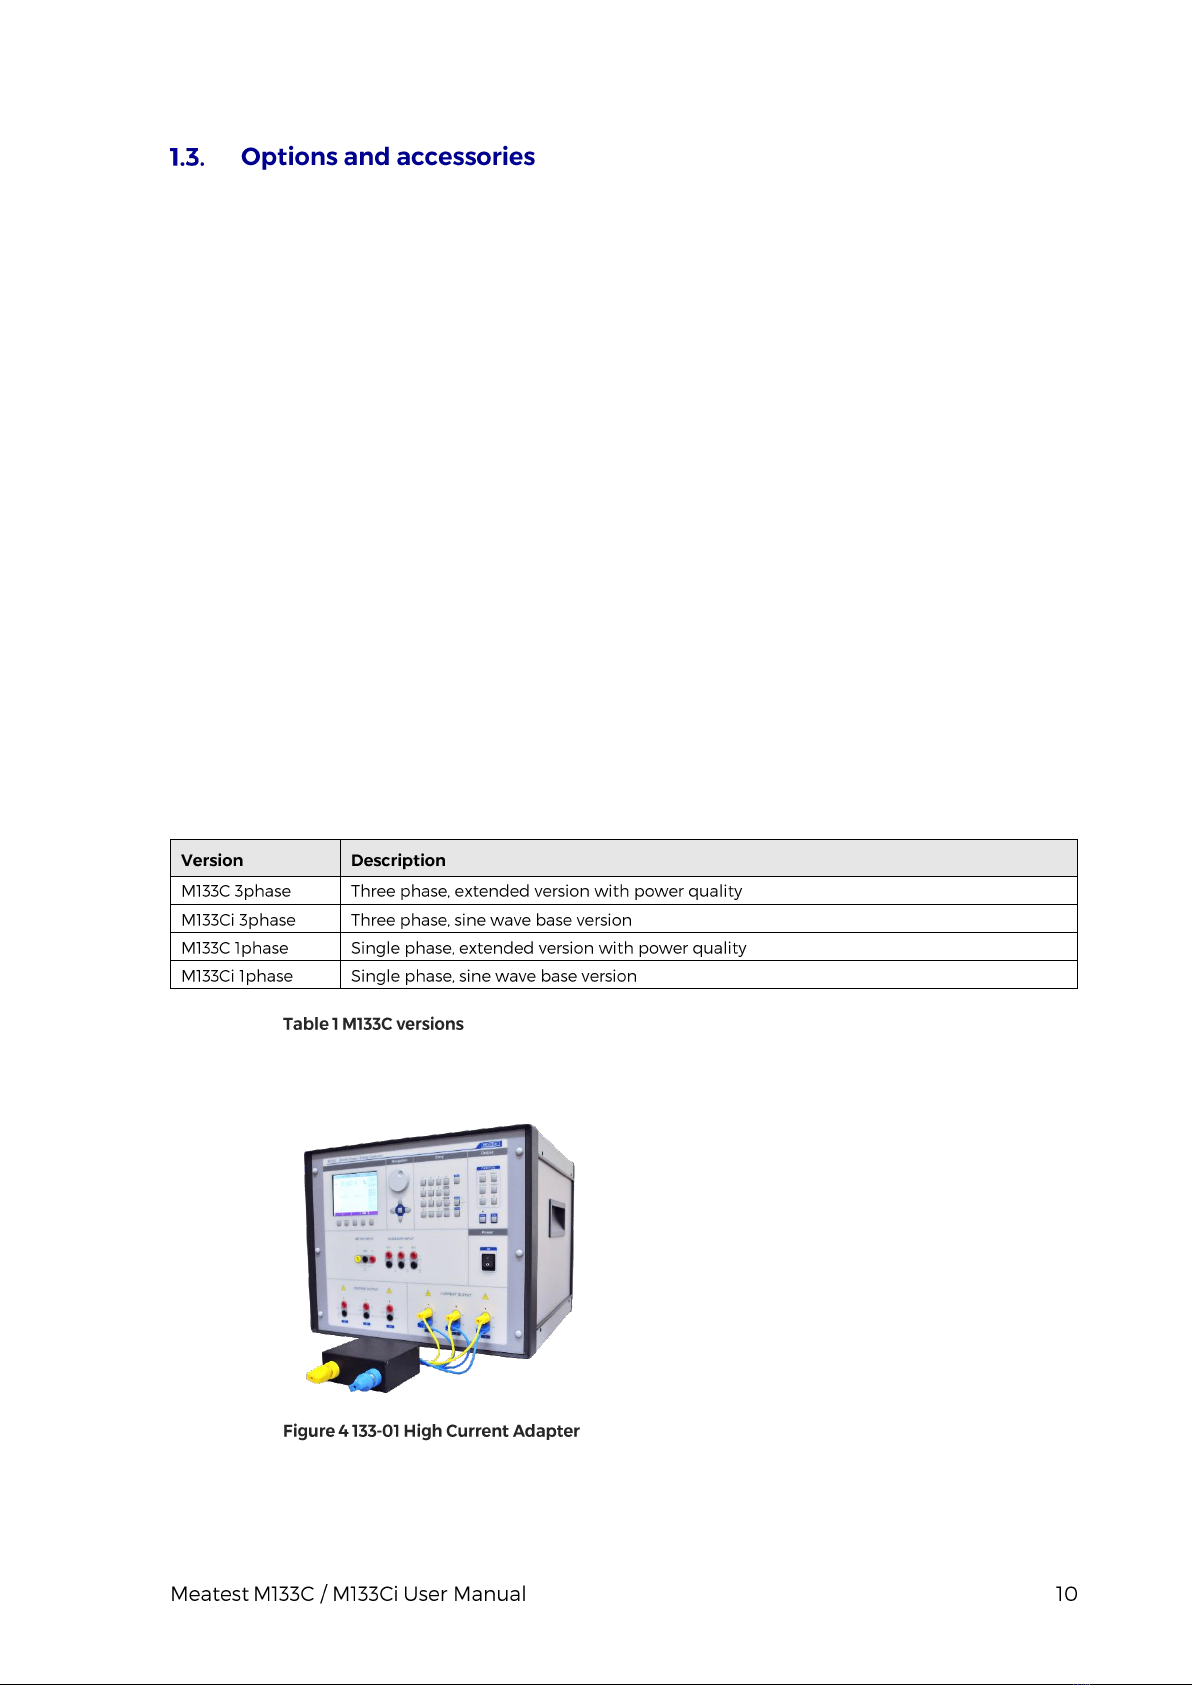
Standard part of delivery the three-
phase power calibrator is the
option 133-01. Using this adapter
all current outputs are connected in
parallel and the configuration can
deliver up to 90 A in single phase
mode.

The calibrator can be integrated into automated calibration systems (ATS) and generally controlled from
remote computer via following remote control interfaces:
-RS232
-GPIB (IEEE488)
-LAN
When controlled remotely, maximum ratings of calibrator’s output signals as well as all other
specifications are the same as in manual mode.
Meatest software package WinQbase + Caliber is recommended for best automation results. This system
is designed for automated and semi-automated calibrations of digital and analogue meters including
uncertainty calculation, result evaluation and certificate printing according to ISO 17025 standard.
Only one interface can be used for communication at any given time. Default active interface is RS232,
other interfaces can be selected in MENU->Interface->Active interface. To establish connection
between the calibrator and computer, set interface settings in your computer accordingly:
-COM port see available COM ports in Windows Device Manager
-Baudrate RS232 according to MENU->Interface->RS232 Baudrate (9600 by default)
-Data bits 8
-Stop bits 1
-Parity None
-Handshake (XON/XOFF) Off
-GPIB Address according to MENU->Interface->GPIB Address (2 by default)
It is necessary to download special driver that creates virtual COM port. Application software uses this
virtual COM port for communication via Ethernet.
Description: https://www.hw-group.com//products/hw_vsp/index_en.html
Driver download: https://www.hw-group.com/files/download/sw/version/hw-vsp3s_3-1-2.exe
See M133C SCPI manual for complete SCPI reference, more details on communication setup and
troubleshooting.

Inspect package contents when unboxing the calibrator for the first time. See chapter 1.3 for complete
list of accessories.
The instrument has been designed in Safety Class I according to EN 61010-1. The design reflects the
requirements of A2 amendment standard. Safety is ensured by the design and by the use of specific
components. The manufacturer is not liable for the damage caused by modification of the construction
or replacement of parts with non-original ones.
Safety symbols used on the equipment:
Warning, risk of danger.
Warning - risk of electric shock. Hazardous voltage above 50 V DC or AC
might be present.
Protective earth.
To prevent possible electrical shock or personal injury:
-Read carefully safety information before you use the Product.
-Do not alter the Product and use only as specified, or the protection supplied by the Product can be
compromised.
-Do not use the Product if it is altered or damaged.
-Use this Product indoors only.
-Use power cord approved for local mains voltage and plug configuration and rated for the Product.
-Keep hands away from all Product terminals and exposed metal cable parts during operation. High
voltage on those may be cause death or serious injury.
-Do not connect the calibrator to other voltage than set by the voltage selector.
-Do not block the vent openings located at the rear panel, bottom panel and prevent dust and
moisture contamination.
-Whenever possible ground Lo output terminals (GndU On, GndI On).
-Do not overload the power stages by leaving the calibrator switched on with the load connected for
a long time, especially on 30 A current range and 140 V and 280 V voltage ranges.
The calibrator should be powered by 230/115 V –50/60 Hz mains. It is a laboratory instrument whose
parameters are guaranteed at 232 oC. Before powering on the instruments, place it on a level surface.
Do not cover the vents at the bottom side and the fan opening at the rear panel.
Before connecting the calibrator to the mains, check the position of the mains voltage selector located
at the rear panel.

Plug one end of the power cord into the connector located at the rear panel and connect the other end
of the power cord into a wall outlet. Turn the calibrator on with mains switch. You should see
following splash screen:
The calibrator performs internal hardware checks for 5 seconds. Configuration of the instrument is
displayed in the end of this test (connected phase channels).
- phase unit is connected and ready
N.A. - phase unit is not connected
- phase is connected, but failed
After the tests conclude, the calibrator resets to its reference state, i.e. the following parameters are set:
GPIB address of the calibrator is factory-preset to 2. This value is valid until the user changes it.
The calibrator works after it is switched on and the initial checks complete. Specified parameters are
only guaranteed after the instrument warms up. During this period, the instrument cannot be calibrated.

The display shows “cannot access the calibration” message if calibration is attempted during this period.
Calibrator output (source) function can be set using FUNCTION buttons. Push any FUNCTION button
to change function. Push AC or DC button for required function mode.
Once a function is selected, you can change the main value as well as auxiliary output parameters like
frequency in AC modes or phase shift in AC power function. Pressing Mode button will open submenu
where various modes of the selected function can be chosen.
Function parameters can be edited in three ways:
-Numeric keypad. Write a value directly and confirm either by softkey with appropriate unit or
ENTER button to set value in base unit (for example V).

Cursor keys and rotary button. Push buttons or turn rotary knob to increment/decrement
selected digit by one. Move through parameter digits using buttons or push the rotary knob
to switch to digit selection mode, rotate to a new digit and confirm with another push.
Described methods change the main parameter by default. If there are any other parameters on display,
you can switch between them using button. Picture above shows Power Basic function with main
value 100 W and four auxiliary parameters: voltage, current, phase and frequency.
Calibrator output can be turned on by pushing OPER button. STBYbutton turns output off. Output turns
off automatically on calibrator startup and function switch. Output state is indicated by LED light above
the OPER button as well as green circle on the right side of the display. Diagram below Source label
shows which terminals are currently being used.
After switching the AC power supply on the output terminals are disconnected in all modes.
Press the “OPER” button to connect the output signal to the terminals. Green LED above the “OPER”
button is lit.
Press the “STBY” button to disconnect the output terminals. Green LED goes off.

Output terminals are disconnected automatically under following conditions:
-Function mode change
-Output voltage exceeds 100V. It occurs if you change the output value that is below 100V to
the new value above 100V.
-Calibrator is overloaded.
-Changing parameters of power distortion functions.
-Changing frequency for voltage above 280V
-Energy counting is finished.
-Output voltage exceeds 280V while current outputs are floating. It occurs if you change the
output value that is below 280V to the new value above 280V and current outputs are not
grounded (GndI Off). Calibrator disconnects output terminals, grounds the current terminals
and displays following message:
-Grounding state of current outputs will be recovered according to the Setup Menu automatically
as soon as the voltage will drop below 280V.
When output voltage over 100 V is selected, the information section of the display shows the symbol
which informs that a life-threatening voltage will be present at the output terminals. If the output
terminals are currently connected, they will be disconnected when output voltage over 100 V is selected.
OPER button must be pressed to reconnect the output signal to the output terminals. After the OPER
button is pressed green LED is lit and the information section of the display shows the symbol notifying
the user about the connection of the dangerous output signal to the output terminals.
Voltage, and frequency can be set without the outputs being disconnected. The output terminals are
automatically disconnected when changing between AC and DC ranges or when changing the function
mode.

If an obvious failure occurs during the operation (e.g. the display is not lit, the fan is not turning), the
calibrator must be switched off immediately. First, check the fuse located in the power cord receptacle.
Procedure is following:
-Remove the end of power cord from the mains connector at the rear panel.
-Insert the blade of a flat screwdriver into the opening cut in the mains voltage selector and pry
out the fuse holder.
-Remove the fuse. Replace it with new fuse of the same rating if the fuse was broken.
-Replace the fuse holder, reconnect the power cord and switch on the calibrator. If the problem
persists, contact the manufacturer.
If an obvious fault is evidenced, e.g. a measurement range or an operating mode is not functional, the
user cannot correct the fault. Contact the manufacturer.
Hidden faults can cause different symptoms and be caused by different causes. Usually, they cause
instability of some parameter. Hidden defects can be caused by unacceptable distortion, degraded
insulation etc. In this case contact the manufacturer.
Sometimes it seems that the calibrator has hidden defect, when the rules for correct operation are not
adhered to. In this case, the fault is caused by the operator. Most frequent cases of false “hidden defects”:
-mains voltage out of tolerance limits or unstable
-wrong grounding of the measurement circuit (bad connection of the ground terminal of the
mains outlet, or several ground connections when grounding loops are formed)
-proximity to sources of intensive influence, whose products are spread through the mains or
propagated by the electromagnetic field
-strong electrostatic or electromagnetic field which can cause major instability during calibration
using higher impedance.

The calibrator allows many other, less frequently used parameters to be set. Setup menu is used to set
these parameters. Setup menu is opened by pressing MENU button. If output terminals are connected,
they will be disconnected and the following display appears:
Use or cursor button or the rotary knob to browse the menu options. Press „Select“ softkey or press
in on the rotary knob to select highlighted item. Press „Exit“ softkey to leave the selected menu level.
New settings are retained when the calibrator is switched off.
The Main menu contains items:
1. General –general instruments settings (display, keyboard, time, date)
2. Interface –parameters of instruments remote control
3. Calibrator –parameters of signal generation
4. Meter –parameters of multimeter
5. Calibration –instruments calibration data
Submenu contains basic parameters of display and keyboard.
-Language Language version of user interface
-Volume [0 –100 %]
-Brightness [0 –100 %]
-Beeper [On/Off]
-Calibration password Sets new calibration password
-Time System time in HH:MM:SS format
-Date System date in selected format [DD.MM.YYYY]
-Device Information Shows serial number, HW & SW versions, etc.

Submenu contains remote control parameters.
Submenu contains parameters that affect generated signal.


Submenu contains parameters that affect measured signal.
Sets the internal multimeter measuring function and range. By selecting an item from the list Voltage
(DC voltage 0-12V), Current (DC current 0-24mA) and Frequency (Frequency 1Hz-15kHz) function
can be selected.
Calibration password is required to access the Calibration Menu. Default calibration password is „0”.
For more detail about calibration see the chapter 6.
Preset menu is not part of the main menu. It has own buttons.
Preset feature allows you to save and recall one of up to 100 calibrator configurations so that you can
get to work quickly instead of setting up the calibrator every single time. Push Preset Save button and
choose one location 0-99 to save current setting.
To recall a predefined configuration, push Load Preset key and pick one of saved preset and
configuration will be loaded.
Other manuals for M133C
1
This manual suits for next models
1
Other Meatest Test Equipment manuals

Meatest
Meatest MC641 User manual

Meatest
Meatest 9010+ User manual

Meatest
Meatest M-142 Installation manual

Meatest
Meatest M143 User manual

Meatest
Meatest 9010 User manual

Meatest
Meatest M631 User manual

Meatest
Meatest M525 User manual

Meatest
Meatest M133C User manual

Meatest
Meatest M505D User manual

Meatest
Meatest M-140 User manual