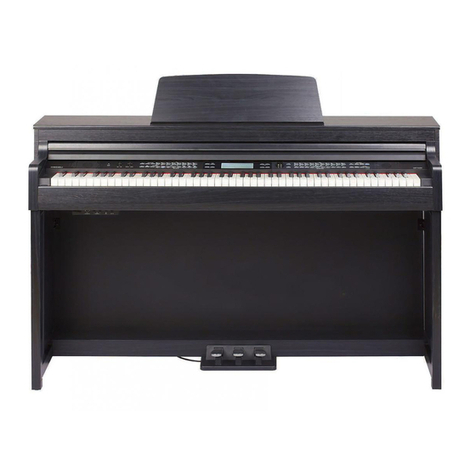
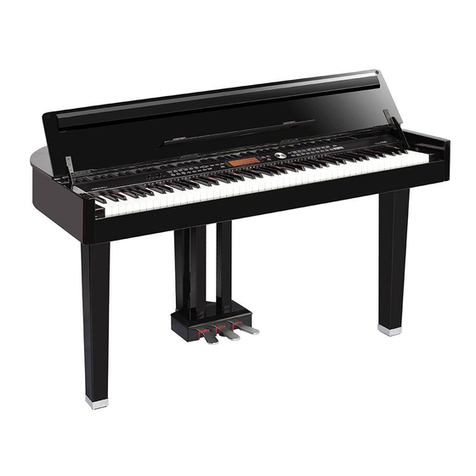
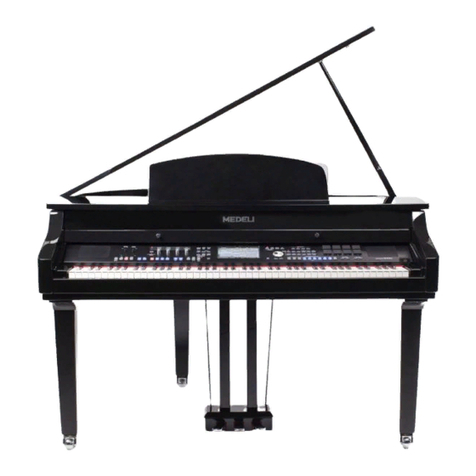
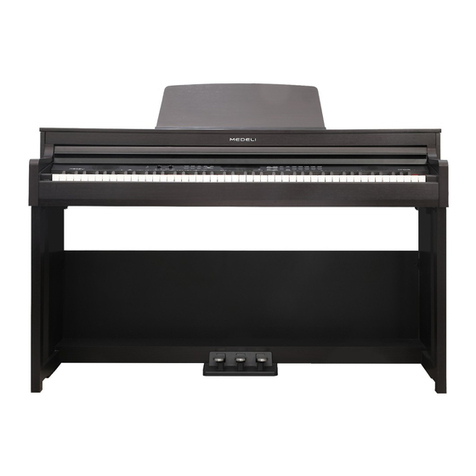
Medeli Grand 1000 User manual

DIGITAL
GRAND PIANO
Quick Start Guide
0
5
25
75
95
100
aw_GRAND1000_QuickStartGuide_G08_150929Part1
2015929 13:59:46

INFORMATION FOR YOUR SAFETY!
THE FCC REGULATION WARNING (for USA)
This equipment has been tested and found to comply with
the limits for a Class B digital device, pursuant to Part 15 of
the FCC Rules.
These limits are designed to provide reasonable protection
against harmful interference in a residential installation. This
equipment generates, uses, and can radiate radio frequency
energy and, if not installed and used in accordance with the
instructions, may cause harmful interference to radio
communications. However, there is no guarantee that
interference will not occur in a particular installation.
If this equipment does cause harmful interference to radio or
television reception, which can be determined by turning the
equipment off and on, the user is encouraged to try to
correct the interference by one or more of the following
measures:
Reorient or relocate the receiving antenna.
Increase the separation between the equipment and
receiver.
Connect the equipment into an outlet on a circuit
different from that to which the receiver is connected.
Consult the dealer or an experienced radio/TV technician
for help.
Unauthorized changes or modification to this system can
void the user's authority to operate this equipment.
CAUTION
The normal function of the product may be disturbed by
Strong Electro Magnetic Interference. If so, simply reset
the product to resume normal operation by following the
owner's manual. In case the function could not resume,
please use the product in other location.
PRECAUTIONS
PLEASE READ CAREFULLY BEFORE PROCEEDING
Please keep this manual in a safe place for future reference.
Power Supply
Please connect the designated Power Cord to an AC outlet
of the correct voltage.
Do not connect it to an AC outlet of voltage other than that
for which your instrument is intended.
Unplug the Power Cord when not using the instrument, or
during electrical storms.
Connections
Before connecting the instrument to other devices, turn off
the power to all units. This will help prevent malfunction and
/ or damage to other devices.
Location
Do not expose the instrument to the following conditions to
avoid deformation, discoloration, or more serious damage:
Direct sunlight
Extreme temperature or humidity
Excessive dusty or dirty location
Strong vibrations or shocks
Close to magnetic fields
Interference with other electrical devices
Radios and televisions placed nearby may experience
reception interference. Operate this unit at a suitable
distance from radios and televisions.
Cleaning
Clean only with a soft, dry cloth.
Do not use paint thinners, solvents, cleaning fluids, or
chemical-impregnated wiping cloths.
Handling
Do not apply excessive force to the switches or controls.
Do not let paper, metallic, or other objects into the
instrument. If this happens, unplug the Power Cord from the
wall outlet. Then have the instrument inspected by qualified
service personnel.
Disconnect all cables before moving the instrument.
2
Regarding the display
This display is a precision device created
using extremely high technology, and careful attention
has been paid to its product quality. Although you may
notice some of the issues listed below, please be aware
that these are due to the characteristics of LCD displays,
and are not malfunctions.
• There may be pixels in the display that are always dark
(unlit) or always bright (lit).
• Depending on the displayed content, the brightness of
the display may appear uneven.
• Depending on the displayed content, horizontal stripes
of shading may be visible.
• Depending on the displayed content, flickering or moire
patterns may be visible.
instrument
0
5
25
75
95
100
aw_GRAND1000_QuickStartGuide_G08_150929Part1
2015929 13:59:46

Contents
3
Introduction
Panel & Display Description
Front Panel............................ ......................4
Rear Panel..........................................................5
Main Display........................................................6
Setup
Part List...............................................................7
Setup Guide........................................................8
Connections
Power Supply....................................................12
Connecting a pair of Headphones.....................12
Connecting an Audio Equipment.......................12
Connecting an MP3/CD Player.........................13
Connecting a Microphone.................................13
Connecting a Computer....................................13
Connecting External MIDI Devices...................13
Quick Start
Basic Operations
Selection Operation...........................................14
Soft Keyboard Operation...................................14
Setting Operation..............................................15
Playing the Demos.......................................16
Playing Voices...............................................17
Playing with a Style......................................18
Playing Songs...............................................19
Recording Your Performance to MIDI......20
Recording Your Performance as Audio...21
Using a USB Storage Device.....................22
........
Appendices
Troubleshooting
Specification..................................................24
Appendices
Voice List...........................................................25
Style List............................................................31
Song List...........................................................32
Demo List..........................................................32
Chord List..........................................................33
MIDI Implementation List..................................34
............................................23
0
5
25
75
95
100
aw_GRAND1000_QuickStartGuide_G08_150929Part1
2015929 13:59:46

O.T.S.
LINK
AUTO
FILL IN
FADE
IN / OUT
START/
STOP
SYNCSYNC
STOP
INTRO 1 INTRO 2 MAIN 1 MAIN 2 MAIN 3 MAIN 4 ENDING 1
PLAY/
STOP
RW FF
REVERB
ATTACK
ASSIGN 1
CHORUS
RELEASE
ASSIGN 2
VOLUME
CUTOFF
ASSIGN 3
PAN
RESONANCE
ASSIGN 4
MIXER
METRO.
NEW SONG
SELECT
SONG
RECORD
AUDIO
RECORD
A.B.C.
CHORD
DICT.
START
ENDING 2
MASTER
VOLUME
MUSIC
VOLUME SONG
SELECTSCORE
STYLE
SELECT
TEMPO
TAP
EFFEC T ON / OFF
TEMPO
MAX
MIN
MAX
MIN
PAUSE
17
16
15
14
Panel & Display Description
Front Panel
4
1. POWER ON/OFF BUTTON
Turn the power on or off.
2. MASTER VOLUME SLIDER
Adjust the master volume.
3. MUSIC VOLUME SLIDER
Adjust the volume of the playing style
or the playing song.
4. SELECT BUTTON
Select the three effect combinations of
GROUP KNOBS sequentially.
5. GROUP KNOBS
Effect1: Adjust reverb level, chorus
level, volume, pan of the
RIGHT 1 voice.
Effect2: Adjust attack time, release
time, the filter cut off
frequency, the amount of
resonance applied at the filter
cutoff frequency of the
RIGHT 1 voice.
Effect3: The knob effect can be
assigned separately. See
“Controller”.
6. EFFECT ON/OFF BUTTON
Turns the keyboard effect (arpeggio,
harmony, chopper) on or off.
7. SCORE BUTTON
Show the staff of the current song
(SMF).
8. SONG SELECT BUTTON
Enter the SONG SELECT interface.
9. STYLE SELECT BUTTON
Enter the STYLE SELECT interface.
10. TEMPO TAP BUTTON
Change the tempo by “tapping” out
the tempo with this button.
11. TEMPO+, TEMPO- BUTTONS
Adjust the current tempo.
12. METRO. BUTTON
Turn the Metronome on or off.
13. RECORD SONG BUTTON
Enter the RECORD SONG interface.
You’ll record your performance in
SMF format.
14. RECORD AUDIO BUTTON
Enter the audio recording is in ready
state. You’ll record your performance
in WAV format.
15. A.B.C. BUTTON
Turn the A.B.C. MODE on or off.
16. O.T.S. LINK BUTTON
Turn the O.T.S. LINK on or off.
If it is turned on, the One Touch
Settings can be changed when you
select different style.
17. AUTO FILL IN BUTTON
Turn the AUTO FILL IN on or off.
18. FADE IN/OUT BUTTON
Turn the FADE IN or OUT on or
off.
19. INTRO 1, 2 BUTTONS
Play the intro.
20. MAIN 1, 2, 3, 4 BUTTONS
Play the main part.
STYLE CONTROL
21. ENDING 1, 2 BUTTONS
Play the ending.
22. SYNC. STOP BUTTON
Turn the SYNC. STOP on or off.
23. SYNC. START BUTTON
Turn the SYNC. START on or off.
24. START/STOP BUTTON
Start or stop playing the style.
SONG
21. RW, FF BUTTONS
Rewind and fast forward the song.
23. PAUSE BUTTON
Pause the song playback.
24. PLAY/STOP BUTTON
Start playing the song or stop
the song playback.
25. MIXER BUTTON
Enter the MIXER interface.
23
4
5
6
78 9
10 11
12 13
18 19 20 21
22 23 24
1
25
0
5
25
75
95
100
aw_GRAND1000_QuickStartGuide_G08_150929Part1
2015929 13:59:47

BANK FREEZE STORE O.T.S.
VOICE
MODE
PIANO
MODE
USB
DISK
GLOBAL
SETTING R 2
IGHT R3IGHT
EXIT
M1 M2 M3 M4 M5 M6
DEMO
PART ON/OFF
PIANO E.PIANO ORGAN
ACCORDION &
HARMONICA
GUITAR &
BASS
STRINGS &
ENSEMBLE
BRASS &
SAXOPHONE
FLUTE &
WOODWIND
LEAD &
PAD
FX &
EFFECTS
ETHNIC &
COMBINED
PERCUSSIVE &
DRUM
2 3 41
6 7 85
VOICE
LEFT RIGHT 1
TRANSPOSE OCTAVE
PERFORMANCE MEMORY
O.T.S.
37
36
35
Panel & Display Description
5
26. VOICE MODE BUTTON
Enter the VOICE mode.
27. PIANO MODE BUTTON
Enter the PIANO mode.
28. GLOBAL SETTING BUTTON
Enter the GLOBAL SETTING
interface.
29. USB DISK BUTTON
Enter the USB DISK interface.
30. PART ON/OFF BUTTONS
Turn LEFT, RIGHT1, RIGHT2,
RIGHT3 on and off individually.
31. DATA DIAL
Increase and decrease the
value.
32. VOICE BUTTONS
Enter the VOICE SELECT
interface. You'll select a voice
category.
33. MULTI PADS
Add spice to your performance
with special dynamic phrases
by pressing them.
34. EXIT BUTTON
Exit the current interface and
return to the previous display.
35. +, - BUTTONS
Increase and decrease the
value by 1.
36. BANK BUTTON
Enter the PERFORMANCE SELECT
interface.
37. FREEZE BUTTON
Turn the FREEZE function on or off.
38. STORE BUTTON
Save the panel setups to one of the
performance memorys.
26 27 28
30
31
32
34 38
39
40 41
39. M1-M6 BUTTONS
PERFORMANCE MEMROY:
Recall the panel setups from one of
the performance memorys.
O.T.S (M1-M4):
Call up all the settings (voice, effect,
etc) that match the current style.
40. O.T.S. BUTTON
Switch to the O.T.S. function.
41. TRANSPOSE+, TRANSPOSE-
BUTTONS
Adjust the TRANSPOSE value.
42. OCTAVE+, OCTAVE-
BUTTONS
Adjust the OCTAVE value.
43. USB PORT
Connect the USB storage device.
PEDAL
USB
IN OUT THRU L R R
AC INPUT
AUX. OUT
L/MONOMIC MIC VOL
MIDI AUX.IN
44. MIDI IN/OUT/THRU JACKS
Connect other products equipped
with a MIDI interface.
45. USB JACK
Connect to a computer.
46. MIC JACK
Connect a microphone.
47. MIC VOL KNOB
Adjust the input volume of the
microphone.
48. AUX IN JACKS
Connect any external audio source,
such as an MP3 or CD player.
49. AUX OUT JACKS
Connect to your amp/audion system.
For monaural output, use the L/MONO
jack.
50. AC POWER INLET
Connect the AC power cable to this inlet.
51. PEDAL JACK
Connect pedals.
52. PEDALS
The function of pedal can be set.
The default settings are soft,
sostenuto, sustain from left to right.
45 46 47 48 49
51
Rear Panel
43
52
29
33
42
50
44
0
5
25
75
95
100
aw_GRAND1000_QuickStartGuide_G08_150929Part1
2015929 13:59:47

Main Display
Panel & Display Description
6
1. Voice
Display voice name and octave data of each part.
(Right1, Right2, Right3, Left)
How to select the voice for each part?
For example:
1. Pressing anywhere in the R1 display area makes the
R1 part selected.
2. Pressing again will call up the Voice Selection display.
Now, you can select the voice for R1.
2. Style&Song
Display the currently selected style name, for example
“8Beat Ballad”. Pressing this name will call up the Style
Selection.
Pressing song tab will display the currently selected song
name, for example “Brahms Waltz”. Pressing this name
will call up the Song Selection display.
3. Performance
Display the currently selected performance name.
Pressing this name will call up the Performance
Selection display.
12
3
4
5
6
CB
A
4. Chord
Display the chord name and related information.
A. Chord Name
B. Chord Mode
C. Split
5. Shortcut to setup pages
Pressing “Split Point” will call up the Split Setting quickly.
Pressing “Effect” will call up the Effect Setting quickly.
Pressing “Controllers” will call up the Controllers display
quickly.
6. Others
The amount of transposition in semitone units.
Current tempo.
Current playback position.
Current time signature.
0
5
25
75
95
100
aw_GRAND1000_QuickStartGuide_G08_150929Part1
2015929 13:59:47

Setup
7
This section contains information about setting up your instrument and preparing to play. Please go through this section carefully
before turning the power on.
Before you proceeding to assemble the stand, get a Philip's
screwdriver (not supplied).
Make sure you have the following parts, which are supplied into
package.
Part List
A Pedal component
B Right leg component
C Left leg component
D Rear leg component
E Piano body
F Slice
G M12X45mm hexagonal bolt
H 3x15mm screw
I Copper pole
J Wrench
E
C
AHIBD
J
G
F
0
5
25
75
95
100
aw_GRAND1000_QuickStartGuide_G08_150929Part1
2015929 13:59:48

Setup
A. Please reverse the carton to upside down and place it in the
horizontal before you initial assembly the piano. Make sure the
bottom surface of carton is up. Then open the box, take off the
foams which used for protected piano body.
8
Setup Guide
0
5
25
75
95
100
aw_GRAND1000_QuickStartGuide_G08_150929Part1
2015929 13:59:49

B. Put the left leg component(C) on the left of piano body. Find the
sunken hole on the leg component and correspond the hole on the
piano body. Then place a washer into this sunken hole, Use Wrench
(J) to tighten 4 pieces of hexagonal bolt (2 on each side) by
clockwise turn.
Please see below illustrator for you detail reference.
(Make sure the direction of the placement is correct before screwing)
Fix the Right leg component(B) and Rear leg component(D) to Piano
body (E) with Hexagonal bolt(G) according finished assembly in left leg
component.
How to screwing the hexagonal bolt?
Put a Washer into the sunken hole on the leg component.
* Put the hexagonal bolt into the sunken hole, then screwing it
* Use the Wrench snapped the cap of Hexagonal bolt, put together the
leg component and the piano body by clockwise turn the wrench.
Wrench/hexagonal bolt spanner
hexagonal bolt
Slice
Setup
9
0
5
25
75
95
100
aw_GRAND1000_QuickStartGuide_G08_150929Part1
2015929 13:59:50

C. Use screws(H) to tighten the two copper poles (I) onto the back of
Pedal component(A).Make sure the direction of the placement is
correct before screwing.
D. Then reserved the Pedal component with two copper poles(I), and
use the hexagonal bolt(G) to tightly settled it with the piano body
according finished assembly in left leg component, fix the other side
of copper Pole onto the piano body (E). The assembly are finished.
Setup
10
0
5
25
75
95
100
aw_GRAND1000_QuickStartGuide_G08_150929Part1
2015929 13:59:51

E. Reverse the piano after finished assembly.
Please carefully reverse the piano avoid touched floor cause
damaged or broke any leg components or pedal component. Then
moved the carton box and all package goods.
You can enjoy play the piano now.
Caution!
Setup
11
Carefully reverse the piano
avoid damaged or broke
any legs.
0
5
25
75
95
100
aw_GRAND1000_QuickStartGuide_G08_150929Part1
2015929 13:59:52

Connections
12
Connecting a pair of Headphones
There are two headphones jacks on the left underneath the piano body.
1. When an optional pair of stereo headphones is connected with the
headphones jack 2, the sound from speakers will switch off
automatically resulting in only the sound from headphone to be
heard.
2. When jack 1 is connected with the stereo headphones, the sound
can be heard from both headphones and speakers of the piano.
3. Connect two pairs of headphones to jack1 and jack 2, it helps the
user play with the teacher or friend in a quiet surrounding.
Note:
Do not listen with the headphones at high volume for long periods of
time. Doing so may cause hearing loss.
Connecting an Audio Equipment
Connect the rear-panel AUX.OUT jack to amplified speakers, amplifiers
or domestic hi-fi units for external amplification.
For monaural output, use the L/MONO jack.
Note:
To avoid damaging the speakers, please ensure that the volume has
been set to the minimum level before connecting the power and other
devices.
Power Supply
1.
Note:
Move the MASTER and MUSIC VOLUME sliders downward to set
the minimum volume level.
2. Connect the AC power cable to AC power inlet on the underside of
the piano body.
3. Plug the AC power cable into an AC outlet.
4. Turn the power ON. The LCD on the panel will light up.
1. In order to save energy, we have designed the Auto Power Off
function to this instrument. With this function, the instrument will be
automatically powered off in 30 minutes if you do not take any action
on the instrument. For more details, please refer to Global Setting
chapter.
2. When the piano is not in use or in the time of thunderstorm, please
disconnect the power for safety purpose.
3. To prevent malfunction and / or damage, always use the panel
power button to power off the piano. Never unplug the power
adapter before the piano is powered off, doing so may cause
damage to your product.
Headphone Jack 1
Headphone Jack 2
L R R
AC INPUT
AUX. OUT
L/MON OMIC VOL
AUX.IN
1
2
3
4
0
5
25
75
95
100
aw_GRAND1000_QuickStartGuide_G08_150929Part1
2015929 13:59:53

Connections
13
Connecting a Computer
You can simply connect the computer with USB cable via the USB
connector.
You can use a commercially available MIDI interface to connect the
piano to the computer via the MIDI connectors.
After the driver is installed and initialization is finished, you can choose
USB Audio Device in the device menu of the software to transfer midi
data.
Note:
Do not select USB audio device in both of input and output setting
together, otherwise the sound overlaps.
Connecting External MIDI Devices
You can use standard MIDI cables to connect external MIDI devices.
MIDI IN: Receive MIDI message from an external MIDI device.
MIDI OUT: Transmits MIDI message generated by the instrument.
MIDI THRU: Simply relays the MIDI message received at MIDI IN.
Note:
To avoid damages, please be sure to turn off the power switches
before you disconnect the related devices from the piano.
Connecting a Microphone
You can connect an external microphone to MIC IN jack.
Adjust the input volume of the microphone by using MIC VOLUME
knob.
Note:
Turn the volume switch counter-clockwise to reach the minimum
volume level when connecting or disconnecting a microphone.
MIDI OUTMIDI IN
MIDI OUT MIDI IN
USB
L R
AUX. OUT
L/MONOMIC MIC VOL
AUX.IN
USB
IN OUT THRU MIC
MIDI
USB
IN OUT THRU MIC
MIDI
Connecting an MP3/CD Player
Connect the audio output of an MP3/CD player or other audio source to
the stereo AUX IN jacks on the rear panel.
The input signal is mixed with the instrument signal, allowing you to
play along.
L R R
AC INPUT
AUX. OUT
L/MON OMIC VOL
AUX.IN
0
5
25
75
95
100
aw_GRAND1000_QuickStartGuide_G08_150929Part1
2015929 13:59:53

Selection Operation
14
There are some selection interfaces: voice selection, style selection,
song selection, performance selection, etc.
How to select the file in these selection interfaces?
For example:
1. Location of data
Preset: Location where pre-programmed (preset) data is stored.
User: Location where recorded or edited data is saved.
USB: Location where data on USB storage device is saved.
2. Category of data
The files are divided into categories according to their types. The
categorization will be selected by pressing this categorization name
on LCD. For example: The voice file (Grand Piano) is in the Piano
categorization. Pressing “Piano” will select the Piano
categorization.
3. Flip and File Browsing
4. File Selecting
Select the desired file by pressing the file name on the current page.
10 files can be listed in one page, use screen page up or page
down button to browsing files by pages.
Using the Soft Keyboard
When you name or rename a file or a folder, you should call up soft
keyboard display.
1. Deleting characters:
Press the delete button.
2. Moving the cursor:
Press the right or left cursor button.
3. Entering capital characters:
Press the CAPS button, the capital characters will be displayed.
4. Entering space:
Press the space button.
5. Entering numbers or marks:
Press the numbers button, the numbers and marks will be
displayed.
Enter the number or mark by pressing its button.
6. Confirming OK or Cancel:
After you have finished name editing, press the OK button to
actually enter the new name and return to the previous display. Or
you can press the CANCEL button to cancel operations and return
to the previous display.
Previous Page
Next Page
Current Page
Page Num
3
54
1
2
Basic Operations
6
1
22 4
3
0
5
25
75
95
100
aw_GRAND1000_QuickStartGuide_G07_150108Part2
201518 10:18:52

Basic Operations
Setting Operation
ON
15
Normal
100
There are three types on parameter setting.
1. ON/OFF as in the picture: )
Press this “ON” button to switch the keyboard touch response
ON or OFF.
2. LIST (as in the picture: Curve )
Press this “Normal” button, all available parameters would be
listed.
3. DATA (as in the picture: Flat velocity )
Press this “100” button to a pop-up box.
(
Directly press a desired parameter on the display, or you can also
use DATA DIAL or [+] / [-] button.
Note:
The selected parameter will be highlighted.
call up
Press the screen button “▲” or “▼” to adjust the data. Or you can
also use DATA DIAL or [+] / [-] button.
In order to have a quick reference for basic parameter settings, please
remember these panel button operations during all edit procedure.
Select a voice, a style or a song
Use the DATA DIAL or [+] / [-] button to select a desired item. Quickly
press [+] / [-] button for once to increase/decrease value gradually.
Press and hold for a while to have a quickly change in value.
EXIT button
This is a very useful button. Sometimes, you may “lost” in a
selection/setting interface, and you want back to the main display, don't
worry and just press [EXIT] button times until you get the goal display.
Decrease Increase
0
5
25
75
95
100
aw_GRAND1000_QuickStartGuide_G07_150108Part2
201518 10:18:52

Playing the Demos
The instrument features 9 wonderful demos. Please refer to DEMO
LIST.
Press the buttons
simultaneously to start playing the demo.
Select your desired demo
Press the Demo name on LCD or use the DATA DIAL, the [+] or the
[-] button to select your desired demo.
Pause the demo
Press the [PAUSE] button to pause the demo playing or continue
playing the demo.
Stop the demo
Press the [PLAY/STOP] button to stop the demo playback.
Adjust the tempo of the demo playback
Press the [TEMPO+] or [TEMPO-] button to adjust the tempo of the
playback demo.
Exit the demo
Press the [EXIT] button to stop the demo playback and return to the
main display.
[VOICE MODE] and [PIANO MODE]
16
VOICE
MODE
PIANO
MODE
DEMO
0
5
25
75
95
100
aw_GRAND1000_QuickStartGuide_G07_150108Part2
201518 10:18:52

Playing Voices
The piano has 672 remarkably realistic built-in voices including Piano, Woodwind, Saxophone, Drum Kits and many more, .
Please refer to Voice List.
Turn the R1 PART on
Normally, the default setting is R1, or you can press PART ON/OFF
[RIGHT 1] to turn the right 1 part on.
Note:
You can also turn most 4 parts on at the same time (L, R1, R2, andR3),
refer to Playing Different Voices with the Left and Right Hands
chapter for details.
Select a Voice for R1 PART
1. Select a voice category, call up voice selection display.
There are 2 methods to select a voice category:
Panel button: press one of the panel voice category buttons located
on the right-top of instrument. For example “PIANO”, as the picture
shown.
Screen button: in main display, tap the R1 part.
2. Select an exactly voice.
Use DATA DIAL or [+] / [-] button move cursor position step by step.
The last voice you have selected will be saved as your new choice.
See Basic Operations page description. Also can use screen page
up or page down button to browsing files by pages.
Play the Voice Demo
Press the “Voice Demo” on the Voice Selection display to start the
demo for the selected voice. Press the “Voice Demo”again to stop it.
Note:
If there isn't voice demo for the selected voice, “Voice Demo” will not
be displayed.
Play the keyboard and listen to the selected voice.
17
R 2
IGHT R3IGHT
PART ON/OFF
LEFT RIGHT 1
PIANO
0
5
25
75
95
100
aw_GRAND1000_QuickStartGuide_G07_150108Part2
201518 10:18:52

Playing with a Style
The instrument features 240 styles in a variety of different musical genres. Try selecting some of the different styles
(Refer to Style List) and play with the auto accompaniment.
Select a style
1. Select a style category, call up style selection display.
There are 2 methods to select a style category:
Panel button: press the panel [STYLE SELECT] button.
Screen button: in main display, tap the style tab area.
2. Select an exactly style.
Use DATA DIAL or [+] / [-] button move cursor position step by step.
The last style you have selected will be saved as your new choice.
See Basic Operations page description. Also can use screen page
up or page down button to browsing files by pages.
Start a style
1. Press the [A.B.C.] button.
When the [A.B.C.] is switched on, the chords you played in the
specified Chord section of the keyboard will be automatically
detected and will be used to control the playback of the selected
style.
2. Press the [SYNC START] button.
Set Auto Accompaniment to standby—letting you simultaneously
start the accompaniment as soon as you start playing in Chord
section.
3. Playing the keyboard as your performance should be.
4. Press the [START/STOP] button to stop the accompaniment.
18
0
5
25
75
95
100
aw_GRAND1000_QuickStartGuide_G07_150108Part2
201518 10:18:52

Playing Songs
The instrument features 10 piano songs. You can playback and enjoy these classical piano songs, or you can learn how to play
them from the score display.
Select a Song
1. Call up the song selection display.
There are 2 methods:
Panel button: press the panel [SONG SELECT] button.
Screen button: in main display, tap the song tab area.
Note:
Normally, the main display shows style area as default setting, you may
firstly tap the song tab in need.
2. Select an exactly song.
Use DATA DIAL or [+] / [-] button move cursor position step by step.
The last song you have selected will be saved as your new choice.
See Basic Operations page description.
Playback a Song
19
The instrument automatically switches to song control mode,
corresponding indicator lights up.
1. Press the [PLAY/STOP] button to start playing a selected song.
There is a pre-count, about a measure length, at the beginning of
one song. [PLAY/STOP] button flashes in red and blue, and the red
light represents the first stressed beat.
2. If you want to pause playing.
Press [PAUSE] button to pausing a song playing, press [PAUSE]
again to continue playing back.
3. Press the [PLAY/STOP] button to stop playing song.
SONG
SELECT
PLAY/
STOP
PLAY/
STOP
PAUSE PAUSE
PLAY/
STOP
PLAY/
STOP
0
5
25
75
95
100
aw_GRAND1000_QuickStartGuide_G07_150108Part2
201518 10:18:52

Recording Your Performance to MIDI
It is convenient to record your performance, play back your
performance, and share your performance.
1. Press the [METRO.] and [RECORD SONG] panel buttons
simultaneously to call up the Recording Display.
A blank song (“New Song”) is called up and the system is in
recording standby mode. The screen displays “Waiting to
Record…”, at the mean time, the [RECORD SONG] starts flashing.
2. Play notes on the keyboard or press the [PLAY/ STOP] button to
start recording. The [RECORD SONG] button will stop flashing and
keep lighting.
3. Press the [RECORD SONG] button or tap the “STOP” button to stop
recording. There will pop-up a soft keyboard to remind you to
rename the new recording or not.
4. Enter a new name and press “OK” button to save this new recording
into user location.
5. Press the [PLAY/ STOP] button to playback the recorded user song.
If you want to record R1, R2, R3, L or record melody and
accompaniment simultaneously, you may refer to MIDI RECORDING
for details.
20
METRO.
NEW SONG
SONG
RECORD
PLAY/
STOP
METRO.
NEW SONG
SONG
RECORD
METRO.
NEW SONG
SONG
RECORD
PLAY/
STOP
0
5
25
75
95
100
aw_GRAND1000_QuickStartGuide_G07_150108Part2
201518 10:18:52
Other manuals for Grand 1000
1
Table of contents
Other Medeli Musical Instrument manuals

Medeli
Medeli DP263 Operating instructions

Medeli
Medeli CDP5200B User manual

Medeli
Medeli CDP5000 User manual

Medeli
Medeli Cdp5000w User manual

Medeli
Medeli DP269 User manual

Medeli
Medeli St430 User manual

Medeli
Medeli Grand 1000 User manual

Medeli
Medeli CDP6200 User manual

Medeli
Medeli DP10 User manual

Medeli
Medeli sp 5100 User manual

Medeli
Medeli DP388 User manual

Medeli
Medeli SP3000 User manual

Medeli
Medeli sp 5100 User manual

Medeli
Medeli Grand 510 User manual

Medeli
Medeli GRAND1000 User manual

Medeli
Medeli DP70EU User manual

Medeli
Medeli DP 100 User manual

Medeli
Medeli SP4200 User manual

Medeli
Medeli CDP6000 User manual

Medeli
Medeli SP-40 Series User manual