MERITECH CleanTech 2000S User manual

CleanTech 2000S
Sole-Clean Pan INSTALLATION
AND OPERATION MANUAL

2
CleanTech 2000S Sole-Clean Pan
Automated Handwashing & Boot Sanitizing System
INSTALLATION AND OPERATION MANUAL
Manufactured by:
Meritech Systems, LLC
720 Corporate Circle, Suite K
Golden, CO 80401 USA
Phone: (800) 932-7707
Fax: (303) 790-4859
www.meritech.com
E-mail: [email protected]om
WARNING: The performance and effectiveness of CleanTech® systems have been
extensively tested when using solutions provided by Meritech Systems, LLC.
Satisfactory performance or effectiveness cannot be guaranteed when other solutions
are used.
FAILURE TO USE MERITECH SYSTEMS, LLC SUPPLIED
CHEMICALS WILL VOID ANY AND ALL WARRANTIES
January 1, 2020

3
MERITECH SYSTEMS, LLC
CleanTech 2000S Sole-Clean Pan
Installation and Operation Manual
Description
Page #
Table of Contents
3
Introduction
4
Overview
5
Facility Installation Instructions / Requirements
6 - 8
First Time Start Up / Operation
9
Cycle Time / Calibration
10
System Cleaning
10
Contacting Meritech
11
4
Introduction
Thank you for selecting the CleanTech® 2000S Automated Hand Cleansing System with the Sole-Clean Pan
option as a component in your handwashing regimen. We designed the Series 2000S to provide your
facility with an automated, turnkey system that meets or exceeds your hand cleansing requirements for
compliance, standardization and effectiveness. The addition of the footwear sanitizing pan saves valuable
employee time and increases sanitizing contact time for the best in footwear hygiene.
This manual describes everything you will need to properly site, install, and maintain your Sole-Clean Pan
System attached to the CleanTech system. Please refer to the separate CleanTech® 2000S Installation
operation manual for set up and installation of those handwashing systems.
The CleanTech 2000S w/ Sole-Clean Pan has a 23" wide X 42" deep footprint, and the accompanying cart
has a 16” wide by 18” deep footprint. The system will hook-up to your existing, standard hot/cold water
lines and wall drain for the handwasher. No additional drainage is necessary for the Sole-Clean Pan. A
more detailed description of the installation procedure can be found in the Installation Guide of this
manual.
Select an area for installation that is level and encourages frequent use in your facility. We recommend
positioning the CleanTech system either near the main work area, lunch facilities, restroom facilities, or
close to the entrance and exit doors.

5
Overview
The Meritech CleanTech 2000S system with the Sole-Clean Pan provides a means of washing hands
and sanitizing footwear at the same time for your employees while maintaining a low moisture
environment that traditional boot dips do not allow. This is possible through the use of the Sanifect
D2 alcohol-based sanitizer, which is quick to evaporate and prevents excessive moisture build-up and
tracking. At the completion of every five handwash cycles, the system replenishes the sanitizing pan
with additional pre-mixed sanitizer to keep the mats properly saturated. Additional sanitizer will also
be added every 20 minutes after the most recent hand wash to ensure that it is always ready for use.
Features:
•Quick-disconnect sanitizer inlet for easy cleaning
•Sloped ramps for safety
•Highly visible caution markings for safety
•Equipped with an easy prime button to wet the pan on startup or after long periods without
use
•Castered cart for simple cleaning
•5-gallon solution tray
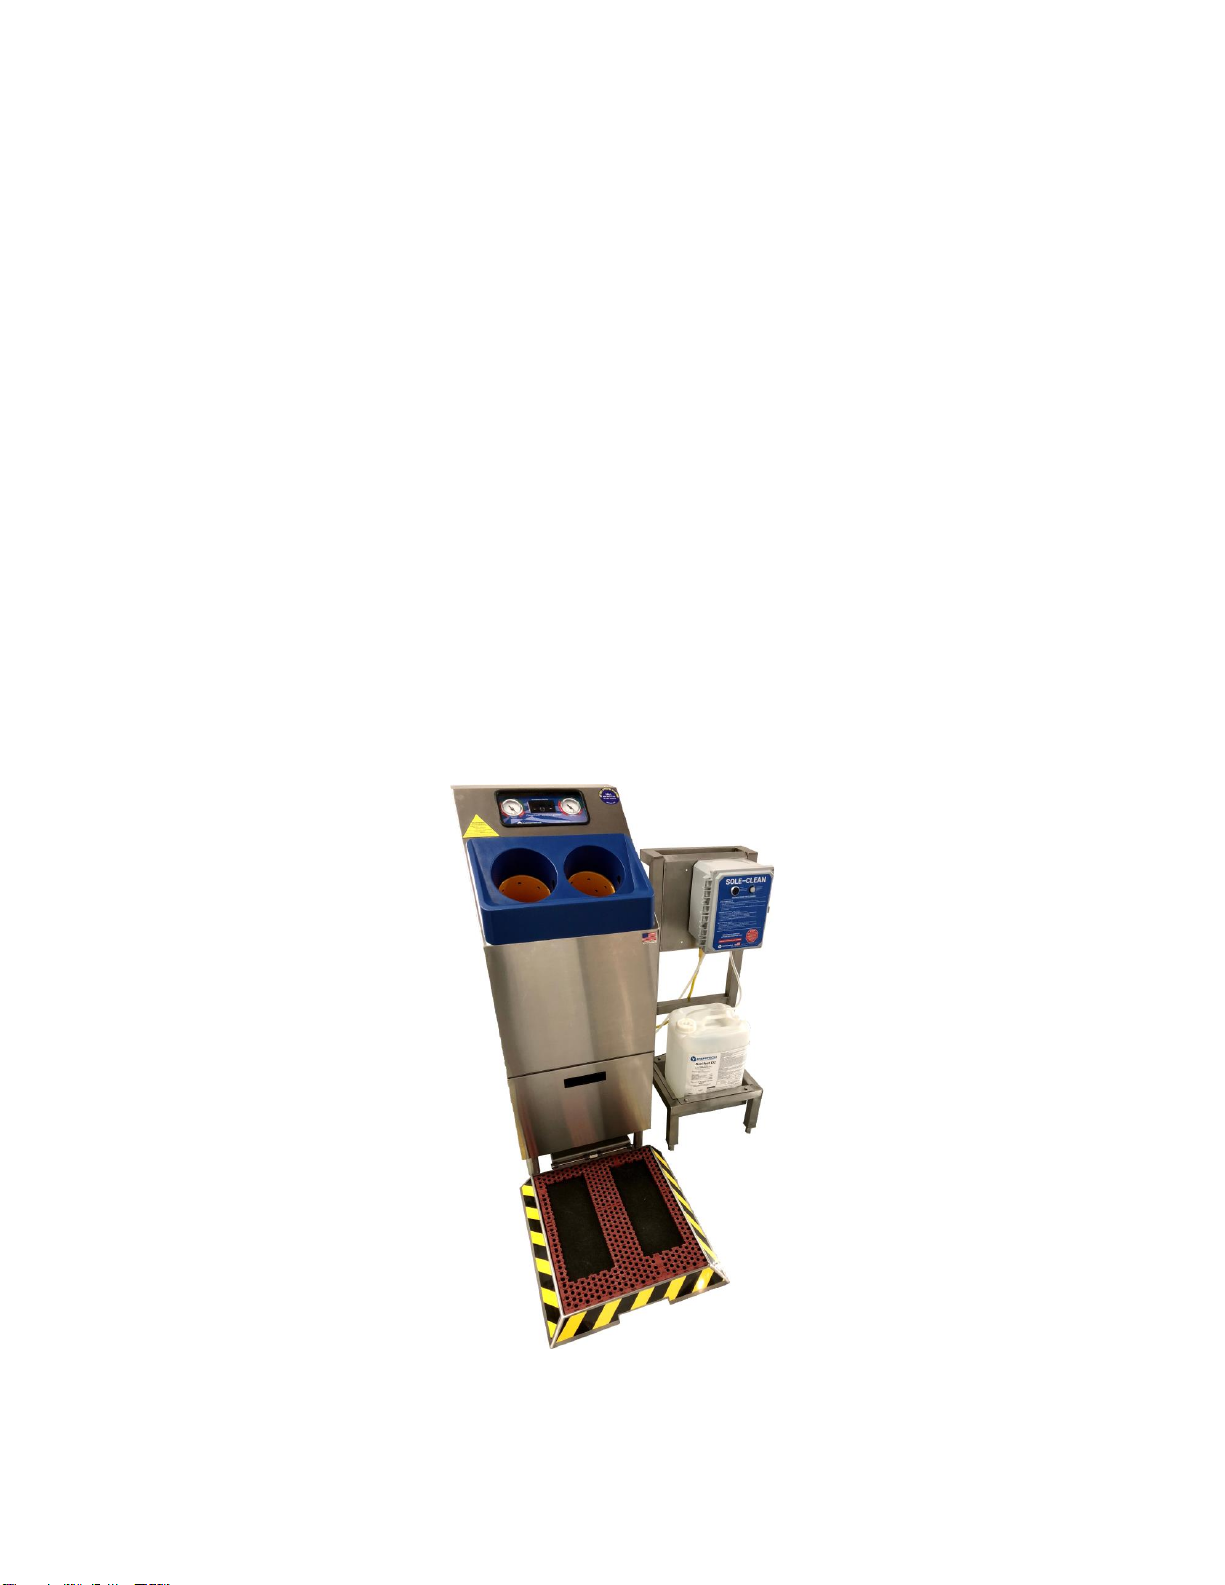
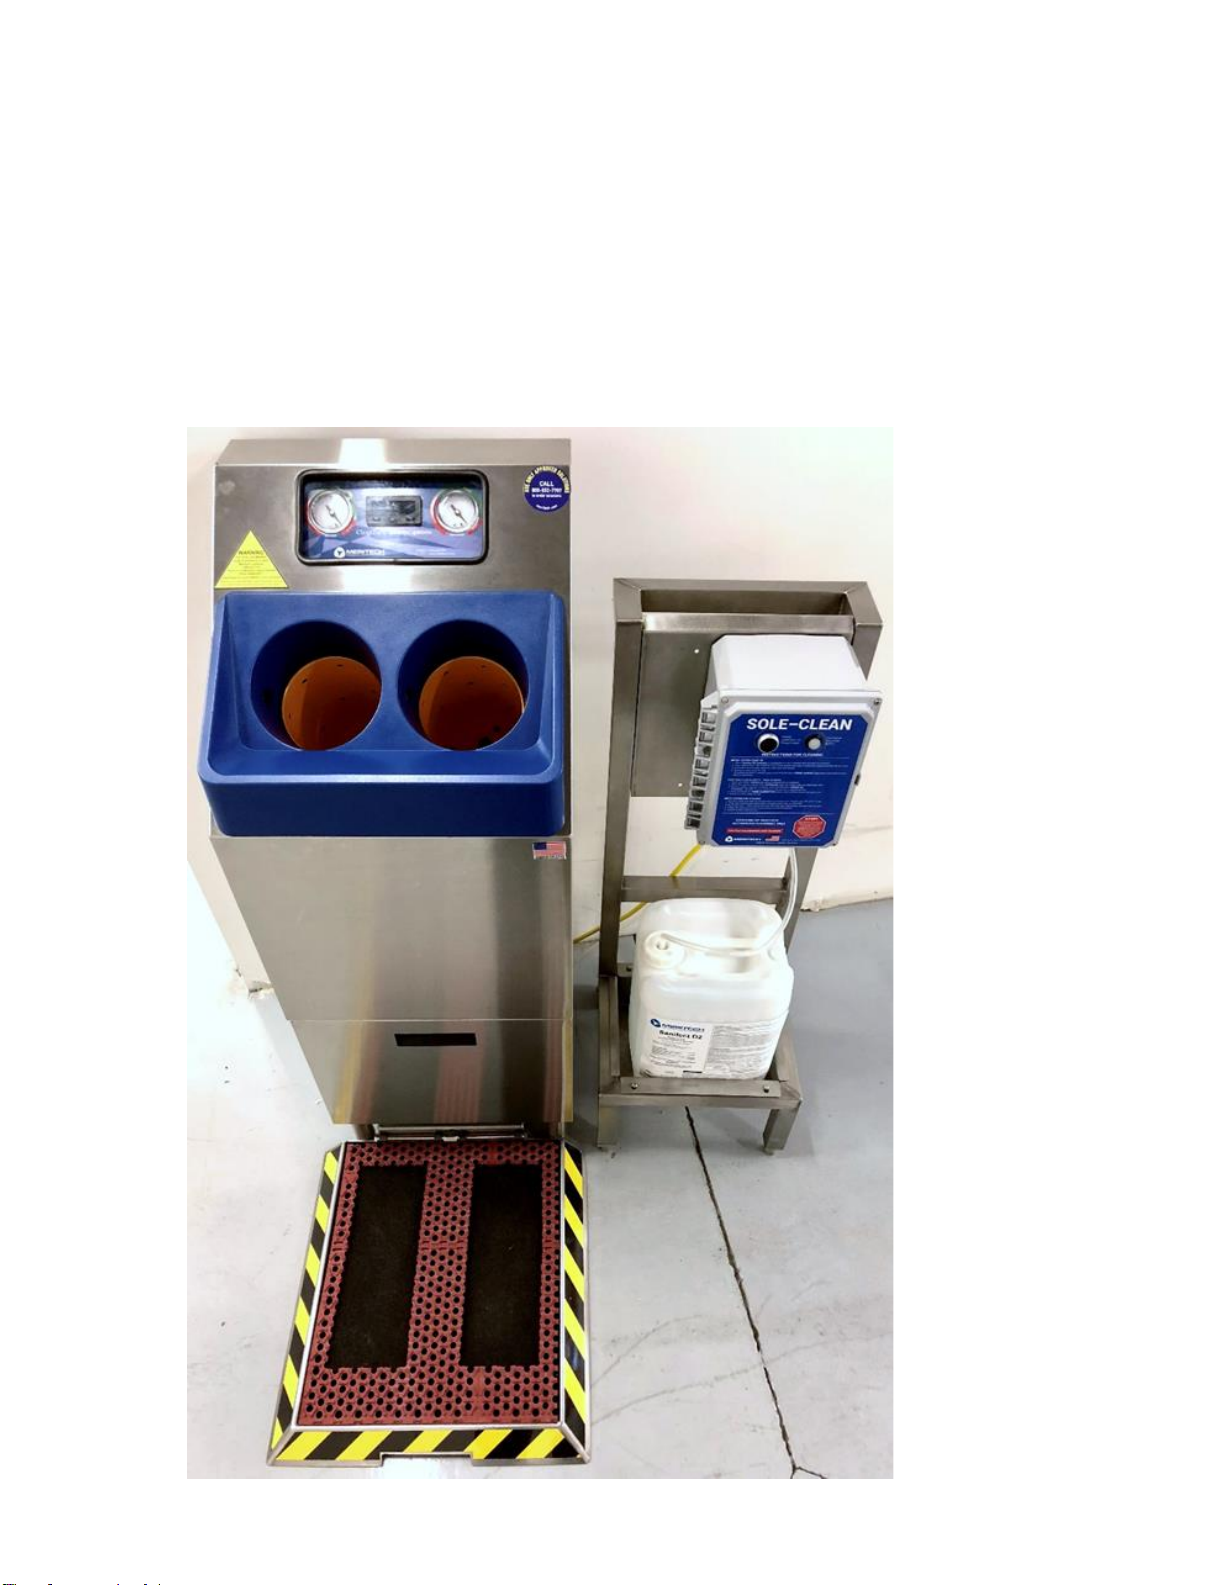
CleanTech 2000S w/ Sole-Clean
6
Facility Installation Instructions/Requirements
The CleanTech 2000S system should be installed per the instructions within its separate installation /
operation manual. This manual gives detailed instructions on the installation, operation, & cleaning
of the Sole-Clean Pan. Do not hardwire the system electrical cord without having a way to
disconnect the system from the electrical source for future serviceability of the system.
1. Install the 2000S system per its installation instructions.
2. Unpack the Sole-Clean cart and pan, then place the pan in front of the 2000S and the Sole-
Clean cart to the right or left of the handwasher per the photo below.

7
3. Make certain that the pan is sitting level and does not rock.
4. Place the three mats into the pan, ensuring that they are in the correct order from bottom to
top: black bubble mat, grey absorptive mat (with soft side up), red foot placement mat (with
grip knobs upward).
5. Place the Sanifect D2 Sanitizer bottle into the basket attached to the Sole-Clean cart.
6. Connect the pickup tube cap to the sanitizer bottle. (it is attached with a clear tube just above
the tube going to the pan)
7. Connect the yellow cable coming out the back of the handwasher to the electrical connection
on the front of the Sole-Clean stand.
8. Take the 3/8” sanitizer supply line and connect it to the fitting on the bottom of the Sole-
Clean system. Make certain the supply line is pushed at least 3/8” into the fitting.
8
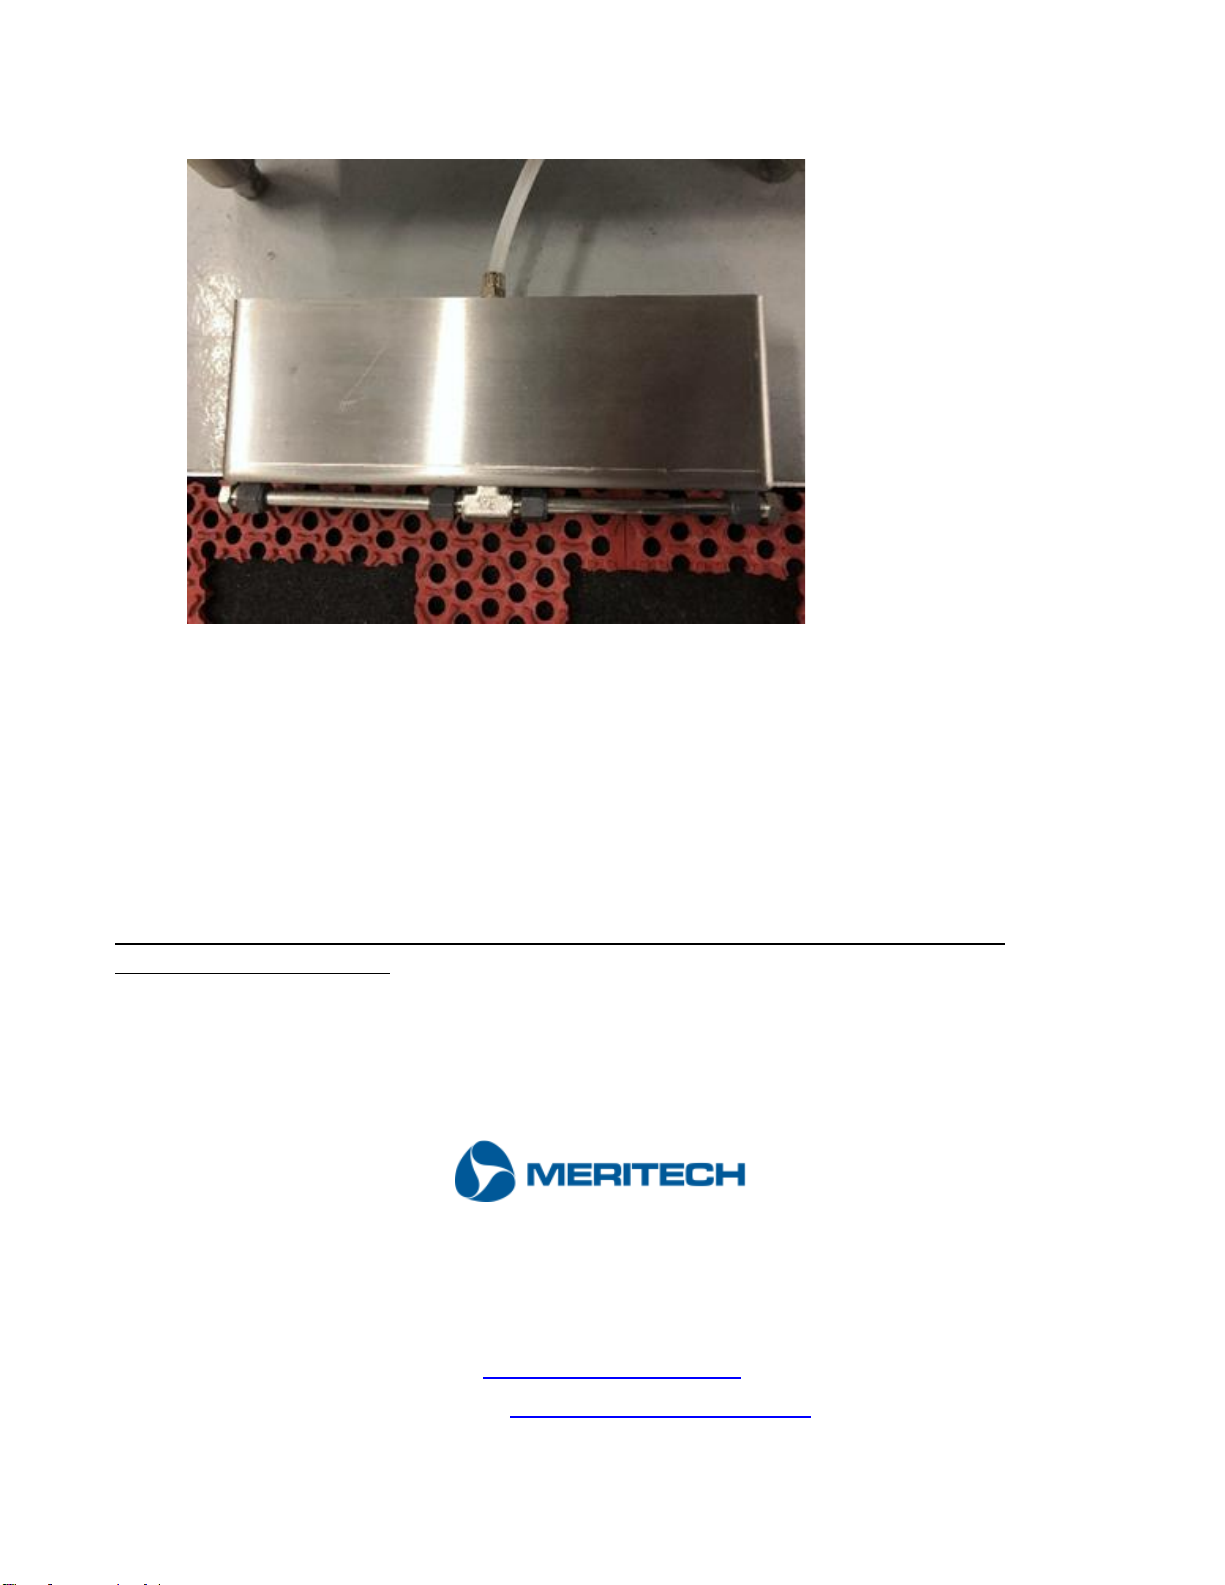
9. Route the other end of the supply line under the hand washer and attach it to the pan
manifold.
10. Push the pan under the handwashing system, making certain the 2 tabs are on the between
legs of the handwasher.
Consult local and national codes: conformity and compliance to local and national codes is the
responsibility of the installer.
IF YOU SHOULD EXPERIENCE ANY DIFFICULTY OR ARE UNSURE ABOUT THE
INSTALLATION PROCEDURE, WE ENCOURAGE YOU TO CONSULT
IMMEDIATELY WITH MERITECH.
720 Corporate Circle, Suite K
Golden, CO 80401 USA
Phone: (800) 932-7707 Fax: (303) 790-4859
www.meritech.com
E-mail: [email protected]m

9
First Time Start Up & Operation
Once the CleanTech 2000S system is installed with the Sole-Clean and is fully functional, follow the
steps below to prime the pan for the first time.
1. Locate the “Prime Sanifect D2” button on the face of the Sole-Clean system.
2. Press and hold the prime button for approximately 30 seconds, or until the desired mat
saturation level is reached. Do not fill the pan to where the fluid pools, only saturate the mat.
3. The CleanTech system with the Sole-Clean is ready for use.
4. Step into the cutouts in the Sole-Clean pan and place hands into the Cleantech cylinders. Once
hands are placed into the cylinders, the handwash cycle will initiate.
5. Once the 12-second handwash cycle is complete, the water will shut off, and hands can be
removed from the cylinders.
6. Caution: Use of the Sole-Clean with footwear heavily laden with debris/soil will cause buildup
on the Sole-Clean mat. This buildup may render the system less effective. Meritech
recommends using the Sole-Clean only in environments with no foot debris. If debris is
present, remove it from footwear prior to using the Sole-Clean.
7. After every five handwashes, the Sole-Clean will dispense Sanifect D2 onto the mat in the pan.
In addition, if no hand washes occur for 20 minutes, sanitizer will be dispensed to keep the
pan ready for use. This will happen every 20 minutes from the last handwash up to four times
before deactivating to prevent unnecessary sanitizer use. The system will reactivate upon the
use of the handwasher.
8. Additional sanitizer can be added to the pan at any time by pressing and holding and “Prime
Sanifect D2” button.

10
System Cleaning
The frequency and type of cleaning of the system will depend on the environment that the system is
installed, the frequency of use, and the quantity of debris being removed from the boots. The
cleaning process should also be documented within your HAACP or SSOP procedures and/or per your
company’s internal procedures.
Meritech recommends daily cleaning of the handwashing system and the Sole-Clean pan. Please refer
to the CleanTech Maintenance Manual or request the specific cleaning instructions from Meritech
customer service for the handwasher.
Sole-Clean Pan Cleaning Instructions:
1. Pull pan forward and disconnect the supply line by pushing the silver button.
2. Remove the three mats from the pan and hose down each of them to remove soils and debris.
3. Hose down the entire inside, top, bottom, and sides of the pan to remove soils and debris.
4. Sanitize all pan surfaces and follow standard sanitizing chemical instructions.
5. Once the cleaning procedure has been completed per the instructions above, re-assemble the
pan per the instructions in this manual.
6. Re-prime the pan per the instructions in this manual.
Contact Meritech Customer Service for additional assistance on cleaning assistance or instruction on
any systems manufactured by Meritech.
Cycle Time / Calibration
To adjust cycle time and calibration of the system, please contact Meritech customer service for
assistance. Please refer to “Contacting Meritech” in this manual.
Sanitizing Fluid is Empty –How to Refill
1. Read and follow the Sanifect D2 safety instructions on its container.
2. When the system needs more Sanifect D2 fluid, the “Footwear Solution Empty” light will
illuminate red.
3. Replace the empty sanitizer container with a new Meritech Sanifect D2 container.
(WARNING –Do NOT reuse containers, discard per company policy.)
4. Press and hold the “Prime Sanifect D2” button until the solution empty light goes out.
5. The system is now ready for use.

11
Contacting Meritech
If you have questions about the general use of the CleanTech® systems, need installation or trouble
shooting assistance, or need to purchase additional solution for your system contact us below.
Meritech
720 Corporate Circle, Suite K
Golden, CO 80401 USA
Phone :( 800) 932-7707
Fax :( 303) 790-4859
www.meritech.com
E-mail: [email protected]m
THE CleanTech FAMILY OF SYSTEMS HAS BEEN DESIGNED TO OPERATE SPECIFICALLY
WITH THE SOLUTIONS PROVIDED OR APPROVED BY MERITECH. THEY ARE OF A
SPECIFIC CONCENTRATION AND VISCOSITY. WE CANNOT GUARANTEE SATISFACTORY
PERFORMANCE NOR WARRANTY THE SYSTEM IF THE CONTAINERS ARE FILLED WITH A
DIFFERENT SOLUTION. IN ADDITION, THERE IS ALSO A RISK OF INTRODUCING
CONTAMINANTS WHICH WILL BE INCOMPATIBLE WITH THE SYSTEM.
Other manuals for CleanTech 2000S
1
Table of contents
Other MERITECH Cleaning Equipment manuals


Popular Cleaning Equipment manuals by other brands


Resol
Resol SBS 1000 Connection & operation

Microdyn Nadir
Microdyn Nadir BIO-CEL BC50 Assembly instruction

Tennant
Tennant 9018842 installation instructions

Scott Aerator
Scott Aerator AquaSweep 15000 quick start guide

Radio Shack
Radio Shack VHS VideoBRUSH Cleaner owner's manual

Kärcher
Kärcher WV 6 Plus N quick start guide