size 850
V2107L x 1
V2107R x 1
size 950
V2106L x 1
V2106R x 1
FITTING INSTRUCTIONS1 DOOR QUADRANT
size 850 •size 950
Any parts missing or damaged must be reported to your supplier
within 5 days of purchase. Please state size & colour of product and
part number as shown for the correponding size of door.
INSPECT DOOR & TRAY BEFORE FITTING NO CLAIMS WILL BE ACCEPTED
AFTER THE TRAY OR DOOR HAVE BEEN INSTALLED
Thank-you for choosing a MERLYN shower door.
Please familiarise yourself with these instructions before installing.
Do you have all the tools required?
Is the installation site compatible with the size of door supplied?
Are all the enclosure components present?
Is the installation kit complete?
DO NOT attempt to install the product unless you can tick ALL 4 boxes
adjacent as satisfactory.
The wall plugs supplied with the installation kit are for use in solid walls.
Hollow or ‘stud-partition' walls will require alternative fixings. Please
consult a hardware supplier for the correct type.
It may also be necessary to consult your tiling supplier about the correct
method for drilling your tiles.
<<
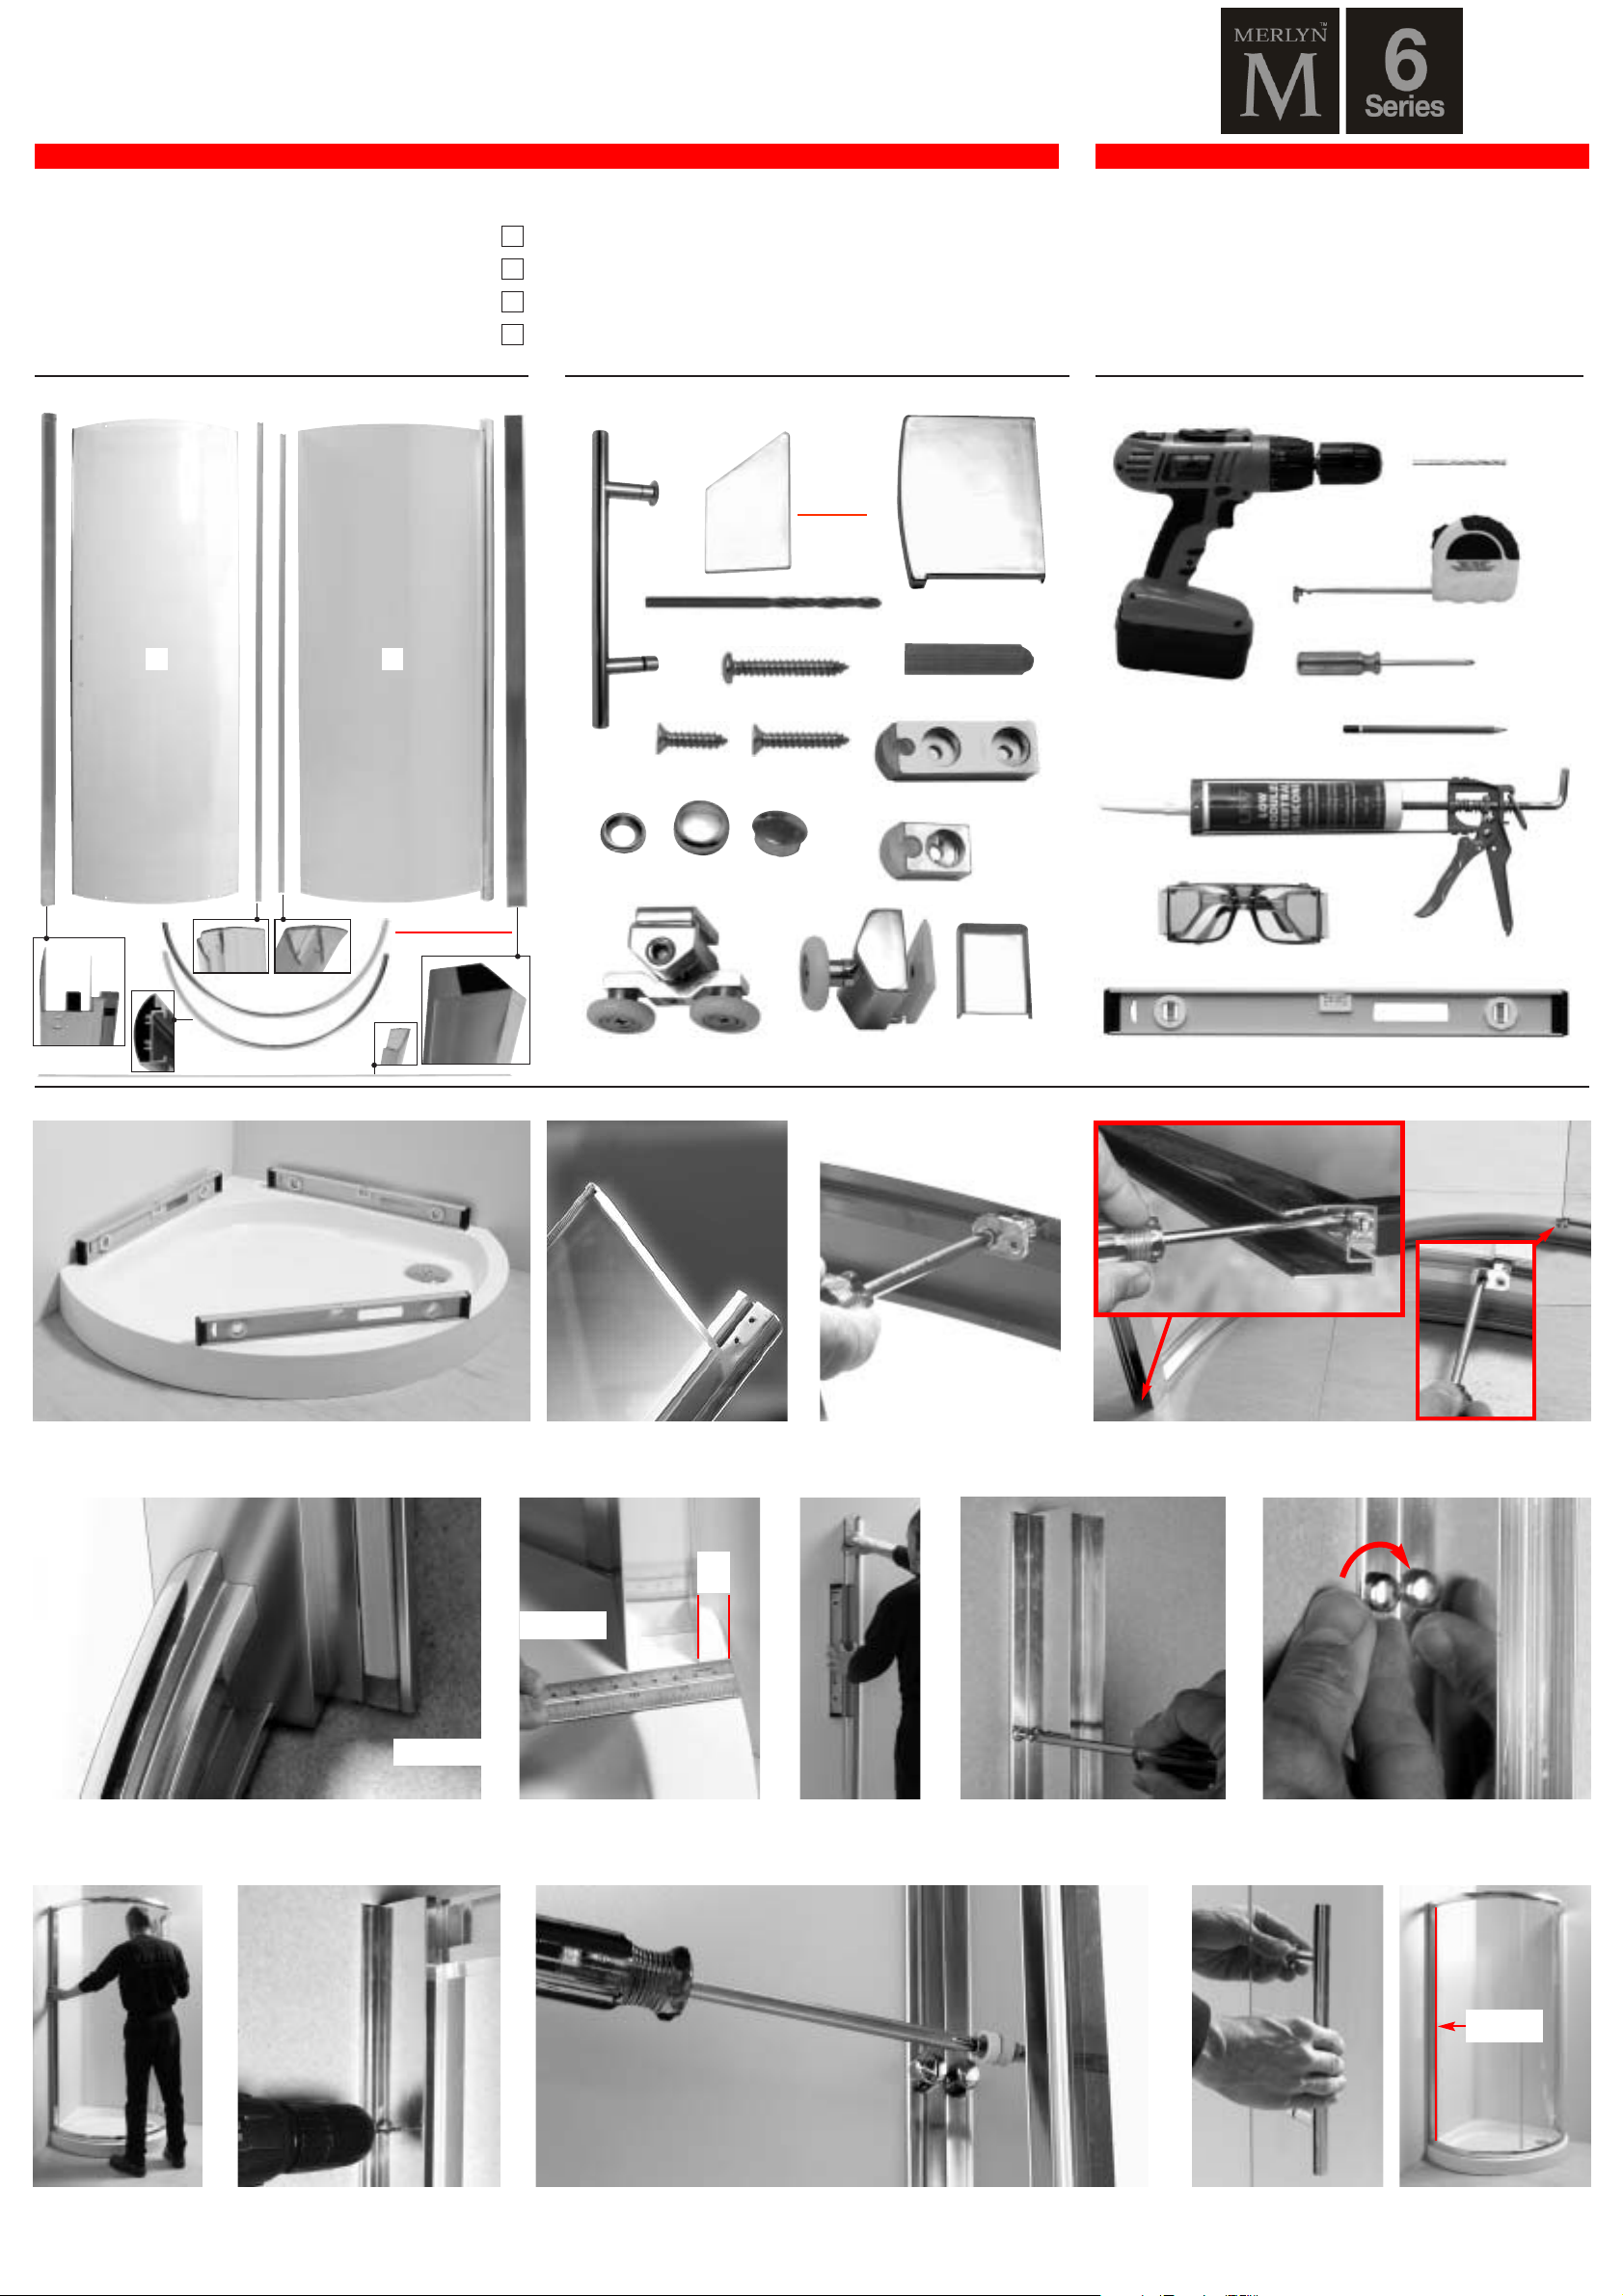
MAJOR COMPONENTS
>>
FITTING INSTRUCTIONS - FOLLOW STEPS IN SEQUENCE
Ensure the dedicated shower trayis level in all directions
and is properly sealed to the wall. The wall must be tiled down
to the top edge of the tray. Do not angle out bottom tile.
1 2 Loosen fixed glass panel
clip.
3Place fixed glass panel into position on bottom rail & screw the
frame together with screws V4111. Tighten glass panel clip.
4
Power drill
6mm masonry drill bit
Pencil/marker
#2 Philips screwdriver
Spirit-level with horizontal & vertical level indicators
Tape measure
Safety eyewear
Quality silicone sealant & applicator
<<
TOOLS YOU WILL NEED
>><<
FITTING KIT
>>
Repeat steps 2 to 4 for top rail and finish frame by
positioning magnetic upright profile Eand screwing
frame together. Note: magnet to inside of enclosure
5
Fit handle V6107 to door. Handle will always
be to the side of the magnetic upright
profile E when door is closed.
8
WARNING
HEAVY PROD UCT, ASSIS TANC E MAY BE RE Q UIR ED
USE SAFETY EYEWEAR WHEN DRILLING
IMPORTANT
INSIDE
Place door frame into position on top of shower tray ensuring entry space is in the correct position. Fit second wall profile t o wall & secure (as 6 above).
Align frame into position, drill through profiles at similar position to wall fixing screws and fix to wall profiles with screw s V4110, clips V2110 & twist-on
caps V2109.
7
Place both wall profiles V1108 or V1109 at 15mm from front edge of shower tray to outside edge of wall profile, wall flange to inside, plumb, mark &
drill holes. Fix only the fixed panel side wall profile into position with screws V4111, clips V2110 and twist-on caps V2109, t he second wall profile
can be fitted when the door frame is in position. Place 2nd wall profile onto frame when lifting onto tray.
6
INSIDE
15
mm
MAGNETIC
PROFILE
size 850 V1109 x 2
size 950 V1108 x 2
V3111
V3104 x1 V3106 x1
V6101 x 2 V6102 x 2
V2101L x 1
V2101R x 1
V6103 x 2
V6107 x 1
V6104 x 1
V6105 x 1
V2111 x 3V2109 x 12V2110 x 12
V4109 x 3 V4110 x 6
V6113 x 6
V4111 x 14
V6115 x 1
A
E
B
C
D
Place fixed panel gasket
V3111 onto bottom edge
of glass.
MERLYN


