Metcal PS-900 User manual

7000-2250_A
PS-900 系统用户指南
PS-900 系統使用者指南
PS-900 取扱説明書
PS-900 시스템 사용자 설명서
PS-900
Soldering System

1
www.metcal.com
PS-900 Soldering System
Operations Manual & User Guide
Congratulations on your purchase of the PS-900 Soldering Station. It utilizes SmartHeat®
technology to ensure unsurpassed performance without the need for system calibration. It
has been designed and manufactured to the highest quality standards to provide
consistent good performance and reliability.
This document has been prepared to guide you with the setup, operation, and user
maintenance of your station. We recommend that you review it to optimize performance
and operational consistency.
Table of Contents
1. Packing / Spares Lists............................................1
2. Initial Setup.............................................................2
3. Smartheat®.............................................................2
4. Selecting Heater Tips .............................................3
5. Replacing Heater Tips............................................3
6. Replacing the Coil Assembly..................................4
7. Troubleshooting......................................................4
8. Specifications .........................................................5
9. Warranty.................................................................6
10. Safety Information ................................................7
1-a. PACKING LIST (with part numbers for re-ordering):
a. PS-900 Power Supply (Part Number: PS-PW900)
b. PS-900 - Black (Part Number: WS2-NS
c. Sponge (Part Number: AC-YS4)
d. PS-900 Soldering Handle / Coil Assembly (Part Number: PS-HC3)
e. Cartridge Removal Pad (Part Number: AC-CP2)
f. Power Cord
g. Instruction Manual
1-b. ADDITIONAL SPARE PART / CONSUMABLE ITEMS:
a. Coil assembly, PS-900 system (Part Number: PS-CA3)
b. Handpiece / power cord. (NO Coil Assembly) (Part Number: PS-H3)
c. PS-900 Auto-sleep Workstand - Green (Part Number: WS2G)
d. Heater Tips (See section 4)
e. Net Power Meter for PS-900 system (part Number: PS-PM900)

2
www.metcal.com
2. INITIAL SETUP
The PS-900 Soldering System consists of a Power Supply, Workstand with Cradle and
Sponge, and a Soldering Handle. The soldering handle also houses a replaceable Coil
Assembly and replaceable heater tip. Both of these consumables are available from your
authorized OK International distributor as needed. The power supply features a Power Switch,
green “Power On” indicator light, power cord, and a connecting port for the solder handle cord.
1. Mount the power supply in a convenient location in your workspace, such as on the
workbench.
2. Insert a heater tip onto the Coil Assembly and simply push the Heater Tip all the way
until it seats. You should feel a slight “click” as it locks into place.
Insert Tip onto Coil Assembly
3. With the power “Off”, attach the solder handle cord to the power supply by inserting
the cord connector into the power supply connecting port. To align the 3 pins, position
the flat side of the cable connector toward the 9 o'clock position of the power supply.
4. Wet the sponge with de-ionized water until it is moist but not soaked. Then place it in
the workstand tray.
5. Plug the power cord into a grounded wall socket of the appropriately rated input line
voltage. To turn the unit on, push the switch (located on the front of the power supply)
until it latches. The green indicator light should light up. If it does not, see the
“Troubleshooting Guide” in this manual.
CAUTION: To provide continued protection against the risk of electric shock, connect
only to properly grounded outlets.
3. SMARTHEAT®: NO CALIBRATION REQUIRED
The PS-900 System is comprised of an induction coil assembly and a heater tip. Each heater tip
is equipped with a self-regulating heater which ‘senses’ its own temperature and tightly
maintains its pre-set idle temperature for the life of the heater-tip; all controlled by OK
International’s proprietary SmartHeat®technology. The tip temperature is determined by the
inherent metallurgical properties of the heater; no external adjustment or equipment is required.
The power delivered to the tip automatically varies in direct response to the thermal load. This
eliminates spikes and transients associated with electrically switched elements found in
conventional soldering irons. Please feel free to contact your OK International representative
with any questions.

3
www.metcal.com
4. SELECTING HEATER TIPS
OK International’s Heater Tips come in a wide variety of tip geometries and temperature ranges
(contact your local OK International Representative or visit our website for more information).
These tip geometries cover a broad range of tasks from delicate precision work to heavy ground
plane soldering.
1. Pick a tip that maximizes contact area between the tip and solder joint. Maximizing contact
area gives the most efficient heat transfer, producing high quality solder joints quickly.
2. Pick a tip that allows good access to the solder joint. Shorter tip lengths allow more precise
control. Longer or angled tips may be needed for soldering densely populated boards.
3. Pick the lowest temperature tip cartridge that will accomplish the task. This minimizes the
potential for thermal damage. The temperature series is marked on the shaft of the Heater
Tip.
5. REPLACING HEATER TIPS
1. Push the Power Switch “Off.” Removal of the
Heater Tip with the power On will result in damage
to the coil assembly.
2. Pull out the heater tip using the supplied AC-CP2
Cartridge Removal Pad. DO NOT USE METAL
TOOLS (SUCH AS PLIERS) TO REMOVE
HEATER TIPS, AS THIS CAN DAMAGE THE
HEATER.
CAUTION: THE HEATER TIP MAY BE HOT!
1. Push a new heater tip into the solder handle with the supplied AC-CP2 Cartridge Pad.
2. Push the Power Switch “On.” The new heater tip will heat up to temperature in less
than 20 seconds.
Too Light
Correct
Too Heavy

4
www.metcal.com
6. REPLACING COIL ASSEMBLIES
1. Push the Power Switch “Off.” Wait for the heater tip to reach room temperature.
2. Remove the heater tip from the handle assembly. DO NOT USE METAL TOOLS (SUCH
AS PLIERS) TO REMOVE HEATER TIPS.
3. To disconnect the Coil Assembly from the Soldering Handle depress the button on the Coil
Assembly and pull it away from the Soldering Handle assembly.
4. Insert the new Coil assembly into the handle assembly, you will feel a ‘click’ as it seats.
7. TROUBLESHOOTING
a. Power LED Not ON
Check the power cord
Check to see that you have mains voltage
Check to see if the power switch is in the ON position
b. Tip Does Not Heat
Is the LED Illuminated?
Is the Hand-Piece Connected to the Power Supply?
Is the PS-CA3 Coil assembly firmly inserted into the PS-H3 Soldering
Handle assembly?
Is the Tip Firmly Inserted onto the PS-CA3 Coil Assembly?
Has a replacement PS-CA3 been tried?
If you cannot resolve the problem after conformation of the above, please contact your local OK
International representative.

5
www.metcal.com
8. SPECIFICATIONS
Power Supply
Ambient Operating Temperature 10 - 40°C
Maximum Enclosure Temperature 65°C
Input Line Voltage 100 - 240 VAC
Input Line Frequency 50/60 Hz
Power Consumption 90 Watts max.
Output Power 60 Watts max. at 22°C ambient temperature
Output Frequency 470 KHz
Power Cord (3-wire) 183 cm 18/3 SJT
Dimensions (approx.) W = 80 mm (3.1"), D = 160 mm (6.3"),
H = 115 mm (4.5")
Soldering Handle and Coil Assembly
Tip-to-Ground Potential < 2 mV True RMS, 50-500 Hz
Tip-to-Ground Resistance < 2 ohms DC, unit on
Idle Temperature Stability ± 1.1°C in still air
Handle Cord Assembly Length 122 cm –burn proof, ESD safe
Connector 3-pin power connector
Dimensions (approx.)
Overall length (with tip) 230 mm (9.06") with standard tips
Grip diameter 13 mm (0.51")
Tip to grip 58 mm (2.28")
Tip shaft diameter 8.0 mm (0.31")
Tip length 82 mm (3.23") to 93mm (3.66") (typical)
Workstand
Dimensions W = 105 mm (4.1"), D = 175 mm (6.9"),
H = 90 mm (3.5")

6
www.metcal.com
9. WARRANTY
Please visit OK International's products web page (www.metcal.com) where you will find
available information on systems, tips, accessories, technical notes, and more. You may also
contact your local OK International representative for pricing and availability.
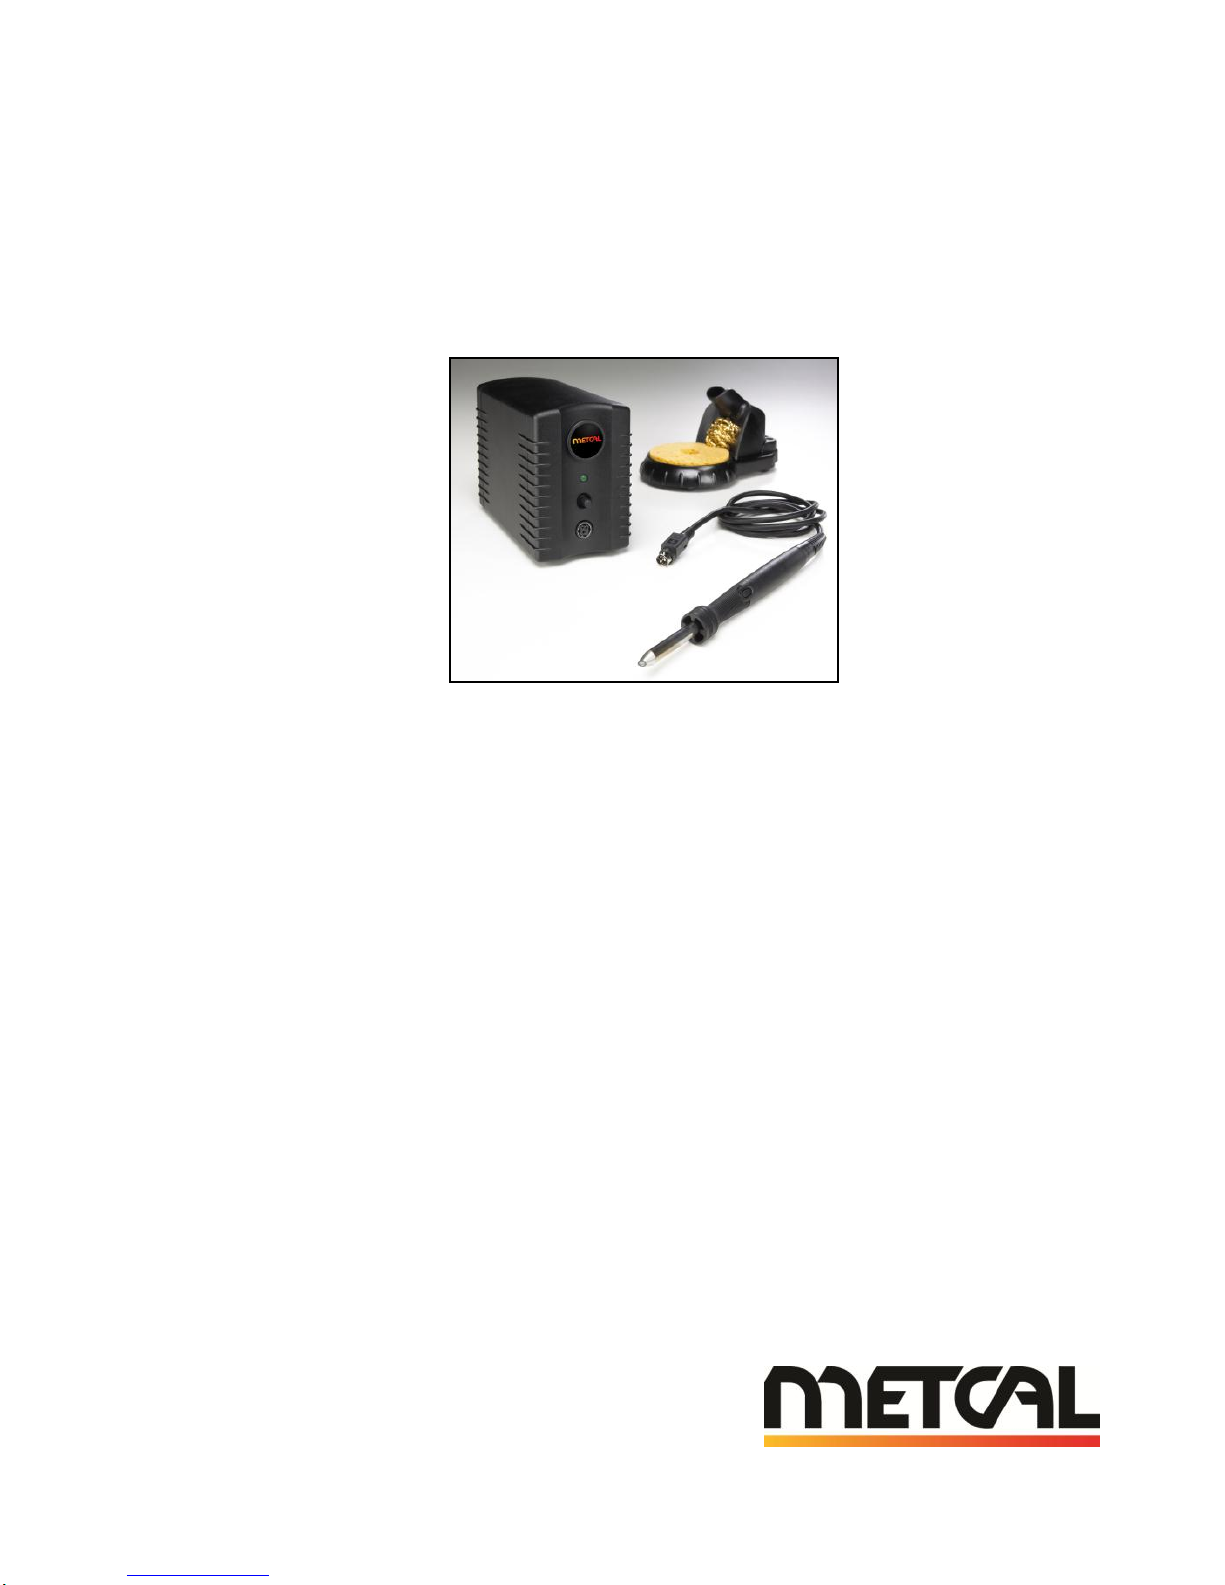
OK International warrants the PS-900 power supply and Handle cord assembly against any
defects in materials or workmanship for one (1) year from the date of purchase by the original
owner. This Warranty excludes normal maintenance and shall not apply to any opened,
misused, abused, altered or damaged items. If the product should become defective within the
warranty period, OK International will repair or replace it free of charge at its sole option. The
replacement item(s) will be shipped, freight prepaid, to the original purchaser. The warranty
period will start from the date of purchase. If the date of purchase cannot be substantiated the
date of manufacture will be used as the start of the warranty period.
SERVICE AFTER WARRANTY
OK International will repair or replace (at OK International's sole option) a PS-900 Power Supply
that fails in normal use within one year (1) year after the expiration of the one-year warranty at
the then current repair or exchange rate. To return a failed Power Supply for repair or
replacement, follow the steps outlined below. This repair/replace offer does not apply to any
previously opened, modified, repaired, altered, misused or damaged Power Supply.
REPLACEABLE PS-CA3 HEATER COIL ASSEMBLY WARRANTY
OK International warrants the coil assembly against material and workmanship defects for a
period of 30 days.
REPLACEABLE TIP WARRANTY
OK International warrants that the heater-tip will operate according to specifications for the
lifetime of the tip plating. A heater tip that fails to heat during the lifetime of the plating will be
replaced at no charge. For replacement contact your local retail supplier. Because tip plating is
mainly dependent upon the user’s application and practices, tips are not warranted for plating
wear. Heater-tips are warranted against any defects in materials or workmanship. Misused,
abused, altered or damaged tips are not warranted. All heater-tips that fail to heat will be
repaired or replaced at OK International’s option. For returns follow the steps outlined below.
RETURN PROCEDURE
Please contact your local OK International Representative for return procedures and policies.

7
www.metcal.com
10. SAFETY INFORMATION
With power applied, the tip temperature can be > 300°C. Failure to observe the following
precautions may lead to injury to users or damage the equipment:
•Do not touch any metallic parts of the hand-piece
•Do not use near flammable items
•Do not use unit for any function other than described in this manual
•Use only genuine PS replacement parts
•Use in a well ventilated area
•Do not use the equipment with wet hands
•Connect only to properly grounded outlets to prevent risk of electric shock.
•Always place hand-piece back into the workstand to prevent accidental
burning of oneself or surrounding objects.
Although the systems offer superior EOS (Electrical Overstress) protection, periodic checks of
the instrument cord should be incorporated into standard operator maintenance procedures.
Waste Electrical and Electronic Equipment Directive - WEEE (2002/96/EC).
When this product is no longer required, if it cannot be re-used,
we ask our customers not to dispose of it as unsorted municipal
waste but to appropriately recycle the product. In Europe, please
contact your OK International distributor who can advise the
recycling options available (www.metcal.com).
WARNING
!

1
www.metcal.com
PS-900 焊接系统
操作手册和用户指南
祝贺您购买了 PS-900 焊接系统。它利用 SmartHeat® 技术确保其卓越的性能,且无需系统校准。
它的设计和制造过程均符合最高质量标准,可提供始终如一的卓越性能和可靠性。
本文用来指导您安装、操作和自行维护焊接台。我们建议您熟读本文,以便优化性能和操作
连贯性。
目录
1. 包装/备件清单.........................................................1
2. 首次安装.................................................................2
3. Smartheat®.............................................................2
4. 选择加热烙铁头 ......................................................3
5. 更换加热烙铁头 ......................................................3
6. 更换加热体组件 ......................................................4
7. 故障排除.................................................................4
8. 规格说明.................................................................5
9. 保修........................................................................6
10. 安全信息...............................................................7
1-a. 包装清单(提供重新订货的零件号):
a. PS-900 主机 (零件号:PS-PW900)
b. PS-900 自动休眠烙铁支架- 黑色 (零件号:WS2-NS)
c. 海绵 (零件号:AC-YS4)
d. PS-900 焊接手柄(含加热体组件) (零件号:PS-HC3)
e. 烙铁头拆卸垫 (零件号:AC-CP2)
f. 说明手册
g. 说明手册
1-b. 其他备件/耗材:
f. 加热体组件 (PS-900 系统) (零件号:PS-CA3)
g. 手柄线/(无加热体组件) (零件号:PS-H3)
h. PS-900 自动休眠烙铁支架 - 绿色 (零件号:WS2G)
i. 加热烙铁头 (参见第 4 部分)
j. PS-900 功率表 (零件号:PS-PM900)

2
www.metcal.com
2. 首次安装
PS-900 焊接系统由“主机”、带有“海绵”的“烙铁支架”以及“焊接手柄”组成。焊接手
柄中还可装入一个可更换的加热体组件和一个可更换的加热烙铁头。可以根据需要从已授权的
OK International 经销商那里获得这两种耗材。主机包括“电源开关”、绿色“通电”指示灯、
以及焊接手柄电线的连接端口。
1. 将电源固定在工作区内的适当位置上,例如工作台上。
2. 将烙铁头插入到“加热体组件”中,仅需用力推动“烙铁头”直到卡入到位。“烙铁
头”插入到位时会发出一声轻微的“卡嗒”声。
烙铁头插入到加热体组件中
3. “关闭”主机电源,将电线插头插入主机连接端口中,从而将焊接手柄电线连接到主
机上。要校准 3 个插脚,请将电线插头扁平面置于主机上(处于主机的 9点钟位置)。
4. 用脱离子水将海绵弄湿,但不要浸透。然后将其置于烙铁支架的托盘上。
5. 将主机电源线插入具有相应额定输入线电压的接地壁装插座中。要开启设备,请按下
(位于主机前面的)开关直到卡定到位。绿色指示灯变亮。如果没有变亮,请参阅本
手册的“故障排除指南”。
注意:为了长期预防触电危险和正常使用,必须连接正确接地的电源插座。
3. SMARTHEAT®:不需要校准
PS-900 加热系统主要由一个感应线圈组和一个加热烙铁头组成。每个加热烙铁头都装有一个温
度自适应加热体,用来感知自身温度并严格保持其预置的闲置温度,以延长加热烙铁头的使用寿
命,这一切均可由 OK International 的专利 SmartHeat®技术控制。该烙铁头的温度由加热器的
固有金属性质所确定;不需要外部电路或外部设备来调节。输送到烙铁头的功率根据热负载的大
小自动变化,从而消除了普通焊铁中采用电子开关元件作为控制电路而产生的峰值脉冲和瞬变现
象。如有任何问题,请随时联系 OK International 代表处。

3
www.metcal.com
4. 选择加热烙铁头
OK International 的加热烙铁头形状各异、温度范围很大(详细信息请联系当地 OK International 代
表处或者访问我们的网站)。这些不同形状的烙铁头能够完成从精细焊点到大接地焊盘等各种焊接
任务。
1. 挑选烙铁头和焊接点之间接触面积最大的烙铁头。最大的接触面积会使热传递效率最高,从而
得到高质量的焊接点。
2. 挑选与焊接点接触良好的烙铁头。长度较短的烙铁头会使控制更为精确。焊接焊点密集的电路
板时,可能需要使用较长或弯曲的烙铁头。
3. 挑选可完成任务的温度最低的烙铁头。这将使可能的热损坏降至最低程度。“加热烙铁头”的
杆上标有温度序列。
5. 更换加热烙铁头
1. 应将“电源开关”置为“Off(关)”。如果在
“ON(通电)”的状态下拆卸烙铁头,将导致加热体
组件的损坏。
2. 用随附的 AC-CP2“烙铁头拆卸垫”拔出烙铁头。
切勿使用金属工具(例如钳子)拔下烙铁头,因为
这样做会损坏烙铁头。
注意:加热烙铁头可能很烫!
3. 用随附的 AC-CP2“烙铁头拆卸垫”将新的烙铁头推入焊接手柄中。
4. 将“电源开关”置为“On(开)”。在 20 秒之内新烙铁头将加热至工作温度。
太小
正确
太大

4
www.metcal.com
6. 更换加热体组件
1. 将“电源开关”置为“Off(关)”。等待加热烙铁头降至室温。
2. 从手柄装置上拔下加热烙铁头。切勿使用金属工具(例如钳子)拔下烙铁头。
3. 要将加热体组件从“焊接手柄”上拆除,请按下加热体组件上的按钮,然后将加热体组件从
焊接手柄装置上拔掉。
4. 将新的加热体组件插入到焊接手柄中,当插入到位时将发出“卡嗒”声。
7. 故障排除
a. 电源指示灯不亮
检查电源线
检查是否有电源电压
检查电源开关是否处在“ON(开)”的位置上
b烙铁头不热
指示灯亮了吗?
“手柄”是否“连接”到“电源”上?
PS-CA3加热体组件是否牢固地插入 PS-H3“焊接手柄”装置中?
烙铁头是否牢固地插入到 PS-CA3“加热体组件”中?
是否尝试更换 PS-CA3?
如果确认了上述情况之后仍不能解决问题,请联系当地 OK International 代表处。

5
www.metcal.com
8. 规格说明
主机
操作环境温度 10 - 40°C
最高内部温度 65°C
输入线电压 100 - 240 VAC
输入线频率 50/60 Hz
功率消耗 最大为 90 瓦
输出功率 在22°C 的环境温度中最大为 60 瓦
输出频率 470 KHz
电源线(3线) 183 cm 18/3 SJT
(大约)尺寸 宽= 80 mm (3.1"),深 = 160 mm (6.3"),高= 115 mm (4.5")
焊接手柄和加热体组件
烙铁头对地的电位 < 2 mV 真RMS,50-500 Hz
烙铁头对地的电阻 < 2 欧姆,直流电流下的数值
闲置温度稳定性 在静止空气中为 ± 1.1°C
手柄电线装置长度 122 cm -防火,ESD 安全
插头 3 插脚电源插头
(大约)尺寸
总长度(含烙铁头) 插入标准烙铁头后为 230 mm (9.06")
手柄直径 13 mm (0.51")
烙铁头到手柄的长度 58 mm (2.28")
烙铁头杆直径 8.0 mm (0.31")
烙铁头长度 82 mm (3.23") –93mm (3.66")(典型)
自动休眠烙铁支架
尺寸 宽= 105 mm (4.1"),深 = 175 mm (6.9"),高= 90 mm (3.5")

6
www.metcal.com
9. 保修
请访问 OK International 产品网页 (www.metcal.com),您将获得关于系统、烙铁头、附件、技术
说明以及更多信息。还可以向当地 OK International 代表处咨询价格和供货等事宜
自第一个买主购买之日起的一年内,OK International 对PS-900 电源和“手柄”电线装置在材
料或工艺方面的缺陷提供保修。此保修不包含正常的维护,且不保修由任何打开、误用、违规操
作、经改动或受损的零件。如果产品在保修期内出现故障,OK International 将免费地修理或更
换产品而不得推卸责任。更换件将寄送到第一个买主手中,并预付运费。保修期从购买之日开始
算起。如果无法确定购买日期,生产日期将作为保修期的起始日期。
保修期之后的服务
保修期(一年)届满之后的一年内,如果 PS-900 电源不能正常使用,OK International 将以当
时的价格进行修理或者更换(OK International 不得推卸责任)。要退还一个需要修理或更换的
故障电源,请遵循下列步骤。此项维修/更换服务不适用于任何曾打开、修改、修理、改动、误用
或受损的“电源”。
可更换 PS-CA3加热体组件保修
OK International 对加热体组件在材料和工艺方面的缺陷提供 30 天的保修期。
可更换烙铁头保修
OK International 保证加热烙铁头在烙铁头电镀层的寿命期限内都将按照规范进行工作。如果加
热烙铁头在电镀层的寿命期限内不能正常加热,将免费更换加热烙铁头。请联系当地零售商进行
更换。由于烙铁头电镀层的状况主要取决于用户的实际应用和操作,故不对烙铁头电镀层的磨损
进行保修。对加热烙铁头在材料或工艺方面的缺陷提供保修。不保修由误用、违规操作、改动或
受损的烙铁头。由 OK International 决定是否对所有出现加热故障的烙铁头进行修理和更换。有
关退货事宜请遵循下列步骤。
退货过程
请向当地 OK International 代表处咨询退货过程和退货政策。

7
www.metcal.com
10. 安全信息
通电后,烙铁头温度将达到 300°C 以上。为了避免受到伤害或者损坏设备,请牢记以下注意事项:
•切勿接触手柄的任何金属部分
•切勿在易燃物附近使用
•切勿使用本手册中没有介绍的设备功能
•只使用原装的 PS 更换件
•在通风良好的区域中使用
•切勿用湿手使用设备
•为了防止触电的危险,只能连接到适当接地的电源插座中。
•请始终将手柄放回到工作台,以防止意外烫伤自己或者烧坏周围的物品。
尽管该系统提供了可靠的 EOS(电性过压)保护,仍应将定期检查设备电线纳入标准的操作员维
护程序中
废弃电子电器设备指令 - WEEE (2002/96/EC)。
当客户不再需要某产品,且该产品无法回收利用,我们将要求客户
不要不加分类地将其作为市政垃圾丢弃,而要正确地加以回收利用。
在欧洲,请联系您的 OK International 经销商,以获取回收利用可
用选项的建议 (www.metcal.com)。
警告
!

1
www.metcal.com
PS-900 焊接系統
操作手冊和使用者指南
恭喜您購買了「PS-900 焊接系統」。它使用的是 SmartHeat® 技術,可確保其卓越的性能
而且無需考慮系統校準。它的設計和製造過程均符合最高品質標準,並能提供穩定的性能和
可靠性。
本手冊將會指導您安裝、操作和自行維護焊接系統。我們建議您熟讀本手冊,以便讓性能和
操作的連貫性達到最佳化。
目錄
1. 包裝清單 / 備件清單......................................................1
2. 首次安裝 ........................................................................2
3. Smartheat®....................................................................2
4. 選取加熱烙鐵頭.............................................................3
5. 更換加熱烙鐵頭.............................................................3
6. 更換線圈組.....................................................................4
7. 疑難排解 ........................................................................4
8. 規格 ................................................................................5
9. 保固 ................................................................................6
10. 安全資訊 ......................................................................7
1-a. 包裝清單(含零件編號以便重新訂購):
a. PS-900 電源 (零件編號:PS-PW900)
b. PS-900 自動休眠工作台–黑色 (零件編號:WS2-NS)
c. 海綿 (零件編號:AC-YS4)
d. PS-900 焊接手柄 / 線圈組 (零件編號:PS-HC3)
e. 烙鐵頭拆卸墊 (零件編號:AC-CP2)
f. 電源線
g. 說明手冊
1-b. 其他備用零件 / 消耗零件:
a. 加熱線圈組,PS-900 系統 (零件編號:PS-CA3)
b. 握把 / 電源線(無線圈組)(零件編號:PS-H3)
c. PS-900 自動休眠工作台 - 綠色 (零件編號:WS2G)
d. 加熱烙鐵頭 (請參閱第 4 節)
e. PS-900 功率表 (零件編號:PS-PM900)

2
www.metcal.com
2. 首次安裝
「PS-900 焊接系統」由「主機」、帶有「支架」和「海綿」的「工作台」以及「焊接手柄」
組成。焊接手柄中還可裝入一個可更換的線圈組和一個可更換的加熱烙鐵頭。可根據需要向授
權的 OK International 經銷商購買這些消耗零件。主機包括「電源開關」、綠色「通電」指示
燈、電源線以及焊接手柄電線的連接埠。
1. 將主機固定在工作區內的適當位置上,例如工作台上面。
2. 將烙鐵頭插入「加熱體組件」,然後將其完全推入直到卡入定位為止。烙鐵頭插入到
定位時會發出一聲輕微的「卡嗒」聲。
將落鐵頭插入加熱體組件中
3. 「關閉」主機電源,將電線插頭插入主機連接埠中,然後將焊接手柄電線連接到主機
上。要校準 3個插腳,請將電線插頭的扁平面朝向主機的 9點鐘方向。
4. 用去離子水將海綿弄濕,但不要浸透。然後將其置於烙鐵支架的托盤上。
5. 將主機電源線插入具有相應額定輸入線電壓的接地壁裝插座中。要開啟設備,請按下
(位於主機前面的)開關直到閂上為止。綠色指示燈亮起。如果沒有亮起,請參閱本
手冊的「疑難排解指南」。
注意:為了長期預防觸電危險和正常使用,必須連接正確接地的電源插座。
3. SMARTHEAT®:不需要校準
PS-900 加熱系統主要由主機和一個感應線圈組及一個加熱烙鐵頭組成。每個加熱烙鐵頭都裝有
一個自調加熱器,用來感知自身溫度並嚴格保持其預設的閒置溫度,以延長加熱烙鐵頭的使用壽
命;這一切皆由 OK International 的專利 SmartHeat®技術所控制。烙鐵頭溫度由加熱器的固有
金屬性質所確定;不需要外部電路或使用外部設備來調節。輸送到烙鐵頭的功率根據熱負載的大
小自動變化。這將消除了普通焊鐵中採用電子開關元件作為控制電路而產生的峰值脈衝和瞬變現
象。如有任何問題,請隨時聯絡 OK International 代表處。

3
www.metcal.com
4. 選取加熱烙鐵頭
OK International 的「加熱烙鐵頭」形狀各異、溫度範圍很大(如需詳細資訊,請聯絡當地
OK International 代表處或造訪我們的網站)。這些不同形狀的烙鐵頭能夠完成從精細焊點到大
型接地焊盤等各種焊接任務
1. 挑選烙鐵頭和焊接點之間接觸面積最大的烙鐵頭。最大的接觸面積會使熱傳遞效率最高,進而
產生高品質的焊接點。
2. 挑選與焊接點接觸良好的烙鐵頭。長度較短的烙鐵頭會使控制更為精確。焊接焊點密集的電路
板時,可能需要使用較長或彎曲的烙鐵頭。
3. 挑選可完成任務的溫度最低的烙鐵頭。這將使可能的熱損壞降至最低程度。「加熱烙鐵頭」的
手柄上標有溫度序列。
5. 更換加熱烙鐵頭
1. 將「電源開關」推至「Off(關)」。如果在電源「On
(開)」的狀態下拆卸烙鐵頭,將會導致加熱體組件損壞。
2. 用提供的 AC-CP2「烙鐵頭拆卸墊」拔出加熱烙鐵
頭。切勿使用金屬工具(例如鉗子)拔下加熱烙鐵
頭,因為這樣做會損壞加熱器。
注意:加熱烙鐵頭可能很燙!
3. 用提供的 AC-CP2「烙鐵頭拆卸墊」將新的加熱烙
鐵頭推入焊接手柄中。
4. 將「電源開關」推至「On(開)」。在 20 秒之內新加熱烙鐵頭將加熱至工作溫度。
太小
正確
太大

4
www.metcal.com
6. 更換加熱體組件
1. 將「電源開關」推至「Off(關)」。等待加熱烙鐵頭降至室溫。
2. 從手柄裝置上拔下加熱烙鐵頭。切勿使用金屬工具(例如鉗子)拔下加熱烙鐵頭。
3. 要將「加熱體組件」從「焊接手柄」上拆除,只要按下加熱體組件上的按鈕,然後將加熱體
組件從「焊接手柄」裝置上拔掉即可。
4. 將新的「加熱體組件」插入手柄裝置,插入定位後會發出「卡嗒」聲。
7. 疑難排解
a. 電源指示燈不亮
檢查電源線
檢查是否有電源電壓
檢查電源開關是否處在「ON(開)」的位置上
b. 烙鐵頭不熱
指示燈亮了嗎?
「手柄」是否「連接」到「電源」上?
PS-CA3 加熱體組件是否牢固地插入「PS-H3 焊接手柄」裝置中?
「烙鐵頭」是否牢固地插入「PS-CA3 加熱體組件」中?
是否嘗試更換 PS-CA3?
如果確認了上述情況之後仍不能解決問題,請聯絡當地 OK International 代表處。
按鈕

5
www.metcal.com
8. 規格說明
主機
操作環境溫度 10 - 40°C
最高內部溫度 65°C
輸入線電壓 100 - 240 VAC
輸入線頻率 50/60 Hz
功率消耗 最大為 90 瓦
輸出功率 在22°C 的環境溫度中最大為 60 瓦
輸出頻率 470 KHz
電源線(3線) 183 cm 18/3 SJT
尺寸(大約)寬= 80 mm (3.1"),深 = 160 mm (6.3"),高 = 115 mm (4.5")
焊接手柄與加熱體組件
烙鐵頭對地的電位 < 2 mV 真RMS,50-500 Hz
烙鐵頭接地的電阻 < 2 歐姆,直流電流下的數值
閒置溫度穩定性 在靜止空氣中為 ± 1.1°C
手柄電線裝置長度 122 cm -防火,ESD 安全
插頭 3插腳電源插頭
尺寸(大約)
總長度(含烙鐵頭) 插入標準烙鐵頭後為 230 mm (9.06")
手柄直徑 13 mm (0.51")
烙鐵頭到手柄的長度 58 mm (2.28")
烙鐵頭杆直徑 8.0 mm (0.31")
烙鐵頭長度 82 mm (3.23") –93mm (3.66")(典型)
自動休眠烙鐵支架
尺寸 寬= 105 mm (4.1"),深 = 175 mm (6.9"),高 = 90 mm (3.5")
Table of contents
Languages:
Other Metcal Soldering Gun manuals

Metcal
Metcal RSS-1000-CVSI User manual

Metcal
Metcal HCT-910 User manual

Metcal
Metcal BGA-3590 Series User manual

Metcal
Metcal HCT-900 User manual

Metcal
Metcal BVX-200 User manual

Metcal
Metcal MFR-WSDSX User manual

Metcal
Metcal MFR-1100 Series User manual

Metcal
Metcal Metcal MX-5200 User manual

Metcal
Metcal GT90 User manual

Metcal
Metcal MFR-1300 Series User manual