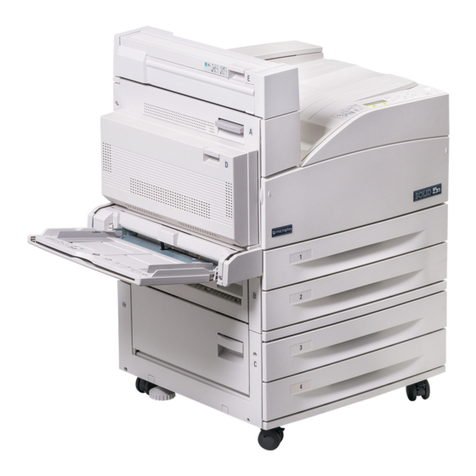
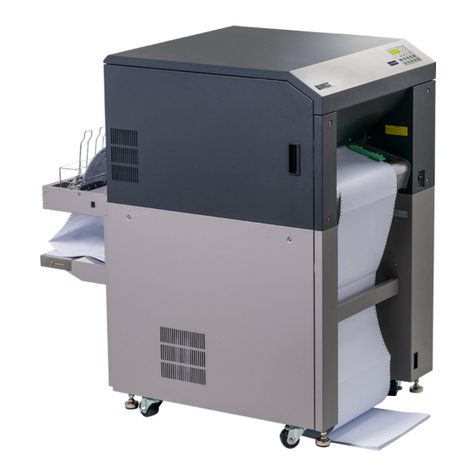
Microplex PP 404 User manual

USER MANUAL
Fanfold Printer
Multi-Purpose Printer

Acknowledgements
EPSON is a Trademark of Seiko Epson Corporation.
IBM is a Trademark of International Business Machines Corporation.
Proprinter is a
Trademark of International Business Machines Corporation.
A Publication of
Microplex
100 Northfield Rd
Bedford, OH 44146
USA
November 2015
Number: 5112 991 20523
http:\\www.microplex-
usa.com
Great care has been taken to ensure that the information in this handbook is accurate and complete.
However,
should any errors or omissions be discovered or should any user wish to make suggestions
for improving this
handbook, please feel encouraged to send us the relevant details.
The contents of this manual are subject to change without notice.
Copyright © by Microplex.
All rights strictly reserved. Reproduction or issue to third parties in any form is not permitted without
written
authorization from the publisher.

I
Safty Regulations
The printer PP 404 (Fanfold Printer) and PP 405 (Multi-purpose Printer) fulfils the safety
regulations according to EN 60950-1, UL 60950-1 and CAN/CSA 22.2/No. 60950-1 for Information
Technology Equipment.
The mains cable must be connected to a ground protected wall-socket. The indicated voltage of
the printer needs to agree with the local voltage.
The power plug must be easily accessible at any time so that it can be disconnected immediately
in case of danger or for maintenance purposes.. Comme le câble de secteur sert de dipositif
d'arrêt-urgence, sa connexion à l'imprimante doit être tout le temps accessible.
Before installing the printer, check the surrounding conditions in which the printer will be placed
(see next page, Operating Environment and chapter 1).
During a thunderstorm you should never attempt to connect or disconnect any data transfer
cables.
The power supply should only be opened and checked by authorized personnel. Repairs and
maintenance beyond the descriptions of chapter 3 Maintenance may only be attempted by
authorized personnel as well. Repairs done inappropriately may cause damage and severe danger
for the user.
There are warning symbols to draw the user's attention to possible injuries:
This symbol is visible when the top cover has been opened. It indicates that the print
head is extremely hot after long periods of printing.
This symbol is located after the front cover. It indicates the possibility to go through
the both holes into the mechanical part of the printer - danger of hurt!

I
Safty Regulations
Electromagnetic Compatibility
We certify that the equipment at issue,
Printer PP 405 (Multi-purpose Printer))
Corresponds to the law regulations ruling electromagnetic compatibility of
appliances
(2004/108/EC) and, therefore, fulfils the requirements for conformity marking with the CE-sign.
In order to ensure the adherence to the limit values in accordance with that test
standards for
breakdown sending (EN 55022, class B) and noise immunity
(EN 55024), in principle shielded interface cables are to be used.
This equipment has been tested and found to comply with the limits for a Class B digital device,
pursuant to Part 15 of the FCC rules. These limits are designed to provide reasonable protection
against harmful interference in a residential installation. This equipment generates, uses, and can
radiate radio frequency energy and, if not installed and used in accordance with the instruction
manual, may cause interference to radio communications.
However, there is no guarantee that interference will not occur in a particular installation. If this
equipment does cause harmful interference to radio or television reception, it can be determined
by turning the equipment off and on. The user is encouraged to try to correct the interference
by one or more of the following measures:
Reorient or relocate the receiving antenna.
Increase the separation between the equipment and receiver.
Connect the equipment to an outlet on a circuit different from the circuit to
which the
receiver is connected.
Consult the dealer or an experienced radio/TV technician for help.
Shielded interface cables should be used with this unit to ensure compliance with Class B limits.
Changes and modifications not explicitly allowed by the equipment's manufacturer could void
the user's authority to operate the equipment.
Changes et modifications pas expressément approuvés par le producteur peuvent dévaluer
l'autorité d'opérer l'équipement.
.

III
Content
1. Getting Started..........................................................................................1-1
1.1. Unpacking the Fanfold Printer ...............................................................1-1
1.2. Unpacking the Multi-purpose Printer ....................................................1-3
1.2.1 A First Look at the Multi-purpose Printer.................................................1-4
1.3. Site Considerations................................................................................1-5
1.4. Transport Lock.......................................................................................1-6
1.5. Installing the Personality Module (only Multi-purpose Printer).............1-7
1.6. The Power Supply..................................................................................1-8
1.7. Power ON/OFF Switch ...........................................................................1-9
1.8. Installing the Ribbon Cassette..............................................................1-10
1.9. Tractor.................................................................................................1-15
1.10. Manual Front Insertion Guide ..............................................................1-18
1.11. Output Stacker (only Multi-purpose Printer) .......................................1-19
1.12. Selection of Operator Panel Language .................................................1-20
1.13. Paper Source Selection ........................................................................1-21
1.14. Print Test .............................................................................................1-22
1.15. To start a print test:.............................................................................1-23
1.16.
Installation of Personality Module (PM).
................................................1-25
Connection to a Computer Parallel or Serial or USB .........................................1-25
HTTP Web Server (PSi Printer WebPanel) .........................................................1-29
PNS Display Current Settings ............................................................................1-31
PNS Page Basic Settings....................................................................................1-32
PNS Page Network Administration ...................................................................1-34
PNS Configuration Logical Printer.....................................................................1-35
PNS Page Printer Actions ..................................................................................1-36
1.17. Emulation Select..................................................................................1-38
2. Printer Operation......................................................................................2-1
2.1 The control panel...................................................................................2-1
2.2 Function Keys ........................................................................................2-2
2.2.1 Short Description of Keys .......................................................................2-2
2.2.2 Detail Description of Keys ......................................................................2-4
2.3 Menu-Mode ..........................................................................................2-9
To Activate the Menu:.......................................................................2-9
To Confirm Selection: ......................................................................2-10
How to Save Settings .......................................................................2-11

III
Quick Settings..................................................................................2-11
......................................................................................................................2-11
3. Maintenance .............................................................................................3-1
3.1 Cleaning .................................................................................................3-1
3.2 Cleaning Procedure................................................................................3-3
3.3 User Replaceable Parts ..........................................................................3-4
3.4 Replacement of the Platen.....................................................................3-7
4. Troubleshooting and Diagnostics...............................................................4-9
4.1 Power-related Problems ......................................................................4-10
Error Messages.............................................................................................4-10
4.1.1 Errors during Self-test ..........................................................................4-10
4.1.2 Errors during Printing...........................................................................4-12
4.1.3 Technical Errors....................................................................................4-14
4.1.4 No Printout...........................................................................................4-15
4.3.1 Operation-related Problems............................................................4-16
4.1.5 Print-related Problems .........................................................................4-17
4.1.6 Ribbon or Carriage-related Problems...................................................4-12
4.1.7 Print Tests ............................................................................................4-12
4.2 Diagrams of Errors ...............................................................................4-13
4.2.1 PAPER JAM TRF (fanfold paper jam)................................................4-13
4.2.2 PAPER JAM ASF (only Multi-purpose Printer) or MANUAL .............4-14
4.2.3
NOPRINTOUT
I
NOPRINTING
..........................................................4-15
4.2.4 PRINT FAINT OR OF POOR QUALITY ................................................4-16
5. ASF-Cassettes (only for Multi Purpose Printer) ..........................................5-1
5.1 Automatic Sheet Feeder Cassettes (ASF) ...............................................5-1
5.1.1 Checking the Delivery Consignment..................................................5-1
5.1.2 Prepare the ASF Cassettes.................................................................5-2
5.1.3 Installing the ASF Cassettes ...............................................................5-3
5.1.4 Removing the ASF Cassette ...............................................................5-5
5.1.5 lnsert Paper .......................................................................................5-6
5.2 Replacement of the ASF Pick-up Rollers.................................................5-8
5.2.1 To Remove the ASF Pick-up Rollers (3) ..............................................5-8
5.2.2 To Install the Pick-up Rollers .............................................................5-9
6. Technical Data ...........................................................................................6-1
Appendix A Configuration of the Printer ............................................................1
A.1 What is Configuring...................................................................................1
A.2 Standard Configuration.............................................................................3
A.3 Explanation of the printouts on the previous pages..................................5

III
A.4 Explanation of the Individual Menu Items.................................................6
Appendix B System Interface Description ............................................................1
B.1 Serial Interface RS-232C............................................................................2
B.2 Parallel Interface.......................................................................................3
B.3 Additional Information..............................................................................4
B.4 USB Interface ............................................................................................5
Appendix C Character Set Tables ....................................................................6
C.1 Code Page ISO 8859-1...............................................................................6
C.2 Code Page ISO 8859-15.............................................................................2
C.3 Code Page ISO 8859-5...............................................................................3
C.4 Code Page ISO 8859-9...............................................................................4
C.5 Code Page IBM All Character Set ..............................................................5
C.6 Code Page IBM Set 1.................................................................................6
C.7 National Version IBM Set 1 ......................................................................7
C.8 Code Page IBM Set 2.................................................................................8
C.9 National Version IBM Set 2 ......................................................................9
IBM Code Pages ..................................................................................................10
C.10 IBM Code Page 437 USA, ASCII, and Graphics .......................................11
C.11 IBM Code Page 850 Greek (437) and ISO 8859-1....................................12
C.12 IBM Code Page 858 Latin 1 with € Sign .................................................13
C.13 IBM Code Page 860 Portugal ..................................................................14
C.14 IBM Code Page 863 Canada, French.......................................................15
C.15 IBM Code Page 865 Norway ...................................................................16
C.16 IBM Code Page 857 Turkey .....................................................................17
C.17 EPSON Extended Graphics Code Page.....................................................18
C.18 National Version EPSON Extended graphics Code Page .........................19
C.19 EPSON Italic Code Page...........................................................................20
C.20 National Version EPSON Italic Code Page (part 1)..................................21
C.21 National Version EPSON Italic Code Page (part 2)..................................22
Code Pages for the Eastern European Countries (EE)...........................................23
C.22 Code Page 437 Greek..............................................................................23
C.23 Code Page 851 Greek..............................................................................24
C.24 Code Page 928 Greek..............................................................................25
C.25 Code Page 855 Cyril ................................................................................26
C.26 Code Page 866 Russia ...........................................................................27
C.27 Code Page 869 Greek.............................................................................28
C.28 Code Page 852 Multilingual Latin 2 .......................................................29
C.29 Code Page KAMENICKY ...........................................................................30


III
C.30 Code Page ISO LATIN 2............................................................................31
C.31 Code Page MAZOVIA...............................................................................32
C.32 Code Page 437 HUN................................................................................33
C.33 Code Page 852 SEE..................................................................................34
C.34 Code Page 866 LAT .................................................................................35
C.35 Code Page WIN LAT2 ..............................................................................36
Code Pages for the Eastern European Countries (EE2).........................................37
C.36 Code Page 771 Lithuanian and Russian .................................................37
C.37 Code Page 773 Latin 7 (Baltic old standard)..........................................38
C.38 Code Page 774 Lithuanian = IBM 1118 ..................................................39
C.39 Code Page 775 (Baltic Rim)....................................................................40
C.40 Code Page BALTIC RIM............................................................................41
C.41 Code Page 1251 Win Cyrillic ...................................................................42
C.42 Code Page 1125 / 866 Ukrainian ............................................................43
C.43 Code Page OCR-A....................................................................................44
Appendix D IBM ProPrinter Quick Reference ........................................................1
Appendix E EPSON LQ 2550 and ESC/P2 Quick Reference ..................................1
Appendix F Bar Code Quick Reference ...........................................................1
Appendix G Print Samples of Resident Fonts.........................................................1

III
Preface
Preface
About this Manual
This manual is covering the two printers
Fanfold Printer
Multi-purpose Printer
The operation and functionality are nearly the same. In most illustrations, the Multi-purpose
Printer is used. In case there are differences in the handling you will find the note:
Fanfold Printer
or
Multi-purpose Printer
The Interface (Personality Module (PM)) is an integral part of the printer, and the type of PM
used determines the functionality of the printer especially regarding the user and system
interface.
This manual is divided into the following chapters:
1. Getting Started
2. This chapter covers the unpacking and setting-up of the printer and the installation of
the ribbon cassette. By the end of this chapter the printer should be fully functional and
tested in its primary form. It is not yet
connected to the host computer system and no
options are mounted.
3. Operating the Printer
4. This chapter discusses in great detail the operation of the operator panel, menu
functions, and the general operation of the menu.

III
Preface
5. Maintenance
6. shows how to clean the printer and how to replace the platen and the print head.
7. Trouble Shooting and Diagnostics
8. Suggests how to identify and correct simple problems.
9. Automatic Sheet Feeder Cassettes (ASF) (only for Multi-purpose Printer) this chapter
shows how to handle the ASF Cassettes.
10. Technical Data
11. All technical details or data about the printer can be found here.
Appendix
A. Configuring the Printer
This chapter explains how to configure the printer so that it can communicate with the
corresponding system environment. Then this chapter thoroughly describes the printer's
operating controls. In the last part you will find explanations of individual menu items. At
The end of this chapter you will find the Menu tree.
B. Interface Description
This chapter gives hints about possibilities to connect the printer to the various computer
systems and explains particularities depending on the version of the operating system.
Additionally, cable connection is illustrated.
C. Character Set Table
All printer supported character sets are listed in this chapter.
D. Control Codes
Quick reference for IBM Proprinter and IBM Proprinter AGM (4207, 4208 XL 24) Emulation.
E. Control Codes
Quick reference for EPSON LQ 2550 / 1060 /ESC/P2 Emulation.

III
Preface
A. Barcode Quick Reference
Quick reference for Bar Code programming.
B. Print Samples of Resident Fonts
Conventions Used in this Guide
The following conventions are used:
Bold: Headlines and important information.
Note: Contains special advice to facilitate handling.
Caution: Contains important information to prevent damage of the equipment.
[ENTER] Key functions are always depicted in brackets or you will find the symbol
of the key e.g.
Abbreviations and Acronyms
AGC
Automatic Gap Control
ASF
Automatic Sheet Feeder Cassette for cut sheets and form sets
EE
Eastern European
LCD
Liquid Crystal Display
LED
Light Emitting Diode
LQ
Letter Quality
MACRO
User defined group (1 bis 4) of stored parameter
NLQ
Near Letter Quality
PM
Interface (Personality Module)

1-1
1. Getting Started
1.1. Unpacking the Fanfold Printer
Check each item against the check list detailed below. Contact your reseller immediately if any item
is missing or damaged.
The printer package should contain the following:
(1)
24-Needle Printer
(2) Ribbon cassette
(3)
Power cord
(4) Quick reference guide
(5)
CD-ROM
Caution: Do not connect to the mains until the main's voltage has been checked (see
paragraph 1.6 The Power Supply).
Note: Save all packing material and boxes for future transportation of the printer. The
printer drivers for Windows® are available on the enclosed CD- ROM.
4
5
1
3
2

Getting Started
1-2
1.1.1 A First Look at the Fanfold Printer
Before installing the printer, spend some time familiarizing yourself with the printer.
(1)
Printer
(2)
Ribbon Cassette
(3)
Top Cover
(4)
Tractor for Continuous Paper
(5)
Paper Supports
(6)
Front Cover
(7)
Control Panel
(8)
Tear off edge
(9)
Serial / Parallel / USB Input
(10)
Power Cord Socket
(11)
Power Switch
1
11
8
9
10
5
3
2
7
4
6

Getting Started
1-3
1.2. Unpacking the Multi-purpose Printer
Check each item against the check list detailed below. Contact your reseller immediately if any
item is missing or damaged.
The printer package should contain the following:
(1)
Output Stacker
(2) Ribbon Cassette
(3)
Printer
(4) Quick Reference Guide
(5)
Personality Module (PM) (sep.)
(6) Power Cord
(7)
CD-ROM
A separate box contains the Personality Module (5)
Caution: Do not connect to the mains until the PM is installed and the main's voltage selection
has been checked. (See paragraph 1.5 and 1.6).
Note: Save all packing material and boxes for future transportation of the printer. The
printer drivers for Windows® are available on the enclosed CD- ROM.
1
5
2
6
3
4
7

Getting Started
1-4
1.2.1 A First Look at the Multi-purpose Printer
Before installing the printer, spend some time familiarizing yourself with the printer.
(1)
Printer
(2)
Ribbon Cassette
(2)
Top Cover
(4)
Tractor for Continuous Paper
(3)
Paper Supports
(6)
Front Cover
(4)
Control Panel
(8)
Tear off edge
(5)
Serial / Parallel / USB Input
(10)
Power Cord Socket
(6)
Power Switch
(11)
Personality Module (PM)
11
12
10
9
8
6
7
5
4
3
2
8
1

Getting Started
1-5
1.3. Site Considerations
Environment Conditions
Install the printer in an area away from any heat source, air conditioner or strong draught.
Avoid installing the printer in a dusty or humid environment.
Work Location
Place the printer on the stand or a flat, solid level area such as a desk.
Slots and openings in the printer's housing are provided for ventilation; always ensure that
these openings are not obstructed.
Always place the printer with its front edge slightly off the edge of the table when
processing fanfold paper.
Also ensure that the cables at the rear of the printer do not interfere with the output paper
path.
Power Requirements
No special wiring is required. A typical office wall outlet is sufficient.
Do not plug in other equipment besidesthe printer such as coffee machines, copy machines
or air conditioners into the same wall outlet.

Getting Started
1-6
1.4. Transport Lock
You will find a red shipping tab under the top cover (1).
Grasp the top cover (1) on the left and right, lift it and remove the transport locking clip (2)
from the print head drive belt.
Re-packing Information
Note: Save all packing material and boxes for future transportation of the printer. To ensure
maximum protection when transporting the printer, always
Remove any installed paper handling option.
Remove the output stacker and the mains cable.
Remove the ribbon cassette.
Reposition the transport locking clip.
Pack the printer in its original packing material and ship in its original box.
1
8

Getting Started
1-7
1.5. Installing the Personality Module (only Multi-purpose Printer)
The printer functions only in combination with an installed interface module, called a
Personality Module (PM).
The illustration below shows the standard PM with a serial, parallel, and USB interface.
Note To avoid damage due to electrostatic discharge, do not touch the pins or components
of the PM.
Never attempt to install or remove a PM while the printer is switched ON
1.
Switch-off the printer
2.
Remove the PM (1) from its packaging.
3.
Insert the Personality Module (1) with the component side upwards until the
connector fully engages. Hand tightens the two locks screws (2).
1
2

Getting Started
1-8
1.6. The Power Supply
Mains Voltage
In general, the main's voltage selection is determined at factory sites.
Make sure that the specified voltage on the label (1) corresponds to your main's voltage:
The 230 V setting applies to the range of 180 to 264 V alternating current.
Note: Since an incorrect voltage selection can seriously damage the printer, please pay
special attention to the following.
Connect the printer to the mains using the power cord (2). First connect the cable to the
power cord socket and then to the mains.
Note: As the power cord serves as a safety cut off, its connection to the printer must be
accessible any time.
2
1

Getting Started
1-9
1.7.Power ON/OFF Switch
The power ON/OFF switch (1) turns the printer's power supply ON or OFF.
After switched ON the printer an internal self-test which checks the electronics, the print head
carriage movement and the interface will be performed.
At first the yellow LED on the Operator Panel is lighting up and the display shows TEST.....0.1
(bootstrap). In the next step the yellow LED will be dark, the green LED lights up and the display
shows TEST....FW..0101234 (version of the firmware).
If the message INSTALL RIBBON is shown, follow the steps in paragraph 1.8 installing the
Ribbon Cassette.
If the message INSTALL RIBBON is shown, follow the steps in paragraph 1.8 installing the
Ribbon Cassette.
After inserting the ribbon press to continue. When the internal test has been completed
successfully the display shows READY 1 ELQ or BUSY 1 ELQ in case data has already been
transmitted.
Note: If the display shows anything different, please refer to chapter 4 Troubleshooting and
Diagnostics.
1
This manual suits for next models
1
Table of contents
Other Microplex Printer manuals

Microplex
Microplex SOLID 166E User manual

Microplex
Microplex SOLID F44 User manual

Microplex
Microplex SOLID T11 DT User manual

Microplex
Microplex F36C User manual

Microplex
Microplex SOLID F90 HD User manual

Microplex
Microplex PP 803 User manual

Microplex
Microplex SOLID 50 A3 - 3 User manual

Microplex
Microplex SOLID F40 User manual

Microplex
Microplex SOLID T8 User manual

Microplex
Microplex LOGIJET TC8 User manual