Miditech Pianobox USB User manual

miditech Pianobox USB
GM Soundmodul mit 128 GM Sounds
und vollständiger GM Implementation
195 Variations-Sounds
9 Drum Sets und ein SFX Set
Spei hert die letzte Einstellung
Drum omputer/Metronom mit 100 Drumpatterns
Vierstelliges Display
HI-Z Gitarren-Input 6,3mm Klinke
Play/Stop Taster, Drum/Sound Taster
10 Funktions Taster
MIDI I/O und USB MIDI I/O
LINE OUT 6,3 mm Klinkenausgänge
Kopfhörer-Ausgang 3,5mm
Stromversorgung per Netzteil oder USB
eMail: [email protected] Internet: www.miditech.de
1

Bedienungsanleitung
Vielen Dank, das Sie sich für die Miditech Pianobox USB entschieden haben. Die Pianobox USB
stellt Ihnen zu günstigen Preis ein General MIDI Sound odul und 100 Dru patterns zur
Verfügung. Angeschlossen an ein Masterkeyboard können Sie it der Pianobox USB direkt spielen!
Die 10 Funktionstaster er öglichen eine leichte Sound- und Pattern-Auswahl. Oder schliessen Sie
Ihre Gitarre an den Gitarreneingang an, und spielen Sie zu eine der 100 Dru patterns, die in der
Pianobox USBgespeichert sind. Das Te po ist dabei frei wählbar. Die odernen Patterns aus allen
Stilrichtungen er öglichen ein vielfältiges Spielen, oder auch nur den Einsatz als Metrono .
Über MIDI angeschlossen, verbessert die Pianobox USB den Klang eines älteren Keyboards oder
Synthesizers. An einen Co puter über USB angeschlossen kann die Pianobox USB ein Software-
Wavetable ersetzen und so MIDIfiles „zu Leben erwecken“! Und das in echter Hifi-Qualität und
ohne ein MIDI Interface!
Oder, schliessen Sie ein Keyboard und eine Gitarre gleichzeitig an, und lassen sich von den
Dru patterns begleiten.
I Verlauf dieser Bedienungsanleitung werden wir einige Hinweise zur Bedienung und Funktionen
der Pianobox USB geben.
Technische Daten der Pianobox USB:
●Einfacher Anschluss an Keyboards, Masterkeyboards oder den Co puter über MIDI und
USB
●16 Bit/48 kHz DA Wandler
●Kopfhörer-Ausgang, 32Ω, 65mW, 20Hz- 20kHz, thd 0.1%
●Line Out, 10kΩ, 1V, 20Hz- 20kHz, thd 0.01%
●Direct Input ür Gitarre/Bass 10kΩ, 20Hz- 20kHz
●AC Netzteil i Lieferu fang, 1 A pere, 9V, Plus Innen
●oder: USB powered
●regelbarer Kopfhörer Ausgang
●Integriertes USB MIDI Interface it voller Record und Playback Funktion.
Ans hluss und Bedienelemente
Das Gehäuse der Pianobox USB ist eindeutig beschriftet!
Sie finden auf der Frontseite den HI-Z Gitarren-Eingang und daneben den Kopfhörer-Ausgang. Auf
der linken Seite finden Sie den Master-Lautstärkeregler der Pianobox USB.
2

Auf der Rückseite sind der Anschluss für das Netzteil, MIDI In- und Output, der USB MIDI Port,
der Power On/Off Schalter sowie die LINE Outs und Lautstärkeregelung.
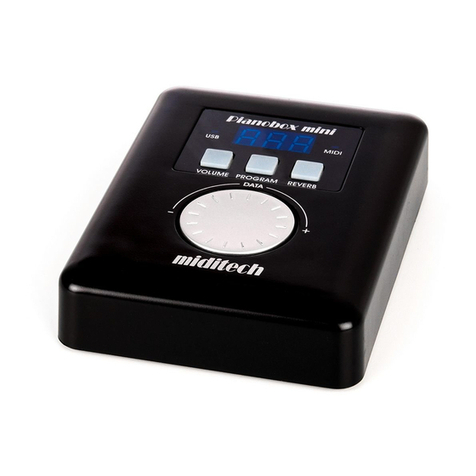
Auf der Oberseite sind die Bedienele ente, 10 Taster, Play/Sound und Dru /Sound Taster und das
vierstellige Display, das die angewählte Funktion und deren Para eter sichtbar acht.
Die 10 Funktionstaster sind jeder für eine besti te Funktion der Pianobox USB verantwortlich,
it jeder einzelnen wird eine besti te Funktion greifbar. Dabei gibt es zwei Ebenen, die Dru -
Ebene und die Sound-Ebene.
3

Ans hluß der Pianobox USB an ein Keyboard, Masterkeyboard oder Computer
Der Anschluss der Pianobox USB an ein Keyboard oder Masterkeyboard erfolgt über den MIDI IN
it eine herkö lichen Standard MIDI Kabel. Verbinden Sie den MIDI OUT des Keyboards it
de MIDI IN der Pianobox USB.
Der Anschluss an den Co puter erfolgt über den integrierten USB Anschluss. Da die Pianobox
USB Class co pliant ist, uss kein Treiber installiert werden. Bei Anschluss and den Co puter
wird die Pianobox USB als „Pianobox“ erkannt und eingerichtet. Stellen Sie in Ihrer
Musiksoftware diesen Treiber ein und benutzen Sie die Pianobox wie ein MIDI Interface!
Zur Stro versorgung schliessen Sie die Pianobox USB it de itgelieferten Netzteil a
Stro netz an. Sie brauchen AC, 1000 A, 9V. Bitte verwenden Sie KEIN DC Netzteil!
Der LINE OUT der Pianobox USB sind herkö liche 6,3 Klinkenbuchsen, verbinden Sie diese
über ein LINE Kabel it Ihre Verstärker.
HI-Z Instrument DI Eingang (Mono-Klinke 6,3 mm)
An diesen Klinken-Eingang können Sie Instru ente it hoher I pedanz, z.B. E-Gitarren und E-
Bässe anschliessen. Das Signal wird zur Pianobox USB dazuge ischt, Sie können gleichzeitig auch
den Dru co puter und die Sounds über MIDI it eine Keyboard spielen.
Line Ausgänge (2x Mono-Klinke 6,3 mm)
Diese führen zusa en it de Kopfhörer Out das gleiche Ausgangs-Signal. Verbinden Sie diese
Ausgänge über ein Stereokabel it eine Eingang Ihres Verstärkers.
Kopfhörer-Ausgang (Stereo-Mini-Klinke 3,5 mm)
Hier schliessen Sie Ihren Kopfhörer an, it de Drehregler auf der Rückseite können Sie die
Lautstärke des Kopfhörer-Ausgangs und des MAIN Outs gleichzeitig regeln.
USB-As hluss (Typ B)
Hier schliessen Sie die Pianobox USB it eine handelsüblichen USB Kabel (Typ A auf B) Ihren
Co puter an. In diese Fall ist die Pianobox USB voll USB powered, das heisst Sie brauchen kein
zusätzliches Netzteil. Das integrierte USB MIDI Interface kann zu Aufneh en und Wiedergeben
von MIDI Files genutzt werden.
Bedienung der Pianobox USB
Die 10 Funktionstaster der Pianobox USB sind zusätzlich it der Funktion beschriftet.
Grundsätzlich wird it de Dru /Sound Taster zwischen de Dru -Modus und de Sound-
Modus hin und hergeschaltet. I Dru -Modus ist die erste Ziffer i Display ein „d“, i Sound
Modus ein „S“.
Danach steht die Para eter-Nu er als dreistellige Ziffer.
Sound-Modus im Überbli k:
Schalten Sie mit Drum/Sound in den Sound Modus, bis ein „S“ im Display erscheint.
1.Preset +1 – hier wird die Sound-Progra Nu er in einzelnen Schritten addiert
Darstellung: S für Sound und danach die Progra -Nu er, also S.xxx
2.Preset +10 – hier wird die Sound-Progra Nu er in 10er Schritten addiert
4

Darstellung: S für Sound und danach die Progra -Nu er, also S.xxx
3.RevT – hier wird der Hallrau /-typ eingestellt. Es sind 8 Typen wählbar
Darstellung: P für den Hallrau und danach die Nu er, also z.B. P.008
4.Te po +1 - I Sound-Modus wird hier die Lautstärke des Sound-Progra s in
einzelnen Schritten addiert
Darstellung: L für die Lautstärke und danach die Nu er, also z.B. L.127
5.Volu e +10 - I Sound-Modus wird hier die Lautstärke des Sound-Progra s in
10er Schritten addiert
Darstellung: L für die Lautstärke und danach die Nu er, also z.B. L.127
6.Preset -1 – hier wird die Sound-Progra Nu er in einzelnen Schritten subtrahiert
Darstellung: S für Sound und danach die Progra -Nu er, also S.xxx
7.Preset -10 – hier wird die Sound-Progra Nu er in 10er Schritten subtrahiert
Darstellung: S für Sound und danach die Progra -Nu er, also S.xxx
8.RevD – hier wird der Hallrau /-typ anteilig von 0-127 als Wert eingestellt.
Darstellung: e für den Effekt-Anteil und danach die Nu er, also z.B. e.110
9.Te po -1 - I Sound-Modus wird hier die Lautstärke des Sound-Progra s in
einzelnen Schritten subtrahiert
Darstellung: L für die Lautstärke und danach die Nu er, also z.B. L.127
10.Volu e -10 - I Sound-Modus wird hier die Lautstärke des Sound-Progra s in
10er Schritten subtrahiert
Darstellung: L für die Lautstärke und danach die Nu er, also z.B. L.127
Drum-Modus im Überbli k:
Schalten Sie it Dru /Sound in den Dru Modus, bis ein „d“ i Display erscheint.
1.Preset +1 – hier wird die Dru Pattern Nu er in einzelnen Schritten addiert
Darstellung: d für Dru Pattern und danach die Nu er, also d.xxx
2.Preset +10 – hier wird die Dru Progra Nu er in 10er Schritten addiert
Darstellung: d für Dru Pattern und danach die Nu er, also d.xxx
3.RevT – hier wird der Hallrau /-typ eingestellt. Es sind 8 Typen wählbar
Darstellung: P für den Hallrau und danach die Nu er, also z.B. P.008
4.Te po +1 - I Dru -Modus wird hier das Te po des Dru Patterns
in einzelnen Schritten addiert
Darstellung: t für das Te po und danach die Nu er, also z.B. t.112
5.Volu e +10 - I Dru -Modus wird hier die Lautstärke des Dru Patterns in
10er Schritten addiert
Darstellung: L für die Lautstärke und danach die Nu er, also z.B. L.127
6.Preset -1 – hier wird die Dru Pattern Nu er in einzelnen Schritten subtrahiert
Darstellung: d für Dru Pattern und danach die Nu er, also d.xxx
7.Preset -10 – hier wird die Dru Pattern Nu er in 10er Schritten subtrahiert
Darstellung: d für Dru Pattern und danach die Nu er, also d.xxx
8.RevD – hier wird der Hallrau /-typ anteilig von 0-127 als Wert eingestellt.
Darstellung: e für den Effekt-Anteil und danach die Nu er, also z.B. e.110
9.Te po -1 - I Dru -Modus wird hier das Te po des Dru Patterns
in einzelnen Schritten subtrahiert
Darstellung: t für das Te po und danach die Nu er, also z.B. t.112
10.Volu e -10 - I Dru -Modus wird hier die Lautstärke des Dru -Patterns in 10er
Schritten subtrahiert
Darstellung: L für die Lautstärke und danach die Nu er, also z.B. L.127
5
Arbeiten mit der Pianobox USB
Wie spielt die Pianobox USB ein Drumpattern?
Der PLAY/STOP Taster startet die Wiedergabe des angewählten Styles, ein Druck auf den gleichen
Taster stoppt die Wiedergabe wieder. Die erste LED blinkt i Takt des Patterns.
Was ist der Sound und Drum Modus?
Mit de Dru /Sound Taster wird zwischen de Dru box und de GM-Soundbox Modus hin und
hergeschaltet.
Das Einstellen eines Para eters:
I Sound-Modus wird die Soundprogra -Nu er i er über die Preset Tasten eingestellt. Das
Display zeigt i er die aktuelle Auswahl. Mit den Dru patterns geht das genauso. Eine Sound-
und Dru -Pattern-Liste finden Sie a Ende dieser Anleitung.
Der Halltyp und der Anteil des Halls werden it Tastenko binationen eingestellt: Halten Sie die
Taste RevD gedrückt, das Display zeigt P.XXX. Nun können Sie it Preset +/- das Hallprogra
anwählen. Zu Einstellen des Hallanteils gehen Sie genauso vor: Halten Sie die Taste RevT
gedrückt und stellen Sie it Preset +/- den gewünschten Hallanteil von 1-127 ein.
Mögliche Hallräu e sind: 1= Roo 1, 2= Roo 2, 3= Roo 3, 4=Hall 1, 5= Hall 2, 6= Plate,
7= Delay, 8= Pan Delay
I Dru Modus stellt an it den Tasten Te po +1/Te po -1 das Te po des eingestellten
Patterns ein. I Sound Modus dienen diese beiden Taster u die Lautstärke +1/-1 einzustellen.
Die Lautstärke eines Sounds oder Patterns wird über die Volu e +10/-10 Taster eingestellt.
Wie speichert man das letzte Preset?
Durch halten der Taste PLAY/STOP wird die aktuelle Einstellung it Progra -Nu er,
Hallanteil etc. gespeichert. Dieses bleibt auch bei Ausschalten der Pianobox USB erhalten.
Wie initialisiert man die Pianobox USB?
Halten Sie den Dru /Sound Taster bei Einschalten gedrückt. Die Pianobox USB wird auf die
Werkseinstellungen zurückgesetzt, alle gespeicherten Sounds und Einstellungen werden gelöscht.
Wie erreicht man die zusätzlichen Variations-Sounds und Drumsets der Pianobox USB?
Mit eine externen MIDI Sequenzer oder Masterkeyboard haben Sie die Möglichkeit, it Standard
GM Befehlen die zusätzlichen Sound-Variationen und Dru sets der Pianobox USB anzusprechen.
Die Dru sounds laufen dabei, wie bei General MIDI üblich, nur über den MIDI Kanal 10.
Über das Senden der zugehörigen Bank Select und Progra Change Befehle lesen Sie bitte i
Handbuch Ihres Sequenzers oder Masterkeyboards nach.
Weitere Infor ationen zu Erweiterungen, Updates und anderen Produkten der Fir a Miditech
finden Sie i Internet unter: http://www. iditech.de !
6

Liste der Pianobox USB GM Sounds
1Acoustic Grand Piano 34 Electric Bass (finger)
2Bright Acoustic Piano 35 Electric Bass (pick)
3Electric Grand Piano 36 Fretless Bass
4Honky-tonk Piano 37 Slap Bass 1
5Electric Piano 1 38 Slap Bass
6Electric Piano 39 Synth Bass 1
7Harpsichord 40 Synth Bass
8Clavi 41 Violin
9Celesta 42 Viola
10 Glockenspiel 43 Cello
11 Music Box 44 Contrabass
12 Vibraphone 45 Tremolo Strings
13 Marimba 46 Pizzicato Strings
14 Xylophone 47 Orchestral Harp
15 Tubular Bells 48 Timpani
16 Dulcimer 49 String Ensemble 1
17 Organ 50 String Ensemble
18 Percussive Organ 51 Synth Strings 1
19 Rock Organ 52 Synth Strings
20 Church Organ 53 Voice Aahs
21 Reed Organ 54 Voice Oohs
22 Accordion 55 Synth Voice
23 Harmonica 56 Orchestra Hit
24 Tango Accordion 57 Trumpet
25 Acoustic Guitar (nylon) 58 Trombone
26 Acoustic Guitar (steel) 59 Tuba
27 Electric Guitar (jazz) 60 Muted Trumpet
28 Electric Guitar (clean) 61 French horn
29 Electric Guitar (muted) 62 Brass Section
30 Overdriven Guitar 63 Synth Brass 1
31 Distortion Guitar 64 Synth Brass
32 Guitar harmonics 65 Soprano Sax
33 Acoustic Bass 66 Alto Sax
7

67 Tenor Sax 101 FX 5 (brightness)
68 Baritone Sax 102 FX 6 (goblins)
69 Oboe 103 FX 7 (echoes)
70 English Horn 104 FX 8 (sci-fi)
71 Bassoon 105 Sitar
72 Clarinet 106 Banjo
73 Piccolo 107 Shamisen
74 Flute 108 Koto
75 Recorder 109 Kalimba
76 Pan Flute 110 Bagpipe
77 Blown Bottle 111 Fiddle
78 Shakuhachi 112 Shanai
79 Whistle 113 Tinkle Bell
80 Ocarina 114 Agogo Bells
81 Lead 1 (square) 115 Steel Drums
82 Lead (sawtooth) 116 Woodblock
83 Lead 3 (calliope) 117 Taiko Drum
84 Lead 4 (chiff) 118 Melodic Tom
85 Lead 5 (charang) 119 Synth Drum
86 Lead 6 (voice) 120 Reverse Cymbal
87 Lead 7 (fifths) 121 Guitar Fret Noise
88 Lead 8 (bass + lead) 122 Breath Noise
89 Pad 1 (new age) 123 Seashore
90 Pad (warm) 124 Bird Tweet
91 Pad 3 (polysynth) 125 Telephone Ring
92 Pad 4 (choir) 126 Helicopter
93 Pad 5 (bowed) 127 Applause
94 Pad 6 (metallic) 128 Gunshot
95 Pad 7 (halo)
96 Pad 8 (sweep)
97 FX 1 (rain)
98 FX (soundtrack)
99 FX 3 (crystal)
100 FX 4 (atmosphere)
8

9

Liste der Drumpatterns
1 Ballad 01 26 Funk 01
2 Ballad 02 27 Funk 02
3 Ballad 03 28 Funk 03
4 Ballad 04 29 Groove 01
5 Ballad 05 30 Groove 02
6 Ballad 06 31 Groove 03
7 Bossa 01 32 Groove 04
8 Bossa 02 33 Groove 05
9 Bossa 03 34 Groove 06
10 Bossa 04 35 Groove 07
11 Bossa 05 36 Groove 08
12 ChaCha 37 Jazz 01
13 Country 01 38 Jazz 02
14 Country 02 39 Jazz 03
15 Country 03 40 Latin 01
16 Country 04 41 Latin 02
17 Country 05 42 Latin 03
18 Dance 01 43 Latin 04
19 Dance 02 44 Latin 05
20 Disco 01 45 Latin 06
21 Disco 02 46 Latin 07
22 Disco 03 47 Latin 08
23 Disco 04 48 Latin 09
24 Disco 05 49 Pop 01
25 Disco 06 50 Pop 02
10

51 Pop 03 76 Rock 13
52 Pop 04 77 Sa ba 01
53 Pop 05 78 Sa ba 02
54 Pop 06 79 Sa ba 03
55 Pop 07 80 Sa ba 04
56 Pop 08 81 Sa ba 05
57 Pop 09 82 Sa ba 06
58 Pop 10 83 Soul 01
59 Pop 11 84 Soul 02
60 Pop 12 85 Soul 03
61 Reggae 01 86 Soul 04
62 Reggae 02 87 Soul 05
63 Reggae 03 88 Soul 06
64 Rock 01 89 Soul 07
65 Rock 02 90 Soul 08
66 Rock 03 91 Swing 01
67 Rock 04 92 Swing 02
68 Rock 05 93 Swing 03
69 Rock 06 94 Swing 04
70 Rock 07 95 Swing 05
71 Rock 08 96 Swing 06
72 Rock 09 97 Swing 07
73 Rock 10 98 Swing 08
74 Rock 11 99 Waltz 01
75 Rock 12 100 Waltz 02
Änderungen der te hnis hen Daten und des Designs sind mögli h
Für Dru kfehler wird keine Haftung übernommen
11

miditech Pianobox USB
Owner´s manual
General MIDI soundmodule with 128 sounds
and full GM implementation
195 variation-sounds
9 drum sets and one SFX set
Stores the last setting
Drum omputer/metronom with 100 drumpatterns
LED display
HI-Z guitar-input TRS ja k 6,3mm
PLAY/STOP button, Drum/Sound button
10 fun tion buttons
MIDI I/O and USB MIDI I/O
LINE OUT TRS ja k 6,3 mm
Headphone output TRS ja k 3,5mm
AC adaptor in luded, or USB powered
eMail: [email protected] Internet: www.miditech.de
12

PREFACE
Congratulations on pur hasing the Midite h Pianobox USB General MIDI sound module. With
this module you will be able to dis over the wonderful world of Musi , with a set of omplete
musi al instruments and many drumpatterns in this little bla k box.
Conne t your Pianobox USB to a Masterkeyboard, and you will be able to play easily different
sounds, or use it for playba k GM files from a Computer or sequenzer. If you are a guitar player,
you an use the Dire t Input to onne t your guitar, and pra ti e songs and riffs by using the
Pianobox USB drumpatterns as a drum omputer. Many different modern styles are available.
This manual is written to help you be ome familiar with the features of the Midite h Pianobox
USB. Please read the manual arefully to dis over all the features of your Pianobox USB. After
reading the manual, you will have a lear understanding of how to use the Pianobox USB, use
its drumpatterns and sounds. At the end of this manual you will find a list of the 100
implemented drumpatterns.
Te hni al Spezifi ations of the Pianobox USB:
●Easy to use with keyboards, asterkeyboards, or co puter with MIDI.
●16 Bit/48 kHz DA converter
●Adjustable headphone out 32Ω, 65mW, 20Hz- 20kHz, thd 0.1%
●Line Out, 10kΩ, 1V, 20Hz- 20kHz, thd 0.01%
●Direct Input or guitar/bass 10kΩ, 20Hz- 20kHz
●Including AC adaptor 1 A pere, 9V, Plus in the iddle
●USB powered
Conne tions and user panel:
On the front of the Pianobox USB you will find the Volu e Leveler, the DI (direct input) for
guitar/bass and the headphone out. Please connect your guitar or headphone here.
13

On the rear panel of the Pianobox USB you will find the LINE Out to connect the Pianobox USB to
an a plifier. Beside the LINE Outs there is the volu e leveler, which controls the volu e of the
LINE Outs and the headphone out at the sa e ti e. In the iddle, there is the MIDI I/O, please
connect your keyboard here with a standard MIDI cable. The MIDI Out fro the keyboard ust be
connected to the MIDI In of the Pianobox USB. Beside the MIDI DIN ports you find the USB port.
If you connect your co puter here, the Pianobox USB will be recognised as a USB MIDI device
called „Pianobox“. Use this driver in your usic software to setup the device.
On the left side there is the power switch and the connection for the AC power adaptor. Please
connect the power adaptor here, the Pianobox USB needs AC, 1000 A, 9V, Plus in the iddle.
On the top of the Pianobox USB, you see the display, the Play/Stop and the Dru /Sound button.
And below this the 10 function buttons.
14

How to use the Pianobox USB
The basic buttons of the Pianobox USB are the Dru /Sound button and the Play/Stop button. The
Dru /Sound button switches between the basic odes: Dru box and General MIDI-Sound odule.
In dru ode, the display shows a „d“, in sound ode, a „s“. After this you can switch between the
sounds or dru patterns with the Preset +1/-1 and Preset +10/-10 buttons.
The Play/Stop button plays the dru patterns of the Pianobox USB. Press button PLAY to start
playing style, press the sa e button for STOP, when the dru playing the first LED dot shall blink
according the beat.
You can set one of the reverb types by holding RevT. Then you can choose between the reverb
types wit Preset +1 and Preset -1. This reverb types are possible: 1= Roo 1, 2= Roo 2, 3= Roo 3,
4=Hall 1, 5= Hall 2, 6= Plate, 7= Delay, 8= Pan Delay
The display shows a „P“ for this reverb progra s.
To choose the value of the reverb, hold RevD in the sa e co bination with Preset +1/-1.
Possible values are between 0 and 127.
To adjust the MIDI volu e level of the dru patterns or the Pianobox USB sounds, please use the
Volu e +10/-10 buttons.
This is an overview of the 10 function buttons and what the display is showing:
Sound-Mode overview:
Please switch with the Drum/Sound button in the sound mode, the display shows a „S“.
1.Preset +1 – this button switches the sound progra nu ber in one step up
display: „S“ for sound and then the progra -nu ber, e.g. S.xxx
2.Preset +10 – this button switches the sound progra nu ber in 10 step up
display: „S“ for sound and then the progra -nu ber, e.g. S.xxx
3.RevT – with this button you can choose a reverb type. In the Pianobox II there are 8
reverb types usable.
display: „P“ for the reverb type and then the type nu ber, e.g. P.008
4.Te po +1 - In sound- ode the Te po +1 button controls the volu e +1
display: „L“ for the volu e level and then the nu ber, e.g. L.127
5.Volu e +10 - In sound- ode this button controls the volu e +10 step up
display: „L“ for the volu e level and then the nu ber, e.g. L.127
6.Preset -1 – this button switches the sound progra nu ber in one step down
display: „S“ for sound and then the progra -nu ber, e.g. S.xxx
7.Preset -10 – this button switches the sound progra nu ber in 10 step down
display: „S“ for sound and then the progra -nu ber, e.g. S.xxx
8.RevD – with this button you can choose a reverb type para eter.
display: „e“ for the effect power fro 0-127, e.g. e.110
9.Te po -1 - In sound- ode the Te po -1 button controls the volu e -1
display: „L“ for the volu e level and then the nu ber, e.g. L.127
10.Volu e -10 - In sound- ode this button controls the volu e +10 step down
display: „L“ for the volu e level and then the nu ber, e.g. L.127
15

Drum-Mode overview:
Please switch with the Drum/Sound button in the drum mode, the display shows a „d“.
1.Preset +1 – this button switches the dru pattern progra nu ber in one step up
display: „d“ for dru and then the progra -nu ber, e.g. d.xxx
2.Preset +10 – this button switches the dru pattern progra nu ber in 10 step up
display: „d“ for dru and then the progra -nu ber, e.g. d.xxx
3.RevT – with this button you can choose a reverb type. In the Pianobox II there are 8
reverb types usable.
display: „P“ for the reverb type and then the type nu ber, e.g. P.008
4.Te po +1 - in dru - ode this button controls the te po of the pattern in 1 step up
display: „t“ for dru te po and then the nu ber, e.g. t.112
5.Volu e +10 - in dru - ode this button controls the volu e +10 step up
display: „L“ for the volu e level and then the nu ber, e.g. L.127
6.Preset -1 – this button switches the dru pattern progra nu ber in one step down
display: „d“ for dru and then the progra -nu ber, e.g. d.xxx
7.Preset -10 – this button switches the dru pattern progra nu ber in 10 step down
display: „d“ for dru and then the progra -nu ber, e.g. d.xxx
8.RevD – with this button you can choose a reverb type para eter.
display: „e“ for the effect power fro 0-127, e.g. e.110
9.Te po -1 - in dru - ode this button controls the te po of the pattern in 1 step down
display: „t“ for dru te po and then the nu ber, e.g. t.112
10.Volu e -10 - in dru - ode this button controls the volu e -10 step down
display: „L“ for the volu e level and then the nu ber, e.g. L.127
Because the Pianobox USB is fully General MIDI co patible, you can send nor al GM bank select
and progra change orders with a sequenzer or a asterkeyboard. So you will reach the additional
sounds and dru sets. The dru sounds are only triggered on MIDI channel 10. You can use 16
channels at one ti e with different sounds, because the sound engine of the Pianobox USB is
ultiti bral.
If you use the Pianobox USB with the USB port on a PC, the Pianobox USB will be fully USB
powered. You can use the internal USB MIDI Interface to record and playback MIDI files.
16

List of the Pianobox GM sounds
1Acoustic Grand Piano 34 Electric Bass (finger)
2Bright Acoustic Piano 35 Electric Bass (pick)
3Electric Grand Piano 36 Fretless Bass
4Honky-tonk Piano 37 Slap Bass 1
5Electric Piano 1 38 Slap Bass
6Electric Piano 39 Synth Bass 1
7Harpsichord 40 Synth Bass
8Clavi 41 Violin
9Celesta 42 Viola
10 Glockenspiel 43 Cello
11 Music Box 44 Contrabass
12 Vibraphone 45 Tremolo Strings
13 Marimba 46 Pizzicato Strings
14 Xylophone 47 Orchestral Harp
15 Tubular Bells 48 Timpani
16 Dulcimer 49 String Ensemble 1
17 Organ 50 String Ensemble
18 Percussive Organ 51 Synth Strings 1
19 Rock Organ 52 Synth Strings
20 Church Organ 53 Voice Aahs
21 Reed Organ 54 Voice Oohs
22 Accordion 55 Synth Voice
23 Harmonica 56 Orchestra Hit
24 Tango Accordion 57 Trumpet
25 Acoustic Guitar (nylon) 58 Trombone
26 Acoustic Guitar (steel) 59 Tuba
27 Electric Guitar (jazz) 60 Muted Trumpet
28 Electric Guitar (clean) 61 French horn
29 Electric Guitar (muted) 62 Brass Section
30 Overdriven Guitar 63 Synth Brass 1
31 Distortion Guitar 64 Synth Brass
17

32 Guitar harmonics 65 Soprano Sax
33 Acoustic Bass 66 Alto Sax
67 Tenor Sax 101 FX 5 (brightness)
68 Baritone Sax 102 FX 6 (goblins)
69 Oboe 103 FX 7 (echoes)
70 English Horn 104 FX 8 (sci-fi)
71 Bassoon 105 Sitar
72 Clarinet 106 Banjo
73 Piccolo 107 Shamisen
74 Flute 108 Koto
75 Recorder 109 Kalimba
76 Pan Flute 110 Bagpipe
77 Blown Bottle 111 Fiddle
78 Shakuhachi 112 Shanai
79 Whistle 113 Tinkle Bell
80 Ocarina 114 Agogo Bells
81 Lead 1 (square) 115 Steel Drums
82 Lead (sawtooth) 116 Woodblock
83 Lead 3 (calliope) 117 Taiko Drum
84 Lead 4 (chiff) 118 Melodic Tom
85 Lead 5 (charang) 119 Synth Drum
86 Lead 6 (voice) 120 Reverse Cymbal
87 Lead 7 (fifths) 121 Guitar Fret Noise
88 Lead 8 (bass + lead) 122 Breath Noise
89 Pad 1 (new age) 123 Seashore
90 Pad (warm) 124 Bird Tweet
91 Pad 3 (polysynth) 125 Telephone Ring
92 Pad 4 (choir) 126 Helicopter
93 Pad 5 (bowed) 127 Applause
94 Pad 6 (metallic) 128 Gunshot
95 Pad 7 (halo)
96 Pad 8 (sweep)
97 FX 1 (rain)
98 FX (soundtrack)
18

99 FX 3 (crystal)
100 FX 4 (atmosphere)
19

List of the drumpatterns
1 Ballad 01 26 Funk 01
2 Ballad 02 27 Funk 02
3 Ballad 03 28 Funk 03
4 Ballad 04 29 Groove 01
5 Ballad 05 30 Groove 02
6 Ballad 06 31 Groove 03
7 Bossa 01 32 Groove 04
8 Bossa 02 33 Groove 05
9 Bossa 03 34 Groove 06
10 Bossa 04 35 Groove 07
11 Bossa 05 36 Groove 08
12 ChaCha 37 Jazz 01
13 Country 01 38 Jazz 02
14 Country 02 39 Jazz 03
15 Country 03 40 Latin 01
16 Country 04 41 Latin 02
17 Country 05 42 Latin 03
18 Dance 01 43 Latin 04
19 Dance 02 44 Latin 05
20 Disco 01 45 Latin 06
21 Disco 02 46 Latin 07
22 Disco 03 47 Latin 08
23 Disco 04 48 Latin 09
24 Disco 05 49 Pop 01
25 Disco 06 50 Pop 02
20
Table of contents
Languages:
Other Miditech Recording Equipment manuals

Miditech
Miditech i2 Control-37 black edition User manual

Miditech
Miditech MK-61 User manual

Miditech
Miditech MIDIPLUS Jr. User manual

Miditech
Miditech USB MIDI HOST User manual

Miditech
Miditech midiface 4x4 Thru/Merge User manual

Miditech
Miditech Pianobox mini II User manual

Miditech
Miditech Midistart T3 User manual

Miditech
Miditech MTB User manual

Miditech
Miditech Groovestation User manual

Miditech
Miditech MIDI controller keyboard User manual