manuals.online logo
Brands
  1. Home
  2. •
  3. Brands
  4. •
  5. Mocka
  6. •
  7. Indoor Furnishing
  8. •
  9. Mocka Avoca User manual

Mocka Avoca User manual

mocka.co.nz I mocka.com.au I
ASSEMBLY INSTRUCTIONS
Console Table
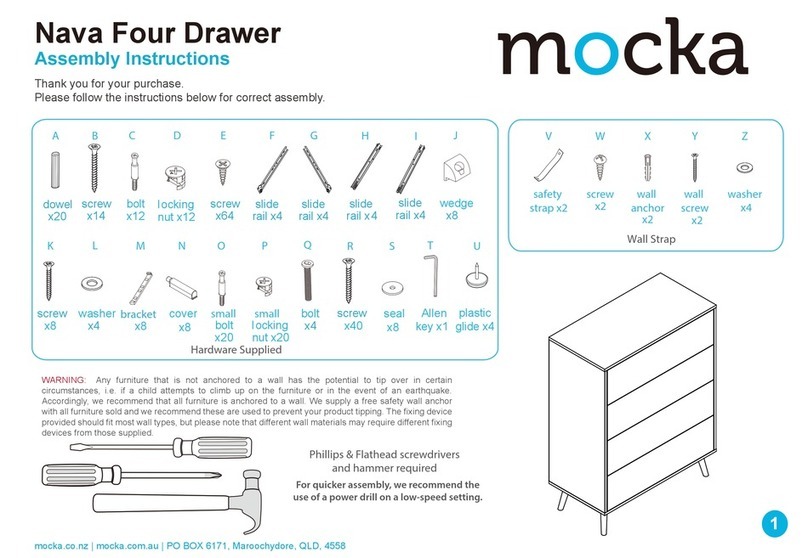
HARDWARE SUPPLIED WARNING: Any furniture that is not anchored to a wall has the
potential to tip over in certain circumstances, ie. if a child attempts
to climb on the furniture or in the event of an earthquake.
Accordingly, we recommend that all furniture is anchored to a wall.
We supply a free safety wall anchor with all furniture sold and we
recommend these are used to prevent your product tipping. The
fixing device provided should fit most wall types, but please note
that dierent wall materials may require dierent fixing devices from
those supplied.
Phillips & Flathead screwdrivers required.
For quicker assembly, we recommend the
use of a power drill on a low-speed setting.
A
42 x 42 x 22 x 14 x 24 x
B C D E
G
M
8 x 2 x 2 x 2 x 2 x
H I J K
CL CR DL
bolt nut dowel screw screw
bracket
2 x
wall plug
clip spacer wall anchor screw
2 x 2 x 2 x
slide slide slide
2 x
slide
8 x
F
2 x
L
DR
screw
screw
Avoca
Console Table
mocka.co.nz I mocka.com.au I
ASSEMBLY INSTRUCTIONS
1
2
3
13
13
14
14
15
15
16
16
5
8
89
9
9
10
11
12
6
4
7
Avoca
mocka.co.nz I mocka.com.au I
ASSEMBLY INSTRUCTIONS
Console Table
1 2
X2
A
A
A
A
A
E
E
E
II
E
E
E
E
H
H
H
H
K
K
J
J
A
AA
AA
A
A
A
A
A
A
A
AAA
AA
AAA
A
A
A
AA
AA
AA
AA
A
A
A
1
5
6
2
3
8
11 12
Attach 22 x bolts to panel [2], [3], [8], [11]and [12] as shown.
Tighten with a screwdriver.
Avoca
Attach 17 x bolts{A}, 2 x clips{H} and 2 pacer {I} to panel {1} and {6}. secure with
4 x screws {E}. Tighten with a screwdriver. Attach 3 x bolts{A} and 2 x wall anhors{J}
to panel {5}. secure with 2 x screws {K}。Tighthen with a screwdriver.
!
mocka.co.nz I mocka.com.au I
ASSEMBLY INSTRUCTIONS
Console Table
3 4
X2 X2
CL
CR
E
EE
E E E
E
CL
CR
E
E E E
E
D
D
D
D
B
B
B
B
B
B
B
B
4
4
11
12
14
14
14
14
16 16
16
15
15
13
13 13
13
2
3
Attach 6x screws (E), 1 x left rails (CL) and 1 x right
rails (CR) to panels [2] and [3] as shown. Attach 6x screws (E), 1 x left rails (CL)
and 1 x right rails (CR) to panel [4] as shown.Tighten with a screwdriver.
Attach 1 x left rails (CL) and 1 x right rails (CR) to panels [2] and [3] as shown.
Attach 1 x left rails (CL) and 1 x right rails (CR) to panel [4] as shown. Secure with
12x screws (E), Tighten with a screwdriver.
Avoca
B
DL DL
E E
E E
B
B
D
C
C
D
B
DR DR
E E E E
11
5
5
4
7
12
14 14
mocka.co.nz I mocka.com.au I
ASSEMBLY INSTRUCTIONS
Console Table
5 6
Attach 2 x left rails (DL) and 2 x right rails (DR) as shown. Secure with
4x screws (E). Tighten with a screwdriver.
Lift up assembled frame as shown. Attach panel {4} to assembled frame as shown,
secure with 2 x dowels {C} and 2 x screws{D}. Tighten with a screwdriver.
Avoca
B
2
26
7
5
3
3
mocka.co.nz I mocka.com.au I
ASSEMBLY INSTRUCTIONS
Console Table
7 8
Attach panel {2} and {3} to assembled frames together as shown and secure with
8 x nuts (B) and 4x dowels {C}. Tighten with a screwdriver.
Attach panel {6} to assembled frames together as shown and secure with 4x
dowels {C} and 4x screws {D}. Tighten with a screwdriver.
Avoca
B
D
D
D
D
B
B
B
B
B
B
B
C
C
C
C
C
C
C
C
B
9
9
9
9
8
8
6
2
3
8
mocka.co.nz I mocka.com.au I
ASSEMBLY INSTRUCTIONS
Console Table
9 10
Attach 6 x nuts (B) and 6 x dowels {C} as shown. Tighten with a screwdriver. Attach assembled frame as shown and secure with 11x nuts{B}. Tighten with a
screwdriver.
Avoca
C
C
C
C
C
C
B
B
B
B
B
B
B
B
B
B
B
B
B
BB
B
B
B
B
10
2
2
3
3
1
4
4
mocka.co.nz I mocka.com.au I
ASSEMBLY INSTRUCTIONS
Console Table
11 12
Slide panel {10} into position as shown. Attach panel {1} as shown, secure with 6 x nuts(B) and 6 x dowels {C}. Tighten with
a screwdriver.
Avoca
B
C
C
C
C
C
C
B
B
B
B
B
B
10
32
5
mocka.co.nz I mocka.com.au I
ASSEMBLY INSTRUCTIONS
Console Table
13 14
Attach 8 x braket {G} as shown and secure with8 x screws (F). Tighten with
a screwdriver.
Attach 2 x screws and 2 x plug {M} to the wall. Tighten with a screwdriver.
Avoca
F
J
J
L
L
M
M
F
F
F
F
F
F
F
G
G
G
G
G
G
G
11
12
mocka.co.nz I mocka.com.au I
ASSEMBLY INSTRUCTIONS
Console Table
Avoca
15 16
Slide assembled drawer into position as shown. You’re done. Enjoy it!

Other manuals for Avoca

4

Other Mocka Indoor Furnishing manuals

Mocka Addi Coffee Table User manual

Mocka

Mocka Addi Coffee Table User manual

Mocka Hamptons Six User manual

Mocka

Mocka Hamptons Six User manual

Mocka Rupert User manual

Mocka

Mocka Rupert User manual

Mocka Alps User manual

Mocka

Mocka Alps User manual

Mocka Vigo Desk User manual

Mocka

Mocka Vigo Desk User manual

Mocka Zara User manual

Mocka

Mocka Zara User manual

Mocka Addi Six Drawer - Wide User manual

Mocka

Mocka Addi Six Drawer - Wide User manual

Mocka Kalley User manual

Mocka

Mocka Kalley User manual

Mocka Sadie Six Drawer User manual

Mocka

Mocka Sadie Six Drawer User manual

Mocka Mischa User manual

Mocka

Mocka Mischa User manual

Mocka Aspiring Classic Cot User manual

Mocka

Mocka Aspiring Classic Cot User manual

Mocka Milton Medium Plant Stand User manual

Mocka

Mocka Milton Medium Plant Stand User manual

Mocka Aspen Six Drawer User manual

Mocka

Mocka Aspen Six Drawer User manual

Mocka Nancy User manual

Mocka

Mocka Nancy User manual

Mocka Hamptons Six Drawer User manual

Mocka

Mocka Hamptons Six Drawer User manual

Mocka Betti Bobbin Tallboy User manual

Mocka

Mocka Betti Bobbin Tallboy User manual

Mocka Denham User manual

Mocka

Mocka Denham User manual

Mocka Brooklyn Change Table User manual

Mocka

Mocka Brooklyn Change Table User manual

Mocka Hamptons Coffee Table User manual

Mocka

Mocka Hamptons Coffee Table User manual

Mocka Kai Armchair User manual

Mocka

Mocka Kai Armchair User manual

Mocka Zara User manual

Mocka

Mocka Zara User manual

Mocka Denham Coffee Table User manual

Mocka

Mocka Denham Coffee Table User manual

Mocka Bentley Slim Shelf User manual

Mocka

Mocka Bentley Slim Shelf User manual

Mocka Kennedy User manual

Mocka

Mocka Kennedy User manual

Popular Indoor Furnishing manuals by other brands

Walker Edison D48UBC30 Assembly instructions

Walker Edison

Walker Edison D48UBC30 Assembly instructions

little chicks CK102 instructions

little chicks

little chicks CK102 instructions

DITALIA BB-104 Assembly manual

DITALIA

DITALIA BB-104 Assembly manual

Alice's Garden NAEVIA30 manual

Alice's Garden

Alice's Garden NAEVIA30 manual

SelectBlinds Sheer Horizontal Window Shadings installation instructions

SelectBlinds

SelectBlinds Sheer Horizontal Window Shadings installation instructions

Rauch M2390 Assembly instructions

Rauch

Rauch M2390 Assembly instructions

overstock MF304787 Assembly instructions

overstock

overstock MF304787 Assembly instructions

EPSOM E7105L Assembly instruction

EPSOM

EPSOM E7105L Assembly instruction

AKANTE VALENTINA CT174 Assembly instructions

AKANTE

AKANTE VALENTINA CT174 Assembly instructions

Safavieh Furniture Tarly ACH9500 quick start guide

Safavieh Furniture

Safavieh Furniture Tarly ACH9500 quick start guide

Decor Living HANNA EC7300 Use and care guide

Decor Living

Decor Living HANNA EC7300 Use and care guide

Homexperts Loop Assembly instructions

Homexperts

Homexperts Loop Assembly instructions

Sauder Steel River 427549 manual

Sauder

Sauder Steel River 427549 manual

Synargy Milner PLB-3318RPHT Assembly instructions

Synargy

Synargy Milner PLB-3318RPHT Assembly instructions

Julian Bowen Limited Rialto Assembly instructions

Julian Bowen Limited

Julian Bowen Limited Rialto Assembly instructions

real living 52201-CRM Assembly instructions

real living

real living 52201-CRM Assembly instructions

Safavieh Furniture KCH1400 quick start guide

Safavieh Furniture

Safavieh Furniture KCH1400 quick start guide

Regency MVTBT22 instructions

Regency

Regency MVTBT22 instructions

manuals.online logo
manuals.online logoBrands
  • About & Mission
  • Contact us
  • Privacy Policy
  • Terms and Conditions

Copyright 2025 Manuals.Online. All Rights Reserved.