manuals.online logo
Brands
  1. Home
  2. •
  3. Brands
  4. •
  5. Mocka
  6. •
  7. Indoor Furnishing
  8. •
  9. Mocka Nava Buffet User manual

Mocka Nava Buffet User manual

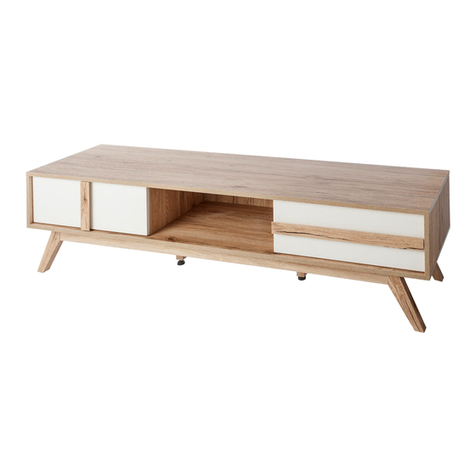
Nava Buffet
Assembly Instructions
Thank you for your purchase.
Please follow the instructions below for correct assembly.
mocka.co.nz | mocka.com.au | PO BOX 6171, Maroochydore, QLD, 4558
1
x2
washer
Z
wall
screw
Y
wall
anchor
x1
X
safety
strap x1
W
Wall Strap
V
H
IO
Hardware Supplied
dowel
x20
bracket
x5
height
adjuster x1
screw
x28
P
Q
screw
x1
x1
UA1
bolt
x24
locking
nut x24
screw
x45
shelf
plugx8
screw
x8
clip
x5
seal
x5
hinge
x4
screw
x24
bolt
x4
screw
x12
slide
railx3
slide
railx3
slide
railx3
slide
railx3
wedge
x12
screw
x12
*We recommend using a Flathead screwdriver to tighten all locking nuts 100% before rst use.
Please clear any loose wood from the locking nut holes before inserting the nut to ensure it locks 100%.
WARNING: Any furniture that is not anchored to a wall has the
potential to tip over in certain circumstances, i.e. if a child
attempts to climb up on the furniture or in the event of an
earthquake. Accordingly, we recommend that all furniture is
anchored to a wall. We supply a free safety wall anchor with all
furniture sold and we recommend these are used to prevent
your product tipping.The fixing device provided should fit most
wall types, but please note that different wall materials may
require different fixing devices from those supplied.
Phillips & Flathead screwdrivers
and hammer required
x4
washer
R
S T A2
key
x1
Allen
AB C DE F G
JKLMN
plastic
glide x4
A3
Nava Buffet
Assembly Instructions
mocka.co.nz | mocka.com.au | PO BOX 6171, Maroochydore, QLD, 4558
2
12
Attach 1x bracket (I) to panel [4] using 2x screws (E). Attach 1x bracket
(I) to panel [5] using 2x screws (E). Tighten with a screwdriver. Cover
each bracket with 1x clip (J) as shown.
Insert 2x bolts (C) into panel [4]. Insert 2x bolts (C) into panel [5].
EE
I
J
EE
I
EE
I5
4
C
C
C
C
5
4
Nava Buffet
Assembly Instructions
mocka.co.nz | mocka.com.au | PO BOX 6171, Maroochydore, QLD, 4558
3
4
Attach 3x slide rails (Q) to panel [4] and secure with 9x screws (E).
Attach 3x slide rails (R) to panel [5] and secure with 9x screws (E).
Tighten with a screwdriver.
Attach 1x bracket (I) to each panel [7] using 2x screws (E). Tighten with
a screwdriver. Cover each bracket with 1x clip (J) as shown.
E
E
E
E
E
E
E
E
E
E
E
E
E
E
E
E
E
E
R
R
R
Q
Q
Q
5
4
3
7
EE
I
E
E
IJ
x2
Nava Buffet
Assembly Instructions
mocka.co.nz | mocka.com.au | PO BOX 6171, Maroochydore, QLD, 4558
4
56
Attach both panels [7] between panels [4] and [5] using 4x dowels (A)
and secure with 4x locking nuts (D). Tighten with a screwdriver.
Insert 8x bolts (C) into panel [1] as shown.
D
D
D
D
A
A
A
A
7
5
4
7
D
C
C
C
C
C
C
C
C
1
Nava Buffet
Assembly Instructions
mocka.co.nz | mocka.com.au | PO BOX 6171, Maroochydore, QLD, 4558
5
78
Attach panel [1] to panels [2], [3], [4] and [5] using 8x dowels (A) and
secure with 8x locking nuts (D). Tighten with a screwdriver.
Slide down panels [9] and [20] between the grooves in panels [2],
[3], [4] and [5] to form the back of the unit.
D
A
D
A
A
A
A
A
A
A
4
3
2
1
5
D
D
D9
5
4
3
2
9
20
Nava Buffet
Assembly Instructions
mocka.co.nz | mocka.com.au | PO BOX 6171, Maroochydore, QLD, 4558
6
910
Attach 1x bracket (I) to panel [8] using 2x screws (E). Tighten with a
screwdriver. Cover the bracket with 1x clip (J) as shown.
Attach panel [8] to the rest of the unit using 8x dowels (A) and 8x screws
(G) as shown.
8
E
I
EE
I
J
E
A
A
A
A
A
5
4
3
2
8
G
G
G
G
G
G
G
G
Nava Buffet
Assembly Instructions
mocka.co.nz | mocka.com.au | PO BOX 6171, Maroochydore, QLD, 4558
7
11 12
Attach panels [22] to panels [10] and [11] with 16x screws (B).
Tighten with a screwdriver.
Attach panels [10] and [11] to panel [8] using 12x screws (P). Tighten with
a screwdriver. Attach support leg [12] to panel [8] as shown. Screw the height
adjuster (H) onto the support leg [12].
P
P
P
P
P
P
P
P
P
P8
12 H
B
B
BB
22
10
11
B
P
P
11 10
Nava Buffet
Assembly Instructions
mocka.co.nz | mocka.com.au | PO BOX 6171, Maroochydore, QLD, 4558
8
13 14
Attach 2x hinges (L) to panel [13] using 4x screws (M), and attach 1x
seal (K) and secure with 1x screw (E). Attach 2x hinges (L) to panel
[14] using 4x screws (M). Now attach 1x seal (K) and secure with 1x
screw (E).
13
14
E
E
K
K
L
L
MM
L
MM
MM
L
MM
N
O
N
O
Attach Legs [21] to panels [22] with 4x washers (O) and 4x bolts (N).
Tighten with the Allen key (A2). Attach 4x plastic glides (A3) to the
legs using a hammer.
21 22
A2
A3
Nava Buffet
Assembly Instructions
mocka.co.nz | mocka.com.au | PO BOX 6171, Maroochydore, QLD, 4558
9
15 16
Attach door hinges on panels [13] and [14] to the unit using 16x screws
(M). Tighten with a screwdriver. Ensure the doors open and close easily.
If a clip (J) is not catching on the seal (K), adjust the magnetic end by
twisting it outwards.
M
M
M
M
M
M
13
14
NOTE: If the doors are uneven or
there is a gap in the middle, loosen
or tighten the screw on the door
hinge until they are sitting flush.
J
J
K
J
J
K
Nava Buffet
Assembly Instructions
mocka.co.nz | mocka.com.au | PO BOX 6171, Maroochydore, QLD, 4558
10
17 18
Insert 8x shelf plugs (F) into the unit at the desired height for the
shelves and rest the shelf panels [6] onto them. Ensure the shelves
are balanced and stable. Insert the three assembled drawers,
ensuring they slide along the rails smoothly.
Insert 4x bolts (C) and attach 1x seal (K) using 1x screw (E) to panel [15].
Attach side panels [16] and [17] using 4x locking nuts (D). Slide base panel [18]
down between the grooves of the side panels. Attach back panel [19] using 4x
screws (B). Turn drawer upside down and attach 1x slide rail (T) and 1x slide
rail (S) to the side panels using 4x screws (E). Tighten with a screwdriver.
19
E
K
CC
C
C
D
D
D
D
E
E
EE
BB
BB
S
T
15
16
15
17
16
15 17
16
15
18
17
16
F
F
F
6
4
3
2
6
Attach 12x wedges (A1) to the back of the unit as shown, and secure
with 12x screws (U). Now attach 1x safety strap (V) to the back edge of
panel [1] using 1x washer (Z) and 1x screw (W). Tighten with a
screwdriver.
V
ZW
screw
strap
washer
A1
U
A1
U
A1
U
A1
U
A1
U
A1
U
Nava Buffet
Assembly Instructions
mocka.co.nz | mocka.com.au | PO BOX 6171, Maroochydore, QLD, 4558
11
19 20
Once assembled lift furniture into place, do not drag. Use a drill to
create a small hole lining up with the top of the safety strap (V). Fasten
to wall using 1x wall anchor (X), 1x washer (Z) and 1x screw (Y). Ensure
unit is balanced and steady before use. You’re done, enjoy!
X
Y
Z
wall
anchor
screw
strap
washer

Other manuals for Nava Buffet

1

Other Mocka Indoor Furnishing manuals

Mocka Freestanding Coat and Hat Stand User manual

Mocka

Mocka Freestanding Coat and Hat Stand User manual

Mocka Tahoe User manual

Mocka

Mocka Tahoe User manual

Mocka Austin Chair User manual

Mocka

Mocka Austin Chair User manual

Mocka Edmond Four Drawer User manual

Mocka

Mocka Edmond Four Drawer User manual

Mocka Jolt Six Drawer - Wide User manual

Mocka

Mocka Jolt Six Drawer - Wide User manual

Mocka Chelsea Low Sideboard User manual

Mocka

Mocka Chelsea Low Sideboard User manual

Mocka Asha Entertainment Unit User manual

Mocka

Mocka Asha Entertainment Unit User manual

Mocka Tahoe Entertainment Unit User manual

Mocka

Mocka Tahoe Entertainment Unit User manual

Mocka Juno Kids User manual

Mocka

Mocka Juno Kids User manual

Mocka Jolt Bedside User manual

Mocka

Mocka Jolt Bedside User manual

Mocka Luna Cube 4 User manual

Mocka

Mocka Luna Cube 4 User manual

Mocka Brixton User manual

Mocka

Mocka Brixton User manual

Mocka Balley Mesh Bouncer User manual

Mocka

Mocka Balley Mesh Bouncer User manual

Mocka Milton Medium Plant Stand User manual

Mocka

Mocka Milton Medium Plant Stand User manual

Mocka Mischa Buffet User manual

Mocka

Mocka Mischa Buffet User manual

Mocka Taylor User manual

Mocka

Mocka Taylor User manual

Mocka Canyon User manual

Mocka

Mocka Canyon User manual

Mocka Owen User manual

Mocka

Mocka Owen User manual

Mocka Nyla Bedside Table User manual

Mocka

Mocka Nyla Bedside Table User manual

Mocka Denham User manual

Mocka

Mocka Denham User manual

Mocka Oli Bookcase User manual

Mocka

Mocka Oli Bookcase User manual

Mocka Kirra Coffee Table User manual

Mocka

Mocka Kirra Coffee Table User manual

Mocka Asta rocker User manual

Mocka

Mocka Asta rocker User manual

Mocka Marlow Bedside Table User manual

Mocka

Mocka Marlow Bedside Table User manual

Popular Indoor Furnishing manuals by other brands

BOPITA FOLDABLE DRAWER 90X200 Assembly instruction

BOPITA

BOPITA FOLDABLE DRAWER 90X200 Assembly instruction

Riverside Furniture Cora Assembly instructions

Riverside Furniture

Riverside Furniture Cora Assembly instructions

BDI Sequel owner's manual

BDI

BDI Sequel owner's manual

FMD Furniture LASSE 289-001 Assembly instructions

FMD Furniture

FMD Furniture LASSE 289-001 Assembly instructions

Multimo ROYAL MOTORLU YATAK Assembly instructions

Multimo

Multimo ROYAL MOTORLU YATAK Assembly instructions

physa DAVOS WHITE user manual

physa

physa DAVOS WHITE user manual

Ergomotion Rio 6.0 owner's manual

Ergomotion

Ergomotion Rio 6.0 owner's manual

Next 260413 Assembly instructions

Next

Next 260413 Assembly instructions

Next BORDEAUX 733966 Assembly instructions

Next

Next BORDEAUX 733966 Assembly instructions

Sanus SFV265 manual

Sanus

Sanus SFV265 manual

Songmics Vasagle LCR101 manual

Songmics

Songmics Vasagle LCR101 manual

Baumax DALIA 50 Assembly instructions

Baumax

Baumax DALIA 50 Assembly instructions

LPD Furniture STOCKHOLM 1 DRAWER BEDSIDE CABINET Assembly instructions

LPD Furniture

LPD Furniture STOCKHOLM 1 DRAWER BEDSIDE CABINET Assembly instructions

Rocker COSMOS RGB 2112001 Assembly instructions

Rocker

Rocker COSMOS RGB 2112001 Assembly instructions

Forte Canne CQNK231B Assembling Instruction

Forte

Forte Canne CQNK231B Assembling Instruction

Seconique GREY TOLEDO Assembly instructions

Seconique

Seconique GREY TOLEDO Assembly instructions

CB2 ACACIA Assembly instructions

CB2

CB2 ACACIA Assembly instructions

Next PARIS 296872 Assembly instructions

Next

Next PARIS 296872 Assembly instructions

manuals.online logo
manuals.online logoBrands
  • About & Mission
  • Contact us
  • Privacy Policy
  • Terms and Conditions

Copyright 2025 Manuals.Online. All Rights Reserved.