manuals.online logo
Brands
  1. Home
  2. •
  3. Brands
  4. •
  5. Mocka
  6. •
  7. Indoor Furnishing
  8. •
  9. Mocka Sadie Six Drawer User manual

Mocka Sadie Six Drawer User manual

Sadie Six Drawer
Assembly Instructions
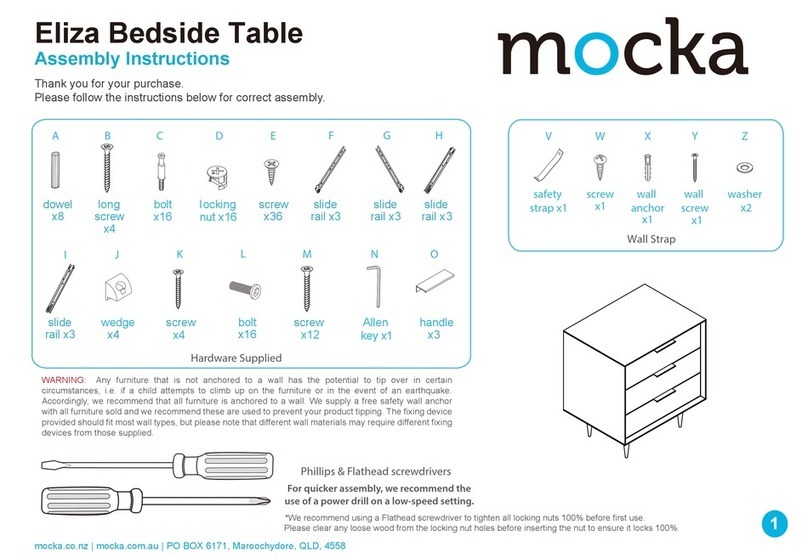
Thank you for your purchase.
Please follow the instructions below for correct assembly.
mocka.co.nz | mocka.com.au | PO BOX 6171, Maroochydore, QLD, 4558
1
Wall Strap
x2
washer
Z
Y
wall
anchor
x1
X
safety
strap x1
WV
screw
x4
wall
screw
x1
WARNING: Any furniture that is not anchored to a wall has the potential to tip over in certain
circumstances, i.e. if a child attempts to climb up on the furniture or in the event of an earthquake.
Accordingly, we recommend that all furniture is anchored to a wall. We supply a free safety wall anchor
with all furniture sold and we recommend these are used to prevent your product tipping. The fixing device
provided should fit most wall types, but please note that different wall materials may require different fixing
devices from those supplied.
bolt
x68
x8
AB C D E F G
HJ K
I
Hardware Supplied
dowel
x30
screw
x72
slide
rail x6
slide
rail x6
slide
rail x6
slide
rail x6
locking
nut x68
screw
x10
x8
wedge screw
x24
L
screw
M
plastic
glide x10
N
long
dowel
x3
For quicker assembly, we recommend the
use of a power drill on a low-speed setting.
Phillips & Flathead screwdrivers
and hammer required
Sadie Six Drawer
Assembly Instructions
mocka.co.nz | mocka.com.au | PO BOX 6171, Maroochydore, QLD, 4558
2
1 2
Attach 3x slide rails (F) and 3x slide rails (G) to panels [3]
and [4] as shown with 18x screws (E). Tighten with a screwdriver.
Insert 8x bolts (C) into panels [3] and [4]. Tighten with
a screwdriver.
E
E
EE
E
EE
E
E
E
E
E
F
F
F
G
G
G
E
E
E
E
E
E
C
C
C
C
C
C
C
C
CR
G
E
F
CL
E
3 3
4
4
Sadie Six Drawer
Assembly Instructions
mocka.co.nz | mocka.com.au | PO BOX 6171, Maroochydore, QLD, 4558
3
3 4
Attach 3x slide rails (F) and 3x slide rails (G) to panel [5] as shown
with 18x screws (E). Tighten with a screwdriver.
Insert 6x bolts (C) into panel [5]. Tighten with
a screwdriver.
FLIPFLIP
E
E
EE
E
EE
E
E
E
E
EE
E
EE
E
E
C
C
C
C
C
C
CR
G
G
G
G
E
F
F
F
F
CL
E
5
5
5
5
Sadie Six Drawer
Assembly Instructions
mocka.co.nz | mocka.com.au | PO BOX 6171, Maroochydore, QLD, 4558
4
65
Attach panels [10] and [23] to panel [3], secure with 3x locking nuts (D)
and 3x dowels (A). Tighten with a screwdriver.
Attach panels [10] and [23] to panel [4], secure with 3x locking nuts (D)
and 3x dowels (A). Tighten with a screwdriver.
A
D
D
D
A
A
A
D
D
A
A
D
4
3
10
10
23
10
10
23
D
Sadie Six Drawer
Assembly Instructions
mocka.co.nz | mocka.com.au | PO BOX 6171, Maroochydore, QLD, 4558
5
7 8
Insert 2x bolts (C) into panel [8], attach panel [8] to panels [6] and [7]
with 4x screws (B) and 4x dowels (A). Tighten with a screwdriver.
Insert 2x bolts (C) into panels [6] and [7]. Tighten with
a screwdriver.
C
C
C
C
B
B
A
A
B
B
A
6
6
7
8
8
7
Sadie Six Drawer
mocka.co.nz | mocka.com.au | PO BOX 6171, Maroochydore, QLD, 4558
6
910
Assembly Instructions
Attach panels [9] to panels [6] and [7] with 2x locking nuts (D)
and 2x dowels (A). Tighten with a screwdriver.
Attach panels [5] to panel [8] with 2x locking nuts (D)
and 2x dowels (A). Tighten with a screwdriver.
D
D
D
D
A
A
A
A
6
8
5
7
9
9
Sadie Six Drawer
Assembly Instructions
mocka.co.nz | mocka.com.au | PO BOX 6171, Maroochydore, QLD, 4558
7
1211
Attach panels [4], [10] and [23] to panels [5] and [9]. Secure with 4x locking
nuts (D), 3x long dowels (M) and 1x dowel (A). Tighten with a screwdriver.
Attach panels [3], [10] and [23] to panels [5] and [9]. Secure with
4x locking nuts (D) and 1x dowel (A). Tighten with a screwdriver.
M
D
D
D
D
D
D
D
M
M
A
D
A
9
5
5
9
4
3
23
10
10
23
10
10
Sadie Six Drawer
Assembly Instructions
mocka.co.nz | mocka.com.au | PO BOX 6171, Maroochydore, QLD, 4558
8
13 14
Insert 12x bolts (C) and 8x dowels (A) into panel [1] as shown.
Attach panels [11] to panel [1] with 4x locking nuts (D). Tighten
with a screwdriver.
Attach panel [1] to panels [3], [4], [6] and [7] with 8x locking nuts (D).
Tighten with a screwdriver.
C
C
A
AC
C
A
A
C
C
A
AC
C
C
C
C
C
A
A
D
D
D
D
D
D
1
1 1
11
11
7
3
43
6
Sadie Six Drawer
Assembly Instructions
mocka.co.nz | mocka.com.au | PO BOX 6171, Maroochydore, QLD, 4558
9
15 16
Attach panels [12] together with connect sticks [24]. Slide panels [12]
down along the grooves between the panels [3] and [4].
Insert 10x bolts (C) into panel [1]. Tighten with a screwdriver.
C
C
C
C
C
C
C
C
C
C
2
12
12
12
4
3
5
24
Sadie Six Drawer
Assembly Instructions
mocka.co.nz | mocka.com.au | PO BOX 6171, Maroochydore, QLD, 4558
10
17 18
Attach panel [2] to panels [4], [5] and [3], with 6x
screws (B) and 6x dowels (A). Tighten with a screwdriver.
Insert 4x bolts (C) into panels [13]. Attach panels [13] and [14] together with
4x locking nuts (D). Tighten with a screwdriver. Attach 10x plastic glide (N)
to panels [13] using a hammer.
B
B
A
A
B
B
B
B
A
A
C
C
D
D
D
D
N
N
N
x2
N
N
N
N
N
N
N
4
3
2
5
13
13
13
14
14
Sadie Six Drawer
Assembly Instructions
mocka.co.nz | mocka.com.au | PO BOX 6171, Maroochydore, QLD, 4558
11
19 20 Drawers x6
Insert 24x bolts (C) into panels [15], [16], [17] and [18] as shown. Tighten with
a screwdriver.
Attach panels [13] and [14] to panel [2] with 10x locking nuts (D).
Tighten with a screwdriver.
D
D
DDCC
CC
CC
CC
CC
CC
C
x2 x2
C
CC
13
3
13
3
14 3
2
3
14
3
15
3
16
3
17 3
18
Sadie Six Drawer
Assembly Instructions
mocka.co.nz | mocka.com.au | PO BOX 6171, Maroochydore, QLD, 4558
12
21 Drawers x6 22 Drawers x6
Attach panels [19] and [20] to panels [15], [16], [17] and [18] secure
with 24x locking nuts (D) as shown. Tighten with a screwdriver.
Slide panels [21] down along the grooves between the panels [19]
and [20] as shown.
D
D
D
D
D
D
D
D
DD
DD
DDDD
3
15
3
15
3
16
3
16
x2
3
17
x2
3
17
x2
3
18
3
19
3
20
3
19
3
20
3
19
3
20
3
21
3
19
3
20
3
19
3
20
3
19
3
20
3
21
3
21
3
21
3
19
3
20
3
19
3
20
x2
3
18
Sadie Six Drawer
Assembly Instructions
mocka.co.nz | mocka.com.au | PO BOX 6171, Maroochydore, QLD, 4558
13
23 Drawers x6 24 Drawers x6
Attach slide rail (I) and slide rail (H) to the underside of the side panels
as shown. Secure with 36x screws (E) and tighten with a screwdriver.
Attach panels [19], [20] and [22] as shown using 24x screws (L).
Tighten with a screwdriver.
LL
L
L
L
L
L
H
E
E
E
E
E
E
I
H
E
E
E
E
E
E
H
E
E
E
H
E
E
E
I
E
E
EI
E
E
EI
3
15
3
15
3
16
3
16
3
19
3
19
3
19
3
19
3
19
3
20
3
20
3
20
3
20
3
19
3
20
3
19
3
19
3
20
3
20
3
20
3
22
3
22 3
22
3
22
x2
3
17
x2
3
18
x2
3
17
x2
3
18
Attach panels [12] together with connect sticks [24]. Slide panels [12]
down along the grooves between the panels [3] and [4].
Sadie Six Drawer
Assembly Instructions
mocka.co.nz | mocka.com.au | PO BOX 6171, Maroochydore, QLD, 4558
14
25 26
Attach 8x wedges (J) to the back of the unit as shown, and secure
with 8x screws (K). Now attach 1x safety strap (V) to the back edge
of panels [12] using 1x washer (Z) and 1x screw (W). Tighten with a
screwdriver.Attach panels [12] to panel [5] with 3x screws (W). Tighten
with a screwdriver
Insert the assembled drawers into the corresponding compartments as
shown. Ensure the drawers slide easily along the rails.
J
K
J
K
J
K
J
J
K
KJ
K
K
J
K
J
screw
strap
washer
V
ZW
W
W
W
J
K
4
3
3
15
3
16
3
17
3
18
3
17
3
18
12
12
12
Sadie Six Drawer
Assembly Instructions
mocka.co.nz | mocka.com.au | PO BOX 6171, Maroochydore, QLD, 4558
15
27 28
You’re done, enjoy!
Insert 4x bolts (C) into panels [13]. Attach panels [13] and [14] together with
4x locking nuts (D). Tighten with a screwdriver. Attach 10x plastic glide (N)
to panels [13] using a hammer.
Once assembled lift furniture into place, do not drag. Attach the other
end of the safety straps (V). Fasten to the wall using 1x washer (Z), 1x
wall anchor (X) and 1x screw (Y). Ensure unit is balanced and steady
before use.
Y
Z
wall
anchor
screw
strap
washer

Other Mocka Indoor Furnishing manuals

Mocka Sadie User manual

Mocka

Mocka Sadie User manual

Mocka Bronte Entertainment Unit User manual

Mocka

Mocka Bronte Entertainment Unit User manual

Mocka Macrame Hanging Shelf User manual

Mocka

Mocka Macrame Hanging Shelf User manual

Mocka Addi Six Drawer Slim User manual

Mocka

Mocka Addi Six Drawer Slim User manual

Mocka Hugo Bedside Table User manual

Mocka

Mocka Hugo Bedside Table User manual

Mocka Sadie User manual

Mocka

Mocka Sadie User manual

Mocka Locka Bedside Table User manual

Mocka

Mocka Locka Bedside Table User manual

Mocka Otto Woven Chair User manual

Mocka

Mocka Otto Woven Chair User manual

Mocka Maya Bookcase User manual

Mocka

Mocka Maya Bookcase User manual

Mocka Aspen Wardrobe User manual

Mocka

Mocka Aspen Wardrobe User manual

Mocka Sadie Coffee Table User manual

Mocka

Mocka Sadie Coffee Table User manual

Mocka Chelsea Tallboy Drawers User manual

Mocka

Mocka Chelsea Tallboy Drawers User manual

Mocka Vermont Cot User manual

Mocka

Mocka Vermont Cot User manual

Mocka Sonata User manual

Mocka

Mocka Sonata User manual
Mocka Avoca User manual

Mocka

Mocka Avoca User manual

Mocka Livi User manual

Mocka

Mocka Livi User manual

Mocka Nava User manual

Mocka

Mocka Nava User manual

Mocka Parker 4 Drawer User manual

Mocka

Mocka Parker 4 Drawer User manual

Mocka Six Cube User manual

Mocka

Mocka Six Cube User manual

Mocka Savannah Two Drawer Bedside User manual

Mocka

Mocka Savannah Two Drawer Bedside User manual

Mocka Avoca User manual

Mocka

Mocka Avoca User manual

Mocka Urban Buffet User manual

Mocka

Mocka Urban Buffet User manual

Mocka Blair User manual

Mocka

Mocka Blair User manual

Mocka Porto User manual

Mocka

Mocka Porto User manual

Popular Indoor Furnishing manuals by other brands

emob Jonas manual

emob

emob Jonas manual

Alape Betty Blue installation instructions

Alape

Alape Betty Blue installation instructions

Ameriwood HOME 5322222COM manual

Ameriwood HOME

Ameriwood HOME 5322222COM manual

Rauch 46127.9020 Assembly instructions

Rauch

Rauch 46127.9020 Assembly instructions

juwel SB 80 Assembly instructions

juwel

juwel SB 80 Assembly instructions

Furniture of America Wadenswil CM3285T Assembly instructions

Furniture of America

Furniture of America Wadenswil CM3285T Assembly instructions

DutchCrafters GCT0060D Assembly Directions

DutchCrafters

DutchCrafters GCT0060D Assembly Directions

Lovencare HK800 quick start guide

Lovencare

Lovencare HK800 quick start guide

Bestar Murphy 26183-5 manual

Bestar

Bestar Murphy 26183-5 manual

Bush Business Furniture CH1206BLF-03 Assembly instructions

Bush Business Furniture

Bush Business Furniture CH1206BLF-03 Assembly instructions

ROBERTO FIORE Cabinets To Go BC24 Assembly instructions

ROBERTO FIORE

ROBERTO FIORE Cabinets To Go BC24 Assembly instructions

Gami BROOKLYN H53 Assembly instructions

Gami

Gami BROOKLYN H53 Assembly instructions

Seville Classics WEB714 Assembly instructions

Seville Classics

Seville Classics WEB714 Assembly instructions

Tufferman STORALEX 4 TIER HRX SHELVING BAY instructions

Tufferman

Tufferman STORALEX 4 TIER HRX SHELVING BAY instructions

Hay Arcs Wall instruction manual

Hay

Hay Arcs Wall instruction manual

ergolutions PRIMUS XL instruction manual

ergolutions

ergolutions PRIMUS XL instruction manual

Next MALVERN 604104 Assembly instructions

Next

Next MALVERN 604104 Assembly instructions

KITCHEN KIT DOCU0090 Assembly & installation

KITCHEN KIT

KITCHEN KIT DOCU0090 Assembly & installation

manuals.online logo
manuals.online logoBrands
  • About & Mission
  • Contact us
  • Privacy Policy
  • Terms and Conditions

Copyright 2025 Manuals.Online. All Rights Reserved.