manuals.online logo
Brands
  1. Home
  2. •
  3. Brands
  4. •
  5. Mocka
  6. •
  7. Indoor Furnishing
  8. •
  9. Mocka Scarborough Entertainment Unit User manual

Mocka Scarborough Entertainment Unit User manual

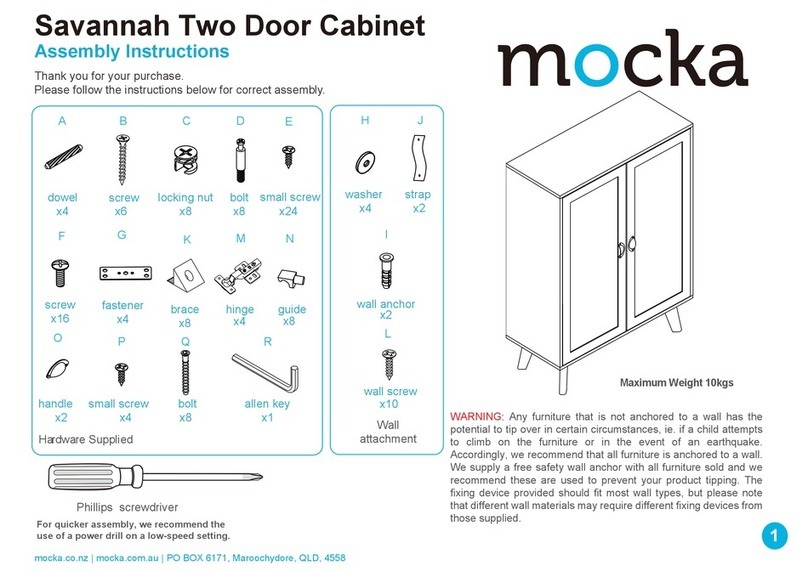
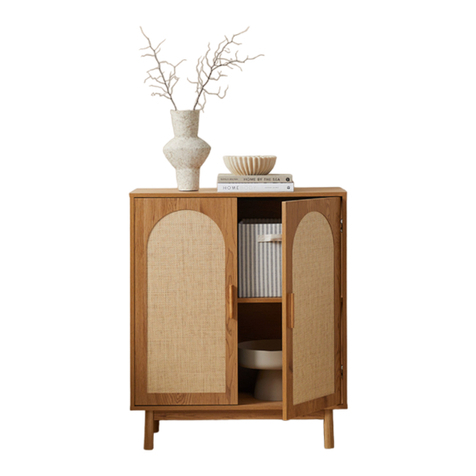
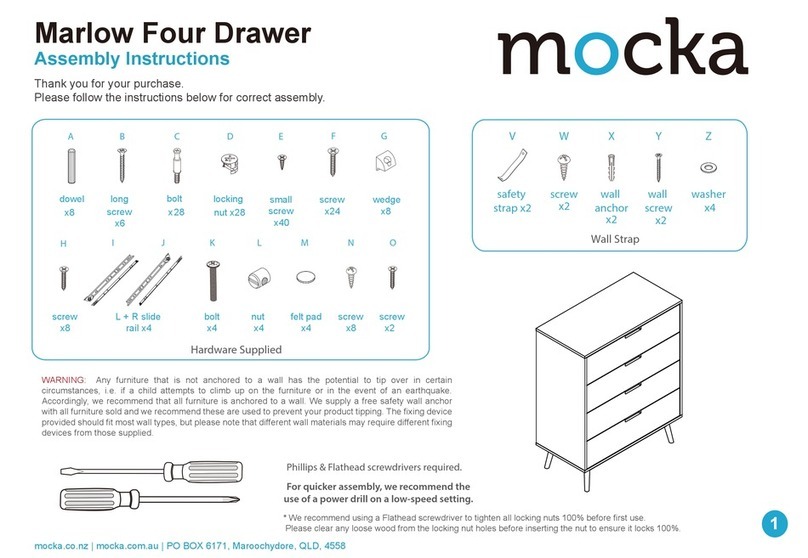
Scarborough Entertainment Unit
Assembly Instructions
Thank you for your purchase.
Please follow the instructions below for correct assembly.
mocka.co.nz | mocka.com.au | PO BOX 6171, Maroochydore, QLD, 4558
1
bolt
x18
leg
bracket x4
bolt
x4
allen
key x1
screw
x8
long
screw x8
plug
x4
cover
x4
screw
x8
ABCD E F G H
JKLM N
IOP
Q R
dowel
x18
screw
x32
slide
rail x2
slide
rail x2
slide
rail x2
slide
rail x2
bracket
x4
locking
nut x18
T
felt pad
x4
small bolt
x16
SA1
U
Wall Strap
x2
washer
Z
Y
wall
anchor
x1
X
safety
strap x1
WV
screw
x1
wall
screw
x1
WARNING: Any furniture that is not anchored to a wall has the potential to tip over in certain
circumstances, i.e. if a child attempts to climb up on the furniture or in the event of an earthquake.
Accordingly, we recommend that all furniture is anchored to a wall. We supply a free safety wall anchor
with all furniture sold and we recommend these are used to prevent your product tipping. The fixing device
provided should fit most wall types, but please note that different wall materials may require different fixing
devices from those supplied.
For quicker assembly, we recommend the
use of a power drill on a low-speed setting.
Hardware Supplied
Phillips & Flathead screwdrivers
wedge
x8
screw
x8
A2 A3
hinge
x4
screw
x24
height
adjuster x2
Scarborough Entertainment Unit
Assembly Instructions
mocka.co.nz | mocka.com.au | PO BOX 6171, Maroochydore, QLD, 4558
2
12
Insert 8x bolts (C) into panel [1] and tighten with a screwdriver.
Attach 2x brackets (J) to panel [1] secure with 4x screws (E).
Tighten with a screwdriver. Place 2x covers (K) over the brackets
(J) as shown.
Attach 2x slide rails (F) to panel [5] as shown with 6x screws (E).
Tighten with a screwdriver. Insert 1x bolt (C) into panel [5] and
tighten with a screwdriver.
5
EE
K
JJ
C
C
C
C
C
C
C
C
E
J
E
J
F
CL
E
E
E
E
F
F
E
E
E
C
1
Scarborough Entertainment Unit
Assembly Instructions
mocka.co.nz | mocka.com.au | PO BOX 6171, Maroochydore, QLD, 4558
3
34
Attach 2x slide rails (G) to panel [6] as shown with 6x screws (E).
Tighten with a screwdriver. Insert 1x bolt (C) into panel [6] and
tighten with a screwdriver.
Attach 2x brackets (J) to panels [2] and [7] secure with 4x screws (E).
Tighten with a screwdriver. Place 2x covers (K) over the brackets
(J) as shown.
G
CR
E
6
EE
K
JJ
EE
J
EE
J
2
7
E
E
E
E
E
G
G
E
C
The round head
is aligned with the
direction of the arrow
Scarborough Entertainment Unit
Assembly Instructions
mocka.co.nz | mocka.com.au | PO BOX 6171, Maroochydore, QLD, 4558
4
56
Attach panels [7] to panels [5] and [6] with 2x dowels (A) and secure
with 2x locking nuts (D). Tighten with a screwdriver.
Attach panels [3], [4], [5] and [6] to panel [1] with 8x dowels (A) and
secure with 8x locking nuts (D). Tighten with a screwdriver.
A
A
D
D
5
5
3
4
6
6
1
7
D
AA
AA
AA
A
A
D
D
D
D
D
D
Scarborough Entertainment Unit
Assembly Instructions
mocka.co.nz | mocka.com.au | PO BOX 6171, Maroochydore, QLD, 4558
5
78
Slide panels [8] and [18] down along the grooves between
panels [3], [4], [5] and [6] as shown.
Attach panel [2] to panels [3], [4], [5] and [6] with 8x dowels (A) and secure
with 8x long screws (B). Tighten with a screwdriver.
5
5
8
18
8
2
3
3
4
6
6
B
B
A
A
B
A
B
B
A
B
B
A
B
B
4
Scarborough Entertainment Unit
Assembly Instructions
mocka.co.nz | mocka.com.au | PO BOX 6171, Maroochydore, QLD, 4558
6
910
Attach a leg bracket (P) to each leg [9] using 2x screws (R) and
1x bolt (Q). Tighten with a screwdriver and Allen key (O). Attach
each leg [9] to panel [2] using 4x small bolts (S) as shown. Tighten
with the Allen key (O). Attach 4x felt pads (T) to the ends of the legs.
Attach 2x support legs [10] to panel [2] as shown. screw the 2x height
adjusters (N) onto the support legs [10].
Attach 4x hinges (A2) to panel [11] and [12], secure with 8x screws (A3).
Attach 2x plugs (L) to panel [11] and [12], secure with 2x screws (E).
Tighten with a screwdriver.
2
9
9
9
9
10
10
11
12
9
front
back
O
QR
P
R
O
front
x4
S
S
S
S
N
N
T
T
T
T
L
E
A3
A3
A2
A2
A2
A2
A3
A3
L
E
A3
A2
L
E
9
S
T
Scarborough Entertainment Unit
Assembly Instructions
mocka.co.nz | mocka.com.au | PO BOX 6171, Maroochydore, QLD, 4558
7
11 12 Drawer x 2
Attach doors [11] and [12] to panels [3] and [4] as shown, using
16x screws (A3) to secure each hinges (A2). Tighten with
a screwdriver. If the door is not catching or sitting flush, twist the
end of the cover (K) unit it catches on the plug (L).
Insert 4x bolts (C) and attach 1x plug (L) using 1x screw (E) to
panel [13]. Tighten with a screwdriver.
11 13
3
4
12
C
C
C
C
NOTE: If the doors are
uneven or there is a gap
in the middle, loosen or
tighten the screw on the
door hinge until they are
sitting flush.
A2
A2
A3
A3
L
E
K
A2
A3
Scarborough Entertainment Unit
Assembly Instructions
mocka.co.nz | mocka.com.au | PO BOX 6171, Maroochydore, QLD, 4558
8
13 Drawer x 2 14 Drawer x 2
Attach panels [14], [15] and [17] as shown using 4x screws (M).
Tighten with a screwdriver.
Slide panel [16] along the grooves between the side panels [14] and
[15] to form the base of the drawer.
14
14
15
15
16
17
M
M
M
M
Scarborough Entertainment Unit
Assembly Instructions
mocka.co.nz | mocka.com.au | PO BOX 6171, Maroochydore, QLD, 4558
9
15 Drawer x 2 16 Drawer x 2
Attach panel [13] to panels [14] and [15] using 4x locking nuts (D).
Tighten with a screwdriver.
Attach slide rails (H) and slide rails (I) to the underside of the side panels
as shown. Secure with 4x screws (E) and tighten with a screwdriver.
13
14
15
H
E
E
E
E
I
15
14
D
DD
D
1
18
8
K
Scarborough Entertainment Unit
Assembly Instructions
mocka.co.nz | mocka.com.au | PO BOX 6171, Maroochydore, QLD, 4558
10
17 18
Insert the drawers into the unit as shown. If the door is not catching or
sitting flush, twist the end of the cover (K) until it catches on the plug (L).
Attach 8x wedges (U) to the back of the unit as shown, and secure
with 8x screws (A1). Now attach 1x safety strap (V) to the back edge
of panel [1] using 1x washer (Z) and 1x screw (W). Tighten with a
screwdriver.
V
Z
W
A1
A1
U
V
Z
W
U
Scarborough Entertainment Unit
Assembly Instructions
mocka.co.nz | mocka.com.au | PO BOX 6171, Maroochydore, QLD, 4558
11
19 20
Once assembled lift furniture into place, do not drag. Use a drill to
create a small hole lining up with the top of the safety strap (V).
Fasten to the wall using 1x washer (Z), 1x wall anchor (X) and
1x wall screw (Y). Ensure unit is balanced and steady before use.
You’re done, enjoy!
wall
anchor
screw
strap
washer
X
Y
Z

Other Mocka Indoor Furnishing manuals

Mocka Nava Coffee Table User manual

Mocka

Mocka Nava Coffee Table User manual

Mocka Leon Barstool User manual

Mocka

Mocka Leon Barstool User manual

Mocka Aspen User manual

Mocka

Mocka Aspen User manual

Mocka Sadie User manual

Mocka

Mocka Sadie User manual

Mocka Bentley Tall Shelf User manual

Mocka

Mocka Bentley Tall Shelf User manual

Mocka Lewis User manual

Mocka

Mocka Lewis User manual

Mocka Hamptons User manual

Mocka

Mocka Hamptons User manual

Mocka Hamptons Side Table User manual

Mocka

Mocka Hamptons Side Table User manual

Mocka Kids House Bookcase User manual

Mocka

Mocka Kids House Bookcase User manual

Mocka Blair User manual

Mocka

Mocka Blair User manual

Mocka Sintra User manual

Mocka

Mocka Sintra User manual

Mocka Tahoe Buffet User manual

Mocka

Mocka Tahoe Buffet User manual

Mocka Canyon User manual

Mocka

Mocka Canyon User manual
Mocka Eclipse User manual

Mocka

Mocka Eclipse User manual

Mocka Addi User manual

Mocka

Mocka Addi User manual

Mocka Hudson User manual

Mocka

Mocka Hudson User manual

Mocka Mischa User manual

Mocka

Mocka Mischa User manual

Mocka Scout Desk User manual

Mocka

Mocka Scout Desk User manual

Mocka Aspen Wardrobe User manual

Mocka

Mocka Aspen Wardrobe User manual
Mocka Porto User manual

Mocka

Mocka Porto User manual
Mocka Oli Bookcase User manual

Mocka

Mocka Oli Bookcase User manual

Mocka Brixton Bookcase User manual

Mocka

Mocka Brixton Bookcase User manual

Mocka Leia User manual

Mocka

Mocka Leia User manual

Mocka Zack User manual

Mocka

Mocka Zack User manual

Popular Indoor Furnishing manuals by other brands

Wampat MTS31502 Use and care guide

Wampat

Wampat MTS31502 Use and care guide

Furniture Solutions 19WESTC.S instruction manual

Furniture Solutions

Furniture Solutions 19WESTC.S instruction manual

Meradiso 270395 Instructions for use

Meradiso

Meradiso 270395 Instructions for use

Belle Foret PARKAIRE PKBM3030 installation instructions

Belle Foret

Belle Foret PARKAIRE PKBM3030 installation instructions

COMFORTBABY Sweethome User manual and assembly instructions

COMFORTBABY

COMFORTBABY Sweethome User manual and assembly instructions

Jysk VEDDE 3620938 manual

Jysk

Jysk VEDDE 3620938 manual

Safavieh Ibuki ACH4006 quick start guide

Safavieh

Safavieh Ibuki ACH4006 quick start guide

Jysk MYRHAUK 6433200 manual

Jysk

Jysk MYRHAUK 6433200 manual

WIEMANN 992 441 Assembly instructions

WIEMANN

WIEMANN 992 441 Assembly instructions

DITALIA BB-200 Assembly manual

DITALIA

DITALIA BB-200 Assembly manual

SIGE 561 Guide

SIGE

SIGE 561 Guide

Habitat Nikky 820727 quick start guide

Habitat

Habitat Nikky 820727 quick start guide

Sable SA-HF081 user guide

Sable

Sable SA-HF081 user guide

OSP Home Furnishings WDN51 quick start guide

OSP Home Furnishings

OSP Home Furnishings WDN51 quick start guide

italor Carrito Sigma C0175 Assembly instructions

italor

italor Carrito Sigma C0175 Assembly instructions

Rauch Reflect AG195.0VS0 Assembly instructions

Rauch

Rauch Reflect AG195.0VS0 Assembly instructions

Bedz King BK906EL Assembly instructions

Bedz King

Bedz King BK906EL Assembly instructions

Silverwood Swivel Vanity Seat with Crossbar CPFV1142 Assembly instructions

Silverwood

Silverwood Swivel Vanity Seat with Crossbar CPFV1142 Assembly instructions

manuals.online logo
manuals.online logoBrands
  • About & Mission
  • Contact us
  • Privacy Policy
  • Terms and Conditions

Copyright 2025 Manuals.Online. All Rights Reserved.