manuals.online logo
Brands
  1. Home
  2. •
  3. Brands
  4. •
  5. Mocka
  6. •
  7. Indoor Furnishing
  8. •
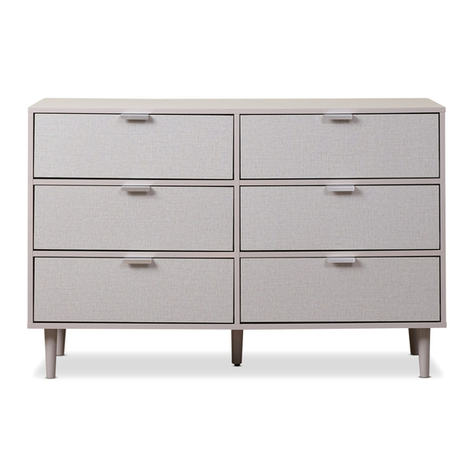
  9. Mocka Jesse Six Drawer User manual

Mocka Jesse Six Drawer User manual

Jesse Six Drawer
Assembly Instructions
Thank you for your purchase.
Please follow the instructions below for correct assembly.
Hardware Supplied
dowel
x30
bolt
x50
screw
x42
locking nut
x50
small screw
x72
cam bolt
x4
mocka.co.nz | mocka.com.au | PO BOX 6171, Maroochydore, QLD, 4558
1
A B CD E
N
M
LKJIHG
F
cam nut
x4
wedge
x4
screw
x4
long screw
x8
Wall Strap
x4
washer
Z
Y
wall
anchor
x2
X
safety
strap x2
WV
screw
x4
wall
screw
x2
WARNING: Any furniture that is not anchored to a wall has the potential to tip over in certain
circumstances, i.e. if a child attempts to climb up on the furniture or in the event of an earthquake.
Accordingly, we recommend that all furniture is anchored to a wall. We supply a free safety wall anchor
with all furniture sold and we recommend these are used to prevent your product tipping. The fixing device
provided should fit most wall types, but please note that different wall materials may require different fixing
devices from those supplied.
CL runner tracks
x6
CR runner tracks
x6
DL runners
x6
DR runners
x6
plastic
glide x5
OP
For quicker assembly, we recommend the
use of a power drill on a low-speed setting.
Phillips & Flathead screwdrivers
and hammer required
long dowel
x4
Jesse Six Drawer
Assembly Instructions
mocka.co.nz | mocka.com.au | PO BOX 6171, Maroochydore, QLD, 4558
2
1 2
E
G
E
F
CR
CL
2
3
Attach 3x CL runner tracks (F) and 3x CR runner tracks (G) to
panels [2] and [3] as shown with 18x screws (E). Tighten with
a screwdriver.
Insert 8x bolts (C) into panels [2] and [3]. Tighten with a screwdriver.
F
E
E
E
F
E
E
E
F
E
E
E
G
EE
E
G
EE
E
G
E
E
C
C
C
C
C
C
C
C
E
2
3
Jesse Six Drawer
Assembly Instructions
mocka.co.nz | mocka.com.au | PO BOX 6171, Maroochydore, QLD, 4558
3
3 4
E
G
CR
E
F
CL
Attach 3x CL runner tracks (F) to panel [5] as shown with
9x screws (E). Flip the panel [5], attach 3x CR runner
tracks (G) to panel [5] as shown with 9x screws (E). Tighten
with a screwdriver.
Insert 8x bolts (C) into panel [5] as shown. Tighten with a screwdriver.
FLIPFLIP
E
E
F
F
F
G
G
G
E
E
E
E
E
EE
E
EE
E
E
E
E
E
E
C
C
C
C
C
C
C
C
3
5
3
5
3
5
3
5
Jesse Six Drawer
Assembly Instructions
mocka.co.nz | mocka.com.au | PO BOX 6171, Maroochydore, QLD, 4558
4
56
Attach panels [6], [19] and [21] to panel [3] with 4x dowels (A)
and secure with 4x locking nuts (D). Tighten with a screwdriver.
Attach panel [5] to panels [6], [19] and [21] with 4x long dowels (P) and
secure with 4x locking nuts (D). Tighten with a screwdriver.
A
A
A
A
D
D
D
D
D
D
D
D
P
P
P
P
3
3
19
19
21
6
6
21
6
6
3
5
A
D
Jesse Six Drawer
Assembly Instructions
mocka.co.nz | mocka.com.au | PO BOX 6171, Maroochydore, QLD, 4558
5
78
Attach panels [6], [19] and [21] to panel [5] secure with
4x locking nuts (D). Tighten with a screwdriver.
Attach panel [2] to panels [6], [19] and [21] with 4x dowels (A) and
secure with 4x locking nuts (D). Tighten with a screwdriver.
D
D
D
D
A
D
A
A
A
D
D
D
19
19
21
6
6
21
6
6
2
3
5
Insert 6x bolts (C) into panel [1]. Tighten with a screwdriver. Attach panel [1] to panels [2], [3] and [5] with 6x dowels (A) and
secure with 6x locking nuts (D). Tighten with a screwdriver.
Jesse Six Drawer
Assembly Instructions
mocka.co.nz | mocka.com.au | PO BOX 6171, Maroochydore, QLD, 4558
6
9 10
C
C
C
C
C
C
A
A
A
A
A
A
D
D
D
D
D
1
1
3
2
5
Jesse Six Drawer
Assembly Instructions
mocka.co.nz | mocka.com.au | PO BOX 6171, Maroochydore, QLD, 4558
7
11 12x2
Insert connector stick [20] to join panels [7]. Slide panels [7] down
along the grooves between the panels [2] and [3] to form the
back of the unit as shown.
Insert 2x bolts (C) into panels [8] and [9]. Attach panels [8] and [9]
to panel [10] with 2x dowels (A) and secure with 2x locking
nuts (D). Tighten with a screwdriver.
C
D
D
A
A
C
3
2
78
8
9
10
9
7
20
Jesse Six Drawer
Assembly Instructions
mocka.co.nz | mocka.com.au | PO BOX 6171, Maroochydore, QLD, 4558
8
13 14
Attach panels [8] and [9] to panels [11] using 4x cam bolt (K) and secure
with 4x cam nuts (L). Tighten with a screwdriver. Attach 4x plastic glides (O)
into the panels [8] and [9] with a hammer as shown.
Attach panel [12] to panel [4] with 2x long screw (J) and secure.
Tighten with a screwdriver.
K
L
O
K
L
K
K
K
L
L
L
O
O
O
O
8
8
9
4
11
12
11
9
JJ
Jesse Six Drawer
Assembly Instructions
mocka.co.nz | mocka.com.au | PO BOX 6171, Maroochydore, QLD, 4558
9
15
16
Attach panel [4] to leg panels with 6x dowels (A) and secure
with 18x screws (B). Tighten with a screwdriver.
Attach panel [4] to the unit with 6x dowels (A) and secure with 6x long screws (J).
Tighten with a screwdriver. Attach 1x plastic glide (O) into the panel [12]
with a hammer as shown.
BB
BBB
B
B
B
B
B
B
B
B
B
B
B
B
B
A
A
AA
A
A
A
A
J
J
J
J
J
J
O
3
2
5
10
10
44
11
11
3
12
Jesse Six Drawer
Assembly Instructions
mocka.co.nz | mocka.com.au | PO BOX 6171, Maroochydore, QLD, 4558
10
17 Drawers x6 18
Insert 4x bolts (C) into panels [13] and [14]. Tighten with a screwdriver. Attach panels [15] and [16] to front panels [13] and [14] using
4x locking nuts (D). Tighten with a screwdriver.
Drawers x6
C
C
C
C
D
D
D
D
15
16
x3 x3/
13 14
x3 x3/
13 14
17
15 15
16
16
18
Attach panels [15], [16] and [18] as shown using 4x screws (B).
Tighten with a screwdriver.
Jesse Six Drawer
Assembly Instructions
mocka.co.nz | mocka.com.au | PO BOX 6171, Maroochydore, QLD, 4558
11
19
20
Slide panel [17] along the grooves between the side panels [15]
and [16] to form the base of the drawer.
Drawers x6Drawers x6
B
B
BB
x3 x3/
13 14
x3 x3/
13 14
15 13
13
13
14
14
14
16
Insert the assembled drawers into the corresponding compartments
as shown. Ensure the drawers slide easily along the rails.
Jesse Six Drawer
Assembly Instructions
mocka.co.nz | mocka.com.au | PO BOX 6171, Maroochydore, QLD, 4558
12
21 22 Drawers x6
Attach DR runners (I) and DL runners (H) to the underside of panels
[15] and [16] as shown. Secure with 6x screws (E) and tighten with
a screwdriver. Complete the other three drawers.
Drawers x6
H
I
E
E
E
E
E
x3 x3/
13 14
E
Once assembled lift furniture into place, do not drag. Use a drill to
create a small hole lining up with the top of the safety strap (V).
Fasten to the wall using 2x washers (Z), 2x wall anchors (X) and
2x screws (Y). Ensure unit is balanced and steady before use.
You’re done, enjoy!
V
Z
W
Jesse Six Drawer
Assembly Instructions
mocka.co.nz | mocka.com.au | PO BOX 6171, Maroochydore, QLD, 4558
13
23 24
M
N
M
N
w
w
V
Z
W
V
Z
W
X
Y
Z
X
Y
Z
3
2
5
7
7
X
Y
Z
Attach 4x wedges (M) into the corners of the back of the unit and
secure with 4x screws (N). Tighten with a screwdriver. Attach 2x
safety straps (V) to the top of the back side of the unit as shown
using 2x washers (Z) and 2x screws (W). Tighten with a screwdriver.
Attach panels [7] to panel [5] as shown using 2x screws (W).
Tighten with a screwdriver.

Other Mocka Indoor Furnishing manuals

Mocka Parker User manual

Mocka

Mocka Parker User manual

Mocka Phoebe Bookshelf Large User manual

Mocka

Mocka Phoebe Bookshelf Large User manual

Mocka Zara User manual

Mocka

Mocka Zara User manual

Mocka Orlando User manual

Mocka

Mocka Orlando User manual

Mocka Sadie User manual

Mocka

Mocka Sadie User manual

Mocka Peta User manual

Mocka

Mocka Peta User manual

Mocka Sadie User manual

Mocka

Mocka Sadie User manual

Mocka Denham Coffee Table User manual

Mocka

Mocka Denham Coffee Table User manual

Mocka Sintra User manual

Mocka

Mocka Sintra User manual

Mocka Olsen Entertainment Unit User manual

Mocka

Mocka Olsen Entertainment Unit User manual

Mocka Maeve User manual

Mocka

Mocka Maeve User manual

Mocka Alps User manual

Mocka

Mocka Alps User manual

Mocka Eclipse Four Drawer User manual

Mocka

Mocka Eclipse Four Drawer User manual

Mocka Milton 5 Shelf Plant Stand User manual

Mocka

Mocka Milton 5 Shelf Plant Stand User manual

Mocka Lewis User manual

Mocka

Mocka Lewis User manual

Mocka Addi Tallboy User manual

Mocka

Mocka Addi Tallboy User manual

Mocka Sadie Side User manual

Mocka

Mocka Sadie Side User manual

Mocka Hamptons Side Table User manual

Mocka

Mocka Hamptons Side Table User manual

Mocka Tahoe User manual

Mocka

Mocka Tahoe User manual
Mocka Sadie Buffet User manual

Mocka

Mocka Sadie Buffet User manual

Mocka Aspen Change Table User manual

Mocka

Mocka Aspen Change Table User manual

Mocka Vibe/Olsen Tallboy User manual

Mocka

Mocka Vibe/Olsen Tallboy User manual

Mocka Maya Entertainment Unit User manual

Mocka

Mocka Maya Entertainment Unit User manual

Mocka Boucle User manual

Mocka

Mocka Boucle User manual

Popular Indoor Furnishing manuals by other brands

Studio Henk Blob manual

Studio Henk

Studio Henk Blob manual

Monarch I 8059 Assembly instructions

Monarch

Monarch I 8059 Assembly instructions

KI U Series Assembly instructions

KI

KI U Series Assembly instructions

iHome GLOW RING XL quick start guide

iHome

iHome GLOW RING XL quick start guide

Sears Garden Oasis Harrison D71 M20297 Use and care guide

Sears

Sears Garden Oasis Harrison D71 M20297 Use and care guide

Bertini DA1756-8 instruction manual

Bertini

Bertini DA1756-8 instruction manual

Velocity DESK RETURN Assembly manual

Velocity

Velocity DESK RETURN Assembly manual

Yaasa Desk Light troubleshooting guide

Yaasa

Yaasa Desk Light troubleshooting guide

RiverRidge 02-380 Assembly instructions

RiverRidge

RiverRidge 02-380 Assembly instructions

OVE LANA 24 Assembly instructions

OVE

OVE LANA 24 Assembly instructions

Habitat Rold 822544 quick start guide

Habitat

Habitat Rold 822544 quick start guide

Easylife EL5521 instruction manual

Easylife

Easylife EL5521 instruction manual

Walker Edison RAMU1O Assembly instructions

Walker Edison

Walker Edison RAMU1O Assembly instructions

WIEMANN Bolero 991549 manual

WIEMANN

WIEMANN Bolero 991549 manual

Amart Furniture 72145 Assembly instruction

Amart Furniture

Amart Furniture 72145 Assembly instruction

Intercon LG-BR-2460Q-WST-HB Assembly instruction

Intercon

Intercon LG-BR-2460Q-WST-HB Assembly instruction

Whitewood Industries BD-7019 Assembly instructions

Whitewood Industries

Whitewood Industries BD-7019 Assembly instructions

Forte OVES82444 Assembling Instruction

Forte

Forte OVES82444 Assembling Instruction

manuals.online logo
manuals.online logoBrands
  • About & Mission
  • Contact us
  • Privacy Policy
  • Terms and Conditions

Copyright 2025 Manuals.Online. All Rights Reserved.