manuals.online logo
Brands
  1. Home
  2. •
  3. Brands
  4. •
  5. Monacor
  6. •
  7. Batteries Charger
  8. •
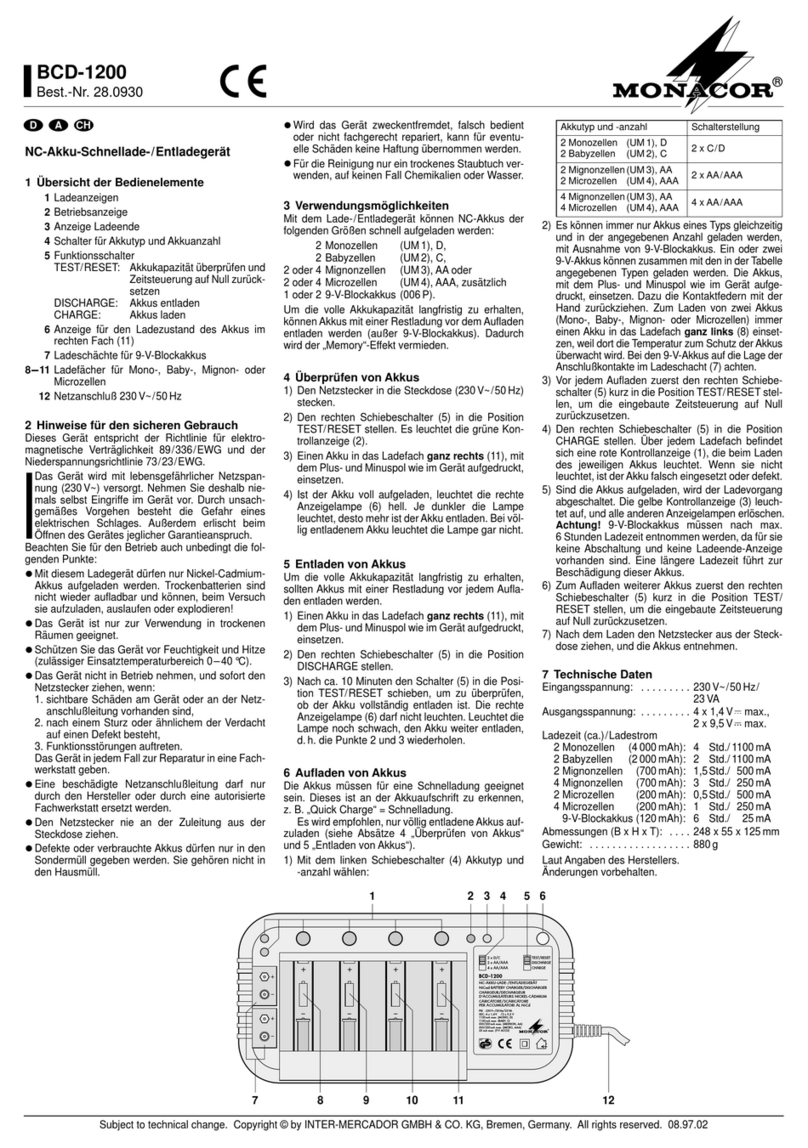
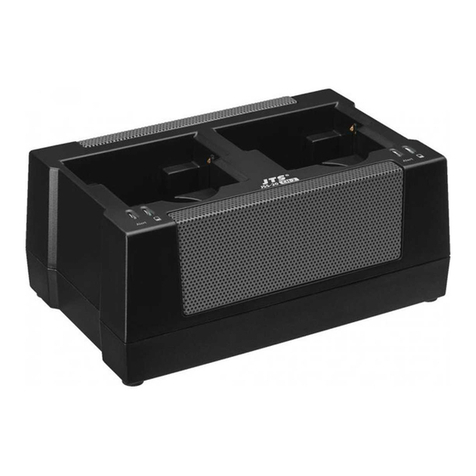
  9. Monacor img Stage Line ATS-162PS User manual

Monacor img Stage Line ATS-162PS User manual

ATS-162PS
Bestellnummer 25.4600
Ladegerät für
Empfänger ATS-162R
und Sender ATS-162T
Bitte lesen Sie diese Anleitung vor dem
Betrieb gründlich durch und heben Sie sie für
ein späteres Nachlesen auf.
1 Verwendungsmöglichkeiten
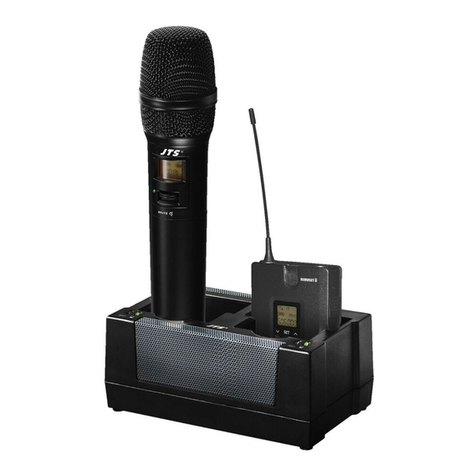
Das Ladegerät dient zum Laden der Lithium-
Polymer-Akkus in den Sendern und Empfän-
gern des ATS-162-Funksystems. Es können
die Akkus von zwei Geräten gleichzeitig auf-
geladen werden.
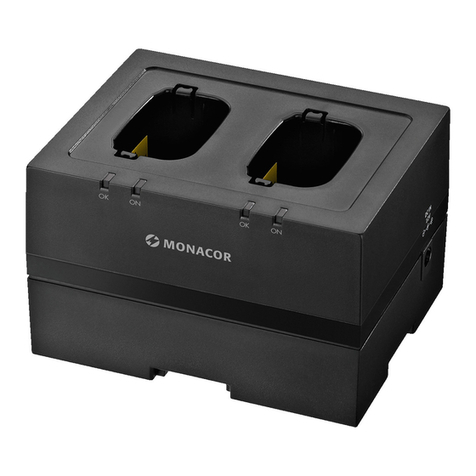
Zum Aufladen der Akkus werden die Sen-
der/Empfänger in die Ladeschächte gesetzt.
Diese sind so ausgelegt, dass ein falsches
Einsetzen der Geräte und damit eine ver-
sehentliche Verpolung ausgeschlossen ist.
Schutzschaltungen sorgen dafür, dass die
Akkus nicht beschädigt werden (z. B. durch
Überladung).
2 Sicherheitshinweise
Die Geräte (Ladegerät und Netzgerät) ent-
sprechen allen relevanten Richtlinien der EU
und sind deshalb mit gekennzeichnet.
WARNUNG Das Netzgerät wird mit lebens-
gefährlicher Netzspannung ver-
sorgt. Nehmen Sie deshalb nie
selbst Eingriffe am Netzgerät
vor. Es besteht die Gefahr eines
elektrischen Schlages.
GDie Geräte sind nur zur Verwendung im
Innenbereich geeignet. Schützen Sie sie
vor Tropf- und Spritzwasser, hoher Luft-
feuchtigkeit und Hitze (zulässiger Einsatz-
temperaturbereich 0 – 40 °C).
GStellen Sie keine mit Flüssigkeit gefüllten
Gefäße, z. B. Trinkgläser, auf die Geräte.
GNehmen Sie das Ladegerät nicht in Betrieb
bzw. ziehen Sie sofort das Netzgerät aus
der Steckdose:
1. wenn sichtbare Schäden an den Gerä-
ten vorhanden sind,
2. wenn nach einem Sturz oder Ähnlichem
der Verdacht auf einen Defekt besteht,
3. wenn Funktionsstörungen auftreten.
Geben Sie die Geräte in jedem Fall zur
Reparatur in eine Fachwerkstatt.
GVerwenden Sie für die Reinigung nur ein
trockenes, weiches Tuch, niemals Wasser
oder Chemikalien.
GWerden die Geräte zweckentfremdet,
falsch bedient oder nicht fachgerecht repa-
riert, kann keine Haftung für daraus resul-
tierende Sach- oder Personenschäden und
keine Garantie für die Geräte übernommen
werden.
Sollen die Geräte endgültig aus dem
Betrieb genommen werden, überge-
ben Sie sie zur umweltgerechten
Entsorgung einem örtlichen Recyc-
lingbetrieb.
3 Akkus aufladen
1) Das Netzgerät an die Buchse 5 V des
Ladegeräts anschließen und in eine
Steckdose (230 V~/50 Hz) stecken. Das
Ladegerät ist damit eingeschaltet. Die bei-
den Ladeanzeigen blinken kurz auf.
2) Die Sender/Empfänger aufrecht in die
Ladeschächte stecken. Die Ladeanzeigen
leuchten. Zusätzlich leuchtet jeweils eine
Kontroll-LED am Sender/Empfänger. Wäh-
rend des Aufladens leuchten die zugehöri-
gen Anzeigen rot.
3) Ist der Akku eines Geräts voll aufgeladen,
leuchten die zugehörigen Anzeigen grün.
Das Gerät kann dann aus dem Lade-
schacht genommen werden.
4) Zum Ausschalten des Ladegeräts das
Netzgerät aus der Steckdose ziehen.
4 Technische Daten
Ladedauer: . . . . . . . ca. 5 Stunden
(abhängig vom Akku-
Ladezustand)
Stromversorgung: . . 5 V /1 A über beilie-
gendes Netzgerät an
100 – 240 V~,
50 – 60 Hz
Abmessungen: . . . . 85 × 70 × 106 mm
Gewicht: . . . . . . . . . 175 g
Änderungen vorbehalten.
®
MONACOR INTERNATIONAL GmbH & Co. KG
•
Zum Falsch 36
•
28307 Bremen
•
Germany
Copyright
©
by MONACOR INTERNATIONAL. All rights reserved. A-1362.99.01.09.2012
Battery Charger for
Receiver ATS-162R and
Transmitter ATS-162T
Please read these operating instructions
carefully prior to operation and keep them for
later reference.
1 Applications
This charger is used to recharge the lithium
polymer batteries of the transmitters and
receivers of the wireless ATS-162 system. It
is possible to recharge the batteries of two
units at the same time.
To recharge the batteries, insert the trans-
mitters/receivers into the charging compart-
ments. The design of the charging compart-
ments ensures correct insertion of the units
and thus prevents inadvertent reverse polar-
ity. Protective circuits are provided to prevent
damage to the batteries, e. g. by overload.
2 Safety Notes
The units (charger and power supply unit)
correspond to all relevant directives of the EU
and are therefore marked with .
WARNING The power supply unit uses
dangerous mains voltage.
Leave servicing to skilled per-
sonnel only. Inexpert handling
or modification of the unit may
result in electric shock.
GThe units are suitable for indoor use only.
Protect them against dripping water and
splash water, high air humidity and heat
(admissible ambient temperature range:
0 – 40 °C).
GDo not place any vessel filled with liquid on
the units, e. g. a drinking glass.
GDo not operate the charger or immediately
disconnect the power supply unit from the
mains socket
1. if the units are visibly damaged,
2. if a defect might have occurred after a
unit was dropped or suffered a similar
accident,
3. if malfunctions occur.
In any case the units must be repaired by
skilled personnel.
GFor cleaning only use a dry, soft cloth;
never use water or chemicals.
GNo guarantee claims for the units and no
liability for any resulting personal damage
or material damage will be accepted if the
units are used for other purposes than orig-
inally intended, if they are not correctly
operated, or if they are not repaired in an
expert way.
If the units are to be put out of oper-
ation definitively, take them to a local
recycling plant for a disposal which
is not harmful to the environment.
3 Recharging Batteries
1) Connect the power supply unit to the jack
5 V of the charger and to a mains socket
(230 V~/50 Hz). Thus, the charger is
switched on. The two charge LED start
flashing briefly.
2) Hold the transmitter/receiver upright to in-
sert them vertically into the charging com-
partments. The charge LEDs light up. In
addition, an indicating LED lights up on the
transmitter/receiver. While recharging, the
corresponding LEDs show red.
3) When the battery of a unit has been fully
recharged, the corresponding charge LEDs
show green to indicate that the unit can be
removed from the charging compartment.
4) To switch off the charger, disconnect the
power supply unit from the socket.
4 Specifications
Charging time: . . . . approx. 5 hours
(depending on battery
status)
Power supply: . . . . . 5 V /1 A via power
supply unit provided
and connected to
100 – 240 V~,
50 – 60 Hz
Dimensions: . . . . . . 85 × 70 × 106 mm
Weight: . . . . . . . . . . 175 g
Subject to technical modification.
wwwwww..iimmggssttaaggeelliinnee..ccoomm
GB
D A CH
ATS-162PS
Bestellnummer 25.4600
Chargeur pour le
récepteur ATS-162R et
lʼémetteur ATS-162T
Veuillez lire la présente notice avec attention
avant le fonctionnement et conservez-la pour
pouvoir vous y reporter ultérieurement.
1 Possibilités dʼutilisation
Le chargeur permet de charger les accumu-
lateurs Lithium-Polymère des émetteurs et
récepteurs du système sans fil ATS-162. Il
est possible de charger simultanément les
accumulateurs de deux appareils.
Pour charger les accus, placez les émet-
teurs/récepteurs dans les compartiments de
charge. Ils sont configurés de telle sorte quʼun
mauvais positionnement des appareils et donc
une inversion accidentelle de polarité ne sont
pas possibles. Des circuits de protection protè-
gent les accumulateurs (p. ex. de surcharge).
2 Conseils de sécurité
Les appareils (chargeur et bloc secteur)
répondent à toutes les directives nécessaires
de lʼUnion européenne et portent donc le
symbole .
GLes appareils ne sont conçus que pour une
utilisation en intérieur. Protégez-les de tout
AVERTISSEMENT Le bloc secteur est ali-
menté par une tension
dangereuse. Ne touchez
jamais lʼintérieur de lʼappa-
reil car vous pourriez subir
une décharge électrique.
type de projections dʼeau, des éclabous-
sures, dʼune humidité élevée et la chaleur
(plage de température de fonctionnement
autorisée : 0 – 40 °C).
GEn aucun cas, vous ne devez poser dʼobjet
contenant du liquide, par exemple un verre,
sur lʼappareil.
GNe faites jamais fonctionner le chargeur et
débranchez immédiatement le bloc secteur
lorsque :
1. des dommages visibles apparaissent
sur les appareils.
2. après une chute ou accident similaire...,
lʼappareil peut présenter un défaut.
3. des dysfonctionnements apparaissent.
Dans tous les cas, les appareils doivent
être réparés par un technicien spécialisé.
GPour le nettoyage, utilisez un chiffon sec et
doux, en aucun cas de produits chimiques
ou dʼeau.
GNous déclinons toute responsabilité en cas
de dommages corporels ou matériels ré-
sultants si les appareils sont utilisés dans
un but autre que celui pour lequel ils ont été
conçus, sʼils ne sont pas correctement uti-
lisés ou sʼils ne sont pas réparés par une
personne habilitée ; de même, la garantie
deviendrait caduque.
Lorsque les appareils sont définitive-
ment retirés du service, vous devez
les déposer dans une usine de recy-
clage de proximité pour contribuer à
leur élimination non polluante.
3 Charge des accumulateurs
1) Reliez le bloc secteur à la prise 5 V du
chargeur et à une prise secteur 230 V~/
50 Hz. Le chargeur est ainsi allumé. Les
deux LEDs de charge commencent à cli-
gnoter brièvement.
2) Tenez lʼémetteur/récepteur par le haut et
insérez-le dans les compartiments de
charge. Les LEDs de charge brillent. En
plus, une LED de contrôle sur lʼémetteur/
récepteur brille. Pendant la charge, les
LEDs correspondantes brillent en rouge.
3) Lorsque lʼaccumulateur dʼun appareil est
complètement chargé, les LEDs corres-
pondantes brillent en vert. Vous pouvez
retirer alors lʼappareil de son comparti-
ment de charge.
4) Pour éteindre le chargeur, débranchez le
bloc secteur de la prise.
4 Caractéristiques techniques
Durée de charge : . . 5 heures environ
(selon lʼétat de charge
de lʼaccu)
Alimentation : . . . . . 5 V /1 A
par bloc secteur relié à
100 – 240 V~,
50 – 60 Hz
Dimensions : . . . . . . 85 × 70 × 106 mm
Poids : . . . . . . . . . . . 175 g
Tout droit de modification réservé.
®
MONACOR INTERNATIONAL GmbH & Co. KG
•
Zum Falsch 36
•
28307 Bremen
•
Germany
Copyright
©
by MONACOR INTERNATIONAL. All rights reserved. A-1362.99.01.09.2012
Caricatore per
il ricevitore ATS-162R e
il trasmettitore ATS-162T
Vi preghiamo di leggere attentamente le pre-
senti istruzioni prima della messa in funzione
e di conservarle per un uso futuro.
1 Possibilità dʼimpiego
Il caricatore serve per ricaricare le batterie ai
polimeri di litio nei trasmettitore e ricevitori
del sistema wireless ATS-162. Si possono
ricaricare contemporaneamente le batterie di
due apparecchi.
Per ricaricare le batterie, i ricevitori/tra-
smettitori si inseriscono nei vani di ricarica.
I vani sono strutturati in modo tale che è
escluso lʼinserimento accidentalmente sba-
gliato degli apparecchi e quindi una polarità
errata. I circuiti di protezione proteggono
le batterie dal danneggiamento (p. es. per
sovraccarica).
2 Avvertenze di sicurezza
Gli apparecchi (caricatore e alimentatore)
sono conformi a tutte le direttive rilevanti del-
lʼUE e pertanto porta la sigla .
AVVERTIMENTO Lʼalimentatore è alimentato
con pericolosa tensione di
rete. Non intervenire mai
personalmente al suo in-
terno. Esiste il pericolo di
una scarica elettrica.
GGli apparecchi sono previsti solo per lʼuso
allʼinterno di locali. Proteggerli dallʼacqua
gocciolante e dagli spruzzi dʼacqua, da alta
umidità dellʼaria e dal calore (temperatura
dʼimpiego ammessa 0 – 40 °C).
GNon depositare sullʼapparecchio dei conte-
nitori riempiti di liquidi, p. es. bicchieri.
GNon mettere in funzione il caricatore o stac-
care subito la spina rete delʼalimentatore
se:
1. gli apparecchi presentano dei danni visi-
bili;
2. dopo una caduta o dopo eventi simili
sussiste il sospetto di un difetto;
3. lʼapparecchio non funziona corretta-
mente.
Per la riparazione rivolgersi sempre ad
unʼofficina competente.
GPer la pulizia usare solo un panno morbido,
asciutto; non impiegare in nessun caso
acqua o prodotti chimici.
GNel caso dʼuso improprio, dʼimpiego scor-
retto o di riparazione non a regola dʼarte
degli apparecchi, non si assume nessuna
responsabilità per eventuali danni conse-
quenziali a persone o a cose e non si
assume nessuna garanzia per gli appa-
recchi.
Se si desidera eliminare gli apparec-
chi definitivamente, consegnarli per
lo smaltimento ad unʼistituzione
locale per il riciclaggio.
3 Ricaricare le batterie
1) Collegare lʼalimentatore con la presa 5 V
del caricatore e inserirlo in una presa di
rete (230 V~/50 Hz). Così, il caricatore è
acceso. Le due spie di ricarica lampeg-
giano brevemente.
2) Inserire in senso verticale i trasmettitori/
ricevitori nei vani di ricarica. Si accendono
le spie di ricarica. In più si accende un
LED di controllo sul trasmettitore/ricevi-
tore. Durante la ricarica, le relative spie
sono rosse.
3) Se la batteria di un apparecchio è comple-
tamente carica, le relative spie diventano
verdi. Allora lʼapparecchio può essere tolto
dal vano di ricarica.
4) Per spegnere il caricatore staccare lʼali-
mentatore dalla presa di rete.
4 Dati tecnici
Durata della ricarica: ca. 5 ore (a seconda
dello stato di carica
della batteria)
Alimentazione: . . . . 5 V /1 A tramite
lʼalimentatore in
dotazione con
100 – 240 V~,
50 – 60 Hz
Dimensioni: . . . . . . . 85 × 70 × 106 mm
Peso: . . . . . . . . . . . 175 g
Con riserva di modifiche tecniche.
wwwwww..iimmggssttaaggeelliinnee..ccoomm
F B CH
I
ATS-162PS
Bestellnummer 25.4600
Cargador de Baterías para
el Receptor ATS-162R
y el Emisor ATS-162T
Lea atentamente estas instrucciones de fun-
cionamiento antes de utilizar el aparato y
guárdelas para usos posteriores.
1 Aplicaciones
Este cargador se utiliza para recargar las
baterías de polímero de litio de los emisores
y los receptores del sistema inalámbrico
ATS-162. Se pueden recargar las baterías de
dos aparatos al mismo tiempo.
Para recargar las baterías, inserte los emi-
sores/receptores en los compartimentos de
carga. El diseño de los compartimentos de
carga asegura la colocación correcta de los
aparatos y por lo tanto previene la inversión
errónea de polaridad. Los circuitos de pro-
tección están previstos para prevenir daños
en las baterías, p. ej. por sobrecarga.
2 Notas de Seguridad
Los aparatos (cargador y alimentador) cum-
plen con todas las directivas relevantes de la
UE y por lo tanto están marcados con el sím-
bolo .
ADVERTENCIA El alimentador utiliza un vol-
taje peligroso. Deje el mante-
nimiento en manos del per-
sonal cualificado. El manejo
inexperto o la modificación
del aparato pueden provocar
una descarga.
GLos aparatos están adecuados para su
aplicación sólo en interiores. Protéjalos de
goteos y salpicaduras, elevada humedad
del aire y calor (temperatura ambiente ad-
misible: 0 – 40 ºC).
GNo coloque ningún recipiente con líquido
encima de los aparatos, p. ej. un vaso.
GNo utilice el cargador o desconecte inme-
diatamente el alimentador del enchufe si:
1. Los aparatos están visiblemente daña-
dos.
2. El aparato ha sufrido daños después de
una caída o accidente similar.
3. No funciona correctamente.
Sólo el personal cualificado puede reparar
los aparatos bajo cualquier circunstancia.
GUtilice sólo un paño suave y seco para la
limpieza; no utilice nunca ni agua ni pro-
ductos químicos.
GNo podrá reclamarse garantía o responsa-
bilidad alguna por cualquier daño personal
o material resultante si los aparatos se uti-
lizan para otros fines diferentes a los origi-
nalmente concebidos, si no se utilizan ade-
cuadamente o no se reparan por expertos.
Si va a poner los aparatos fuera de
servicio definitivamente, llévelos a la
planta de reciclaje más cercana
para que su eliminación no perjudi-
que el medioambiente.
3 Recargar Baterías
1) Conecte el alimentador a la toma 5 V del
cargador y a un enchufe (230 V~/50 Hz).
De este modo, se conectará el cargador.
Los dos LEDs de carga empiezan a par-
padear brevemente.
2) Mantenga el emisor/receptor vertical-
mente para insertarlos en los comparti-
mentos de carga. Se iluminan los LEDs de
carga. Además, se ilumina un LED de indi-
cación en el emisor/receptor. Durante la
recarga, los LEDs correspondientes se
iluminan en rojo.
3) Cuando la batería de un aparato se ha
recargado completamente, los LEDs de
carga correspondientes se iluminan en
verde para indicar que el aparato puede
extraerse del compartimento de carga.
4) Para desconectar el cargador, desconecte
el alimentador del enchufe.
4 Especificaciones
Tiempo de carga: . 5 horas aprox.
(dependiendo del
estado de la batería)
Alimentación: . . . . 5 V /1 A mediante ali-
mentador entregado y
conectado a
100 – 240 V~, 50 – 60 Hz
Dimensiones: . . . . 85 × 70 × 106 mm
Peso: . . . . . . . . . . 175 g
Sujeto a modificaciones técnicas.
®
MONACOR INTERNATIONAL GmbH & Co. KG
•
Zum Falsch 36
•
28307 Bremen
•
Germany
Copyright
©
by MONACOR INTERNATIONAL. All rights reserved. A-1362.99.01.09.2012
Stacja ładująca do
odbiorników ATS-162R
i nadajników ATS-162T
Przed rozpoczęciem użytkowania prosimy o
zapoznanie się z instrukcją i zachowanie jej
do wglądu.
1 Zastosowanie
Stacja ładująca służy do ładowania litowo-
polimerowych akumulatorów w nadajnikach i
odbiornikach serii ATS-162. Umożliwia rów-
noczesną obsługę dwóch urządzeń.
W celu naładowania, umieścić nadajniki/
odbiorniki w komorach ładujących. Ich kształt
zapewnia odpowiednie podłączenie oraz
chroni przed odwróceniem polaryzacji. Spe-
cjalne obwody zabezpieczające zapobiegają
uszkodzeniu akumulatorów np. na skutek
przeładowania.
2 Środki bezpieczeństwa
Urządzenia (stacja ładująca oraz zasilacz)
systemu spełniają wszystkie wymagania
norm UE, dlatego zostały oznaczone symbo-
lem .
UWAGA Zasilacz pracuje na niebez-
piecznym napięciu. Wszelkie
naprawy należy zlecić osobie
przeszkolonej. Nieodpowied-
nia obsługa może spowodo-
wać porażenie prądem elek-
trycznym.
GUrządzenie przeznaczone jest tylko do
użytku wewnątrz pomieszczeń; należy
chronić je przed wodą, dużą wilgotnością
oraz wysoką temperaturą (dopuszczalny
zakres wynosi 0 – 40 °C).
GNa urządzeniu nie wolno stawiać żadnych
pojemników z płynem np. szklanek.
GNie wolno używać urządzenia lub natych-
miast odłączyć wtyczkę zasilającą z
gniazdka
1. jeżeli stwierdzono istnienie widocznego
uszkodzenia urządzenia lub zasilacza,
2. jeżeli uszkodzenie urządzenia mogło
nastąpić w wyniku upadku lub innego
podobnego zdarzenia,
3. jeżeli urządzenie działa nieprawidłowo.
Naprawę urządzenia należy zawsze zlecić
specjaliście.
GDo czyszczenia urządzenia należy używać
suchej, miękkiej tkaniny. Nie stosować
wody ani środków chemicznych
GProducent ani dostawca nie ponoszą odpo-
wiedzialności za wynikłe szkody: uszko-
dzenie sprzętu lub obrażenia użytkownika,
jeśli urządzenie było używane niezgodnie z
ich przeznaczeniem, nieprawidłowo zamo-
ntowane, podłączone lub obsługiwane bądź
poddane nieautoryzowanej naprawie.
Po całkowitym zakończeniu eks-
ploatacji urządzenie należy oddać
do punktu recyklingu.
3 Ładowanie akumulatorów
1) Podłączyć dołączony zasilacz do gniazda
zasilania 5 V w stacji ładującej a następ-
nie do gniazdka sieciowego (230 V~/
50 Hz). Stacja ładująca jest już włączona.
Obie diody zaczynają migać.
2) Włożyć nadajnik/odbiornik pionowo do
komory ładującej. Zapalą się diody łado-
wania. Dodatkowo, zapali się dioda na
nadajniku/odbiorniku. Podczas ładownia
diody świecą na czerwono.
3) Po naładowaniu akumulatorów, odpo-
wiednie diody zaczynają świecić na zie-
lono. Można wówczas wyjąć urządzenie z
komory ładującej.
4) Aby wyłączyć ładowarkę, należy odłączyć
zasilacz od gniazdka sieciowego.
4 Specyfikacja
Czas ładowania: . . . około 5 godzin
(zależnie od stanu
baterii)
Zasilanie: . . . . . . . . 5 V /1 A z doł.
zasilacza
100 – 240 V~,
50 – 60 Hz
Wymiary: . . . . . . . . . 85 × 70 × 106 mm
Waga: . . . . . . . . . . . 175 g
Z zastrzeżeniem możliwości zmian.
wwwwww..iimmggssttaaggeelliinnee..ccoomm
PL
E

This manual suits for next models

1

Other Monacor Batteries Charger manuals

Monacor ATS-50PS User manual

Monacor

Monacor ATS-50PS User manual

Monacor BCD-1200 User manual

Monacor

Monacor BCD-1200 User manual

Monacor JTS W4-CH1 User manual

Monacor

Monacor JTS W4-CH1 User manual

Monacor BCD-100 User manual

Monacor

Monacor BCD-100 User manual

Monacor BC-2002 USB User manual

Monacor

Monacor BC-2002 USB User manual

Monacor TXA-802PS User manual

Monacor

Monacor TXA-802PS User manual

Monacor BC-1800L User manual

Monacor

Monacor BC-1800L User manual

Monacor BC-600L User manual

Monacor

Monacor BC-600L User manual

Monacor JTS TG-10CH2 User manual

Monacor

Monacor JTS TG-10CH2 User manual

Monacor ATS-850PS User manual

Monacor

Monacor ATS-850PS User manual

Monacor TXA-800PS User manual

Monacor

Monacor TXA-800PS User manual

Monacor BC-4HQ User manual

Monacor

Monacor BC-4HQ User manual

Monacor JTS CH-2 User manual

Monacor

Monacor JTS CH-2 User manual

Monacor TXA-12C User manual

Monacor

Monacor TXA-12C User manual

Monacor JTS CH-8 User manual

Monacor

Monacor JTS CH-8 User manual

Monacor BC-1800L User manual

Monacor

Monacor BC-1800L User manual

Monacor IMG STAGELINE RBC-1AA User manual

Monacor

Monacor IMG STAGELINE RBC-1AA User manual

Monacor JTS TG-10CH18 User manual

Monacor

Monacor JTS TG-10CH18 User manual

Monacor JTS 850CH-2 User manual

Monacor

Monacor JTS 850CH-2 User manual

Monacor JTS TG-10CH18 User manual

Monacor

Monacor JTS TG-10CH18 User manual

Monacor BC-6000 User manual

Monacor

Monacor BC-6000 User manual

Monacor BC-600L User manual

Monacor

Monacor BC-600L User manual

Monacor BC-1000L User manual

Monacor

Monacor BC-1000L User manual

Monacor ATS-60PS User manual

Monacor

Monacor ATS-60PS User manual

Popular Batteries Charger manuals by other brands

Lamarche A75D Installation and operation manual

Lamarche

Lamarche A75D Installation and operation manual

FRO­NIUS Acctiva easy Traction 1204 T operating instructions

FRO­NIUS

FRO­NIUS Acctiva easy Traction 1204 T operating instructions

Proseries PSW-70300A owner's manual

Proseries

Proseries PSW-70300A owner's manual

MICRO-POWER Sharp 20 user manual

MICRO-POWER

MICRO-POWER Sharp 20 user manual

Tripp Lite 3-Phase Battery Cabinet Extended-Run owner's manual

Tripp Lite

Tripp Lite 3-Phase Battery Cabinet Extended-Run owner's manual

Lamarche MXHF Installation and operation manual

Lamarche

Lamarche MXHF Installation and operation manual

KraftPowercon PRX Series manual

KraftPowercon

KraftPowercon PRX Series manual

Matt:e Connect-EV installation manual

Matt:e

Matt:e Connect-EV installation manual

Rocket Fish RF-GWII1121 Guide d'installation rapide

Rocket Fish

Rocket Fish RF-GWII1121 Guide d'installation rapide

Gema iONcharge 4.0 Installation and operating instructions

Gema

Gema iONcharge 4.0 Installation and operating instructions

Matt:e ARD-6-32-M-SPD installation manual

Matt:e

Matt:e ARD-6-32-M-SPD installation manual

LRP QUADRA PRO 2 user guide

LRP

LRP QUADRA PRO 2 user guide

Black Box VLC36SK-HD user manual

Black Box

Black Box VLC36SK-HD user manual

PowerWise Renew instruction manual

PowerWise

PowerWise Renew instruction manual

Prologix SOLAR PL6100 Operator's manual

Prologix

Prologix SOLAR PL6100 Operator's manual

Itec CHARGER2A4B user guide

Itec

Itec CHARGER2A4B user guide

Meanwell GC120 instruction manual

Meanwell

Meanwell GC120 instruction manual

OzCharge OC-W12120P owner's manual

OzCharge

OzCharge OC-W12120P owner's manual

manuals.online logo
manuals.online logoBrands
  • About & Mission
  • Contact us
  • Privacy Policy
  • Terms and Conditions

Copyright 2025 Manuals.Online. All Rights Reserved.