manuals.online logo
Brands
  1. Home
  2. •
  3. Brands
  4. •
  5. Monacor
  6. •
  7. Batteries Charger
  8. •
  9. Monacor JTS W4-CH1 User manual

Monacor JTS W4-CH1 User manual

www.jts-europe.com
W4-CH1
Bestell-Nr. • Order No. 1000019
W4-CH12
Bestell-Nr. • Order No. 1000020
Ladestation • Charging Station
®
Vertrieb von JTS-Produkten – Distribution of JTS products
MONACOR INTERNATIONAL GmbH & Co. KG, Zum Falsch 36, 28307 Bremen, Germany
Copyright©by MONACOR INTERNATIONAL. All rights reserved. A-2085.99.01.12.2020
1 32
DEUTSCH
These instructions are intended for users without
any specific technical knowledge. Please read the
instructions carefully prior to operation and keep
them for later reference.
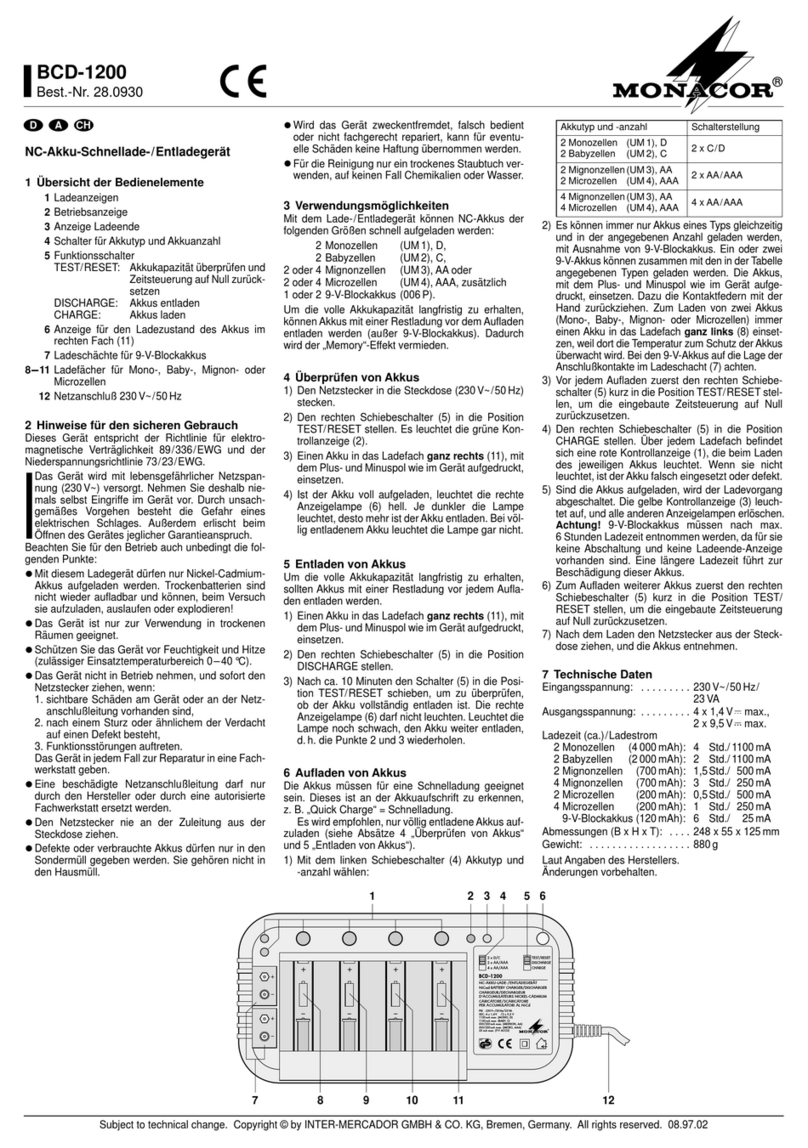
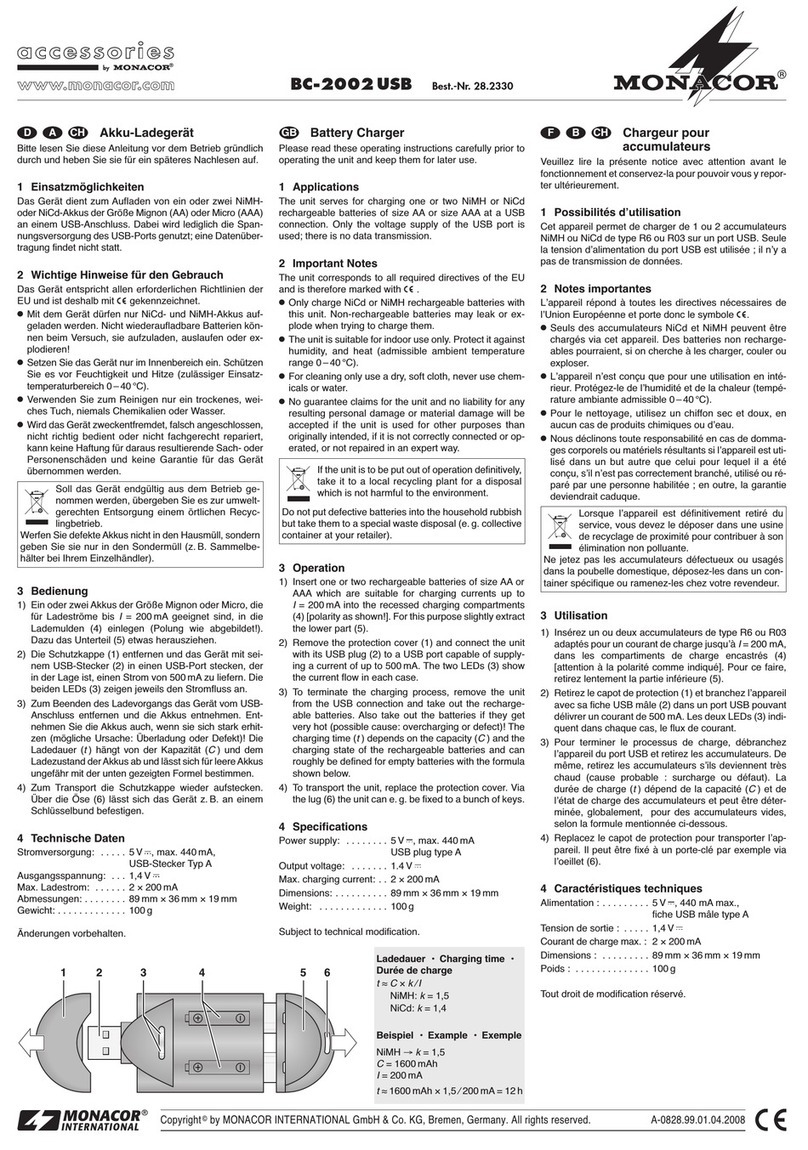
1 Applications
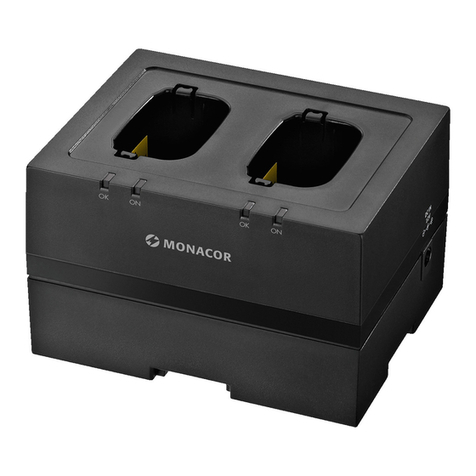
The charging stations are used to charge NiMH bat-
teries inserted in the wireless microphones CS-W4T/…
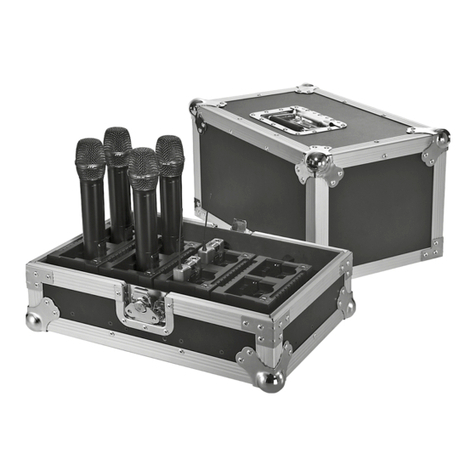
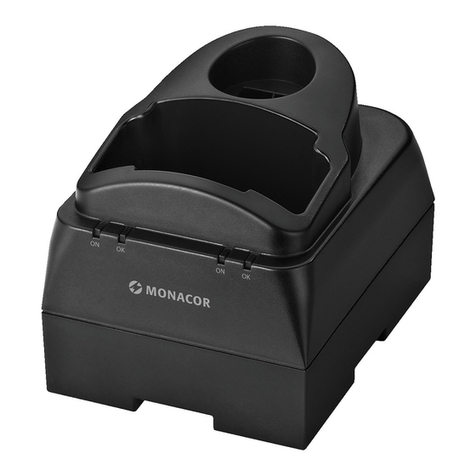
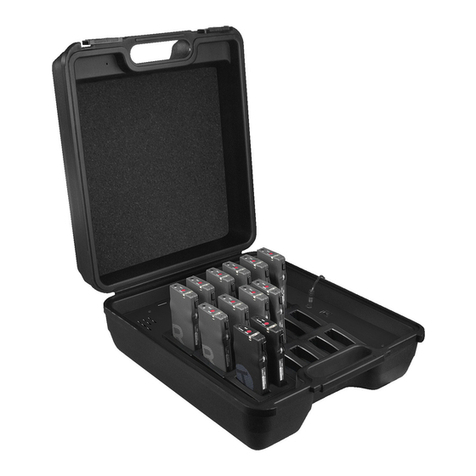
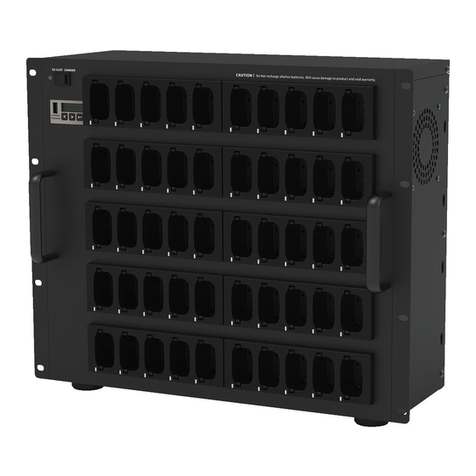
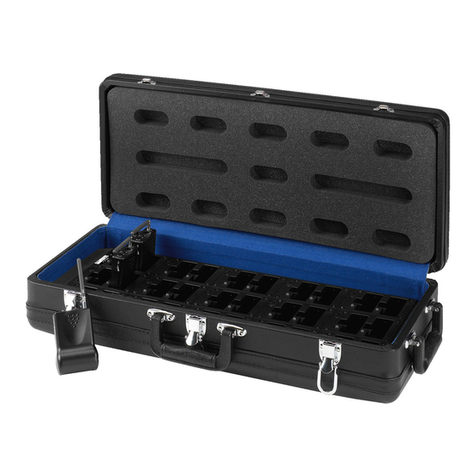
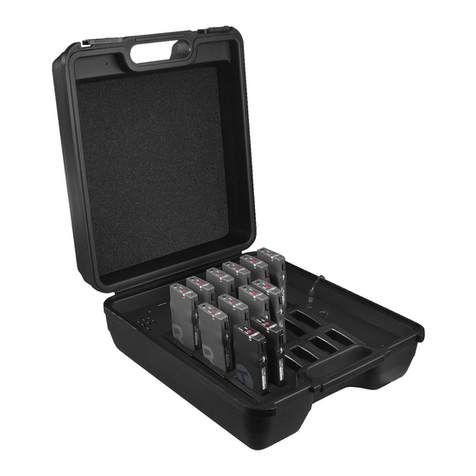
The charging station W4-CH1 will charge a single mi-
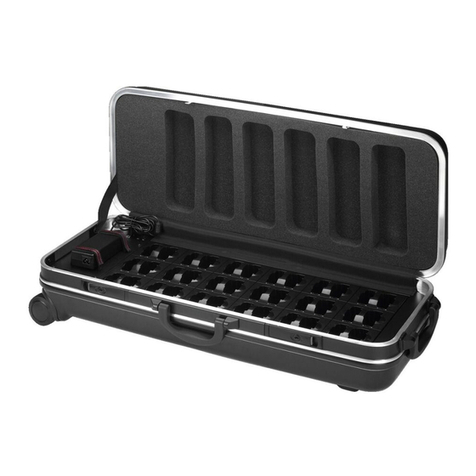
crophone; W4-CH12 provides twelve charging slots
so that the batteries of twelve microphones can be
charged at the same time. In addition, W4-CH12 can be
used to transport the microphones. A cover for closing
the charging case is available as a separate accessory
(W4-CH12/COVER).
2 Safety Notes
The product corresponds to all relevant directives of
the EU and is therefore marked with .
WARNING The power supply unit uses dangerous
mains voltage. Leave servicing to skilled
personnel only. Inexpert handling may
result in electric shock.
•
Only use this charging station for charging NiMH
batteries. Non-rechargeable batteries may leak or
even explode if you try to charge them!
•
Always insert batteries of the same type into the
wireless microphone and always replace the batter-
ies in pairs.
•
The product is suitable for indoor use only. Protect it
against dripping water, splash water and high air hu-
midity. The admissible ambient temperature range
is 0–40°C.
•
The heat produced inside the charging station must
be dissipated by air circulation. Never cover the
charging case W4-CH12 and its lateral air vents while
charging batteries.
•
Do not use the product and immediately disconnect
it from the mains socket
1. if a unit or the mains cable is visibly damaged,
2. if a defect might have occurred after a unit was
dropped or suffered a similar accident,
3. if malfunctions occur.
In any case, the product must be repaired by skilled
personnel.
•
Never pull the mains cable to disconnect the mains
plug from the mains socket, always seize the plug.
•
For cleaning only use a dry, soft cloth; never use
water or chemicals.
•
No guarantee claims for the product and no liability
for any resulting personal damage or material dam-
age will be accepted if the product is not correctly
used or if it is not expertly repaired.
If the product is to be put out of operation
definitely, dispose of the product in accord-
ance with local regulations.
3 Charging Batteries
1)
Connect the power supply unit to the jack of the
charging station and to a mains socket (230 V/50 Hz).
W4-CH1 is now switched on. To switch on W4-CH12,
use the switch next to the jack. The LED (3) is per-
manently green as long as no microphone is inserted
into the corresponding charging slot.
2)
When inserting a microphone into the charging slot,
make sure the contacts on the lower side of the mi-
crophone touch the contacts (1) in the charging slot.
If required, remove the gooseneck.
The LED keeps flashing in green while the
batteries are being recharged. If the LED “Alert” (2)
starts flashing in red, a fault has been detected (e.g.
battery defective).
3)
When the batteries have been fully charged, the
LED will be permanently green again. The micro-
phone can be removed from the slot.
4)
After the batteries have been charged, switch off
the charging station or disconnect the mains plug
from the mains socket.
Never put batteries in the household waste.
Always dispose of the batteries in accord-
ance with local regulations.
4 Specifications
Charging time: . . . approx. 5 hours for rech. 2000 mAh
batteries
Power supply: . . . . via power supply unit provided and
connected to 230V/50Hz
Dimensions (W × H × D)/Weight
W4-CH1:. . . . . . . 150 × 70 × 75mm/187g
W4-CH12:. . . . . . 542 × 240 × 463mm/11kg
Subject to technical modification.
Diese Anleitung richtet sich an Benutzer ohne be-
sondere Fachkenntnisse. Bitte lesen Sie die Anlei-
tung vor dem Betrieb gründlich durch und heben
Sie sie für ein späteres Nachlesen auf.
1 Verwendungsmöglichkeiten
Die Ladestationen dienen zum Aufladen von NiMH-
Akkus, die in den Funkmikrofonen CS-W4T/… einge-
setzt sind. Die W4-CH1 ist für ein einzelnes Mikrofon
vorgesehen. Bei der W4-CH12 sind zwölf Ladeschächte
vorhanden, sodass die Akkus von zwölf Mikrofonen
gleichzeitig aufgeladen werden können. Zudem las-
sen sich die Mikrofone im W4-CH12 transportieren. Ein
Deckel zum Verschließen des Ladekoffers ist separat
erhältlich (W4-CH12/COVER).
2 Sicherheitshinweise
Das Produkt entspricht allen relevanten Richtlinien der
EU und trägt deshalb das -Zeichen.
WARNUNG Das Netzgerät wird mit lebensgefährli-
cher Netzspannung versorgt. Nehmen
Sie deshalb niemals selbst Eingriffe
daran vor! Es besteht die Gefahr eines
elektrischen Schlages.
•
Mit der Ladestation dürfen nur NiMH-Akkus geladen
werden. Nicht wiederaufladbare Batterien können
beim Versuch sie aufzuladen, auslaufen oder explo-
dieren!
•
Setzen Sie nur Akkus gleichen Typs in das Funkmikro-
fon ein und tauschen Sie die Akkus immer paarweise
aus.
•
Das Produkt ist nur zur Verwendung im Innenbereich
geeignet. Schützen Sie es vor Tropf- und Spritzwas-
ser sowie hoher Luftfeuchtigkeit. Der zulässige Ein-
satztemperaturbereich beträgt 0–40°C.
•
Die in der Ladestation entstehende Wärme muss
durch Luftzirkulation abgegeben werden. Decken Sie
darum den Ladekoffer W4-CH12 und dessen seitliche
Lüftungsöffnungen während des Ladens nicht ab.
•
Benutzen Sie das Produkt nicht und ziehen Sie sofort
den Netzstecker aus der Steckdose, wenn:
1. sichtbare Schäden an einem Gerät oder am Netz-
kabel vorhanden sind,
2. nach einem Sturz oder Ähnlichem der Verdacht
auf einen Defekt besteht,
3. Funktionsstörungen auftreten.
Lassen Sie Schäden in jedem Fall in einer Fachwerk-
statt reparieren.
•
Ziehen Sie den Netzstecker nie am Kabel aus der
Steckdose, fassen Sie immer am Stecker an.
•
Säubern Sie das Produkt nur mit einem trockenen,
weichen Tuch, niemals mit Wasser oder Chemikalien.
•
Wird das Produkt falsch verwendet oder nicht fach-
gerecht repariert, kann keine Haftung für daraus re-
sultierende Sach- oder Personenschäden und keine
Garantie für das Produkt übernommen werden.
Soll das Produkt endgültig aus dem Be-
trieb genommen werden, entsorgen Sie es
gemäß den örtlichen Vorschriften.
3 Akkus aufladen
1) Das Netzgerät mit der Buchse der Ladestation und
mit einer Steckdose (230V/50 Hz) verbinden. Die
W4-CH1 ist damit eingeschaltet. Die W4-CH12 mit
dem Schalter neben der Buchse einschalten. Die
LED (3) leuchtet konstant grün, solange kein Mik-
rofon im zugehörigen Ladeschacht steckt.
2)
Ein Mikrofon so in den Ladeschacht stecken, dass
seine Kontakte auf der Unterseite die Kontakte (1) im
Ladeschacht berühren. Bei Bedarf den Schwanenhals
zuvor entfernen.
Während des Ladevorgangs blinkt die LED
grün. Blinkt die LED „Alert“(2) rot, wurde ein Fehler
erkannt (z.B. Akku defekt).
3) Sind die Akkus voll aufgeladen, leuchtet die LED
wieder konstant grün. Das Mikrofon kann aus dem
Ladeschacht genommen werden.
4)
Nach der Benutzung die Ladestation ausschalten
bzw. den Netzstecker aus der Steckdose ziehen.
Akkus dürfen nicht im Hausmüll entsorgt
werden. Geben Sie sie gemäß den örtlichen
Vorschriften in den Sondermüll.
4 Technische Daten
Ladedauer: . . . . . . ca. 5 Std. bei 2000-mAh-Akkus
Stromversorgung: über beiliegendes Netzgerät an
230V/50Hz
Abmessungen (B × H × T)/Gewicht
W4-CH1:. . . . . . . 150 × 70 × 75mm/187g
W4-CH12:. . . . . . 542 × 240 × 463mm/11kg
Änderungen vorbehalten.
ENGLISH
www.jts-europe.com
®
Vertrieb von JTS-Produkten – Distribution of JTS products
MONACOR INTERNATIONAL GmbH & Co. KG, Zum Falsch 36, 28307 Bremen, Germany
Copyright©by MONACOR INTERNATIONAL. All rights reserved. A-2085.99.01.12.2020
1 32
Estas instrucciones van dirigidas a usuarios sin
ningún conocimiento técnico específico. Lea
atentamente estas instrucciones antes del fun-
cionamiento y guárdelas para usos posteriores.
1 Aplicaciones
Estas estaciones de carga sirven para cargar las bate-
rías NiMH integradas en los micrófonos inalámbricos
CS-W4T/… La estación de carga W4-CH1 puede cargar
un micrófono; la W4-CH12 tiene doce ranuras de carga
para cargar las baterías de 12 micrófonos a la vez.
Además, la W4-CH12 puede utilizarse para transpor-
tar los micrófonos. También puede comprarse como
accesorio una tapa para cerrar la maleta de carga
(W4-CH12/COVER).
2 Notas de Seguridad
El producto cumple con todas las directivas relevantes
de la UE y por lo tanto está marcado con el símbolo .
ADVERTENCIA
El alimentador utiliza un voltaje peli-
groso. Deje el mantenimiento en manos
del personal cualificado. El manejo inex-
perto puede provocar una descarga.
•
Utilice esta estación de carga solamente para cargar
baterías NiMH. Si intenta cargar baterías no recarga-
bles, podrían derramarse o incluso explotar.
•
Asegúrese de insertar baterías del mismo tipo en el
micrófono inalámbrico y sustitúyalas siempre de dos
en dos.
•
Este producto está adecuado sólo para interiores.
Protéjalo contra goteos, salpicaduras y humedad
elevada. Rango de temperatura ambiente admisi-
ble: 0–40ºC.
•
El calor producido dentro de la estación de carga
tiene que disiparse mediante la circulación del aire.
No tape nunca la maleta de carga W4-CH12 ni sus
rejillas laterales de ventilación mientras cargue las
baterías.
•
No utilice este producto y desconéctelo inmediata-
mente de la toma de corriente si:
1. Un aparato o el cable de corriente están visible-
mente dañados.
2. El aparato ha sufrido daños después de una caída
o accidente similar.
3. No funciona correctamente.
Sólo un técnico puede reparar el producto bajo cual-
quier circunstancia.
•
No tire nunca del cable de corriente para desconec-
tar su conector de la toma de corriente, tire siempre
del conector.
•
Utilice sólo un paño suave y seco para la limpieza; no
utilice nunca ni agua ni productos químicos.
•
No podrá reclamarse garantía o responsabilidad al-
guna por cualquier daño personal o material resul-
tante si el producto no se utiliza adecuadamente o
no lo repara un técnico.
Si el producto se va a dejar fuera de servicio
definitivamente, deshágase del producto
según las normativas locales.
3 Cargar las Baterías
1) Conecte el alimentador a la toma de la estación de
carga una toma de corriente (230V/50 Hz). La W4-CH1
quedará conectada. Para conectar la W4-CH12, utilice
el interruptor junto a la toma. El LED (3) permane-
cerá iluminado en verde mientras no se inserte un
micrófono en la ranura de carga correspondiente.
2) Cuando inserte un micrófono en la ranura de carga,
asegúrese de que los contactos de la cara inferior
del micrófono tocan los contactos (1) de la ranura
de carga. Si es necesario, extraiga el cuello de cisne.
Mientras se carguen las baterías, el LED par-
padeará en verde. Si el LED “Alert” (2) empieza a
parpadear en rojo, significa que se ha detectado un
error (p.ej. baterías defectuosas).
3)
Cuando las baterías se hayan cargado completamen-
te, el LED quedará iluminado en verde de nuevo. El
micrófono ya se puede extraer de la ranura.
4)
Cuando las baterías se hayan cargado completa-
mente, desconecte la estación de carga o desconecte
el conector de la toma de corriente.
No deposite nunca las baterías gastadas en
el contenedor normal. Deshágase de las ba-
terías según la normativa local.
4 Especificaciones
Tiempo de carga: . 5 horas aprox. para baterías rec. de
2000mAh
Alimentación: . . . . mediante alimentador entregado y
conectado a 230V/50Hz
Dimensiones (B × H × P)/Peso
W4-CH1:. . . . . . . 150 × 70 × 75mm/187g
W4-CH12:. . . . . . 542 × 240 × 463mm/11kg
Sujeto a modificaciones técnicas.
Cette notice s’adresse aux utilisateurs sans
connaissances particulières. Veuillez lire la pré-
sente notice avec attention avant le fonctionne-
ment et conservez-la pour pouvoir vous y repor-
ter ultérieurement.
1 Possibilités d’utilisation
Les stations de charge servent pour charger les accu-
mulateurs NiMH utilisés dans les microphones sans fil
CS-W4T/… La W4-CH1 est prévue pour un seul micro-
phone. La W4-CH12 est dotée de 12 compartiments
de charge permettant ainsi de charger simultanément
les accumulateurs de 12 microphones. Elle permet en
plus de transporter les microphones. Un couvercle pour
fermer la valise de charge est disponible séparément
(W4-CH12 /COVER).
2 Conseils de sécurité
Le produit répond à toutes les directives nécessaires
de l’Union Européenne et porte donc le symbole .
AVERTISSEMENT Le bloc secteur est alimenté par une
tension dangereuse. Ne touchez ja-
mais l’intérieur de l’appareil. Il y a
risque de décharge électrique.
•
La station de charge permet de charger uniquement
des accumulateurs NiMH. Il ne faut pas charger des
batteries non rechargeables, elles pourraient couler
ou exploser.
•
Insérez toujours des accumulateurs de même type
dans le microphone sans fil et remplacez les accumu-
lateurs toujours par paire.
•
Le produit n’est conçu que pour une utilisation en
intérieur. Protégez-le des éclaboussures, de tout type
de projections d’eau et d’une humidité élevée de l’air.
La température ambiante admissible est 0–40 °C.
•
La chaleur dégagée dans la station de charge doit
être évacuée par une circulation correcte de l’air. En
aucun cas, la valise de charge W4-CH12 et les ouïes
latérales de ventilation ne doivent être obturées
pendant la charge.
•
N’utilisez le produit et débranchez immédiatement
dans les cas suivants :
1. un appareil ou le cordon secteur présentent des
dommages visibles.
2. après une chute ou accident similaire, vous avez
un doute sur l’état de l’appareil.
3. des dysfonctionnements apparaissent.
Dans tous les cas, les dommages doivent être réparés
par un technicien spécialisé.
•
Ne débranchez jamais l’appareil en tirant sur le cor-
don secteur ; retirez toujours le cordon secteur en
tirant la fiche.
•
Pour le nettoyage, utilisez un chiffon sec et doux, en
aucun cas de produits chimiques ou d’eau.
•
Nous déclinons toute responsabilité en cas de dom-
mages corporels ou matériels résultants si le produit
est utilisé dans un but autre que celui pour lequel il
a été conçu, s’il n’est pas réparé par une personne
habilitée ; en outre, la garantie deviendrait caduque.
Lorsque le produit est définitivement retiré
du service, éliminez-le conformément aux
directives locales.
3 Charger les accumulateurs
1)
Reliez le bloc secteur à la prise de la station de charge
et à une prise secteur 230V/50Hz. La W4-CH1 est
alors allumée. Allumez la W4-CH12 avec l’interrup-
teur situé à côté de la prise. La LED (3) brille tout
le temps en vert tant qu’un microphone n’est pas
positionné dans le compartiment de charge corres-
pondant.
2)
Placez un microphone dans le compartiment de
charge de telle sorte que ses contacts sur la face
inférieure touchent les contacts (1) dans le compar-
timent de charge. Si besoin, retirez préalablement
le col de cygne.
Pendant la charge, la LED clignote en vert. Si
la LED «Alert» (2) clignote en rouge, un problème a
été détecté (par exemple accumulateur défectueux).
3)
Lorsque les accumulateurs sont chargés, la LED
brille à nouveau constamment en vert. Le micro-
phone peut être retiré du compartiment de charge.
4) Après utilisation, éteignez la station de charge ou
débranchez la prise du secteur.
Les accumulateurs ne doivent pas être dépo-
sés dans la poubelle domestique. Ils doivent
être déposés dans les containers dédiés
selon les directives locales.
4 Caractéristiques techniques
Durée de charge :. 5 heures environ pour accumula-
teurs 2000mAh
Alimentation : . . . via bloc secteur livré relié à
230V/50Hz
Dimensions (l × h × p)/poids
W4-CH1 : . . . . . . 150 × 70 × 75 mm / 187 g
W4-CH12 : . . . . . 542 × 240 × 463 mm / 11 kg
Tout droit de modification réservé.
W4-CH1
Réf. num. • Ref. núm. 1000019
W4-CH12
Réf. num. • Ref. núm. 1000020
Station de charge • Estación de Carga
ESPAÑOL FRANÇAIS
This manual suits for next models

3

Other Monacor Batteries Charger manuals

Monacor ATS-50PS User manual

Monacor

Monacor ATS-50PS User manual

Monacor BC-29 User manual

Monacor

Monacor BC-29 User manual

Monacor JTS TG-10CH18 User manual

Monacor

Monacor JTS TG-10CH18 User manual

Monacor JTS TG-64CH18 User manual

Monacor

Monacor JTS TG-64CH18 User manual

Monacor ATS-60PS User manual

Monacor

Monacor ATS-60PS User manual

Monacor ATS-12CB User manual

Monacor

Monacor ATS-12CB User manual

Monacor BCD-1200 User manual

Monacor

Monacor BCD-1200 User manual

Monacor img Stage Line ATS-162PS User manual

Monacor

Monacor img Stage Line ATS-162PS User manual

Monacor BC-600L User manual

Monacor

Monacor BC-600L User manual

Monacor BC-1800L User manual

Monacor

Monacor BC-1800L User manual

Monacor img Stage Line ATS-12CB User manual

Monacor

Monacor img Stage Line ATS-12CB User manual

Monacor img Stage Line ATS-25C User manual

Monacor

Monacor img Stage Line ATS-25C User manual

Monacor BC-6000 User manual

Monacor

Monacor BC-6000 User manual

Monacor JTS TG-10CH18 User manual

Monacor

Monacor JTS TG-10CH18 User manual

Monacor TXA-800PS User manual

Monacor

Monacor TXA-800PS User manual

Monacor TXA-802PS User manual

Monacor

Monacor TXA-802PS User manual

Monacor IRS-200PS User manual

Monacor

Monacor IRS-200PS User manual

Monacor JTS CH-2 User manual

Monacor

Monacor JTS CH-2 User manual

Monacor ATS-16PS User manual

Monacor

Monacor ATS-16PS User manual

Monacor IMG STAGELINE RBC-1AA User manual

Monacor

Monacor IMG STAGELINE RBC-1AA User manual

Monacor JTS TG-10CH2 User manual

Monacor

Monacor JTS TG-10CH2 User manual

Monacor TXA-800PS User manual

Monacor

Monacor TXA-800PS User manual

Monacor ATS-850PS User manual

Monacor

Monacor ATS-850PS User manual

Monacor BCD-100 User manual

Monacor

Monacor BCD-100 User manual

Popular Batteries Charger manuals by other brands

GRAUPNER Polaron EX Operating	 instruction

GRAUPNER

GRAUPNER Polaron EX Operating instruction

lifeCharge SlimeLife user guide

lifeCharge

lifeCharge SlimeLife user guide

NOCO Genius GENIUS Series user guide

NOCO Genius

NOCO Genius GENIUS Series user guide

ABB HT564225 Operation manual

ABB

ABB HT564225 Operation manual

DeWalt DCB1104P3 Original instructions

DeWalt

DeWalt DCB1104P3 Original instructions

SilverBack SP-UCH4+ user guide

SilverBack

SilverBack SP-UCH4+ user guide

Tuncmatik PRO DC CHARGER 60 kW user manual

Tuncmatik

Tuncmatik PRO DC CHARGER 60 kW user manual

ANDI WIRELESS VENT MOUNT CHARGER manual

ANDI

ANDI WIRELESS VENT MOUNT CHARGER manual

ABB HT568857 Operation manual

ABB

ABB HT568857 Operation manual

AEG PBT 7224 MB Instructions for use

AEG

AEG PBT 7224 MB Instructions for use

PowerTech MB3910 instruction manual

PowerTech

PowerTech MB3910 instruction manual

Recyko D451 instruction manual

Recyko

Recyko D451 instruction manual

Schwaiger LISM0300 user guide

Schwaiger

Schwaiger LISM0300 user guide

Sony BC-M50 operating instructions

Sony

Sony BC-M50 operating instructions

TYSTOR IPC 1225 manual

TYSTOR

TYSTOR IPC 1225 manual

Metabo HPT UC18YTSL Safety instructions and instruction manual

Metabo HPT

Metabo HPT UC18YTSL Safety instructions and instruction manual

Dometic IU1012 Installation and operating manual

Dometic

Dometic IU1012 Installation and operating manual

FoxESS A022KP1-E1-R user manual

FoxESS

FoxESS A022KP1-E1-R user manual

manuals.online logo
manuals.online logoBrands
  • About & Mission
  • Contact us
  • Privacy Policy
  • Terms and Conditions

Copyright 2025 Manuals.Online. All Rights Reserved.