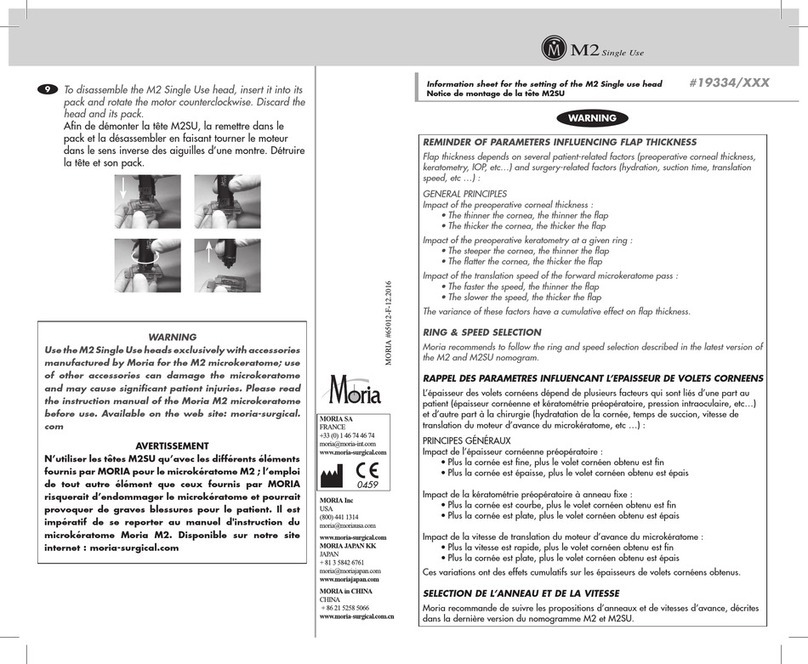
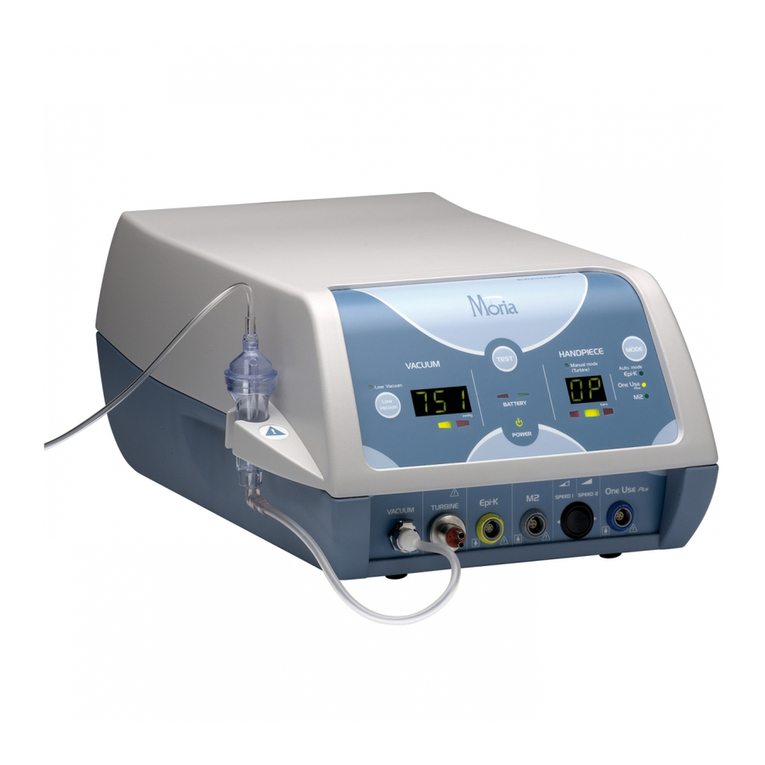
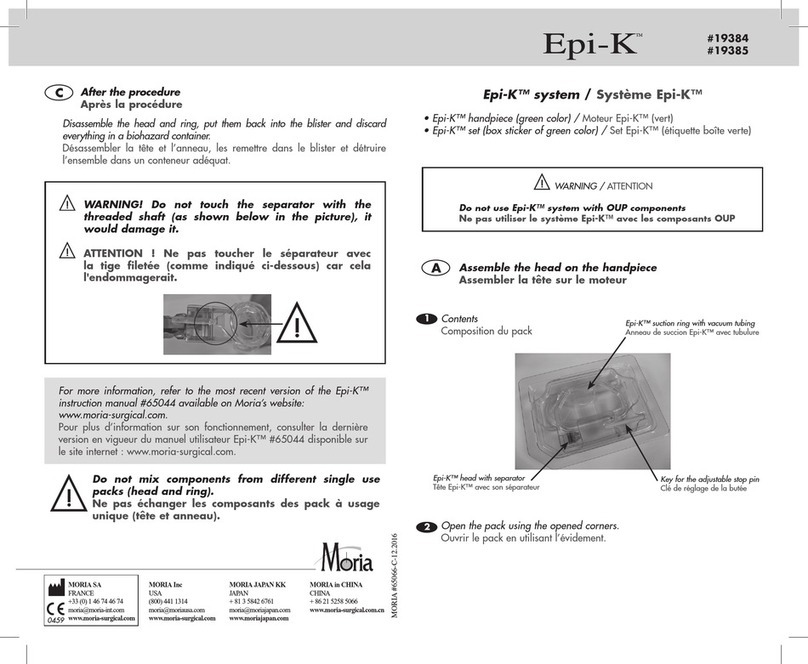
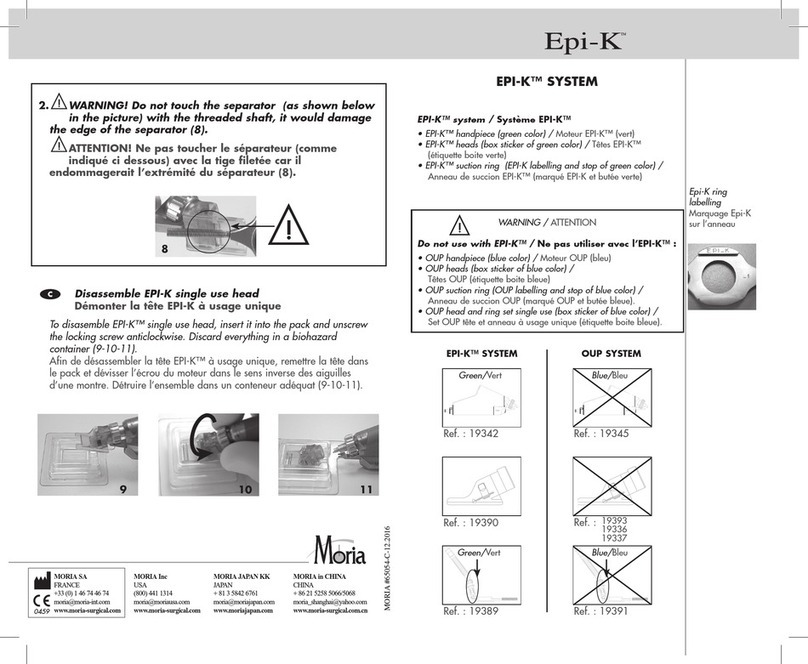
MORIA CB User manual

Ref.: 65005
Année de première mise sur le marché : 1998
0459
EN - CB, CBm, CBSU for LASIK surgery
INSTRUCTION MANUAL.........................1-16
FR - CB, CBm, CBSU pour chirurgie LASIK
MANUEL UTILISATEUR.........................17-32
ES - CB, CBm, CBSU para cirugía LASIK
MANUAL DE INSTRUCCIONES............33-48
IT - CB, CBm, CBSU per la chirurgia LASIK
MANUALE DI ISTRUZIONI ....................49-64
DE - CB, CBm, CBSU für LASIK-Chirurgie
BENUTZERHANDBUCH........................65-80
NL - CB, CBm, CBSU voor LASIK chirurgie
INSTRUCTIEHANDLEIDING .................81-96
PT - CB, CBm, CBSU para LASIK
MANUAL DE INSTRUÇÕES ................97-112
SV - CB, CBm, CBSU för LASIK-kirurgi
INSTRUKTIONSMANUAL..................113-128
TR - CB, CBm, CBSU LASIK için
KULLANIM TALİMATLARI
EL KİTABI ...........................................129-144
MORIA S.A. – 15, rue GEORGES BESSE - 92160 ANTONY – France
#65005-F-02.2017

#65005-F-02.2017 MORIA 1
CONTENTS
1 DISCLAIMER .................................................................................................................................... 2
1.1 MAINTENANCE................................................................................................................................. 2
1.2 USE OF GENERIC PRODUCTS AND REUSE OF SINGLE-USE CONSUMABLES...................... 2
2 EQUIPMENT LIST............................................................................................................................. 3
3 REGULATORY INFORMATION ....................................................................................................... 4
4 LABELING INFORMATION.............................................................................................................. 4
5 IMPORTANT INFORMATION ........................................................................................................... 5
5.1 DESCRIPTION .................................................................................................................................. 5
5.2 INDICATIONS .................................................................................................................................... 5
5.3 HEAD CALIBRATION VALUE AND FLAP THICKNESS.................................................................. 5
5.4 CONTRAINDICATIONS .................................................................................................................... 5
5.5 WARNINGS ....................................................................................................................................... 6
5.6 POTENTIAL ADVERSE EVENTS ..................................................................................................... 6
5.7 PRECAUTIONS ................................................................................................................................. 6
5.8 PRODUCT COMPLAINTS ................................................................................................................ 7
5.9 PACKAGING...................................................................................................................................... 7
6 INSTALLATION AND CONNECTION .............................................................................................. 8
7 OPERATION...................................................................................................................................... 9
8 TROUBLESHOOTING ...................................................................................................................... 10
9 CARE & MAINTENANCE ................................................................................................................. 10
9.1 INTRODUCTION ............................................................................................................................... 10
9.2 INITIAL TREATMENT AND STORAGE ............................................................................................ 10
9.3 CLEANING-DISINFECTION-STERILIZATION-STORAGE OF THE TURBINE.............................. 11
9.4 CLEANING-DISINFECTION-STERILIZATION-STORAGE OF THE FLEXIBLE HOSE ................. 12
9.5 CLEANING-DISINFECTION-STERILIZATION-STORAGE OF THE SUCTION RINGS................. 13
10 WARRANTY...................................................................................................................................... 14
10.1 SCOPE OF WARRANTY .................................................................................................................. 14
10.2 NON-APPLICATION OF WARRANTY.............................................................................................. 14
10.3 WARRANTY PERIOD ....................................................................................................................... 14
10.4 LIABILITY........................................................................................................................................... 14
11 DRAWINGS ....................................................................................................................................... 15

2 MORIA #65005-F-02.2017
This user manual describes every information related to the use and maintenance of CB-CBSU microkeratome
(associated with a suction ring on a patient’s eye), its heads (reusable and single-use) and accessories.
The latest version of user guides and additional information are available on Moria’s restricted-access
website: http://www.moria-surgical.com. You must register to access it.
1 DISCLAIMER
1.1 MAINTENANCE
The CB-CBm-CBSU system has been designed for optimal operation, provided that the recommendations
listed in this user manual are followed carefully. If, for any reasons, the system does not perform properly,
have it checked immediately by MORIA. In order to maintain the original performance of your microkeratome,
MORIA strongly recommends annual maintenance and servicing of all its reusable products.
As only MORIA and its agents are fully expert in MORIA products, servicing and maintenance must be carried
out by MORIA or its approved agents.
MORIA shall not be held liable for any malfunction or damage to the apparatus, poor results, or surgical
complications due to maintenance being having been carried out by an unqualied operator or third party.
Any such unauthorized intervention shall render the guarantee and any maintenance contract null and void.
1.2 USE OF GENERIC PRODUCTS AND REUSE OF SINGLE-USE CONSUMABLES
The materials used in the microkeratome blade, blade holder, and head have been selected for their
biocompatibility and sliding characteristics. The dimensions and tolerances of the blade have been determined
in consideration of the dimensions and tolerances of the head of the keratome. MORIA’s manufacturing and
inspection procedures guarantee there is no conict in dimensions between head and blade, and that the
blade will slide smoothly in the head.
Single-use devices should not be re-used. Doing so will negatively affect their clinical performance
and increase the potential for adverse events.
The reuse of single-use products, or the use of consumables other than those supplied by MORIA,
may entail serious surgical consequences for the patient and damage the microkeratome.
MORIA shall not be held liable in the event of a malfunction or damage to the microkeratome, poor results or
surgical complications due to the reuse of a single-use product, or the use of consumables other than those
supplied by MORIA.
MORIA handpieces must only be connected to MORIA devices (console unit, heads, suction rings,
etc.).
All warranties become null and void if the microkeratome degrades or malfunctions due to such practices.

#65005-F-02.2017 MORIA 3
2 EQUIPMENT LIST
Equipment described in this user guide MORIA reference
Microkeratome CB manual suction rings (size H, -1, 0, +1, +2)
19309/H
19309/-1
19309/0
19309/1
19309/2
Microkeratome CB head 19307/xxx
Microkeratome CBm head 19332/110
19332/130
Box of 10 sterile CBm blades 19333
Box of 10 sterile heads CBSU (for LASIK surgery) 19312/110
19312/130
Devices associated with the equipment described in this user guide MORIA reference
Pneumatic turbine hose 19353
Pneumatic turbine for CB microkeratome 19303
EVOLUTION 2 console 19350
EVOLUTION 3 console 19360
EVOLUTION 3E console (serial number 5000 and above) 19380
EVOLUTION 2 footswitch 19351
EVOLUTION 3 footswitch (also for EVOLUTION 3E serial number 7000 and above) 19361
EVOLUTION 3E footswitch 19381
EVOLUTION 3E (IPX8) footswitch 19381J
EVOLUTION 3E footswitch (for China) 19381C
Accessories MORIA reference
Sterilization box for the turbine, turbine hose and metallic rings 22519139
Tonometer 19042
Aspiration tubing 19138
User information MORIA reference
CB-CBm-CBSU user manual (for Lasik surgery) 65005
EVOLUTION 2 user manual (FR) 65015
EVOLUTION 2 user manual (EN) 65016
EVOLUTION 3 console user manual (FR) 65037
EVOLUTION 3 console user manual (EN) 65038
EVOLUTION 3E console user manual (serial number 5000 and above) 65060/INTL
Annexe “Guidance and manufacturer’s declaration: electromagnetic emissions and immunity” 65073
CB-CBSU nomogram (FR) 65025
CB-CBSU nomogram (EN) 65026
CB-CBSU nomogram (XX=other)(MORIA website) 65026XX
Information sheet for mounting the CB Single Use head (packaged with #19312/xxx) 65001

4 MORIA #65005-F-02.2017
3 REGULATORY INFORMATION
MORIA S.A.
15, rue Georges Besse - 92160 Antony - France
Phone: +33 (0) 146 744 674
Fax: +33 (0) 146 744 670
http://www.moria-surgical.com
Customer Service Information Contact your local dealer or MORIA
EUROPE 0459 in compliance with European Directive MDD 93/42/EEC
USA Registered with the Food and Drug Administration
Caution USA only: Federal law restricts the use of this device to physicians or
licensed practitioners.
Electrical Safety Standard IEC 60601 - Classe II BF
For EU customers only: this symbol indicates that within the European Union, the
product must be discarded in a separate collection bin at the end of its useful life.
This applies not only to this device, but also all accessories, including the pedal
and electrical motors, regardless of whether those accessories are marked with
the symbol. Do not dispose as unsorted municipal waste.
For users out of European Union: please refer to local environmental regulatory
regarding waste of electrical and electronic equipment.
4 LABELING INFORMATION
XXXXXX CATALOGUE REFERENCE
XX
QUANTITY
YYYY/MM/DD USE BY
XXXXXX BATCH CODE
STERILIZED USING ETHYLENE OXIDE
DO NOT REUSE
XXXXXXX MANUFACTURER
YYYY/MM/DD DATE OF MANUFACTURE
XXXXXX CAUTION : CONSULT ACCOMPANYING DOCUMENT(S)
XXXXXX CONSULT OPERATING INSTRUCTIONS
DO NOT USE IF PACKAGE IS DAMAGED
STORAGE CONDITIONS: • TEMPERATURE: XX°C – YY°C / XX°F – YY°F
• HUMIDITY RATE: XX% – YY%
NON
STERILE
NON-STERILE
KEEP DRY
DISCARD IN A SEPARATE COLLECTION BIN
CAUTION for USA only: US federal laws restrict this device to sale by, or on the order of, a physician.

#65005-F-02.2017 MORIA 5
5 IMPORTANT INFORMATION
5.1 DESCRIPTION
The CB microkeratome is a manual, mechanical, pivoting microkeratome. It has three components:
• a pneumatic turbine
• a manual metallic suction ring
• a single use plastic head (CBSU) encasing a pre-inserted blade, or a metallic reusable head (CB,
CBm).
The CB microkeratome operates with the EVOLUTION 2, 3, and 3E control units. Please refer to the user
guides.
5.2 INDICATIONS
The CB microkeratome is indicated for the creation of lamellar corneal aps on patients’ eyes when using CB,
CBm, or CBSU heads in combination with a manual suction ring in corneas with preoperative pachymetry of
500 microns or greater, and keratometry between 39 D and 48 D.
During laser in-situ keratomileusis (LASIK), the ap is then lifted to enable photoablation of the stroma with
an excimer laser.
5.3 HEAD CALIBRATION VALUE AND FLAP THICKNESS
Flap thickness is a key factor for LASIK surgery. Multiple parameters affect ap thickness and standard
deviation. Numerous scientic studies have demonstrated that ap thickness is inuenced by several patient-
related factors such as keratometry (K) readings, corneal anatomy, preoperative pachymetry and refraction,
intraocular pressure (IOP), and also by surgery-related factors, such as corneal hydration and the speed of
the pass (when using manual microkeratomes).
Ultrasonic pachymetry measurements are not always accurate and reproducible, and results may also vary
with surgeons’ techniques and calibration of the device. Thus, a head labeled «130» cuts on average a
160-micron ap:
• 130 microns is a dimension on the head that can be measured and which corresponds to a distance
from the cutting edge of the blade to the front plate of the head
• 160 microns is the average ap thickness that will be cut by this head, with variations around this
average value.
In the example above, the “incremental value” for a 130 head is 30 microns on average.
Head calibration value Incremental value Average ap thickness
130 +30 160
MORIA can only guarantee the dimensional characteristics of the head, not the surgical result.
The surgeon is strongly advised to carry out tests beforehand to determine the thickness and diameters of
the expected cuts based on his/her own technique.
5.4 CONTRAINDICATIONS
Patients who are not candidates for LASIK.
Note: Careful preoperative evaluation and sound clinical judgment should be used by the surgeon to
determine the risk/benet ratio. Particular attention must be given before performing a keratectomy on a
patient with any of the following conditions:
• preoperative pachymetry under 500 microns
• keratometry under 39 D
• keratometry over 48 D
• inability to withstand a transient rise in intraocular pressure.

6 MORIA #65005-F-02.2017
5.5 WARNINGS
• Single-use devices should not be re-used. Doing so will negatively affect their clinical
performance and increase the potential for adverse events.
• Do not use disposable materials and/or components of a brand other than MORIA with the CB
microkeratome.
• Blades must only be inserted in heads by hand. Never use any tools or spanners. Incorrect assembly
may cause incomplete or uneven cuts due to lack of blade oscillation.
• The heads must only be screwed on by hand. Never use any tools or other spanners. Incorrect
assembly may cause incomplete or uneven cuts due to lack of blade oscillation.
• CBm blades (#19333) are compatible with CB heads (#19307/xxx) and CBm heads (#19332/xxx).
System Head CBm blade (#19333)
CB 19307/xxx Compatible
CBm 19332/xxx Compatible
CBSU 19312/xxx Not compatible
5.6 POTENTIAL ADVERSE EVENTS
As with any surgical procedure, there is risk involved. LASIK surgery requiring the use of a microkeratome
that cuts a corneal ap, potential side effects of laser refractive surgery may include but are not limited to:
visual anomalies, dry eye and ap related complications (free cap, incomplete ap, buttonhole, epithelial
defect, ap dislocation, ap striae, wrinkles, etc.).
Inappropriate use, deterioration of microkeratome and/or non-respect to contraindications (§ 5.4) and
warnings (§ 5.5) expose patient at higher risk to adverse events.
Note: Additional surgery may be necessary to correct some of these potential adverse events.
5.7 PRECAUTIONS
• The keratectomy must be performed only by experienced refractive surgeons with specic training in
the use of the CB-CBm-CBSU microkeratome.
• Preoperative and operative procedures, including knowledge of surgical techniques, proper head
and ring selection, and assembly and placement of the microkeratome are important considerations
in the successful use of the system by the surgeon. Furthermore, the proper patient selection and
compliance will greatly affect the results.
For USA only
CAUTION: FEDERAL LAW (USA) RESTRICTS THESE DEVICES TO SALE BY OR ON THE ORDER OF
A PHYSICIAN.
Other preoperative, intraoperative, and postoperative warnings and precautions are as fellows:
• PREOPERATIVE:
o Only patients that meet the criteria described in the indications should be selected.
o Care should be used in the handling and storage of the microkeratome components. They should not
be scratched or otherwise damaged. The CB turbine should be protected during storage, especially
from corrosive environments.
o Check the label and expiration date on unopened packages of CBSU heads and CBm blades.
o After opening the sterile package of CBSU heads, verify that head information is consistent with
information on outer package labeling.
o The head, suction ring, CB turbine, and the control unit should be fully inspected prior to use. The
blade should be inspected on both sides under a microscope.
o The surgeon should be familiar with the various components before using the microkeratome and
verify that all parts and necessary instruments are present and properly assembled before the
surgery begins. Additional sterile components should be available in case of an unexpected need.
o The selection of the proper head, ring, and stop position for each eye is crucial to the success of the
procedure: see MORIA nomogram (#65026).

#65005-F-02.2017 MORIA 7
• INTRAOPERATIVE:
o Breakage, slippage, or misuse of the microkeratome and its components may cause injury to the
patient or operating personnel.
o Before any usage, lubricate the eye, the suction ring, the head, and the blade with a physiological
saline solution or another appropriate ophthalmic solution that is compatible with the CB-CBm-CBSU
components.
• POSTOPERATIVE:
o The surgeon’s postoperative instructions to the patient and the corresponding patient compliance are
extremely important.
5.8 PRODUCT COMPLAINTS
Health care professionals (e.g., customers or users of this device) having any complaints about or
dissatisfaction with the product quality, identity, durability, reliability, safety, effectiveness and/or performance,
should notify MORIA or its distributor by telephone, fax or written correspondence, and have the products
checked by MORIA.
When ling a complaint, please provide the component(s) name(s), reference(s), batch number(s), as well as
your name and address, the nature of the complaint, and the relevant patient data. Also disinfect and return
the components.
5.9 PACKAGING
Packages of each of the components should be intact upon receipt.
Damaged packages or products should not be used and should be returned to MORIA.
Do not use single-use products if package is open or torn.

8 MORIA #65005-F-02.2017
6 INSTALLATION AND CONNECTION
Steps What to do IMPORTANT WARNINGS Related
picture
1 Select the head • CB-CBm: select the appropriate pre-calibrated head. The microkeratome
head is labeled on its front side and indicates depth of cut.
• CBSU: select the appropriate pre-calibrated head. The microkeratome
head is labeled on its front side and indicates depth of cut. Disposable
CBSU heads are supplied sterile and for single use only. Check that
package is undamaged, unopened and within the expiration date.
A, B, C
2a CB, CBm: Insert
the blade into the
blade housing of
the head
• Lubricate the CB, CBm head with balanced salt solution or another
appropriate ophthalmic solution.
• Inspect the blade and particularly the cutting edge before and after
insertion. Blades with spots, nicks, debris or other imperfections which
could compromise performance should be discarded.
• Insert the blade into the blade housing of the head, being careful not to
touch the front edge of the blade.
• Press gently on the blade and slide it completely into the head. In case the
blade does not slide smoothly into the head, check for debris or deposits
in the blade housing or on the blade itself. If, after careful checking of the
blade housing, it does not slide, replace the blade with a new one.
• Guide the blade into the head avoiding contact of the cutting edge with
metal part of the head.
• The blade design allows for only one direction for insertion and prevents
incorrect assembly.
• Before mounting the CB or CBm heads onto the turbine motor, make sure
that the blade holder slot is centered within the head (centered within the
female collar).
D, E
2b CBSU: lubricate
the head.
• CBSU heads are supplied sterile with pre-inserted blade to avoid blade
manipulation.
• Inspect the blade and particularly the cutting edge before and after
insertion. Blades with spots, nicks, debris or other imperfections which
could compromise performance should be discarded.
• Place the protective case on a at surface and lift the top of package with
caution.
• Fill the cavity of the plastic package with balanced salt solution or another
appropriate ophthalmic solution to fully wet the head.
3 Assemble the
head into the
turbine
• CB-CBm: The turbine motor screws onto the reusable microkeratome
head. Hold the microkeratome head rmly and screw the threaded nose of
the turbine motor clockwise. Finger tighten only
• CBSU: Keep the head in the package while screwing it onto the turbine
motor (nger tight only).
• Check that the head is securely screwed and tightened to the CB turbine
motor; no rotation of the head should occur.
• If the head is not completely screwed on, the pneumatic turbine shaft will
not drive the blade holder and the blade will not move. Poor or irregular
resection can result from incorrect assembly.
F, G
4 Inspect the head
after assembly
• The head must be perfectly clean inside and outside and free from debris,
particles, oxidation and deposits. There should be no scratches on the
plates. If any, replace the head.
• After assembly and using a microscope, carefully inspect the blade under
high magnication to ensure that it is not damaged. If so: discard it (CBm
blade, CBSU head) in an appropriate container and replace it.

#65005-F-02.2017 MORIA 9
5 Assemble
pneumatic
turbine hose to
CB turbine and
console unit
• Check that the gaskets on the turbine connector and on the control unit
connector are present and not damaged.
• Check the turbine hose for cracks and possible damage. Replace if
necessary.
• Connect the pneumatic turbine hose to the back of the turbine.
• Screw the metal collar of the turbine hose onto the back of the turbine
motor. The connector shape allows only one possibility of connection and
prevents from wrong assembly. Finger tighten only.
• Place the turbine connector hose onto the control unit front panel
connector.
• The connector shape allows only one possibility of connection and
prevents from wrong assembly.
H
6 Check for blade
oscillation
• Refer to EVOLUTION 2, 3 or 3E user manual for operations prior use.
• Activate CB turbine to check for smooth, strong and uninterrupted blade
oscillation.
• Do not use the CB turbine if the blade oscillation is not smooth, regular and
uninterrupted.
7 Select suction
ring according to
nomogram, then
inspect it
• Refer to the indicative nomogram for the selection of the ring size.
• The suction ring must be carefully inspected prior to use; it must be
perfectly clean, free from debris, particles and deposits.
• Carefully check that the suction port is not obstructed.
• The hinge will be placed facing the arrow on the suction ring.
I
8 Connect the
suction ring to
the aspiration
tubing
• The aspiration tubing is supplied sterile and for single use only.
• Check that package is undamaged, unopened and within the expiration
date.
• Inspect the aspiration tubing and in case of kinks or obstructions, replace it.
J
7 OPERATION
Steps What to do IMPORTANT WARNINGS Related
picture
1 Preliminary check before any usage • It is imperative to verify that the devices are perfectly
clean and free of any organic or other residues.
2 Connect the CB turbine to the control
unit. Check the pressure delivered by
the console at the turbine (operating
range between 2.5 and 3.5 bars).
• See EVOLUTION 2, 3 or 3E user manual for
operations prior use.
H
3Assemble the head in the suction ring • The CB-CBm-CBSU head pivot opening should t
easily over the pivot post of the CB suction ring.
• Align suction ring pivot post and CB head pivot hole.
Carefully place the assembled CB keratome and CB
turbine motor onto the suction ring.
• Avoid inadvertent contact with suction ring pivot post
and CB head blade area. If contact occurs, blade edge
may become damaged, and a new blade should be
used.
K
4 Check for blade oscillation • Refer to EVOLUTION 2, 3 or 3E user manual for
operations prior use.
• Activate CB turbine to check for smooth, strong and
uninterrupted blade oscillation.
• Do not use the CB turbine if the blade oscillation is not
smooth, regular and uninterrupted.
5 Position the suction ring on the eye.
Activate vacuum by pressing the
“Vacuum” footswitch once.
• Verify that the device will not interfere with any other
medical devices used during the procedure.

10 MORIA #65005-F-02.2017
6 Check the intraocular pressure with
the tonometer
• The tonometer must be perfectly dry and used only on
dry eyes.
• If the pressure is below 65 mm Hg, do not proceed
with the surgery.
7Lubricate the suction ring, the
head and the blade
• Prior to use, lubricate the rails of suction ring,
head, and blade with balanced salt solution or
another appropriate ophthalmic solution.
• The device should not be placed in contact with
solutions for which the potential interactions are
unknown.
8 Once the system is in position,
activate blade oscillation by pressing
the “Forward” footswitch.
Manually rotate the CB
microkeratome within the suction ring
until the stop of the suction
ring is engaged.
Stop the turbine motor and manually
reverse the CB microkeratome.
• See EVOLUTION 2, 3 or 3E console user manual.
• Hold the suction ring by its handle; check that your
ngers do not hinder the forward movement of the
device.
• Check nothing prevents or modies head movement in
the rails of the suction ring
• Ensure that there are no obstructions (speculum,
eyelashes, eyelids, etc.) in its path.
9 Release the “Vacuum” footswitch by
pressing once.
Remove the suction ring.
• Discard the disposable blade (CBm) or disposable
head (CBSU) and aspiration tubing after each
procedure in an appropriate container.
8 TROUBLESHOOTING
For any further information and description, please refer to EVOLUTION 2, 3 or 3E console user manual.
9 CARE & MAINTENANCE
The recommendations for cleaning, disinfection and sterilization are updated and available on MORIA’s
restricted-access website: http://www.moria-surgical.com. You must register to access it.
9.1 INTRODUCTION
In case of unusual vibrations or noises, do not use the unit and contact your distributor.
Please contact MORIA for any other servicing.
The following are only recommendations. They must be adapted according to the laws in the country
of utilization. All the products and solutions for cleaning and disinfection must be used according to the
manufacturer’s instructions.
MORIA recommends
• do not touch potentially contaminated areas,
• use gloves during cleaning and decontamination operations.
9.2 INITIAL TREATMENT AND STORAGE
To avoid risks of condensation inside the packaging, unpack and store the devices in a clean, dry environment.
Do not store the instruments in an environment or next to other products that may possibly have a corrosive
or magnetic effect. Avoid any contact between devices, especially those comprised of different materials.
The device should be damage free and have no scratches or other surface defects.
Fragile devices or those requiring particular manipulation must be handled separately, taking special care to
protect delicate parts.

#65005-F-02.2017 MORIA 11
9.3 CLEANING-DISINFECTION-STERILIZATION-STORAGE OF THE TURBINE
The pneumatic turbine must be disconnected from its hose.
It must be cleaned, disinfected, dried and sterilized after each surgical procedure.
ACTIONS IMPORTANT WARNINGS
1. Manual external cleaning
• After use, clean the outside of the turbine with a lint-free
cloth dampened with a cleaning solution (eg: Alkazyme®
/ Laboratoires Alkapharm) to remove any residue.
• Do not use abrasives or scrapers to clean items. It
could damage their usability.
• Do not immerse the turbine in any solution whatsoever,
including water.
• Cleaning is not disinfecting! Disinfection is a separate
step described in point 2.
2. Manual external disinfection
• After cleaning, dry every part of the turbine with a lint-
free cloth dampened with a disinfecting solution.
• Use appropriate disinfection solutions in accordance
with the manufacturer’s instructions.
• Do not immerse the turbine in any solution whatsoever,
including water.
3. Lubrication then cleaning before sterilization
• Lubricate the handpiece using a KaVo spray only
and the appropriate nozzle before every autoclave
sterilization cycle. A single jet of KaVo spray is sufcient
to lubricate the turbine while avoiding excess lubricant
inside the turbine.
• Clean the turbine with a lint-free cloth then keep it
upside down for 20 minutes before the autoclave
sterilization to expel excess lubricant.
• Use the recommended spray. Do not use other lubricant
sprays, vaseline or grease.
• Shake the spray before using.
• Place the spray nozzle on the smallest hole of the
turbine and press once only.
• KaVo spray (ref 411-9630) is not sold by MORIA. It can
be purchased from the Kavo website (www.kavo.com).
4. Sterilization
• Place the turbine and its hose in the dedicated
sterilization box.
• Sterilize the turbine in the autoclave (134°C – 273°F) for
18 minutes.
Sterilization in USA only: sterilize with an autoclave
(steam sterilizer with a vacuum phase) at a minimum of
132°C for at least 4 minutes.
• Remove the turbine from the sterilizer immediately after
the sterilization procedure.
• Never use the turbine immediately after sterilization. Let
it cool down to room temperature rst.
5. Storage
• Once this sterilization cycle is completed, remove the
handpiece as promptly as possible and store it upright
until it cools down and is dry.
• Once cooled down and dry, the handpiece can be
stored in an enclosed dry place.
• To avoid oxidation, make sure that the turbine is
perfectly dry before putting it in the storage box.
• While it is not being used, the CB turbine must be kept
in its storage box in a dry atmosphere (Photo L).
• Before use, check that the handpiece has no lubricant
on it. If it has, do not use it. Do not lubricate before use.

12 MORIA #65005-F-02.2017
9.4 CLEANING-DISINFECTION-STERILIZATION-STORAGE OF THE FLEXIBLE HOSE
The exible hose must be disconnected from the pneumatic turbine and from the generator, cleaned,
decontaminated, sterilized, and dried after each intervention.
Steps What to do IMPORTANT WARNINGS
1Cleaning ➢Do not immerse.
➢ The exible hose can be cleaned on the outside with a lint-free
cloth soaked with alcohol.
2Disinfecting ➢Do not immerse.
➢ The exible hose can be decontaminated on the outside with a
decontaminating solution.
3Rinse and dry ➢ The exible hose must be rinsed on the outside with a lint-free
disposable cleaner soaked in sterile water.
➢It must be then dried with a disposable lint-free cleaner.
4Sterilization ➢ The exible hose can be sterilized in the autoclave 134°C for 18
minutes.
➢Sterilization in USA only: sterilize with an autoclave (steam
sterilizer with a vacuum phase) at a minimum of 132°C for at
least 4 minutes.
➢It must be removed from the autoclave immediately after
sterilization.
➢ Never use the exible hose immediately after sterilization; let it
cool at room temperature.
5Storage ➢ The exible hose must be kept in a dry place, away from dust.
➢In order to avoid that the hose get damaged, it is important to
store it carefully in its box (Figure L).

#65005-F-02.2017 MORIA 13
9.5 CLEANING-DISINFECTION-STERILIZATION-STORAGE OF THE SUCTION RINGS
Steps What to do IMPORTANT WARNINGS
1Double cleaning
• On leaving the operating theatre, immediately
immerse the devices in an aldehyde-free
detergent/disinfectant solution (e.g.: Alkazyme
®
/
Alkapharm Laboratories) for at least 15 minutes
according to manufacturer recommendations.
• Manual cleaning (or use a machine, provided
that it does not recycle the cleaning products,
after disassembling the device where
appropriate).
• Rinse the circuit with water.
• Immerse the device in an aldehyde-free
detergent/disinfectant solution (a different bath
from the one above).
• Manual cleaning (or use a machine, provided
that it does not recycle the cleaning products).
• Rinse using ltered distilled or osmosis-treated
water.
• Wipe the device using a non-woven, lint-free,
disposable cloth.
• Manual cleaning: mechanical cleaning of the
medical device using soft brushes (metal
brushes and scouring pads are prohibited).
• IMPORTANT: Change the baths after each use.
• Incompatibility:
o Do not use bleach
o Do not apply this protocol to products
made of aluminium alloy.
o Do not apply this protocol to heat-sensitive
(motor and turbine).
2Deactivation of NCTAs (Non-Conventional
Transmitted Agents)
• Deactivation of NCTAs: for patients with a risk
of Creutzfeldt-Jakob disease only
• For France, see instruction no. DGS/
RI3/2011/449 of 1st December 2011.
3Sterilisation
Sterilise the sterilisation tray using an autoclave
(moist heat steriliser) at a temperature of at least
134°C for 18 minutes.
Sterilization in USA only : sterilize with an
autoclave (steam sterilizer with a vacuum phase) at
a minimum of 132°C for at least 4 minutes.
Bibliography:
• December2011 –Instruction no.DGS/RI3/2011/449 of1st December 2011updating recommendations
aimed at reducing the risk of transmitting non-conventional transmissible agents during invasive
procedures.
• November 2005 - Guide from the Ministry on the treatment of medical devices for ophthalmology and
contactology - http://www.sante.gouv.fr.

14 MORIA #65005-F-02.2017
10 WARRANTY
10.1 SCOPE OF WARRANTY
Designation MORIA references
Microkeratome CB manual suction rings (taille H, -1, 0, +1, +2)
19309/H
19309/-1
19309/0
19309/1
19309/2
Microkeratome CB head 19307/xxx
Microkeratome CBm head 19332/110
19332/130
Pneumatic turbine hose 19353
Pneumatic turbine for CB microkeratome 19303
Sterilization box for the turbine, turbine hose and metallic rings 22519139
EVOLUTION 2 console (except the battery) 19350
EVOLUTION 3 console (except the battery) 19360
EVOLUTION 3E console (serial number 5000 and above) (except the battery) 19380
EVOLUTION 2 footswitch 19351
EVOLUTION 3 footswitch (also for EVOLUTION 3E serial number 7000 and above) 19361
EVOLUTION 3E footswitch 19381
EVOLUTION 3E (IPX8) footswitch 19381J
EVOLUTION 3E footswitch (for China) 19381C
• The above items as well as spare parts and labor necessary for their repair are covered by warranty.
Any items returned must be sent it their original packaging, after having previously been disinfected.
• The maintenance operations and the replacement of spare parts will be exclusively carried out by
technicians authorized by MORIA.
• Any defective part exchanged during the period of warranty becomes property of MORIA.
• Instruments and accessories that cannot be reused are excluded from this warranty.
• Future upgrades and/or improvements on the keratome are not implied by this warranty.
10.2 NON-APPLICATION OF WARRANTY
The warranty will not be applicable under any of the following conditions:
• Defects or malfunction that occur out of the warranty period (10.3).
• Normal wear and tear.
• Negligence or usage that does not comply with the specications in the user manual.
• The use of supplies, spare parts, or accessories other than those supplied by MORIA.
• Any disassembly, modication or intervention carried out on the devices by a person not authorized
by MORIA.
10.3 WARRANTY PERIOD
• The warranty takes effect on the date the material is dispatched.
• The duration of the warranty is 12 months from the date of effect.
10.4 LIABILITY
• The liability of MORIA is limited to the supply of the services mentioned in paragraph 10.1. MORIA
will not be held responsible of any direct or indirect damage suffered by the client owing to the
interventions within the scope of this warranty.
• For any dispute concerning the interpretation or the execution of the present contract or the present
general terms and conditions, the Commercial Court of Nanterre (France) will have sole jurisdiction.

#65005-F-02.2017 MORIA 15
11 DRAWINGS
A. CB HEAD
1 Head calibration value
2 Female threaded collar
3 Blade housing
4 Sliding guide
B. CBm HEAD
1 Head calibration value
2 Female threaded collar
3 Blade housing
4 Sliding guide
C. CBSU HEAD
1 Head calibration value
2 Blade
D. CBm BLADE
1 Cutting edge
2 Blade holder
E. CBm HEAD WITH INSERTED CBm BLADE
1 CBm head
2 CBm blade
F. MOUNTING THE CBm HEAD ON THE CB
TURBINE
1 CB turbine
2 CBm head
G. MOUNTING THE CBSU ON THE CB TURBINE
1 CB turbine
2 CBSU head
3 Blister of the CBSU head
H MOUNTING THE PNEUMATIC TURBINE
HOSE
1 Pneumatic turbine hose – turbine end
2 CB turbine
3 CBm head
4 Control unit front panel
5 Pneumatic turbine hose – console end
I. CB MANUAL SUCTION RING
1 Handle
2 Sliding guide
3 Stop pin
4 Smooth pivot (manual ring)
5 Aperture
J. CONNECTING THE SUCTION RING TO THE
ASPIRATION TUBING
1 Aspiration tubing end
2 Suction ring end
K. MOUNTING CB MICROKERATOME ON THE
SUCTION RING
1 CB turbine with CBm head
2 CB manual suction ring
L. STERILIZATION BOX
1 CB turbine
2 Pneumatic turbine hose
3 CB manual suction ring
4 CBm heads
5 Tonometer

16 MORIA #65005-F-02.2017
..........................................................................................................................................................................
..........................................................................................................................................................................
..........................................................................................................................................................................
..........................................................................................................................................................................
..........................................................................................................................................................................
..........................................................................................................................................................................
..........................................................................................................................................................................
..........................................................................................................................................................................
..........................................................................................................................................................................
..........................................................................................................................................................................
..........................................................................................................................................................................
..........................................................................................................................................................................
..........................................................................................................................................................................
..........................................................................................................................................................................
..........................................................................................................................................................................
..........................................................................................................................................................................
..........................................................................................................................................................................
..........................................................................................................................................................................
..........................................................................................................................................................................
..........................................................................................................................................................................
..........................................................................................................................................................................
..........................................................................................................................................................................
..........................................................................................................................................................................
..........................................................................................................................................................................
..........................................................................................................................................................................
..........................................................................................................................................................................

#65005-F-02.2017 MORIA 17
SOMMAIRE
1 AVERTISSEMENTS........................................................................................................................... 18
1.1 MAINTENANCE ................................................................................................................................. 18
1.2 UTILISATION DE PRODUITS GÉNÉRIQUES OU RÉUTILISATION DE CONSOMMABLES
À USAGE UNIQUE............................................................................................................................. 18
2 LISTE DES ÉQUIPEMENTS ET ACCESSOIRES ASSOCIÉS.......................................................... 19
3 INFORMATIONS RÉGLEMENTAIRES.............................................................................................. 20
4 INFORMATIONS FABRICANT SUR LES ÉTIQUETTES .................................................................. 20
5 INFORMATIONS IMPORTANTES ..................................................................................................... 21
5.1 DESCRIPTION................................................................................................................................... 21
5.2 INDICATIONS..................................................................................................................................... 21
5.3 ÉPAISSEUR DES VOLETS CORNÉENS .......................................................................................... 21
5.4 CONTRE-INDICATIONS .................................................................................................................... 21
5.5 AVERTISSEMENTS ........................................................................................................................... 22
5.6 EFFETS INDÉSIRABLES POTENTIELS ........................................................................................... 22
5.7 PRÉCAUTIONS.................................................................................................................................. 22
5.8 RÉCLAMATION PRODUIT................................................................................................................. 23
5.9 EMBALLAGE...................................................................................................................................... 23
6 INSTALLATION ET CONNEXION ..................................................................................................... 24
7 OPÉRATION ...................................................................................................................................... 25
8 EN CAS DE PROBLÈME................................................................................................................... 27
9 MAINTENANCE................................................................................................................................. 27
9.1 INTRODUCTION................................................................................................................................ 27
9.2 TRAITEMENT INITIAL ET STOCKAGE ............................................................................................. 27
9.3 PROTOCOLE DE NETTOYAGE-DÉSINFECTION-STÉRILISATION-STOCKAGE
DE LA TURBINE................................................................................................................................. 28
9.4 PROTOCOLE DE NETTOYAGE-DÉSINFECTION-STÉRILISATION-STOCKAGE
DU FLEXIBLE DE LA TURBINE......................................................................................................... 29
9.5 PROTOCOLE DE NETTOYAGE-DÉSINFECTION-STÉRILISATION-STOCKAGE DES TÊTES
MÉTALLIQUES ET ANNEAUX DE SUCCION ................................................................................... 30
10 GARANTIE......................................................................................................................................... 31
10.1 CHAMP D’APPLICATION DE LA GARANTIE .................................................................................... 31
10.2 CAS DE NON APPLICATION DE LA GARANTIE .............................................................................. 31
10.3 PÉRIODE DE GARANTIE.................................................................................................................. 31
10.4 RESPONSABILITÉS .......................................................................................................................... 31
11 FIGURES............................................................................................................................................ 32

18 MORIA #65005-F-02.2017
Ce manuel utilisateur décrit toutes les informations nécessaires à l’utilisation et la maintenance du
microkératome CB (pour chirurgie LASIK) et de ses têtes (réutilisables ou à usage unique) ainsi que ses
accessoires (cf. liste ci-dessous).
La version la plus récente de ces manuels utilisateurs et des informations supplémentaires sur votre
microkératome sont disponibles sur le site internet de MORIA en accès réservé : http://www.moria-surgical.
com. Une inscription est nécessaire pour y accéder.
1 AVERTISSEMENTS
1.1 MAINTENANCE
Le système CB-CBm-CBSU a été conçu pour assurer un fonctionnement optimal, à condition que les
recommandations d’entretien soient scrupuleusement respectées. Si, pour une raison quelconque, le
système ne fonctionne pas correctement, le faire vérier immédiatement par MORIA. Pour garantir les
performances initiales du microkératome, MORIA recommande fortement une maintenance et un entretien
annuels pour tous ses produits réutilisables.
Les produits MORIA utilisent des technologies que seul MORIA ou ses représentants maîtrisent, les
opérations d’entretien et de maintenance doivent être par conséquent effectuées par MORIA ou ses
représentants agréés.
MORIA décline toute responsabilité en cas de mauvais fonctionnement ou de dommages à l’appareil, de
mauvais résultats ou de complications chirurgicales en raison d’opération de maintenance effectuée par
l’exploitant ou un tiers non habilité.
Ces pratiques décrites ci-dessus rendent caduque la garantie et les contrats de maintenance souscrits.
1.2 UTILISATION DE PRODUITS GÉNÉRIQUES OU RÉUTILISATION DE CONSOMMABLES À USAGE
UNIQUE
Les matériaux de la lame, de la navette et de la tête du microkératome ont été sélectionnés pour leurs
caractéristiques de biocompatibilité et de glissement. Les dimensions et tolérances de la lame ont été
déterminées par rapport aux dimensions et tolérances de la tête du kératome. Les procédures de fabrication
et de contrôle de MORIA garantissent qu’il n’y a aucun conit dimensionnel entre la tête et la lame, et que la
lame glisse librement dans la tête.
La conception de produit à usage unique n’autorise en aucun cas sa réutilisation. La réutilisation de
produit à usage unique et/ou l’utilisation de consommables autres que ceux fournis par MORIA peut
entraîner des conséquences chirurgicales graves pour le patient et endommager le microkératome.
MORIA décline toute responsabilité en cas de mauvais fonctionnement ou de dommages au microkératome,
de mauvais résultats ou de complications chirurgicales en raison de la réutilisation de produit à usage unique
ou d’utilisation de consommables autres que ceux fournies par MORIA.
Les pièces à main MORIA ne doivent être connectées qu’avec du matériel MORIA (console, têtes,
anneaux, etc.).
Les clauses de garantie deviennent caduques en cas de dégradation ou de panne du microkeratome liés à
de telles pratiques.

#65005-F-02.2017 MORIA 19
2 LISTE DES ÉQUIPEMENTS ET ACCESSOIRES ASSOCIÉS
Désignation des équipements décrits dans ce manuel Référence MORIA
Anneau de succion CB manuel (taille H, -1, 0, +1, +2)
19309/H
19309/-1
19309/0
19309/1
19309/2
Tête de microkératome CB 19307/xxx
Tête de microkératome CBm 19332/110
19332/130
Boite de 10 lames stériles CBm 19333
Boite de 10 têtes stériles CBSU 19312/110
19312/130
Désignation des dispositifs associés aux équipements décrits dans ce manuel Référence MORIA
Flexible turbine 19353
Turbine pneumatique pour microkératome CB 19303
Console EVOLUTION 2 19350
Console EVOLUTION 3 19360
Console EVOLUTION 3E 19380
Pédale de l’EVOLUTION 2 19351
Pédale de l’EVOLUTION 3 (également pour EVOLUTION 3E SN>7000) 19361
Pédale de l’EVOLUTION 3E 19381
Pédale de l’EVOLUTION 3E 19381J
Pédale de l’EVOLUTION 3E (pour la Chine) 19381C
Désignation des accessoires Référence MORIA
Boite de stérilisation de la turbine, du exible turbine et des anneaux métalliques 22519139
Tonomètre 19042
Tubulure d’aspiration 19138
Désignation des informations livrées aux utilisateurs Référence MORIA
Manuel utilisateur CB-CBm-CBSU pour chirurgie LASIK 65005
Manuel utilisateur EVOLUTION 2 (FR) 65015
Manuel utilisateur EVOLUTION 2 (EN) 65016
Manuel utilisateur EVOLUTION 3 (FR) 65037
Manuel utilisateur EVOLUTION 3 (EN) 65038
Manuel utilisateur EVOLUTION 3E (numéro de série supérieur ou égal à 5000) 65060/INTL
Annexe « Directives et Déclarations du fabricant : émissions et immunités électromagnétiques » 65073
Nomogramme CB-CBSU (FR) 65025
Nomogramme CB-CBSU (EN) 65026
Nomogramme CB-CBSU (XX=autre)(site internet Moria) 65025XX
Notice de montage de la tête CB Single Use (packagée avec #19312/xxx) 65001
This manual suits for next models
2
Table of contents
Languages:
Other MORIA Medical Equipment manuals
Popular Medical Equipment manuals by other brands

SSCOR Duet
SSCOR Duet 2314 series Operating Instructions & Maintenance Manual

Proactive Medical
Proactive Medical Protekt Aire 6500 Operation manual

Ossur
Ossur COLD RUSH Instructions for use

Hoefer
Hoefer HE33 user manual

Abbott
Abbott Amplatzer Trevisio 9-ATV06F45 Instructions for use

FujiFilm
FujiFilm SonoSite iViz User guide supplement

Hill Laboratories
Hill Laboratories HA90D Reference manual

ReBuilder Medical
ReBuilder Medical 300 manual

Fluke Biomedical
Fluke Biomedical ProSim 8 Series Getting started manual

Braun
Braun BUA6150CEME Quick reference guide

ZOLL
ZOLL Cool Line CL-2295A/8700-0781-01 Instructions for use

Coviden
Coviden Kangaroo Joey manual