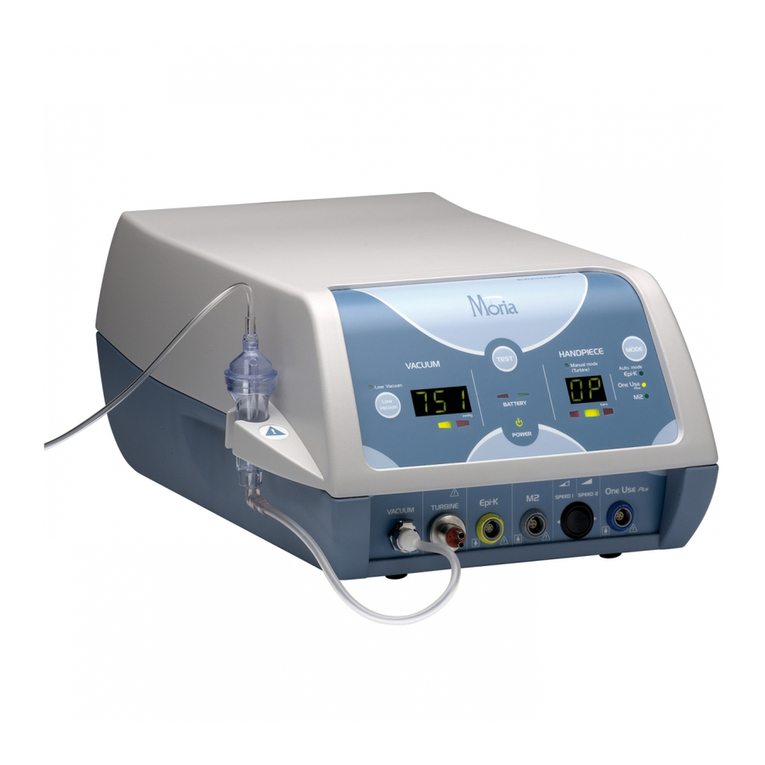
MORIA M2 Single Use Manual

Information sheet for the setting of the M2 Single use head
EN
#19334/XXX
Important
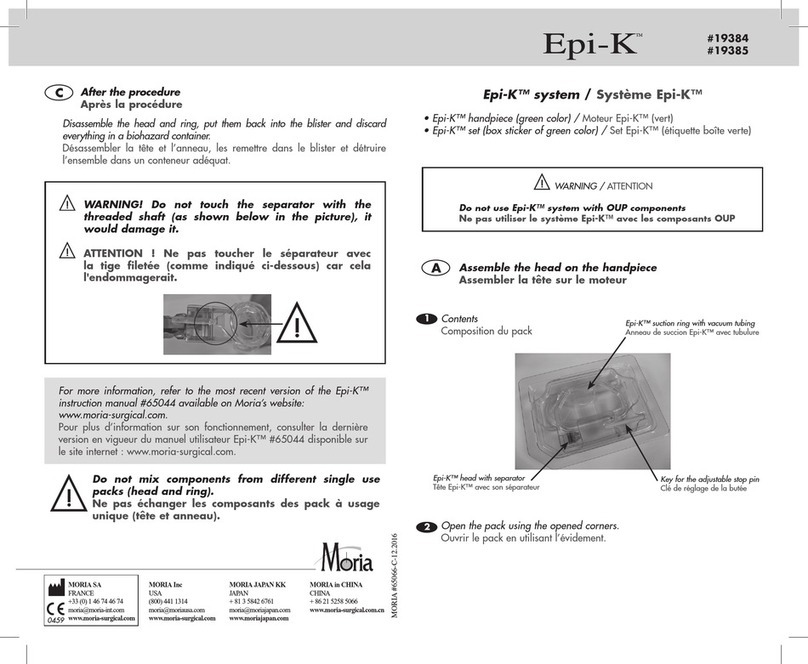
CHECK FOR UNDAMAGED AND UNOPENED PACK. THIS PACK IS STERILE AND FOR SINGLE USE.
READ CAREFULLY THE MORIA M2 MICROKERATOME INSTRUCTION MANUAL.
Warning
REMINDER OF PARAMETERS INFLUENCING FLAP THICKNESS
Flap thickness depends on several patient-related factors (preoperative corneal thickness, keratometry, IOP, etc…) and surgery-
related factors (hydration, suction time, translation speed, etc …) :
GENERAL PRINCIPLES
Impact of the preoperative corneal thickness :
• The thinner the cornea, the thinner the flap
• The thicker the cornea, the thicker the flap
Impact of the preoperative keratometry at a given ring :
• The steeper the cornea, the thinner the flap
• The flatter the cornea, the thicker the flap
Impact of the translation speed of the forward microkeratome pass :
• The faster the speed, the thinner the flap
• The slower the speed, the thicker the flap
The variance of these factors have a cumulative effect on flap thickness.
RING & SPEED SELECTION
Moria recommends to follow the ring and speed selection described in the latest version of the M2 and M2SU nomogram.
Use the M2 Single Use heads exclusively with accessories manufactured by Moria for the M2 microkeratome;
use of other accessories can damage the microkeratome and may cause significant patient injuries. Please
read the instruction manual of the Moria M2 microkeratome before use. Available on the web site: moria-
surgical.com
Ophthalmic Instruments*
*Instruments Ophthalmologiques
Contents
Microkeratome head with its blade. Fig.1
CAUTION for USA only: US federal laws restrict this device to sale by, or on the order of, a physician.
Directions
1 / Remove the inner plastic pack from the peel pouch.
2 / Place the pack with the blade side down (2A) and remove the top of the pack (2B). Fig.2
3 / While the head is in the pack, assemble the motor onto the head and rotate it clockwise. Fig.3
4 / Once assembled, inspect the blade under microscope.
5 / Activate the motor to check that the blade is engaged and oscillates correctly. Press on the vacuum footpedal and then on
the reverse footpedal to reposition the shaft of the M2 motor.
6 / Before the keratectomy, make sure that the post of the selected suction ring slides properly into the head. Assemble the head
onto the ring by rotating the locking ring clockwise. Fig.4
7 / Lubricate the M2 Single Use head and its blade, before the cut, with BSSTM (Trade Mark of Alcon®) or any other appropriate
solution.
8 / After the procedure, rotate the locking ring counterclockwise and remove the suction ring from the M2 Single Use head.
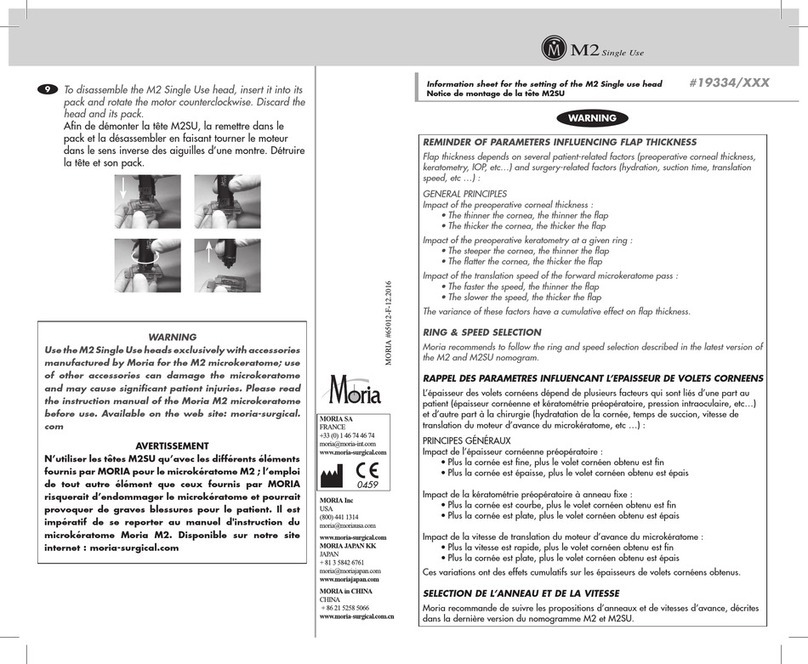
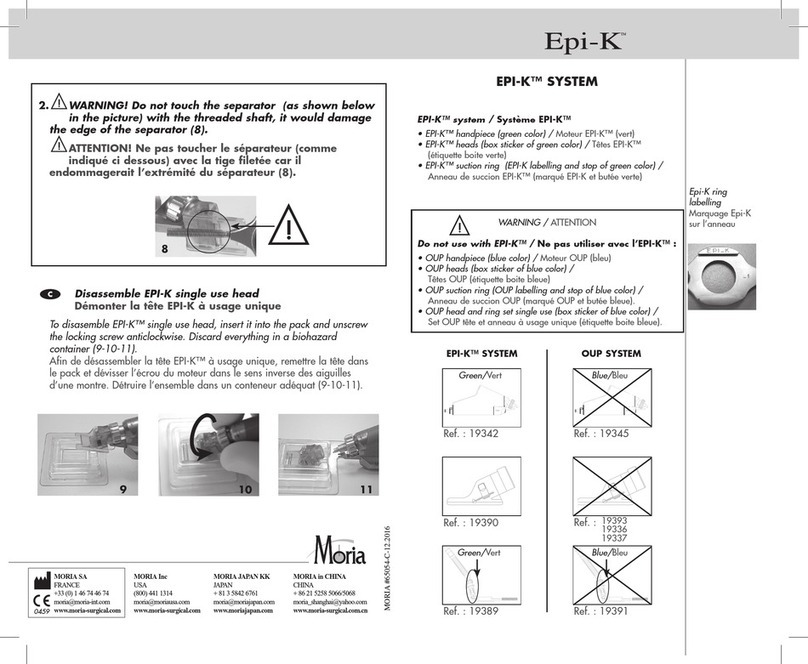
9 / To disassemble the M2 Single Use head, insert it into its pack and rotate the motor counterclockwise. Discard the head and its
pack. Fig.5

Notice de montage de la tête M2SU
FR
#19334/XXX
Important
VÉRIFIER L’INTÉGRALITÉ DU SACHET PROTECTEUR INDIVIDUEL DE STÉRILITÉ AVANT USAGE. CE PACK EST STÉRILE ET À USAGE UNIQUE.
VOIR LES CONSIGNES D’UTILISATION DÉTAILLÉES ET LES AVERTISSEMENTS FIGURANT DANS LE MANUEL D’INSTRUCTION DU
MICROKÉRATOME MORIA M2.
Avertissement
RAPPEL DES PARAMETRES INFLUENCANT L’EPAISSEUR DE VOLETS CORNEENS
L’épaisseur des volets cornéens dépend de plusieurs facteurs qui sont liés d’une part au patient (épaisseur cornéenne et
kératométrie préopératoire, pression intraoculaire, etc…) et d’autre part à la chirurgie (hydratation de la cornée, temps de
succion, vitesse de translation du moteur d’avance du microkératome, etc …) :
PRINCIPES GÉNÉRAUX
Impact de l’épaisseur cornéenne préopératoire :
• Plus la cornée est fine, plus le volet cornéen obtenu est fin
• Plus la cornée est épaisse, plus le volet cornéen obtenu est épais
Impact de la kératométrie préopératoire à anneau fixe :
• Plus la cornée est courbe, plus le volet cornéen obtenu est fin
• Plus la cornée est plate, plus le volet cornéen obtenu est épais
Impact de la vitesse de translation du moteur d’avance du microkératome :
• Plus la vitesse est rapide, plus le volet cornéen obtenu est fin
• Plus la cornée est plate, plus le volet cornéen obtenu est épais
Ces variations ont des effets cumulatifs sur les épaisseurs de volets cornéens obtenus.
SELECTION DE L’ANNEAU ET DE LA VITESSE
Moria recommande de suivre les propositions d’anneaux et de vitesses d‘avance, décrites dans la dernière version du
nomogramme M2 et M2SU.
N’utiliser les têtes M2SU qu’avec les différents éléments fournis par MORIA pour le microkératome M2 ; l’emploi
de tout autre élément que ceux fournis par MORIA risquerait d’endommager le microkératome et pourrait
provoquer de graves blessures pour le patient. Il est impératif de se reporter au manuel d’instruction du
microkératome Moria M2. Disponible sur notre site internet : moria-surgical.com
Ophthalmic Instruments*
*Instruments Ophthalmologiques
Composition du pack
Tête de microkératome avec sa lame
Instructions d’utilisation
1 / Retirer le pack du sachet protecteur.
2 / Placer le pack de façon à ce que le côté de la lame soit en bas (2A) et ouvrir la partie supérieure du pack (2B). Fig.2
3 / En maintenant la tête dans le pack, assembler le moteur sur la tête et faire tourner le moteur dans le sens des aiguilles d’une
montre. Fig.3
4 / Après l’assemblage, inspecter la lame sous microscope.
5 / Activer le moteur afin de vérifier que la lame est bien engagée et oscille correctement. Appuyer sur la pédale de vide puis sur
la pédale de retour pour repositionner l’axe du moteur.
6 / Avant la kératectomie, s’assurer que le pivot de l’anneau de succion sélectionné glisse correctement dans la tête. Assembler
la tête sur l’anneau en tournant la bague de verrouillage dans le sens des aiguilles d’une montre. Fig.4
7 / Lubrifier la tête M2SU et sa lame avant la découpe avec du BSSTM (Marque déposée de Alcon®) ou toute autre solution
appropriée.
8 / Après la chirurgie, faire tourner la bague de verrouillage dans le sens contraire des aiguilles d’une montre et dégager l’anneau
de succion de la tête M2SU.
9 / TAfin de démonter la tête M2SU, la remettre dans le pack et la désassembler en faisant tourner le moteur dans le sens inverse
des aiguilles d’une montre. Détruire la tête et son pack. Fig.5

Ficha de información para los ajustes del cabezal de un solo
uso M2 #19334/XXX
ES
#19334/XXX
Important
COMPRUEBE QUE EL CONJUNTO NO HA SIDO ABIERTO NI MANIPULADO. EL CONJUNTO ES ESTERIL Y DE UN SOLO USO.
LEA CUIDADOSAMENTE EL MANUAL DE INSTRUCCIONES DEL MICROQUERATOMO M2 DE MORIA
Advertencia
RECORDATORIO DE LOS PARÁMETROS QUE INFLUYEN EN EL ESPESOR DEL ‘FLAP’
El espesor del ‘flap’ depende de varios factores relacionados con el paciente (espesor corneal preoperatorio, queratometría,
IOP, etc…) y de factores relacionados con la cirugía (hidratación, tiempo de succión, velocidad de desplazamiento, etc., ...):
PRINCIPIOS GENERALES
Impacto del espesor corneal preoperatorio:
• Cuanto menor es la córnea, menor es el ‘flap’
• Cuanto más gruesa es la córnea, más grueso es el ‘flap’
Impacto de la queratometría preoperatoria en un anillo dado:
• Cuanto más inclinada es la córnea, más delgado es el ‘flap’
• Cuanto más plana es la córnea, más grueso es el ‘flap’
Impacto de la velocidad de desplazamiento del paso del microqueratomo hacia delante:
• Cuanto más rápida sea la velocidad, más delgado es el ‘flap’
• Cuanto más lenta la velocidad, más grueso es el ‘flap’
La variación de estos factores tiene un efecto acumulativo sobre el espesor del ‘flap’.
SELECCIÓN DE ANILLO Y VELOCIDAD
Moria recomienda seguir el anillo y la selección de velocidad descritas en la última versión del nomograma M2 y M2SU.
Utilice el cabezal M2 de un solo uso exclusivamente con accesorios fabricados por Moria para el
microqueratomo M2; el uso de otros accesorios puede dañar el microqueratomo y podría causar heridas
importantes al paciente. Por favor, lea el manual de instrucciones del microqueratomo M2 de Moria antes del
uso. Está disponible en la página web: moria-surgical.com
Ophthalmic Instruments*
*Instruments Ophthalmologiques
Componentes
Cabezal del microqueratomo con su cuchilla
Instrucciones
1 / Saque el conjunto de plástico interior de la funda protectora.
2 / Coloque el conjunto con el lado de la cuchilla hacia abajo (2A) y retire la parte superior de la caja (2B). Fig.2
3 / Con el cabezal en el conjunto, inserte el motor dentro del cabezal y gire en el sentido de las agujas del reloj. Fig.3
4 / Una vez insertado, inspeccione la cuchilla bajo el microscopio.
5 / Active el motor para comprobar que la cuchilla está acoplada y oscila correctamente. Presione el pedal de aspiración y a
continuación el pedal opuesto para reponer el eje del motor M2.
6 / Antes de la queratectomía, asegúrese de que el pivote del anillo de succión seleccionado se desliza adecuadamente
dentro del cabezal. Inserte el cabezal en el anillo rotando el anillo de bloqueo en sentido horario. Fig.4
7 / Lubrique el cabezal de un solo uso M2 y su cuchilla, antes del corte, con BSS™ (Marca registrada por Alcon®) u otra solución
adecuada.
8 / Después del procedimiento, gire el anillo de bloqueo en sentido antihorario y retire el anillo de succión del cabezal de un solo
uso M2.
9 / Para desmontar el Cabezal M2 de un solo uso, insértelo en su caja y gire el motor en dirección contraria a las agujas del reloj.
Deseche el cabezal y su conjunto.Fig.5

To obtain more information
MORIA Inc
1050 Cross Keys Drive
Doylestown, PA 18902
USA
Phone: (800) 441 1314
Fax: + 1 (215) 230 7670
www.moria-surgical.com
Moria Japan K.K.
Arcadia Building 6F
1-12-3 Kanda
SudachoChiyoda-Ku
Tokyo 101-0041
JAPAN
Phone: 81-3-6260-8309
Fax: 81-3-6260-8310
www.moriajapan.com
Moria Shanghai Ofce
RM4, 10 FL, Kai Li Building
N°432 Huai Hai West Road
200052 Shanghai
CHINA
Phone: +86 21 52585278
Fax: +86 21 52585278
www.moria-surgical.com
MORIA #65012-G-10.2018
MORIA SA
15, rue Georges Besse
92160 Antony
FRANCE
Phone: +33 (0) 1 46 74 46 74
Fax: +33 (0) 1 46 74 46 70
www.moria-surgical.com
Fig.2
2A 2B
Fig.1
Blade
Lame
Cuchilla
Fig.3
Fig.4
Fig.5
Table of contents
Languages:
Other MORIA Medical Equipment manuals
Popular Medical Equipment manuals by other brands

Graham Field
Graham Field Lumex FR587W Series Assembly and operating instructions

Meditech
Meditech ABPM-05 Service manual

CUSTOM ULTRASONICS
CUSTOM ULTRASONICS 20000 Operator's manual

schwa-medico
schwa-medico PIERENSYMPHONY P Instructions for use

ResMed
ResMed Swift LT user guide

Jorvet
Jorvet ELECTROSURGE J0470M Operation instructions