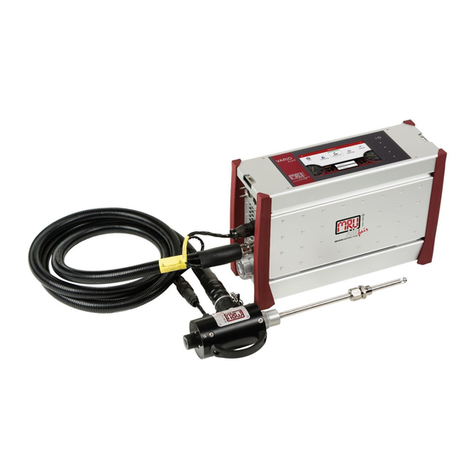
mru DM9600 User manual

USER MANUAL DM9600
MRU GmbH, D-74172 Neckarsulm
1 / 39

USER MANUAL DM9600
MRU GmbH, D-74172 Neckarsulm
2 / 39

USER MANUAL DM9600
MRU GmbH, D-74172 Neckarsulm
3 / 39
Content
1. General information............................................................................................................ 6
1.1. The company MRU GmbH......................................................................................... 6
1.2. Important notes for this operating manual.................................................................. 7
1.3. Intended usage.......................................................................................................... 7
1.4. Security direction....................................................................................................... 7
1.5. Packaging.................................................................................................................. 8
1.6. Return of hazardous waste - Waste Disposal/Returns/Warranty...............................8
1.7. Return of analyzer according to ElektroG..................................................................8
2. DM9600 description............................................................................................................ 9
2.1. Introduction................................................................................................................ 9
2.2. The DM9600.............................................................................................................. 9
3. Operating the DM9600..................................................................................................... 10
3.1. Power on and power off...........................................................................................10
3.2. Zeroing..................................................................................................................... 10
3.3. Function keys........................................................................................................... 10
3.4. Context menu........................................................................................................... 10
3.5. Display..................................................................................................................... 11
3.6. Menu structure......................................................................................................... 11
4. First startup....................................................................................................................... 13
4.1. Readiness of the DM9600........................................................................................13
4.2. Equipment settings.................................................................................................. 13
4.3. Adjusting date and time........................................................................................... 14
4.4. Bluetooth settings (optional).....................................................................................14
5. Maintenance and care...................................................................................................... 15
5.1. Cleaning and care....................................................................................................15
6. Preparation for each measurement..................................................................................16
6.1. Power supply........................................................................................................... 16
6.2. Automatic Auto-off function......................................................................................16
6.3. Measuring withgrid power supply / Battery charging............................................... 16
6.4. Battery charge condition..........................................................................................16
6.5. Operating temperature............................................................................................. 16
6.6. Power up and zeroing..............................................................................................16
7. Performing a measurement.............................................................................................. 17
7.1. Auto-Log function.....................................................................................................17
7.2. General measurement............................................................................................. 18
7.3. Pressure measurement............................................................................................ 19
7.4. Temperature measurement...................................................................................... 20
7.5. Flow velocity measurement (option)........................................................................21
7.6. Leak detection using the external HC-Probe (option).............................................. 23
7.7. Usage capability test (option)................................................................................... 24
7.8. Printing measurement results..................................................................................27
8. Data storage..................................................................................................................... 28
8.1. Data storage structure............................................................................................. 28
8.2. Measurements in the data storage menu.................................................................28
8.3. Sites......................................................................................................................... 29
8.4. Data transferusing the SD-Card..............................................................................30
8.5. Information about the data storage..........................................................................31
USER MANUAL DM9600
MRU GmbH, D-74172 Neckarsulm
4 / 39
9. EXTRAS / Settings ........................................................................................................... 32
9.1. Service adjustment menu........................................................................................ 32
9.2. Factory settings........................................................................................................ 32
9.3. Service values.......................................................................................................... 32
10. Appendix...................................................................................................................... 33
10.1. Technical details...................................................................................................... 33
10.2. Firmware update...................................................................................................... 36
10.3. Trouble shooting...................................................................................................... 37
10.4. Declaration of conformity DM9600........................................................................... 38

USER MANUAL DM9600
MRU GmbH, D-74172 Neckarsulm
5 / 39
Inspect Shipment for Damage
Carefully inspect the entire shipment for damage inthe presence of the shipper’s agent,
removing packaging material ifnecessary. Note any damage to packaging and/or goods on
Packing List and have it signed by the shipper’s agent prior to accepting the shipment. Submit
damage claim to MRU immediately.
NOTE: Damageclaims not received by MRUwithin 3 days of receiptof shipment will not be
accepted.
Important notice!
This high quality electronic device utilizes batteries that discharge even when the device isnot
in use. Therefore, it is very important to charge the batteriesevery 6 months, even if thedevice
is not in use.
Failing to follow these instructions will void your warranty!
Save the original box and thepacking material for use if thedevice must be shipped in the
future.
The products described in thismanual are subject to continuous development and improvement
and it is therefore acknowledged that this manual may contain errors or omissions. MRU
encourages customer feedback and welcomes any comments or suggestions relating to the
product or documentation.
Please forward all commentsor suggestions to the Customer Feedback Department at the
following address:
MRU GmbH
Fuchshalde 8 + 12
74172 Neckarsulm / Obereisesheim
GERMANY
Phone +49 71 32 99 62 0 (Switch board)
Phone +49 71 32 99 62 61 (Service)
Fax +49 71 32 99 62 20
Email: info@mru.de
Homepage: www.mru.eu
This manual is intended solelyas a guide to the use of the product.
MRU shall not be liable for any loss or damage whatsoever arising from content errors or
misinterpretation of information’s from this manual or any miss-use resulting from the useof this
manual.

USER MANUAL DM9600
MRU GmbH, D-74172 Neckarsulm
6 / 39
1. General information
1.1.The company MRU GmbH
This device, DM9600 is manufactured by the MRU GmbH in Neckarsulm Germany (founded in
1984), a medium sized company that specializes in developing, producing and marketing high
quality emission monitoring analyzers. MRU GmbH produces a wide range of instruments, from
standard analyzers up to tailor made industrial analyzers. MRU GmbH contact details are listed
on the previous page.
Plant 1: Sales, Service, R&D and
administration
Plant 2: Production

USER MANUAL DM9600
MRU GmbH, D-74172 Neckarsulm
7 / 39
1.2.Important notes for this operating manual
The operating manual is an important part of your delivery. It explains the usage and purpose of
this device andensures the safety of the user and the environment.
Every user has the obligation to read the complete manual and getting familiar with the device
and follows all directions, especially those regarding safety.
Additional hintsin other chapters willbe clearly marked with an ATTENTION sign.
1.3.Intended usage
The DM9600 is a manometer that is used for pressure measurements as well as temperature
measurement of NON-explosive gases.
1.4.Security direction
The followingsecurity directions must be followed at any time.
They are essential and indispensable element of this manual.
Failing to follow these instructions will void your warranty!
Security directions
The DM9600 may only be used for its intended purpose.
Our analyzers are checked according to the following regulations:
VDE 0411 (EN61010) and DIN VDE 0701 before they leave the MRU GmbH factory.
MRU technicalproducts are designed andmanufactured accordingto DIN 31000/ VDE 1000
and UVV = VBG 4 of the professional guilds for fine mechanics and electrical engineering.
MRU GmbH assures that the analyzer complies to the essential requirements of the legal
regulations of the member states of the electro-magnetic compatibility (89/336/EWG).
Specific security directions
Only use a suitable USB battery charger 5V/>0,7A
Metal parts and accessories may not be used as electric conductors.
The device may not be used under water.
The device may not be stored near fire or great heat.
The temperature range of the temperature sensors may not exceed their nominal ranges, this
can destroy these sensors.
The measuredpressure may not exceed the measuring range of the device.
Electronic devices will be damaged when dropped.

USER MANUAL DM9600
MRU GmbH, D-74172 Neckarsulm
8 / 39
User directions for Li-Ion batteries
•The end-user has NO access to the internal battery.
•This rechargeable battery may only be used inthe DM9600.
•Never throw the battery into fire.
Don’t charge thebattery at high temperatures
Don’t store the battery in a hotlocation
•Don’t deform thebattery, don’t short circuit or changethe battery in any form!
•The battery may not be used in or under water.
•Don’t stress the battery with high mechanical strain and don’t throw the
battery.
•Don’t squeeze nor cut off the battery wires!
•Don’t store nor carry the battery with any sharp items
•Don’t connect the (+) contact with the (-) contact or contact with metal.
•Not following the above-mentioned directions may cause heat, fire and
explosion.
•The life span of this battery isabout 500 charging and dis charging cycles.
With increasing charging cycles the specified device running time will decrease with each
charging cycle
1.5.Packaging
Packing regulation of 12.07.1991
If your local waste facility does not except MRU packing materials for disposal, you may
return it to MRU or our local sales representative. Packing materials returned to MRU must
be returned prepaid.
1.6.Return of hazardous waste - Waste Disposal/Returns/Warranty
MRU GmbH is required to accept the return of hazardous waste such as batteries that cannot
be disposed of locally. Hazardous waste must be returned toMRU prepaid.
1.7.Return of analyzer according to ElektroG
MRU GmbH is required to accept the return, for proper disposal, of all analyzers delivered after
13th of August 2005. Analyzers must be returned to MRU prepaid.

USER MANUAL DM9600
MRU GmbH, D-74172 Neckarsulm
9 / 39
2. DM9600 description
2.1.Introduction
The main task of the DM9600 is measuring pressure and temperature.
Optional with AUX port:
HC-probe for gas leak detection
External pressure sensor to measure higher pressures
2.2.The DM9600
The DM9600 has a compact and robust fiber-reinforced plastic enclosure.
It is entirely operated using the color touch screen.
1
Touch screen
2
Mini USB interface for data transfer and battery charging
3
Pressure port P1
4
Pressure port P2
5
IR interface for external IR Printer
6
Rear magnets for hands free operation
7
Micro-SD-card reader
8
Temperature port Temp 1
9
Temperature port Temp 2
10
AUX-port
11
Reset-button (on the rear side)

USER MANUAL DM9600
MRU GmbH, D-74172 Neckarsulm
10 / 39
3. Operating the DM9600
3.1.Power on and power off
The DM9600 is powered up using the touch screen.
Touch the blank screen, then press the appearinggreen ON button.
The display will turn dark again if the greenON button isnot pressed within 5 seconds.
You will use the context menu button to power the unit down.
Press the context button then the appearingOFF button.
3.2.Zeroing
The zeroing is selectable between last zeroing and
zeroing during start up
Last zeroing:
The unit will select the last zeroing of the pressure sensor.
Using this mode might have inaccurate measurement results due to temperature influences
(zero drift) and the unit will notask to perform zeroing during start up.
Zeroing during start up:
The user will be asked to perform a zeroing when this modeis selected.
The measurement accuracy is warranted once the zeroing was performed. The DM9600 will
select last zeroing in case thezeroing was not performed -> see last zeroing.
3.3.Function keys
Pre-defined function keys will appear on the upper and lower screen border – these keys will
differ depending on the screencontent.
The upper border typically displays the return and context buttons.
The lower border often displays the up and down buttons.
There can be additional or other buttons, depending which program or menucurrently is used.
3.4.Context menu
The context menu button is an addition to the function keys. All available possibilities for the
current displayedscreen will be available for selection.
Some of the available functions are: “power down the unit”, “exit window”, “close context menu
without action” (just to name afew).
1
power down the unit
2
exit window
3
close context menu without action

USER MANUAL DM9600
MRU GmbH, D-74172 Neckarsulm
11 / 39
3.5.Display
All information needed to operate the DM9600 will be displayed as follows:
3.6.Menu structure
The DM9600 has 3 available main menus:
Measurement, Storage and Extras.
The context menu key lets you select the available main menus.
•Menu measurement: All available measurement options will be displayed
and can be selected here.
This screen will only display installedand available
options.
•Menu Storage: All available storage options will bedisplayed here.
•Menu Extras: All other options are displayed here, for example
setting to adapt your DM9600.
See chapter 7 for
measurement menu.
See chapter 8 for
Storage menu.
See chapter 9 for
Extras menu.
1
Main menu
2
Function keys
3
Function keys
4
Context key
5
Battery charging condition (Lithium-Ion Battery)
6
SD-Carte inserted SD-Card reader
GREEN symbol – read and write is possible
YELLOW symbol – read only
7
Scroll bar indicator for the main menu
DM9600


USER MANUAL DM9600
MRU GmbH, D-74172 Neckarsulm
13 / 39
4. First startup
The DM9600 can be customized during the first start-up. Of course, all modifications can be
also done at a laterstage.
4.1.Readiness of the DM9600
•Unpack the DM9600, read the complete manual.
•The DM9600 is delivered fully assembled and ready to use. Nevertheless,
check if the delivery is complete and that nothing is damaged.
•Recommendation: Charge the battery for 5 hours.
•Check date andtime / modifyif needed.
4.2.Equipment settings
The following adjustments canbe made in the „Extras“menu:
Country
When changing the country, country specific pre-
settings and measurement procedures will be
activated.
Please pay special attention ifthe country specific
settings and procedures are working according to
their regulations.
Language
Select the operating language
LCD brightness [%]
5 – 100
The LCD brightness is depending on temperature
and personal perspective of each user.
50% brightness are normal at 68°F (20°C)
Keyboard beep
ON / OFF
Turn the Keyboardbeep ON or OFF
Helping hints
ON / OFF
Turn the feature Helping hints ON or OFF
Measurement
Select the units for pressure and temperature
Logo
ON / OFF
Select if the start logo should be displayed or nor
Printer type
MRU/HP
Select the between MRU protocol and HP protocol

USER MANUAL DM9600
MRU GmbH, D-74172 Neckarsulm
14 / 39
Adjusting date and time
Date and time can be viewed and adjusted in the EXTRAS / Date/Time menu. This device
automatically changes from winter to daylight savings time and back.
The date and time should be adjusted in the internal batterywas completely drained.
Modify the date and time with the buttons left/rightand up/down
4.3.Bluetooth settings (optional)
The following MRU Software can be used:
MRU4u (Bluetooth) available in the Apple App Store and Google Play Store
The Bluetooth-Passkey (connection code) is: 1234
The Bluetooth mode can be viewed and selected in the EXTRAS / Setting / Bluetooth menu.
Please use BT-CL for connections to Android and BT-LE for connections to IOS.

USER MANUAL DM9600
MRU GmbH, D-74172 Neckarsulm
15 / 39
5. Maintenance and care
5.1.Cleaning and care
The DM9600 required only little maintenance:
•Charge the battery completely in case you will not use the analyzer over a
longer period. Then recharge the battery every 6 months (using the included
battery chargerconnected to the USBport).

USER MANUAL DM9600
MRU GmbH, D-74172 Neckarsulm
16 / 39
6. Preparation for each measurement
6.1.Power supply
The DM9600 can be operated optionally:
•With the built in Lithium-Ion battery
•With the included battery charger connected to the USB port
6.2.Automatic Auto-off function
The Auto-off function powers down the device if no key has been touchedfor 60 minutes.
During measurement and/or battery charging the Auto-off function is deactivated.
The device will give an acoustic signal and will display thatit wants to shut down, the
shutdown can be prevented by touching the screen.
6.3.Measuring with grid power supply / Battery charging
The device can be charged by connecting the supplied charger 90...260 V / 50/ 60Hz to
the USB port.
The device can be operated while it is charged.
The device will switch to trickle charge mode once the battery is fully charged.
6.4.Battery charge condition
The battery symbol indicates the battery capacity. The battery symbol will start to flash
every second in red once the battery reaches a remaining operation time of +/- 60
minutes (depending on device configuration). The device will shut down if the batteries
are not chargedin time to prevent a total battery discharge.
6.5.Operating temperature
Please pay attention to the allowed operating temperatures for this device.
The device will display shouldyou try and operate it whilst outside of the defined temperature
ranges.
In case the DM9600 was stored at a very coldlocation you will have to give the device time to
adapt to the warmerenvironment before powering it up, this will avoidcondensation!
The DM9600 is not operable when not within the temperature parameters. After powering up
the device will give acoustic signals during warm up.
6.6.Power up and zeroing
Touch the screen then press the green ON button
During zeroing the device willnotice if there are defectivesensors and will display an error
message if there are defectivesensors.
Repeat zeroing
The zeroing can be repeatedat and time.

USER MANUAL DM9600
MRU GmbH, D-74172 Neckarsulm
17 / 39
7. Performing a measurement
The DM9600 base version has the complete functionality for you to make pressure and
temperature measurements.
For additional measurements additional accessories must be purchased and used.
7.1.Auto-Log function
The Auto-Log function allowsyou to define the measuring time and the measuring intervals.
Auto-Log settings:
Measuring time is the complete time for one measurement cycle.
Press the button measuring time to be able to set the measurement time (using the arrows up
and down to change the time).
Press thebutton interval to select how frequently you want tosave the results.
Press the Site Selection to determine to which site the results will be saved to.
Each interval will be saved to the selected site.
The Auto-Log cansave results either on theinternal memory or onto the SD Card.
Press the Store button and then select where the results should bestored.
Please make sure that there isenough storage space available.
Press the start button to start the Auto-Log, it will end automatically after the defined
measurement time has elapsed.

USER MANUAL DM9600
MRU GmbH, D-74172 Neckarsulm
18 / 39
7.2.General measurement
During the general measurement, the measured pressure as well as measured temperature
are displayed, thevalues can be Auto-logged and saved.
The absolute pressure can also be displayed (optional)
Context menu:
Auto-Log: Measurements are being logged
Store : Single measurements are saved
Adjustm. : The units can beselected
Zeroing : The pressure value is set to zero
Print : The measurement results are being printed (IR printer is needed)

USER MANUAL DM9600
MRU GmbH, D-74172 Neckarsulm
19 / 39
7.3.Pressure measurement
Press Pressure measurement to enter this menu.
On the first page ofthe pressure measurement 4 pressure values can be recorded.
The current displayed pressure value can be assigned and saved to one of the 4 available
spots.
The adjustments are done in the context menu.
The hose (e.g. draft measurement) will be connected to the draft port P1.
For differential pressure measurements, a second hose willbe connected to the P2 port.
On the second page, the pressure flow is visualized in a graph. The pressure can be Auto-
logged (see Auto-Log function). When saving results, the max and min values are saved as
well as the pressure average.
Context menu
Zeroing: The pressure value is set to zero
Auto-Log: Measurements are being logged
Store: Single measurements are saved
Adjustm. : Units and damping time of thepressure measurement can beadjusted
Page +: turn to next page
NOTE:
The pressure sensor will be destroyed if the supplied pressure is too high!
The following warning will be displayed:
Error message “Pressure too high“
There will also be an additional acoustic warn signal.

USER MANUAL DM9600
MRU GmbH, D-74172 Neckarsulm
20 / 39
7.4.Temperature measurement
In the menu temperature measurement, 2 temperatures can be measured. The K-Type
temperature sensors are connected at port T1and T2 – the temperatures T1and T2 will
be displayed as well the temperature difference. The temperatures can besaved or Auto-
logged. On pages 2 and 3 temperatures are displayed as graph.
Context menu
Auto-Log: Measurements are logged
Store: Measurements are saved
Print: Measurements are printed (external IR printer)
Page - : turn to previous page
Page +: turn to next page
NOTE:
The measurement accuracy can only be granted with original MRU temperature
sensors!
Other manuals for DM9600
1
This manual suits for next models
1
Table of contents
Other mru Measuring Instrument manuals

mru
mru OPTIMA User manual

mru
mru AMPROplus User manual

mru
mru NOVAplus biogas User manual

mru
mru Optima 7 User manual

mru
mru OPTIMA7 biogas User manual

mru
mru DELTAsmart FFZ User manual

mru
mru MGAprime Q User manual

mru
mru SWG100 BIOEX User manual

mru
mru SWG100 BIOGAS User manual

mru
mru NOVA compact User manual
Popular Measuring Instrument manuals by other brands

Spirax Sarco
Spirax Sarco MTI10 Insertion Installation and maintenance instructions

Beta
Beta 680 Instructions for use

Gossen MetraWatt
Gossen MetraWatt MAVOLUX 5032C operating instructions

Keysight
Keysight 778D Operating and service manual

Elektor
Elektor Dual DC LISN user manual

Leupold
Leupold GX-3 operating instructions