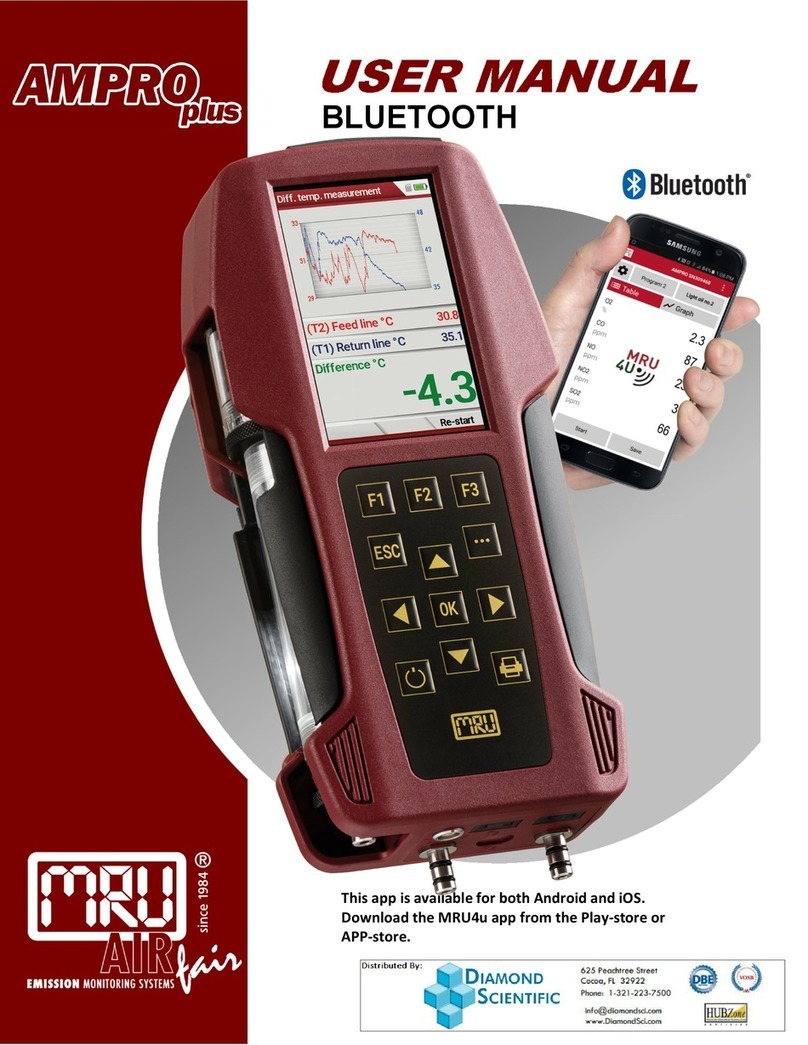
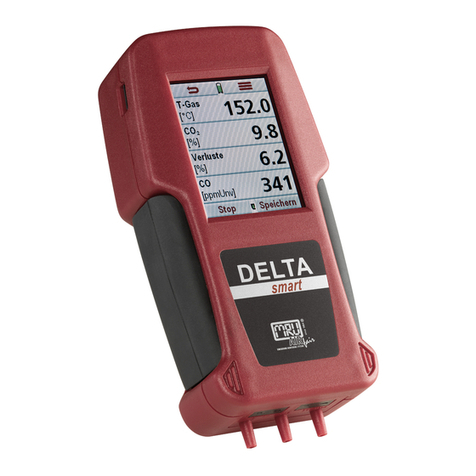
mru DELTAsmart User manual

Operation manual DELTAsmart
MRU GmbH, D-74172 Neckarsulm 1 / 49
6902EN

Operation manual DELTAsmart
2 / 49 MRU GmbH, D-74172 Neckarsulm
Manufacturer:
Legal notices / Intellectual property rights comments
Original user manual
© 2018 by MRU
No part of this manual my be published in any form (print, fotocopy, electronic media or
any other publication form) without a written approval by the publisher.
All user trade marks and name mark descriptions, even those which are not marked as
such, are properties of the respective owners.
Edition: 2018-08-02-V03

Operation manual DELTAsmart
MRU GmbH, D-74172 Neckarsulm 3 / 49
Content
1Introduction ...........................................................................................5
1.1. Intended use .........................................................................................................5
1.2. The company MRU GmbH ................................................................................6
1.3. Analyzer details ....................................................................................................7
1.4. Packaging...............................................................................................................7
1.5. Return of hazardous materialse......................................................................7
1.6. Return of electronic equipment .....................................................................7
2Safety......................................................................................................9
2.1. Safety details .........................................................................................................9
2.2. Ensure safety ...................................................................................................... 10
Lithium-Ion battery user guidelines
.................................................... 10
3Description.......................................................................................... 11
3.1. The Analyzer....................................................................................................... 12
3.2. The condensate separator (water trap)..................................................... 13
3.3. Extraction probes.............................................................................................. 14
4First usage ........................................................................................... 15
4.1. Preparing steps.................................................................................................. 15
4.2. Settings ................................................................................................................ 15
4.3. Set time and date.............................................................................................. 16
4.4. Measurement program configuration....................................................... 16
4.5. Set CO limits ....................................................................................................... 16
4.6. Select fuel types and O2reference.............................................................. 17
4.7. User definable fuel types ............................................................................... 17
4.8. Define the measuring window..................................................................... 17
4.9. Define 6-lines measuring window .............................................................. 18
4.10. Select and modify the Bluetooth parameters......................................... 18
5Operation ............................................................................................ 19
5.1. Power on and power down........................................................................... 19
5.2. Function keys ..................................................................................................... 19
5.3. Context menu .................................................................................................... 19
5.4. Combustion test................................................................................................ 20
5.5. Draft / pressure measurement on combustion test.............................. 21
5.6. Display.................................................................................................................. 23
5.7. Menu structure.................................................................................................. 23
6Preparation for each measurement .................................................. 25
6.1. Power supply...................................................................................................... 25
6.2. Automatic power down function (AUTO-off) ......................................... 25
6.3. Measuring with connected charger / Battery charging....................... 25
6.4. Charging status of the battery ..................................................................... 25
6.5. Operating temperature .................................................................................. 25
6.6. Empying the condensate separator ........................................................... 26
6.7. Connections and leak tightness .................................................................. 26
6.8. Power up and zeroing..................................................................................... 26
Operation manual DELTAsmart
4 / 49 MRU GmbH, D-74172 Neckarsulm
7Measurement ...................................................................................... 27
7.1. Selecting a measurement program.............................................................27
7.2. Measurement screen........................................................................................27
7.3. CO limit .................................................................................................................27
7.4. Specific measuring application.....................................................................27
7.5. Printing measurement results.......................................................................28
7.6. Ending a measurement ...................................................................................28
7.7. Last measured values .......................................................................................28
7.8. Pressure measurements..................................................................................29
7.9. Temperature / differential temperature measurement........................29
7.10. CO Ambient air ..................................................................................................29
7.11. After each measurement ................................................................................30
8Data Storage........................................................................................ 31
8.1. Data storage orginization...............................................................................31
8.2. Data storage information ...............................................................................31
8.3. Sites administration ..........................................................................................31
8.4. Data transfer using the SD card....................................................................32
8.5. Measuremets in Data storage .......................................................................34
9Maintenance........................................................................................ 35
9.1. Cleaning................................................................................................................35
9.2. Annual service and calibration......................................................................35
10 Extras ................................................................................................ 37
10.1. Service calibration menu ................................................................................37
10.2. Factory settings..................................................................................................37
10.3. Service values......................................................................................................37
10.4. Analyzer and accessories leak test...............................................................38
10.5. Analyzer information, Warranty-management and analyzer
identification number...................................................................................................38
11 Appendix.......................................................................................... 39
11.1. Changing pre-calibrated sensors (MSM) ...................................................39
11.2. Technical data.....................................................................................................41
11.3. Firmware updates..............................................................................................44
11.4. Analisis and calculations .................................................................................45
11.5. Fuel type lists ......................................................................................................45
11.6. Troubleshooting ................................................................................................46
11.7. O-Ring Set for DELTAsmart.............................................................................47
11.8. Declaration of conformity DELTAsmart..................................................48

Operation manual DELTAsmart
MRU GmbH, D-74172 Neckarsulm 5 / 49
1Introduction
•This manual enables you to understand and safely operate
this DELTAsmart combustion analyzer.
Please read this manual with great vigilant and get familiar
with the product before using it.
•This analyzer may only be operated by competent personnel
and for its intended use.
•Please pay special attention to all safety directions and warn-
ings to prevent personal injuries and damaging of the prod-
uct.
•We can’t be held responsible for any injuries and/or damages
that occur by not following the instructions in this manual.
•Always keep the manual near you when working with the ana-
lyzer, to be able to read instructions as needed.
Please ensure to hand over all documents to when handing
the analyzer over to others.
1.1. Intended use
The DELTAsmart analyzer is intended for short-term measurement in the context of
emission control measurements and adjustments at small furnaces. The analyzer
measures the measurements provided by VDI4206 and EN50379 metrics and stores
them for further processing.
The DELTAsmart analyzer is specifically not intended as a safety device or personal
protective equipment; it should not be used as a warning device to warn people
against the presence of harmful gases.
The DELTAsmart analyzer may only be used as indicated in this manual. Our analyz-
ers are checked according to the following regulations: VDE 0411 (EN61010) and
DIN VDE 0701 before they leave the MRU GmbH factory.
MRU technical products are designed and manufactured according to DIN 31000/
VDE 1000 and UVV = VBG 4 of the professional guilds for fine mechanics and electri-
cal engineering.
MRU GmbH assures that the analyzer complies to the essential requirements of the
legal regulations of the member states of the electro-magnetic compatibility
(89/336/EWG).

Operation manual DELTAsmart
6 / 49 MRU GmbH, D-74172 Neckarsulm
1.2. The company MRU GmbH
The DELTAsmart analyzer is manufactured by the MRU GmbH in Neckarsulm Ger-
many (founded in 1984), a medium sized company that specializes in developing,
producing and marketing high quality emission monitoring analyzers. MRU GmbH
produces a wide range of instruments, from standard analyzers up to tailor made
industrial analyzers. MRU GmbH contact details are listed on the previous page.
Plant 1: Sales, Service, R&D
Plant 2: Production
MRU GmbH
Fuchshalde 8 + 12
74172 Neckarsulm - Obereisesheim
GERMANY
Phone +49 71 32 99 62 0 (Front office)
Phone +49 71 32 99 62 61 (Service)
Fax +49 71 32 99 62 20
Email: info@mru.de
Internet: www.mru.eu

Operation manual DELTAsmart
MRU GmbH, D-74172 Neckarsulm 7 / 49
1.3. Analyzer details
•The analyzer is not suitable for long term (continuous) meas-
urements (this is a spot analyzer).
•Before using the analyzer verify the condition of the various parts of
the analyzer, such as the probe, the ambient air conditions, the con-
densate separator, star filter and the connectors for damage and/or
blockages.
•When starting the analyzer up it will take between 1 – 3 minutes to
set to zero depending on the condition of the sensors and ambient
conditions. (Zeroing).
•The minimum zeroing time of the analyzer to achieve correct meas-
urement values can be expected by 1.5 minutes!
•Caution: Exposure to acids; aggressive gases such as Sulphur; va-
pors such as thinners, gasoline, alcohol and paint, etc. can damage,
reduce the life of, or destroy the sensors.
•The life of the sensors depends on how they are used, maintained
and treated. Typical average life expectations are: O2 - 2 years; CO - 2
- 3 years and NO - 3 years.
•The battery life is at least 500 charge-discharge cycles. With increas-
ing number of charging cycles the battery capacity (indicated in op-
erating hours) is reduced.
1.4. Packaging
Please keep and store the packaging material to be able to use it when your
analyzer must be sent back for service and calibration.
1.5. Return of hazardous materialse
Waste Disposal/Returns/Warranty - MRU GmbH is required to accept the return of
hazardous waste such as electro-chemical sensors that cannot be disposed of lo-
cally.
Hazardous waste must be returned to MRU prepaid.
1.6. Return of electronic equipment
MRU GmbH is required to accept the return, for proper disposal, of all analyzers de-
livered after 13th of August 2005.
Analyzers must be returned to MRU prepaid.

Operation manual DELTAsmart
8 / 49 MRU GmbH, D-74172 Neckarsulm

Operation manual DELTAsmart
MRU GmbH, D-74172 Neckarsulm 9 / 49
2Safety
Safety and warning notices point out possible dangers to the reader of this
manual.
In this manual safety and warning notices are typically above actions that
might cause harm or danger.
2.1. Safety details
The explanation of safety notices:
Not following the safety and warning notices may cause physical harm
and/or property damages, as well as the loss of warranty of your analyzer.
The following safety and warning notices must be obeyed at any time!
DANGER
Describes an immediate threat of danger which can cause
mayhem or can even cause death.
WARNING
Describes an immediate threat of danger which can cause
mayhem, property damage or can even cause death.
CAUTION
Describes a possible danger that can cause risk of injury.
ATTENTION
Describes a possible harmful situation which can damage the
analyzer or its surroundings.
NOTE
Gives user hints and other important information.
The explanation of safety notices:
CAUTION
HOT – danger of burns and fire hazards from gas extraction
probe.
Physical harm and property damage can be caused.
►Cool down the probe tube.

Operation manual DELTAsmart
10 / 49 MRU GmbH, D-74172 Neckarsulm
2.2. Ensure safety
•The analyzer may only be used for its intended purpose and
within its defined technical parameters. Don’t use any force
and avoid dropping the analyzer.
•Don’t use the analyzer when there are visible damages of the
enclosure, the charger or supply lines.
•Don’t store the analyzer together with solvents and don’t use
any drying agents.
•Only perform maintenance procedures that are described in
this manual and always obey the instructions.
•Only operate the analyzer in closed and dry rooms, protect the
analyzer against rain and moisture.
•Only operate the analyzer with the supplied battery charger.
•Never us the probe tube and other metal parts / accessories as
electric conductors.
•The analyzer may not be positioned near open fire or extreme
heat.
•The defined temperature range of the extraction probe /
probe tube may not be exceeded, the probe tube and/or
thermo-element can be destroyed.
Lithium-Ion battery user guidelines
NOTE
The battery is inside the analyzer and is not accessible to the
end-user.
Below are some guidelines you need to know about
Lithium Ion batteries and the handling of these
.
•The rechargeable battery may only be used for this DEL-
TAsmartanalyzer.
•Don’t charge the analyzer in extreme heat, don’t store the bat-
tery in a hot environment and don’t throw the battery into
fire.
•Don’t try to modify the battery, shortcut it or put any mechan-
ical force to it!
•The battery may not be used in or under water.
•Avoid mechanical force and don’t throw that battery.
•Don’t cut or squeeze the battery cables!
•Don’t carry or store the battery together with sharp objects.
•Don’t connect the (+) contact with the (-) contact or connect
these to a metal object.
•Not obeying the above instructions can cause heat, fire and
explosion.

Operation manual DELTAsmart
MRU GmbH, D-74172 Neckarsulm 11 / 49
3Description
The main task of the DELTAsmart analyzer is to assist with precision control
and adjustment measurements of gas, oil and wood fired furnaces.
Available options for this and other analyzers can be found on the MRU
Homepage or speak to a member of our sales team.
Gas schematics diagram
In combination with the extraction probe (inserted in the stack) the internal
gas pump of the DELTAsmart analyzer extracts a portion of the flue gas and
analyzes it using electro-chemical sensors.
The thermo-element in the probe tube measures the flue gas temperature
and due to the construction of the probe pressure (draft) can be measured
as well.
1
Extraction probe
2
Condensate separator (water trap)
3
Draft/pressure sensor
4
Internal filter
5
Non retrun valve
6
Gas pump
7
O2sensor
8
CO-sensor
9
NO-sensor (optional)

Operation manual DELTAsmart
12 / 49 MRU GmbH, D-74172 Neckarsulm
3.1. The Analyzer
The compact analyzer is made from a fiber re-enforced plastic material with all
measurement related connections at the bottom of the analyzer. The analyzer is
operated exclusively using the touch screen display.
1
Touch screen display
2
Connection port P2 for draft measurement
3
Temperature port T2 for gas temperature
4
Connection port P1 (only for differential pressure measurement)
5
Temperature port T1 for ambient air temperature
6
Connection port flue gas entrance
7
Gas exit (may not be covered during operation)
8
Mini USB port for battery charging and data transfer
9
Reset button
10
IR interface for external IR printer
11
Micro-SD-card slot

Operation manual DELTAsmart
MRU GmbH, D-74172 Neckarsulm 13 / 49
3.2. The condensate separator (water trap)
During a measurement condensate is being collected in the condensate sep-
arator. The maximum water level is marked with a ring on the bottom part of
the show glass.
Empty the condensate separator frequently to avoid water getting into the
analyzer, see chapter 6.6 (empty condensate separator) for details.
1
Hose connection from probe sampling line
2
Bottom hose connector
3
Condensate show glass with max fill indicator
4
Top connection
5
Pleated filter
5
Filter housing
6
Hose connection to analyzer

Operation manual DELTAsmart
14 / 49 MRU GmbH, D-74172 Neckarsulm
3.3. Extraction probes
The DELTAsmart is available with either a probe with fixed probe tube or with ex-
changeable probe tubes. A complete list of available probe options can be found in
our effective price list.
Here are 2 possible options:
Extraction probe
Extraction probe
With 250 mm fixed probe tube and
1,5 m sampling line
With 180 or 300 mm exchangeable
probe tube and 1,5 m sampling line
1
Probe tube
2
Probe cone
3
Condensate separator
4
Hose for draft measurement
5
Hose for flue gas measurement
6
Plug for temperature measurement
7
Tripple hose

Operation manual DELTAsmart
MRU GmbH, D-74172 Neckarsulm 15 / 49
4First usage
Once you have determined that the analyzer is safe to be used, it can now be
customized to meet your needs, these modifications can be changed at any
time.
4.1. Preparing steps
•Remove the analyzer from its packaging and read the com-
plete manual.
•The analyzer has left the manufacturer completely assembled
and ready to use. Check if everything indicated has been de-
livered and that there are no visible damages.
•Charge the battery for at least 8 hours.
•Check and modify date and time if needed.
4.2. Settings
In the main menu Extras and sub menu Settings the following modifica-
tions can be made:
•LCD brightness
•Language
•Country for country specific fuel types and measuring func-
tions
•Helping hints (on/off)
•Keyboard beep (on/off)
•Temperature units
Country
Option
By changing the country, the O2 reference val-
ues will be lost. The fuel type lists are reset.
Country specific parameters will be activated.
Please check if all the country specific parame-
ters are correct, to assure that the analyzer
meets the regulations for the country that you
are using this analyzer in
Language
Option
Select the analyzer language
LCD brightness
5 – 100 %
The display-contrast is dependent on ambient
temperatures as well as the user’s perspective,
at 20°C +/- 50% is normal
Keyboard beep
ON/OFF
Turn on / off the keyboard beep
6-lines
ON/OFF
Turn on / off 6-lines measuring window
Helping hints
ON/OFF
Turn on / off helpful hints
Temperature units
°C or °F
Select the temperature unit

Operation manual DELTAsmart
16 / 49 MRU GmbH, D-74172 Neckarsulm
4.3. Set time and date
In the main menu Extras and sub menu Date & time date and time can be
viewed and modified. The analyzer changes the time automatically between
standard time and daylight savings time.
The time and date must be modified in case the battery has been discharged
completely.
4.4. Measurement program configuration
There are 4 programs available for gas measurement. The programs define the
following parameters:
•A selection of fuel types: a selection of the maximal fuel type
list
•Measurement window: define 4 measurement values per
page on 5 pages in total
•Program name
Pre-defined measurement programs are
•Combustion test
•CO (ambient)
•Combustion test – sub menu Test program
This is used to check the analyzer with test gases without the selection of
a fuel type (third party testing)
Modifications of these programs can be made once a program has been se-
lected and then use the CONTEXT key to select modifiable options.
4.5. Set CO limits
High CO concentrations in the gas stream can shorten the life span of your
CO sensor. The DELTAsmart can warn the user if the analyzer exceeds a pre-
defined CO limit. There will be both an acoustic and visual signal, the
DELTAsmart has NO active CO overload protection! In case the pre-defined
CO limit is active you will have to remove the probe from the stack or you
take actions to lower the CO values.
The CO limit can be defined for each of the 4 measurement programs.
Using during the measuring the context menu and you can press the CO
limit key – the CO limit can be changed in 100 ppm steps.

Operation manual DELTAsmart
MRU GmbH, D-74172 Neckarsulm 17 / 49
4.6. Select fuel types and O2reference
After selecting a measurement program, you can select or add fuel types. You can
define what fuel types you want to see for each measurement program by using
the fuel type list.
Select the context menu key and then select fuel type list.
4.7. User definable fuel types
There are 4 user definable fuel types available. These can be individually ad-
justed; fuel type parameters can be set. Just as all other fuel types these fuel
types can be activated or deactivated for usage.
Remark: The user definable fuel types are the last in the fuel type list and
they are clearly displayed in green.
4.8. Define the measuring window
The DELTAsmart can display 20 measurement values – 4 values on 5 pages.
The user can define in what order he wants to see the available measure-
ment values.
Please select MEASURING WINDOW– CONTEXT MENU – DEFINE WIN-
DOW. You will then select the line that needs to be modified and with left
and/or right you can view and select available parameters. This procedure
will be done for each line.
When completed you will exit this window using the button.
1
Add fuel
type
2
Adjust O
2
re-
ference

Operation manual DELTAsmart
18 / 49 MRU GmbH, D-74172 Neckarsulm
4.9. Define 6-lines measuring window
In the main menu Extras you can select the 6-lines measuring window:
:
The DELTAsmart can display 18 measurement values – 6 values on 3 pages.
4.10. Select and modify the Bluetooth parameters
The following software can be used:
MRU4u (Bluetooth) available in the Apple App Store and Google Play Store
MRU4Win (USB) (MRU4win Version 1.0.3 or higher)
The Bluetooth-Passkey (connecting code) is: 1234
Firmware version 1.06.00 or higher is needed for iOS:
Adjustments can be made in the main menu EXTRAS / sub menu Settings /
sub menu Bluetooth.
There are two selections available:
ANDROID and iOS
BLUEGAZsmart must be OFF
Additional information can be found in the documentation for each individ-
ual software program.

Operation manual DELTAsmart
MRU GmbH, D-74172 Neckarsulm 19 / 49
5Operation
5.1. Power on and power down
The DELTAsmart is powered on using the display.
Touch the screen and the green ON button will appear,
then press the ON button to power on the analyzer.
Use the context menu button
to power the analyzer down.
Now press the red OFF button
to power the analyzer down.
Once the analyzer has been started it will make a self-test and then perform
the zeroing of the analyzer. It is important that at this point the analyzer is
operated at ambient air and that the pressure ports are without pressure.
5.2. Function keys
In all operation windows there are pre-defined function keys at the top and
the bottom of the screen.
At the top of the screen these are mostly the return key and the context
menu key.
At the bottom of the screen these are mostly the page up and page down
keys.
Dependent on the page that you are currently on, the function keys can
have different functions to allow faster access.
5.3. Context menu
The context menu-button offers additional functions. When pressing the context
key, you will see a variety of functions related to the window that you are currently
in.
There are also general functions like: switch off analyzer, exit window, close context
menu without action.
1
Power analyzer down
2
Return – exit window
3
exit context menu window without action

Operation manual DELTAsmart
20 / 49 MRU GmbH, D-74172 Neckarsulm
5.4. Combustion test
DANGER
Poisonous gas can be present
The possibility of death through intoxication.
Flue gases are extracted by the analyzer and then evacuated
into the ambient air.
►Only operate the analyzer in well ventilated rooms.
NOTE
Wrong measuring results
The extracted flue gas must be able to evacuate the ana-
lyzer without obstruction.
►The exhaust outlet at the rear of the analyzer may never
be covered during a measurement, never operate the an-
alyzer in a transport case.
Start: starts a combustion test with the current selected program and fuel
type.
Press Combustion test, then select one of the 4 programs and then select
the fuel type.
The measurements window has in total 20 measurement parameters, 4 pa-
rameters each on 5 pages. There are 2 ways to move from page to page:
•Press the context key and then select page + or page -,
•Or simply touch the left or right border of the display to jump
to the next or previous page
1
Info (Program / Fuel
type)
2
Page 2
Other manuals for DELTAsmart
2
Table of contents
Other mru Measuring Instrument manuals

mru
mru VARIOluxx User manual

mru
mru Air Fair MGAprime User manual

mru
mru SWG100 BIOEX User manual

mru
mru DM9600 User manual

mru
mru AIR fair OPTIMA 7 User manual

mru
mru DELTAsmart User manual

mru
mru DM9600 User manual

mru
mru DM 9600 CHP User manual

mru
mru SWG 100 biogas User manual

mru
mru MGAprime User manual